

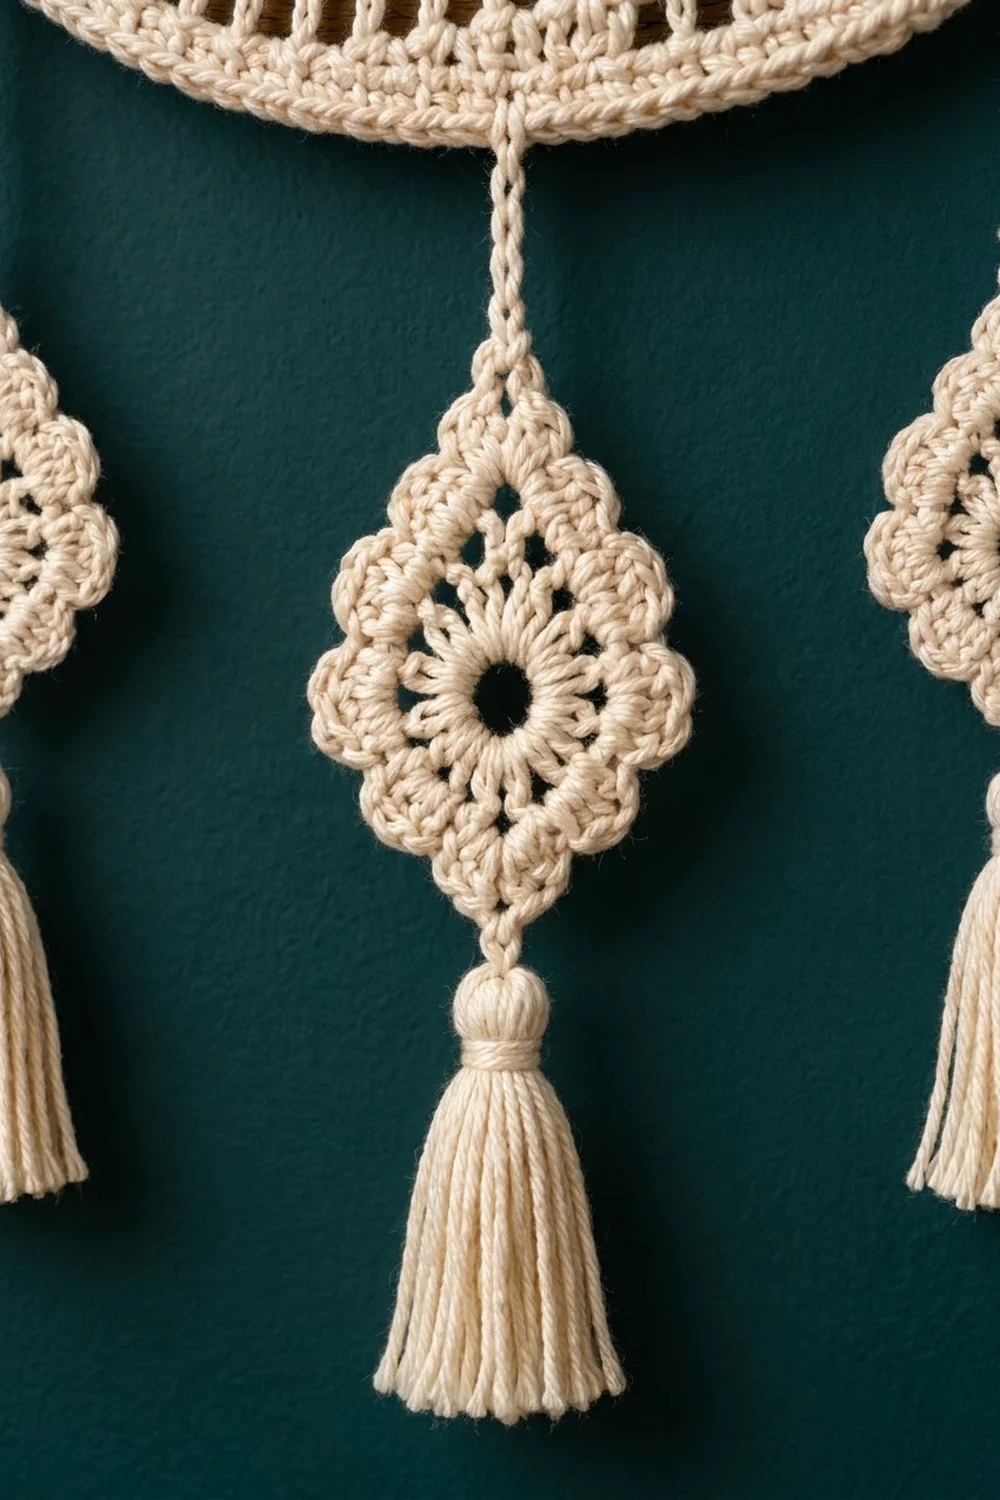
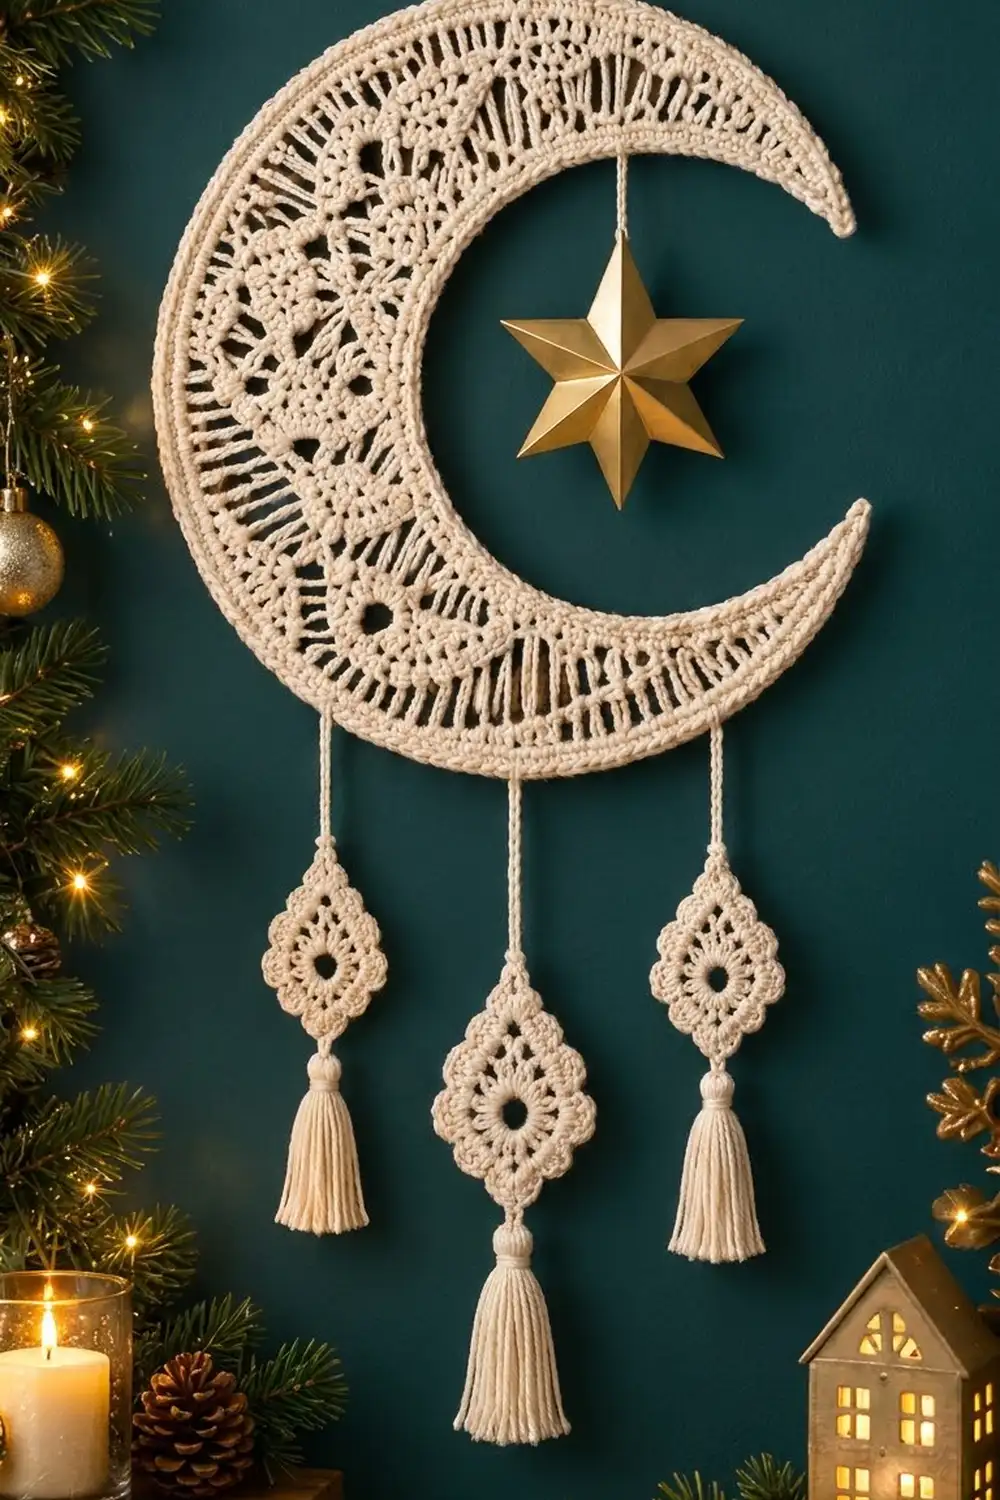
This crescent moon wall hanging is made in one soft cream color. The moon has a lacy band of spokes and shell fans. Three diamond-shaped lace drops hang below it on short cords, and each drop ends in a full tassel.
The style is calm and boho. It suits a nursery, a reading corner or winter decor. A purchased gold star can hang inside the curve of the moon if you like.
This pattern uses US crochet terms. The finished crescent measures 9.4 in (23.9 cm) tall and 8.25 in (21.0 cm) wide. From the top of the moon to the bottom of the middle tassel, the hanging measures 17.1 in (43.4 cm).
You work the crescent flat in seven rows, from the outer curve inward. Each row is shorter at both ends, and that shapes the horns. Two border rounds go all the way around the moon. You then make three drops in the round and three wrapped tassels, and join everything with crocheted cords.
Finished Size and Construction
- Crescent: 9.4 in (23.9 cm) tall x 8.25 in (21.0 cm) wide
- Full length: 17.1 in (43.4 cm), not counting the hanging loop
- Skill level: Intermediate
- Terminology: US
- Yarn weight: Sport (#2) mercerized cotton
- Hook: 3.25 mm (US D/3)
- Pieces: 7 (1 crescent, 3 lace drops, 3 tassels), plus cords and a loop made during assembly
- Layout: crescent opening right, with 3 drops hanging in a row below it
- Band width at the widest point, before the border: 2.25 in (5.7 cm)
- Band width at the widest point, after the border: 2.65 in (6.7 cm)
- Border depth: 0.2 in (0.5 cm) per edge
- Drop: 1.8 in (4.6 cm) wide x 2.3 in (5.8 cm) tall
- Tassel: 2.6 in (6.6 cm) long
Materials
Use a smooth mercerized cotton. It shows the lace clearly, blocks crisply and holds its curve. Fuzzy or stretchy yarns blur the spokes and sag over time. The sample yarn runs about 155 m per 50 g.
Cream (only color):
- Crescent: 30 g (93 m)
- Drops, 3 total: 12 g (37 m)
- Tassels, 3 total: 15 g (47 m)
- Cords and loop: 3 g (9 m)
- Total: 60 g (186 m). Two 50 g balls are enough.
These amounts include a small margin for swatching and tails.
Tools:
- 3.25 mm (US D/3) hook
- Tapestry needle and scissors
- 4 stitch markers
- Stiff card 3 in (7.6 cm) tall
- Blocking mat and rust-proof pins
- Spray starch or diluted fabric stiffener (optional)
- Gold star ornament and thread (optional)
Abbreviations (US Terms)
- ch: chain
- sl st: slip stitch
- sc: single crochet
- hdc: half double crochet
- dc: double crochet
- tr: treble crochet
- rev sc: reverse single crochet
- sk: skip
- sp(s): space(s)
- st(s): stitch(es)
Reverse single crochet: Work from left to right (if you are right-handed). Insert your hook into the next stitch to the right, yarn over and pull up a loop, then yarn over and pull through both loops. This stitch makes the rope-like edge.
Fan: 7 dc in the same ch-1 sp.
Gauge and Checkpoints
Gauge: 22 sc and 24 rows = 4 in (10.2 cm). Chains run about 5 ch per 1 in (2.5 cm).
To make a gauge swatch, ch 23 and work 24 rows of 22 sc. The square should measure 4 in (10.2 cm) each way.
Test piece: Make one drop first. It is quick and shows how your tension behaves. It should measure 1.8 in (4.6 cm) across the widest scallops.
Crescent checkpoints (measured flat at the center, before the border):
- After Row 2: the strip is 22 in (55.9 cm) long.
- After Row 3: the band is 1 in (2.5 cm) deep.
- After Row 5: the band is 1.6 in (4.1 cm) deep.
- After Row 7: the band is 2.25 in (5.7 cm) deep.
If your piece is too big, change to a 3.0 mm hook. If it is too small, change to a 3.5 mm (US E/4) hook. Never change the stitch counts, because all the shaping depends on them.
Crescent
Turn at the end of every row. Rows 3 to 6 skip stitches at both ends, which tapers the horns. The rows also get shorter, so the strip curves on its own.
Row 1 (outer edge): Ch 122. Sc in 2nd ch from hook and in each ch across. Turn. (121 sc)
Row 2: Ch 1, sc in each sc across. Turn. (121 sc)
Check: the strip is 22 in (55.9 cm) long.
Row 3 (outer spokes): Sl st in each of the first 6 sc. Ch 5 (counts as tr and ch 1), sk next sc, [tr in next sc, ch 1, sk next sc] 54 times, tr in next sc. Leave the last 5 sc unworked. Turn. (56 tr, 55 ch-1 sps)
These tall posts form the outer spokes.
Row 4 (fans): Sl st in each of the first 7 sts, ending in the 4th tr. Sc in next ch-1 sp. [Sk next 2 ch-1 sps, 7 dc in next ch-1 sp, sk next 2 ch-1 sps, sc in next ch-1 sp] 8 times. Leave the last 7 sts unworked. Turn. (8 fans and 9 sc = 56 dc + 9 sc = 65 sts)
Each fan uses 6 ch-1 sps. This gathers the inner side of the band.
Row 5 (tie row): Sl st in the first sc and in each of the next 3 dc. Sc in the next dc (the center of the first fan). [Ch 3, tr in next sc between fans, ch 3, sc in 4th dc of next fan] 7 times. Leave the last 3 dc and the last sc unworked. Turn. (8 sc + 7 tr + 42 ch = 57 sts)
The tr stitches raise the valleys between the fans to the height of the fan tops.
Row 6 (inner spokes): Sl st in each of the first 5 sts, ending in the first tr. Ch 4 (counts as dc and ch 1), sk next st, [dc in next st, ch 1, sk next st] 23 times, dc in next st. Leave the last 4 sts unworked. Turn. (25 dc and 24 ch-1 sps = 49 sts)
Row 7 (inner edge): Ch 1, sc in each dc and each ch-1 sp across. Do not fasten off. (49 sc)
Check: the band is 2.25 in (5.7 cm) deep at the center, and both horns taper.
Lace Drops (make 3)
Join each round with a sl st. Do not turn.
Rnd 1: Ch 6 and sl st to the first ch to make a ring. Ch 3 (counts as dc), then 15 dc in the ring. (16 dc)
The open ring is the center eye, about 1 in (2.5 cm) across.
Rnd 2: Ch 1, sc in the same st, [ch 3, sk next dc, sc in next dc] 7 times, ch 3, sk last dc. (8 sc, 8 ch-3 sps)
Rnd 3: Sl st into the first sp. Work (sc, hdc, dc, hdc, sc) in each ch-3 sp. (8 petals, 40 sts)
Check: the drop is 1.5 in (3.8 cm) across.
Rnd 4: Working behind the petals, [sc around the post of the next Rnd 2 sc, ch 4] 8 times. (8 sc, 8 ch-4 loops)
Rnd 5: Number the loops 1 to 8, starting with loop 1 at the top. Sl st into loop 1.
- Loops 1 and 5 (the points): (sc, hdc, dc, ch 3, dc, hdc, sc).
- Loops 2, 3, 4, 6, 7 and 8: (sc, hdc, 3 dc, hdc, sc).
Fasten off. (6 scallops x 7 sts = 42 sts, plus 2 points x 6 sts = 12 sts, for 54 sts and 2 ch-3 point sps)
The two points give the diamond outline, and the six scallops make the rounded sides.
Tassels (make 3)
- Wrap yarn 35 times around the 3 in (7.6 cm) card.
- Tie the top of the bundle tightly with a 10 in (25.4 cm) strand.
- Cut through the wraps at the bottom edge.
- Wrap a separate strand 5 times around the bundle, 0.4 in (1.0 cm) below the top, and knot it. Hide the ends inside the tassel.
- Trim the tassel to 2.6 in (6.6 cm).
Make All Pieces
All pieces are cream.
- 1 crescent: 30 g (93 m)
- 3 drops: 4 g (12 m) each
- 3 tassels: 5 g (16 m) each
- 3 cords and 1 loop: 3 g (9 m) total
                [hanging loop]
       (  crescent, opening faces right  )
        |              |              |
     cord L         cord M         cord R
     1.6 in         2.8 in         1.6 in
     (4.1 cm)       (7.1 cm)       (4.1 cm)
        |              |              |
     [drop]         [drop]         [drop]
     [tassel]       [tassel]       [tassel]
Border
Work the border before joining.
Border gauge: 22 sc = 4 in (10.2 cm). The outer edge gets 1 sc in each of the 121 foundation chains, so it matches the 22 in (55.9 cm) edge exactly.
Rnd 1: Continue from Row 7 with ch 1. Work these sections in order:
- First stepped end (27 sc):
- 1 sc in the Row 7 row-end
- 2 sc around the Row 6 dc post
- 1 sc in each of the 4 unworked Row 5 sts
- 1 sc in each of the 4 unworked Row 4 sts
- 1 sc in each of the 7 unworked Row 3 sts
- 2 sc around the Row 3 tr post
- 1 sc in each of the 5 unworked Row 2 sts
- 1 sc in each of the Row 2 and Row 1 row-ends
That gives 1 + 2 + 4 + 4 + 7 + 2 + 5 + 2 = 27 sc.
– Tip: Ch 2.
– Outer edge: 1 sc in each foundation ch. (121 sc)
– Tip: Ch 2.
– Second stepped end: Work the same 27 sc in reverse order.
– Inner edge: 1 sc in each Row 7 sc. (49 sc)
Join to the first sc. (121 + 27 + 49 + 27 = 224 sc, plus 2 ch-2 tips)
Rnd 2: Ch 1. Rev sc in each sc around, and work (rev sc, ch 1, rev sc) in each ch-2 tip. Join and fasten off. (224 + 4 = 228 rev sc, plus 2 ch-1 tips)
Why the math works:
- Every stitch exposed by the tapering gets 1 sc.
- Each tall row-end gets 2 sc, and each short row-end gets 1 sc. This keeps the inner edge flat.
- The ch-2 tips keep the horns sharp.
- The border adds 0.2 in (0.5 cm) per edge. This takes the band from 2.25 in (5.7 cm) to 2.65 in (6.7 cm).
Joining
Marking: Hold the moon with the opening facing right.
- Count the Border Rnd 1 outer-edge sc from the lower tip, and mark stitches 6, 22 and 38. Stitch 22 is the lowest point of the curve.
- Count from the upper tip and mark stitch 22. This is where the hanging loop goes.
Cords: Make each cord stitch to stitch.
- Sl st into a marked Rnd 1 sc, behind the rev sc.
- Chain the cord. For the middle cord (stitch 22), ch 14 for 2.8 in (7.1 cm). For the side cords (stitches 6 and 38), ch 8 for 1.6 in (4.1 cm).
- Sl st into the top ch-3 point of a drop.
- Sl st back into each ch up to the moon, which doubles the cord. Fasten off.
Tension: Keep the return slip stitches loose. Tight cords shorten, twist and pull the edge of the moon down.
Tassels: Thread each top tie through a drop’s bottom ch-3 point. Double-knot it and hide the ends inside the tassel.
Loop: At the upper marker, ch 30 for 6 in (15.2 cm). Sl st back into the same stitch and fasten off.
Checkpoint: Hang the piece. It should measure 17.1 in (43.4 cm), and the two side tassels should end level with each other. If the moon tips, move the loop one stitch at a time.
Optional star: Tie it to the inner base of the loop so it hangs in the center of the curve.
Final Blocking
- Weave in all ends.
- Soak the moon and drops in cool water, then press out the water in a towel.
- Pin the outer edge along a 9 in (22.9 cm) circle, with a pin every 1 in (2.5 cm).
- Pin the horns to sharp tips and the inner edge to a smooth curve.
- Pin the spokes and fans open evenly.
- Pin each drop to 1.8 in x 2.3 in (4.6 cm x 5.8 cm), with the points stretched out.
- Starch if you want, then let everything dry fully.
- Steam the tassels lightly and trim them again if needed.
Final Quality-Control Checklist
- Rows 1 and 2: 121 sc each, 22 in (55.9 cm) long
- Row 3: 56 tr
- Row 4: 8 fans
- Row 5: 57 sts
- Row 6: 25 dc
- Row 7: 49 sc
- Border: 224 sc in Rnd 1, 228 rev sc in Rnd 2
- Horns sharp and even
- Drops all the same size, with open center eyes
- Tassels all 2.6 in (6.6 cm) long
- Piece hangs level
Troubleshooting
- The moon cups forward: Rows 5 and 6 are tight. Redo Row 6 one hook size larger, or block it hard.
- The outer edge ruffles: The foundation chain is loose. Chain with a smaller hook.
- The horns are blunt: Recount the slip stitches at the start of each row, and check that the border has its ch-2 tips.
- The fans are crowded: Skip exactly 2 sps on each side of each fan.
- The drops look round: Pin the points out farther and starch.
- The tassels look thin: Wrap 40 times instead of 35.
Care
Hand wash in cool water with mild soap. Dry it flat and pinned to shape, and starch again if you want it stiff.
Final Notes
Each measurement sets up the next one:
- The 22 sc = 4 in (10.2 cm) gauge gives a 22 in (55.9 cm) outer edge.
- Seven rows build a 2.25 in (5.7 cm) band.
- The border brings the band to 2.65 in (6.7 cm) and the moon to 9.4 in (23.9 cm) tall.
- Add the cords of 1.6 in and 2.8 in (4.1 cm and 7.1 cm), the 2.3 in (5.8 cm) drops and the 2.6 in (6.6 cm) tassels, and the hanging measures 17.1 in (43.4 cm).
Happy crocheting!