

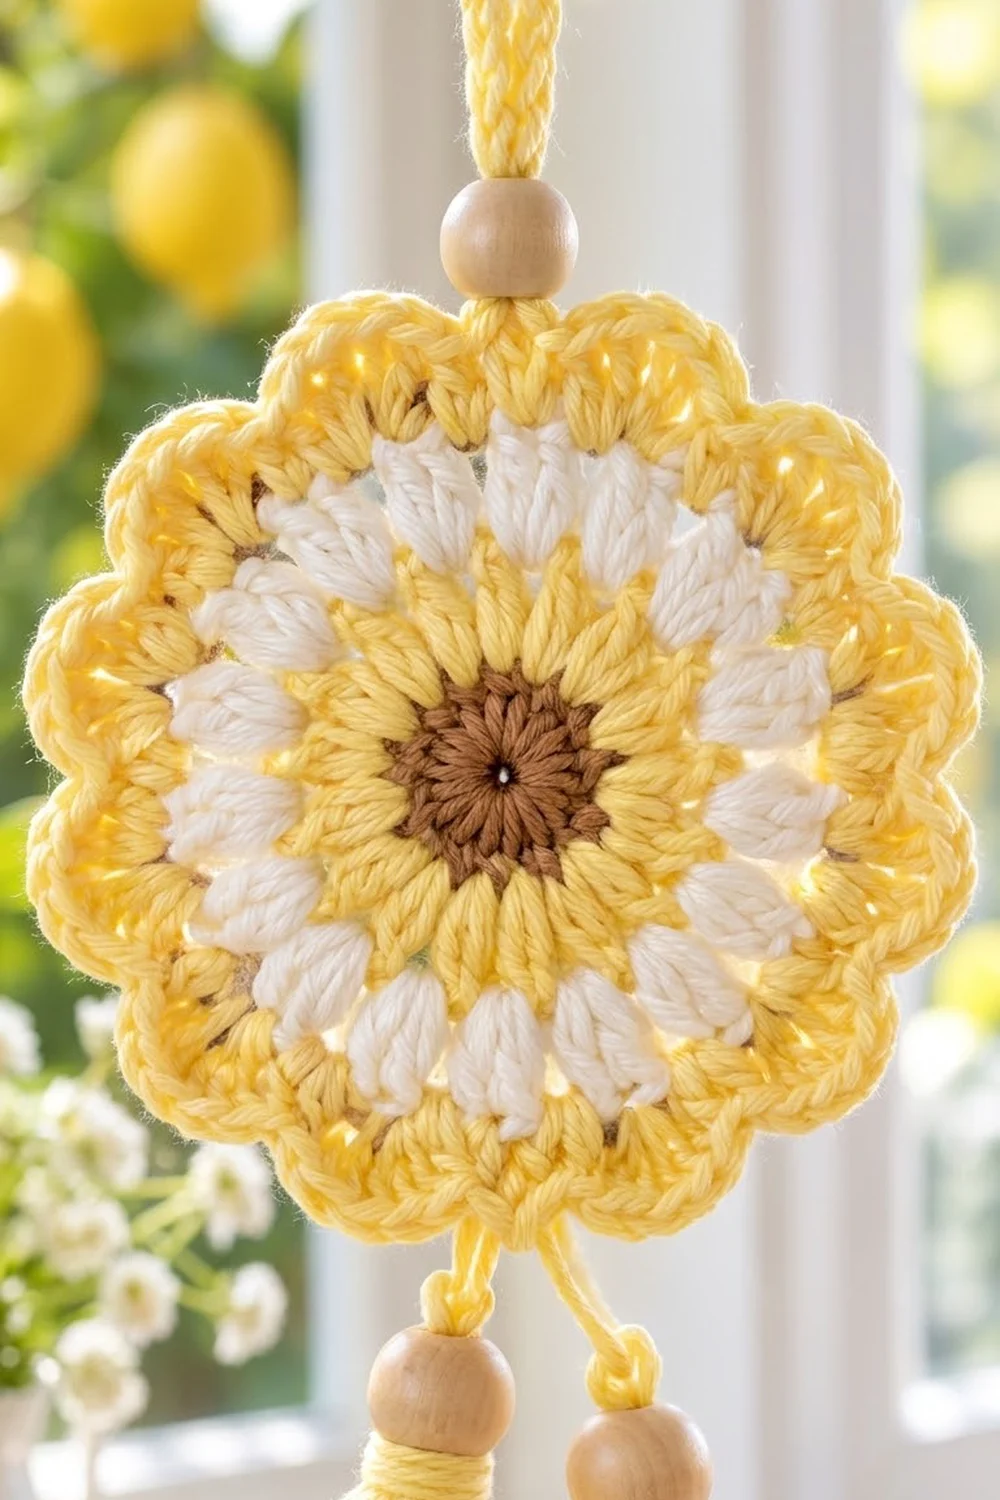
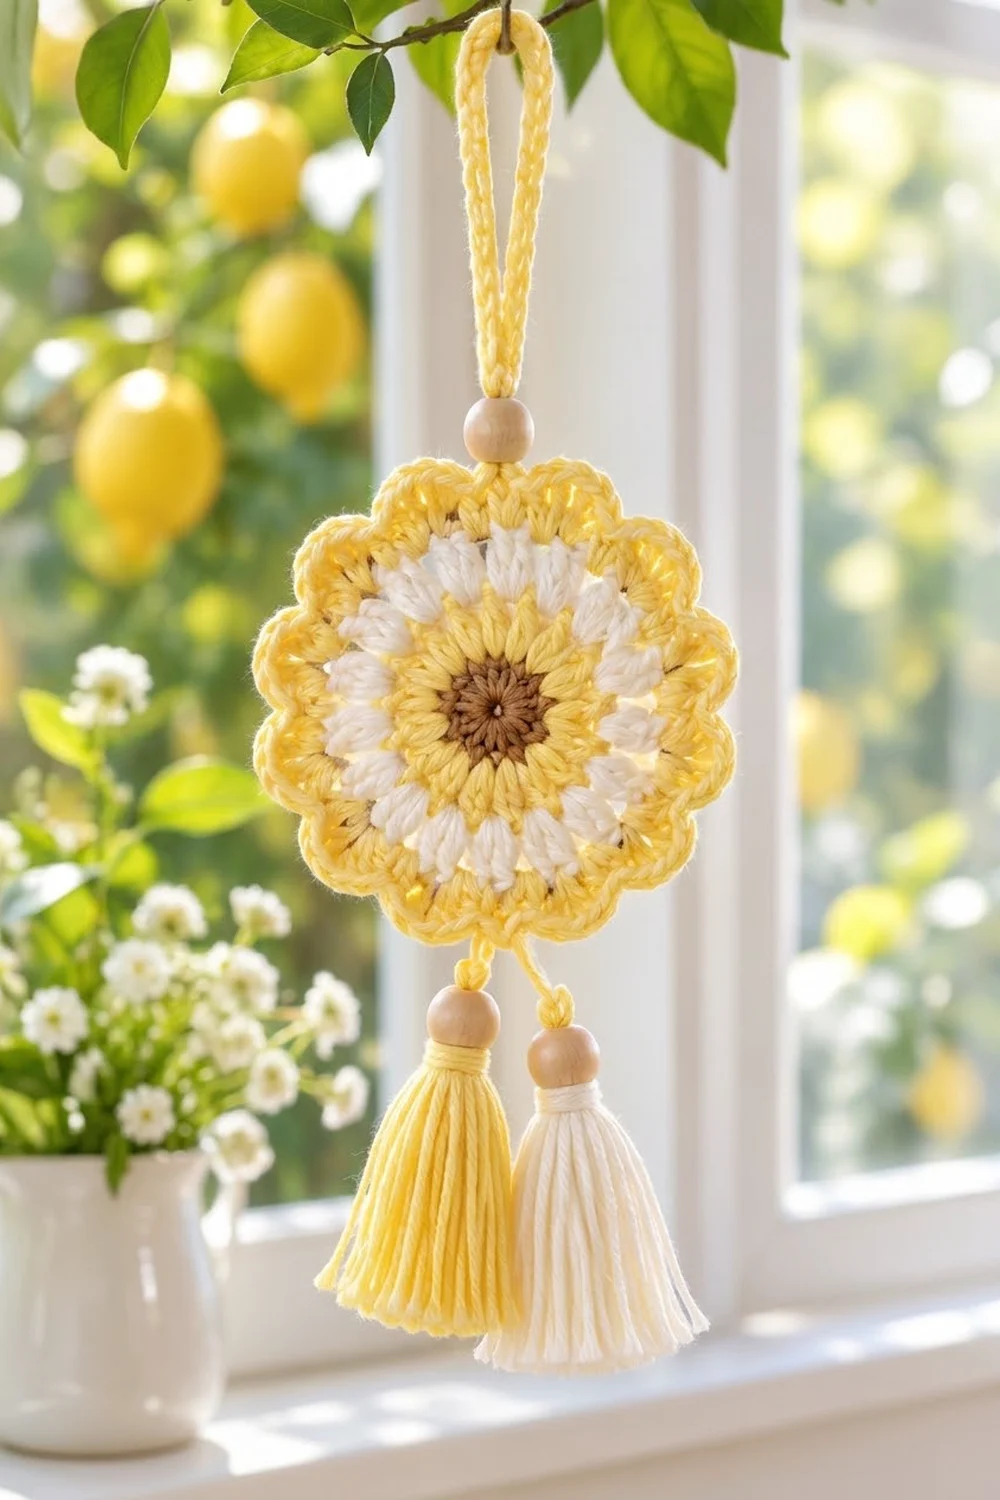
The Lemon Daisy Hanging Ornament is a small, sunny round motif made to hang in a window, from a cabinet knob, or on a branch. It has a warm brown center, a ring of soft yellow double crochet rays, a circle of plump white puff stitches, and a yellow scalloped edge that turns the circle into a flower.
The colors are buttery pale yellow, creamy white, and medium caramel brown. A yellow chain loop with a natural wooden bead sits at the top. Two tassels, one yellow and one white, each topped with a wooden bead, hang from the bottom.
This pattern uses US crochet terms. The finished motif measures 3.75 in (9.5 cm) across, measured point to point over the scallops. With the hanging loop and tassels, the whole ornament is about 12 in (30.5 cm) long.
You work the motif in the round from a magic ring in five rounds, changing color for the center, the rays, and the puffs. The fifth round is the scalloped border. You add the cord, beads, and tassels last.
Finished Size and Construction
- Finished motif size: 3.75 in (9.5 cm) diameter
- Total hanging length: about 12 in (30.5 cm), including loop and tassels
- Skill level: Easy
- Terminology: US crochet terms
- Yarn weight: DK / light worsted (weight 3) cotton
- Hook: 3.5 mm (E-4)
- Number of pieces: 1 crocheted motif, plus 1 chain cord and 2 tassels
- Layout: Single round motif, hung vertically
- Size before border (after Round 4): 3.25 in (8.3 cm)
- Border depth: 0.25 in (0.6 cm) on each side
Materials
Choose a smooth DK cotton or cotton blend, about 125 m per 50 g. Cotton gives crisp puff stitches and a scalloped edge that holds its shape, and the tassels hang straighter. Acrylic also works, but the motif will be a little softer.
- Color A, brown: 3 g (about 8 m)
- Color B, pale yellow: 20 g (about 50 m), for Rounds 2, 4, and 5, the hanging cord, and one tassel
- Color C, cream white: 12 g (about 30 m), for Round 3 and one tassel
These amounts include a margin for tails, a test motif, and the tassels.
Tools:
- 3.5 mm (E-4) crochet hook
- 3 natural wooden beads, 5/8 in (1.6 cm) across, with holes large enough for 4 strands of yarn
- Tapestry needle
- Scissors
- Stiff card, 3.5 in (8.9 cm) tall, for the tassels
- Rustproof pins, blocking mat, and spray bottle
Abbreviations (US Terms)
- ch – chain
- sl st – slip stitch
- sc – single crochet
- hdc – half double crochet
- dc – double crochet
- st(s) – stitch(es)
- sp – space
- sk – skip
- yo – yarn over
- beg – beginning
Puff stitch (puff): (Yo, insert hook in the stitch, yo, pull up a loop to about the height of a dc) 3 times, so you have 7 loops on the hook. Yo, pull through all 7 loops, then ch 1 to close the puff. This closing ch 1 is the top of the puff and does not count as a separate stitch.
Beginning puff (beg puff): Ch 2, then (yo, insert hook in the same stitch, yo, pull up a tall loop) 2 times, so you have 5 loops on the hook. Yo, pull through all 5 loops, then ch 1 to close. This counts as 1 puff.
Gauge and Checkpoints
Gauge doesn’t have to be exact for an ornament, but it controls the size and how flat the scallops lie. Make one test motif before you buy beads or make tassels, and check it against these measurements:
- After Round 1: 1.25 in (3.2 cm) across
- After Round 2: 2 in (5.1 cm) across
- After Round 3: 2.75 in (7.0 cm) across
- After Round 4: 3.25 in (8.3 cm) across
- After Round 5: 3.75 in (9.5 cm) across, measured over the scallops
If your motif is too big: Use a 3.25 mm hook, or pull up shorter loops in the puffs.
If it is too small: Use a 3.75 mm hook. A small motif usually means the puffs are too tight, so make the loops taller.
If it cups: Round 4 is too tight. Loosen your tension, or go up half a hook size for Round 4 only.
If it ruffles: The scallop dc stitches are too loose. Go down half a hook size for Round 5.
Measure on a flat surface without stretching the piece. Small differences of 0.125 in (0.3 cm) are fine and will even out when you block.
Pattern
Round 1 – Center (Color A, brown)
Make a magic ring with Color A.
Ch 3 (counts as dc), then work 11 dc in the ring. Pull the ring tight and sl st to the top of the beg ch-3. (12 dc)
Fasten off, leaving a 4 in (10.2 cm) tail. The center should be a flat disc with a tiny hole in the middle.
Checkpoint: 1.25 in (3.2 cm) across.
Round 2 – Rays (Color B, yellow)
Join Color B with a sl st in any dc.
Ch 3 (counts as dc), dc in the same st, then work 2 dc in each of the next 11 sts. Sl st to the top of the beg ch-3. (24 dc)
This round forms the yellow ring of rays around the brown center. Fasten off.
Checkpoint: 2 in (5.1 cm) across, lying flat.
Round 3 – Puffs (Color C, white)
Join Color C with a sl st in any dc.
Beg puff in the same st, ch 2, sk next st. Puff in next st, ch 2, sk next st. Repeat from * 10 more times. Sl st to the top of the beg puff. (12 puffs, 12 ch-2 sps)
Each ch-2 bridges one skipped stitch. That spaces out the puffs and also adds the width the circle needs. The puffs should sit as separate, rounded white petals. Fasten off.
Checkpoint: 2.75 in (7.0 cm) across.
Round 4 – Smoothing Round (Color B, yellow)
Join Color B with a sl st in the closing ch of any puff.
Ch 2 (does not count as a stitch), hdc in the same st, 3 hdc in next ch-2 sp. Hdc in the top of next puff, 3 hdc in next ch-2 sp. Repeat from * 10 more times. Sl st to the first hdc. (48 hdc)
This is a conversion round. The total is 12 hdc worked one per puff, plus 36 hdc worked into the 12 ch-2 spaces (3 per space), for 48 hdc. This gives an even base for the border. Do not fasten off.
Checkpoint: 3.25 in (8.3 cm) across. This is your size before the border.
Border
Round 5 – Scalloped Edge (Color B, yellow)
Border gauge: Each scallop uses 4 stitches of Round 4 and measures about 1 in (2.5 cm) along the outer curve.
Ch 1, sc in the same st as the join (the hdc above a puff). Sk next st, 5 dc in next st (the center hdc of the 3-hdc group), sk next st. Sc in next st (the hdc above the next puff), sk next st, 5 dc in next st, sk next st. Repeat from * 10 more times. Sl st to the first sc. (12 scallops: 60 dc + 12 sc = 72 sts)
Fasten off, leaving a 6 in (15.2 cm) tail.
Why the math works: One scallop repeat (sc, sk 1, 5 dc, sk 1) uses exactly 4 stitches of Round 4. Since 48 hdc ÷ 4 = 12, you get 12 repeats with nothing left over. Each repeat has 1 sc and 5 dc, so the round has 12 sc + 60 dc = 72 sts.
Each sc sits directly above a puff, and each 5-dc shell sits above a ch-2 space. This lines up the 12 scallops with the 12 white puffs and gives the flower its even, petal-like outline. The border adds 0.25 in (0.6 cm) on each side, so 3.25 in + 0.5 in = 3.75 in (9.5 cm).
Checkpoint: 3.75 in (9.5 cm) across over the scallops.
Weaving In Ends
On the wrong side, weave each tail in behind stitches of its own color. Weave the brown tail around the center to close the magic ring hole. Hide the white tails inside the puffs so they don’t show through the yellow.
Hanging Cord, Beads, and Tassels
Hanging Cord
Holding 2 strands of Color B together, ch 32. The chain should be about 7 in (17.8 cm) long. Fasten off, leaving a 6 in (15.2 cm) tail at each end.
Hold the motif with one scallop centered at the top. Fold the cord in half. Thread both cord ends and their tails through one wooden bead, then slide the bead down until the loop is about 3.25 in (8.3 cm) tall.
Use the tails to sew both cord ends to the back of the center (3rd) dc of the top scallop. Pull the bead down so it sits just above the scallop. Knot securely and weave in the tails.
Tassels (make 1 in Color B and 1 in Color C)
- Wrap yarn 30 times around the 3.5 in (8.9 cm) card.
- Slide a 12 in (30.5 cm) tie strand under the wraps at the top edge and knot it tightly. Leave both ends long.
- Cut through the wraps at the bottom edge and remove the card.
- With a separate 12 in (30.5 cm) strand of the same color, wrap the bundle 6 times about 0.5 in (1.3 cm) below the top. Knot it and hide the ends inside the tassel.
- Trim the bottom evenly so the tassel is 3 in (7.6 cm) long.
Attaching the Tassels
The bottom of the motif is also a scallop, directly opposite the top one.
Thread both tie ends of the yellow tassel through a wooden bead. Pass them through the 2nd dc of the bottom scallop from front to back, leaving about 0.5 in (1.3 cm) of cord between the scallop and the bead. Knot on the back and weave in the ends.
Repeat with the white tassel in the 4th dc of the same scallop. The two tassels should hang side by side, yellow on the left and white on the right.
Final Blocking
- Lightly spray the motif with water until it is damp but not soaking. Keep the tassels dry.
- Lay the motif face up on a blocking mat.
- Pin the sc between each pair of scallops to form a circle 3.25 in (8.3 cm) across.
- Pin the center dc of each scallop out to a circle 3.75 in (9.5 cm) across.
- Shape each puff with your fingers so it is round, and press the brown center flat.
- Let it dry completely, usually 2 to 4 hours.
- Unpin and hang the ornament. Comb the tassels straight with your fingers and trim any long strands.
Final Quality-Control Checklist
- Round 1 has 12 dc, and the center hole is closed.
- Round 2 has 24 dc.
- Round 3 has 12 evenly spaced white puffs.
- Round 4 has 48 hdc and lies flat.
- Round 5 has 12 matching scallops, each with 5 dc.
- Each sc in Round 5 sits above a puff.
- The motif measures 3.75 in (9.5 cm) across.
- The hanging loop is centered on the top scallop.
- Both tassels hang from the bottom scallop and are 3 in (7.6 cm) long.
- All three beads sit snugly against their knots.
- No tails show on the front.
Troubleshooting
Puffs are flat or uneven: Pull every loop up to the same height, and always close each puff with ch 1.
Gaps around the puffs: The ch-2 spaces are too loose. Work them a little tighter, or make those 2 chains with a smaller hook.
Round 4 cups: Work the 3 hdc in each ch-2 space more loosely, or use a larger hook.
Scallops are crowded or ruffled: Make sure you skip exactly 1 st on each side of every shell. Each repeat should use 4 sts.
Wrong number of scallops: Recount Round 4. You need exactly 48 hdc.
Ornament hangs crooked: Move the cord to the exact center dc of the top scallop. Then check that the tassels are attached to the bottom scallop, directly below it.
Bead slides around: Tie an overhand knot below the bead before you attach the cord ends.
Tassels are frizzy: Hold a steam iron above them without touching, then trim.
Care
Spot clean or hand wash in cool water with mild soap, then reshape and dry flat. Keep the ornament out of strong direct sun so the yellow doesn’t fade.
Final Notes
You can check the measurements as you go. Round 1 is 1.25 in (3.2 cm) across with 12 dc. Round 2 is 2 in (5.1 cm) with 24 dc. Round 3 is 2.75 in (7.0 cm) with 12 puffs. Round 4 is 3.25 in (8.3 cm) with 48 hdc. The scalloped border adds 0.25 in (0.6 cm) on each side, so the finished flower is 3.75 in (9.5 cm) across with 12 scallops.
With a 3.25 in (8.3 cm) loop on top, two beads, and 3 in (7.6 cm) tassels below, the whole ornament hangs about 12 in (30.5 cm) long. Make one for a sunny window, or make a few with different center colors to give as small gifts.
Happy crocheting!