

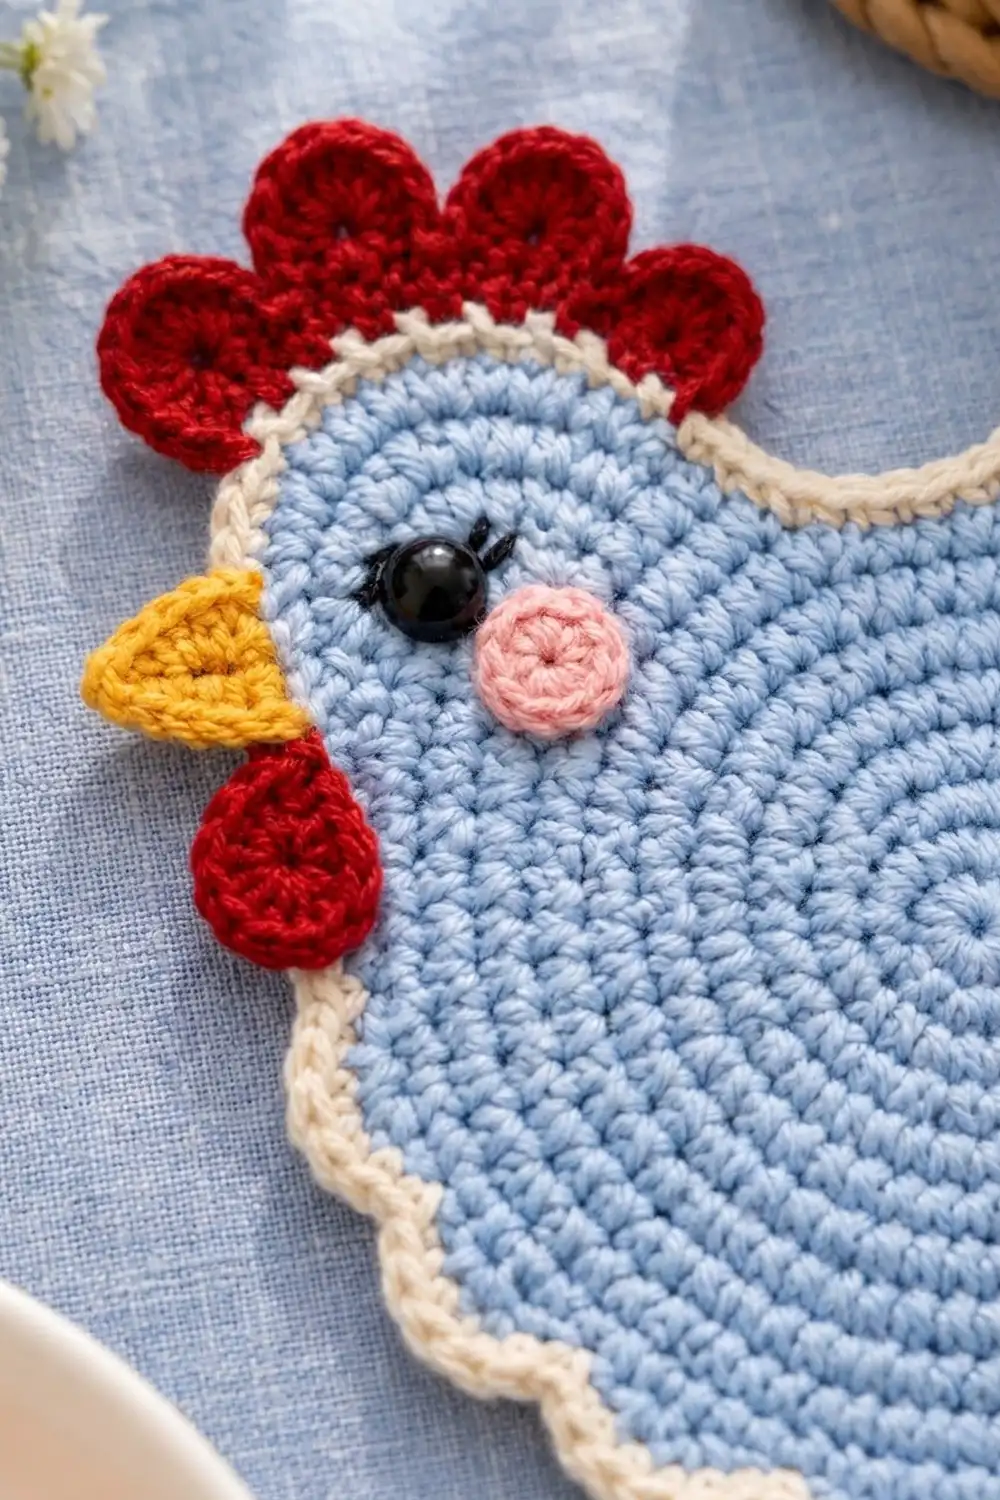
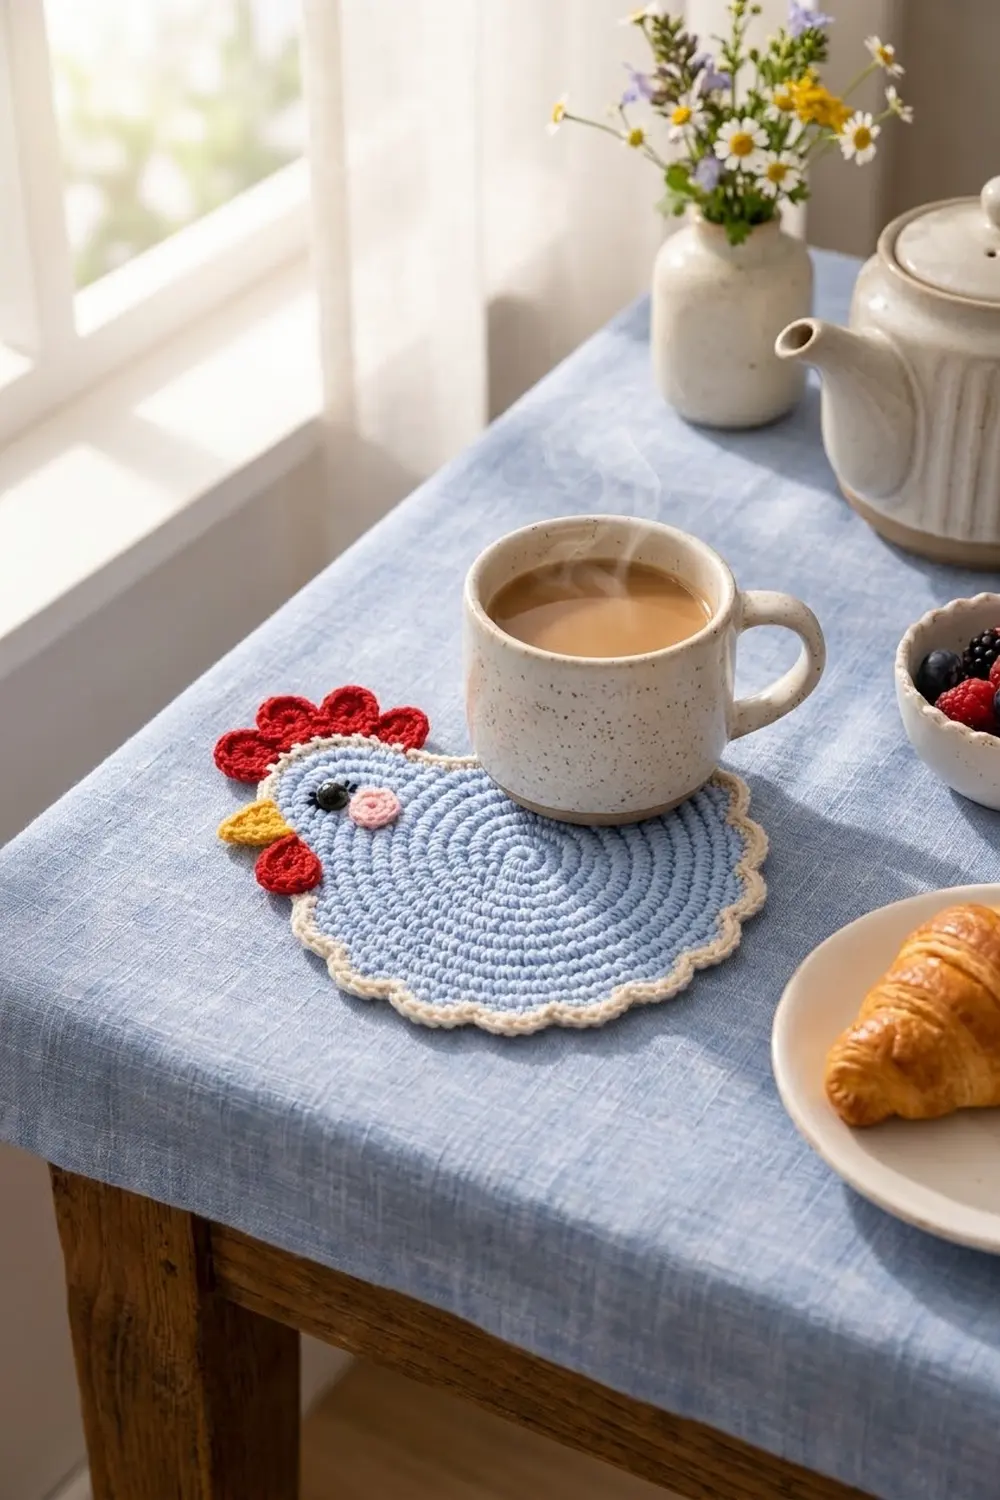
This little hen is a flat, single-layer mug rug in soft powder blue. It has a cream scalloped edge and small bright details: a red comb, a yellow beak, a red wattle, a pink cheek, and a black eye with lashes. It fits nicely under a mug or teapot and looks lovely on a spring or Easter table.
The style is simple and graphic. Most of the body is a plain circle of single crochet, so the spiral texture shows clearly. The hen shape comes from two short-row bumps worked onto the edge of the circle, one for the head and one for the tail.
This pattern uses US crochet terms. The finished hen measures about 8 in (20.3 cm) wide and 8 in (20.3 cm) tall. With the comb it is about 9 in (22.9 cm) tall.
You will crochet a 14-round circle, add the head and tail in rows, and work a two-round cream border. Then you make four small appliqués and sew them on. The hen is one main piece, so the only sewing is for the small features.
Finished Size and Construction
- Finished size: about 8 in x 8 in (20.3 cm x 20.3 cm), plus about 1 in (2.5 cm) of comb above the head
- Skill level: Easy-intermediate
- Terminology: US terms
- Yarn weight: DK / light worsted (weight 3) cotton
- Hook: 3.5 mm (E-4)
- Number of pieces: 1 main body plus 4 small appliqués (comb, beak, wattle, cheek)
- Layout: single piece; no motifs to join
- Body circle: 6 in (15.2 cm) across after Round 14
- Size before border: about 7 in x 7 in (17.8 cm x 17.8 cm) with head and tail added
- Border depth: about 0.5 in (1.3 cm) on every side
Materials
Choose a smooth mercerized or matte cotton, about 115 m per 50 g. Cotton holds its shape, lies flat, and handles warm mugs better than acrylic.
- Light blue (body): 30 g, about 69 m
- Cream (border): 10 g, about 23 m
- Red (comb and wattle): 5 g, about 12 m
- Yellow (beak): 2 g, about 5 m
- Pink (cheek): 1 g, about 2 m
- Black: a short length of embroidery floss or yarn for the lashes
Tools:
– 3.5 mm (E-4) crochet hook
– One 9 mm black safety eye (or black yarn to embroider the eye)
– 4 locking stitch markers
– Tapestry needle
– Scissors
– Blocking mat, rust-proof pins, and a spray bottle or steamer
All quantities include a small margin for a gauge swatch and yarn tails.
Abbreviations (US Terms)
- ch – chain
- sl st – slip stitch
- sc – single crochet
- hdc – half double crochet
- dc – double crochet
- inc – 2 sc in the same stitch
- sc2tog – single crochet 2 together
- sc3tog – single crochet 3 together
- MR – magic ring
- sk – skip
- st(s) – stitch(es)
- RS / WS – right side / wrong side
Special stitch – Scallop: (sl st in next st, sk 1 st, 5 dc in next st, sk 1 st). Each scallop uses exactly 4 stitches of the round below.
Gauge and Checkpoints
Gauge: 18 sc and 19 rows = 4 in (10.2 cm) in sc worked flat.
Gauge matters because the head, tail, and border counts are fixed. Test the circle first: work Rounds 1–7 and measure before going on.
Checkpoints:
– After Round 4: about 1.75 in (4.4 cm) across
– After Round 7: 3 in (7.6 cm) across
– After Round 10: about 4.25 in (10.8 cm) across
– After Round 14: 6 in (15.2 cm) across
– After head and tail: about 7 in x 7 in (17.8 cm x 17.8 cm)
– After border: about 8 in x 8 in (20.3 cm x 20.3 cm)
If your circle is too big, go down to a 3.25 mm (D-3) hook. If it is too small, go up to a 3.75 mm (F-5) hook. If the circle ruffles, your tension is loose on the increases. If it cups, your tension is tight. Fix this before adding the head and tail, because the border will not correct it.
Body Circle
With light blue, work in joined rounds. The ch 1 at the start of each round does not count as a stitch. On even rounds the increases are staggered so the circle stays round rather than turning into a hexagon.
Round 1: MR, ch 1, 6 sc in ring, sl st to first sc. (6)
Round 2: Ch 1, inc in each st around, sl st to first sc. (12)
Round 3: Ch 1, (sc 1, inc) 6 times, join. (18)
Round 4: Ch 1, sc 1, inc, (sc 2, inc) 5 times, sc 1, join. (24)
Round 5: Ch 1, (sc 3, inc) 6 times, join. (30)
Round 6: Ch 1, sc 2, inc, (sc 4, inc) 5 times, sc 2, join. (36)
Round 7: Ch 1, (sc 5, inc) 6 times, join. (42)
Checkpoint: 3 in (7.6 cm) across.
Round 8: Ch 1, sc 3, inc, (sc 6, inc) 5 times, sc 3, join. (48)
Round 9: Ch 1, (sc 7, inc) 6 times, join. (54)
Round 10: Ch 1, sc 4, inc, (sc 8, inc) 5 times, sc 4, join. (60)
Round 11: Ch 1, (sc 9, inc) 6 times, join. (66)
Round 12: Ch 1, sc 5, inc, (sc 10, inc) 5 times, sc 5, join. (72)
Round 13: Ch 1, (sc 11, inc) 6 times, join. (78)
Round 14: Ch 1, sc 6, inc, (sc 12, inc) 5 times, sc 6, join. (84)
Fasten off. The circle should measure 6 in (15.2 cm) across and lie completely flat.
Mark the Sections
Number the Round 14 stitches 1 to 84 in the direction you crocheted, starting with the first sc after the join. Place markers:
- Sts 1–38: chest and bottom (38 sts)
- Sts 39–60: tail (22 sts), with markers in st 39 and st 60
- Sts 61–66: back dip (6 sts)
- Sts 67–84: head (18 sts), with markers in st 67 and st 84
Check: 38 + 22 + 6 + 18 = 84. The Round 14 join ends up on the hen’s chest, just below the head, where the border hides it.
Head
Work the head in rows on sts 67–84. The ch 1 at the start of each row does not count.
Row 1 (RS): Join light blue in st 67. Ch 1, sc in same st and in each st through st 84, turn. (18)
Row 2: Ch 1, sc across, turn. (18)
Row 3: Ch 1, sc2tog, sc 14, sc2tog, turn. (16)
Row 4: Ch 1, sc across, turn. (16)
Row 5: Ch 1, sc2tog, sc 12, sc2tog, turn. (14)
Row 6: Ch 1, sc2tog, sc 10, sc2tog, turn. (12)
Row 7: Ch 1, sc2tog, sc 8, sc2tog. (10)
Fasten off. The head rises about 1.5 in (3.8 cm) above the edge of the circle. The decreases at both ends round off the sides of the head.
Tail
Work the tail in rows on sts 39–60.
Row 1 (RS): Join light blue in st 39. Ch 1, sc in same st and in each st through st 60, turn. (22)
Row 2: Ch 1, sc across, turn. (22)
Row 3: Ch 1, sc2tog, sc 18, sc2tog, turn. (20)
Row 4: Ch 1, sc2tog, sc 16, sc2tog, turn. (18)
Row 5: Ch 1, sc2tog, sc 14, sc2tog, turn. (16)
Row 6: Ch 1, sc2tog, sc 12, sc2tog. (14)
Fasten off. The tail rises about 1.25 in (3.2 cm), so it is lower and wider than the head. The 6 sts left between the head and tail form the back dip. Weave in all blue ends now.
Border
Border gauge: Work 1 sc per stitch along the tops, and 1 sc per row-end along the sides of the head and tail. At this gauge an sc row is about as tall as an sc is wide, so 1 sc per row-end lies flat.
Round 1 (cream): With RS facing, join cream in the row-end of tail Row 1 next to st 38. Ch 1 and work in this order:
- Tail outer side: 1 sc in each of 6 row-ends (6)
- Tail top (Row 6): 2 sc in first st, sc 12, 2 sc in last st (16)
- Tail dip side: 1 sc in each of 6 row-ends (6)
- Back dip: sc in sts 61–66 (6)
- Head dip side: 1 sc in each of 7 row-ends (7)
- Head top (Row 7): 2 sc in first st, sc 8, 2 sc in last st (12)
- Head front: 1 sc in each of 7 row-ends (7)
- Chest and bottom, sts 1–38: (sc 12, 2 sc in next) twice, sc 12 (40)
Sl st to first sc. Total: 100 sc. That is 94 sts worked 1 per existing stitch or row-end, plus 6 extra: 4 corner increases on the head and tail tops and 2 increases along the bottom.
Per section, that gives:
– Tail: 6 + 16 + 6 = 28
– Back dip and head: 6 + 7 + 12 + 7 = 32
– Chest and bottom: 40
A Round 15 of the circle would normally need 6 increases spread all the way around. The 2 bottom increases are that round’s share along the long curved edge, which keeps it from cupping.
Round 2 (scallops): Ch 1. Begin in the first sc of Round 1:
- Tail: work 7 Scallops over the 28 tail sts.
- Back dip and head: sl st in each of the next 32 sts.
- Chest and bottom: work 10 Scallops over the 40 sts.
Sl st to the first sl st. Fasten off. Total: 17 scallops and 32 sl sts.
Why the math works: Each Scallop uses 4 sts. The tail section has 28 sts (7 x 4) and the chest and bottom section has 40 sts (10 x 4). Both scalloped stretches therefore start and end cleanly, with no half scallops. The 32 sts across the dip and head are flat sl sts, which give the smooth cream line across the head top and back. 28 + 32 + 40 = 100, the full Round 1 count.
Appliqués
Comb (red)
Row 1: Ch 11, sc in 2nd ch from hook and in each ch across, turn. (10)
Row 2: Ch 1, (sl st in next st, 7 dc in next st) 5 times, sl st in the same last st. (5 lobes)
Fasten off, leaving a long tail. The comb is about 2.5 in (6.4 cm) wide and 1 in (2.5 cm) tall.
Beak (yellow)
Row 1: Ch 6, sc in 2nd ch from hook and in each ch across, turn. (5)
Row 2: Ch 1, sc2tog, sc 1, sc2tog, turn. (3)
Row 3: Ch 1, sc3tog. (1)
Fasten off, leaving a tail. The triangle is about 1 in (2.5 cm) wide and 0.75 in (1.9 cm) tall.
Wattle (red)
Round 1: MR, ch 1, 8 sc in ring, sl st to first sc. (8)
Round 2: Ch 1, inc in each of next 6 sts, sc in next st, (hdc, ch 2, hdc) in last st, sl st to first sc. (13 sc, 2 hdc, 1 ch-2 point)
Fasten off. The ch-2 point gives the teardrop shape. The wattle is about 1 in (2.5 cm) long.
Cheek (pink)
Round 1: MR, ch 1, 8 sc in ring, pull tight, sl st to first sc. (8)
Fasten off. The cheek is about 0.5 in (1.3 cm) across.
Assembly
- Eye: Insert the 9 mm safety eye on head Row 3, about 1 in (2.5 cm) in from the front edge of the head. Snap the washer on from the WS. Embroider 2 short black lashes angled up from the eye. If the mug rug may touch hot surfaces or be near small children, embroider the eye instead.
- Comb: Lay the comb’s Row 1 edge against the WS of the head top so the 5 lobes stand above the cream border. Whipstitch along the base, catching only the back loops so the stitches don’t show on the RS.
- Beak: Sew the wide edge of the beak to the RS at the head front, level with the eye. Let the point extend about 0.6 in (1.5 cm) past the edge.
- Wattle: Tuck the top of the wattle just under the beak, point down, and sew it so it overlaps the chest edge.
- Cheek: Sew the pink circle just below and behind the eye.
Final Blocking
- Weave in every end. Run cream ends through the cream border and red ends through the comb.
- Spray the hen until damp, or hold a steamer just above it. Don’t press an iron onto the safety eye.
- Pin the body circle flat to 6 in (15.2 cm) across, then pin the full outline to 8 in x 8 in (20.3 cm x 20.3 cm).
- Pin each of the 17 scallops into an even half circle.
- Shape the comb lobes with your fingers so they fan out evenly.
- Leave it to dry completely before unpinning.
Final Quality-Control Checklist
- Circle is 84 sts and 6 in (15.2 cm) across
- Head has 7 rows and ends with 10 sts
- Tail has 6 rows and ends with 14 sts
- Back dip is exactly 6 sts wide
- Border Round 1 has 100 sc
- Border Round 2 has 7 tail scallops, 32 sl sts, and 10 chest/bottom scallops
- Finished piece is about 8 in x 8 in (20.3 cm x 20.3 cm) and lies flat
- Comb has 5 even lobes and sits behind the border
- Eye is secure and all ends are woven in
Troubleshooting
- Circle ruffles: There are too many stitches for your row height. Go down a hook size or tighten your increase stitches.
- Circle cups: Your tension is tight. Go up a hook size.
- Head or tail looks pointed: Decrease only at the row ends, and check that head Rows 2 and 4 have no decreases.
- Back dip puckers: Work the 6 dip sc a little looser in border Round 1.
- Half scallop at the end: Recount Round 1 by section. The tail must have 28 sts and the chest and bottom 40.
- Comb flops forward: On the WS, sew a second line of stitches about 0.25 in (0.6 cm) above the first.
Care
Hand wash in cool water with mild soap, press the water out in a towel, and dry flat. Reshape the scallops while the piece is damp.
Final Notes
The measurements build in a simple chain:
– Round 7: a 3 in (7.6 cm) circle
– Round 14: a 6 in (15.2 cm) circle of 84 sts
– Head and tail added: about 7 in x 7 in (17.8 cm x 17.8 cm)
– Border added: 8 in x 8 in (20.3 cm x 20.3 cm), with 100 stitches and 17 scallops
If each checkpoint matches, the comb, beak, and wattle will sit exactly where they should.
Happy crocheting!