

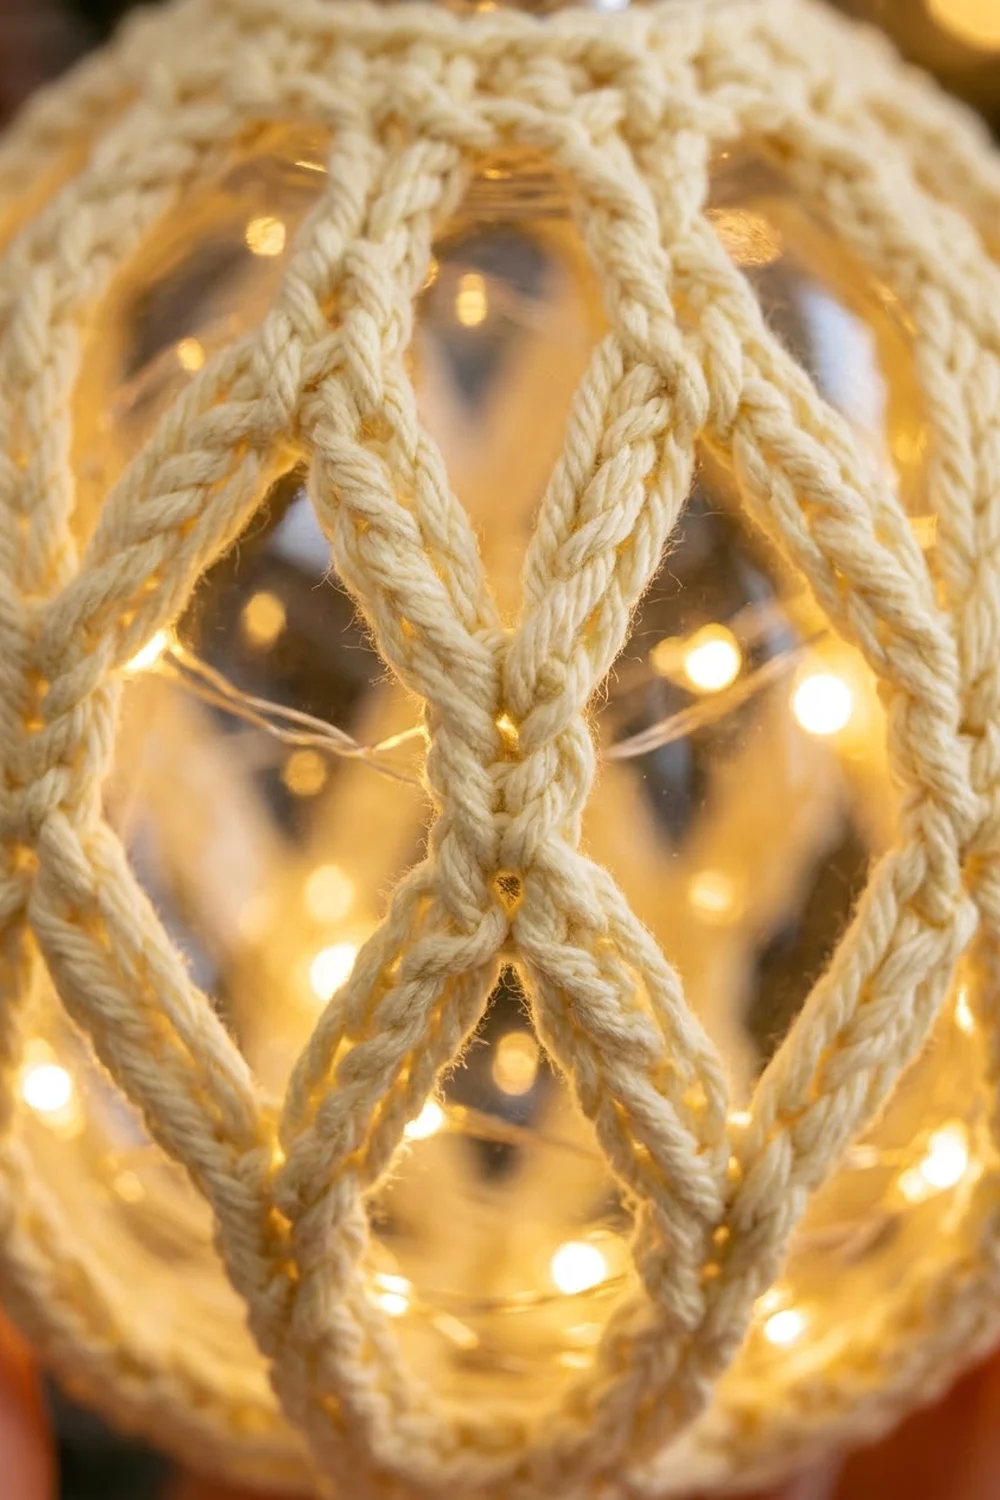
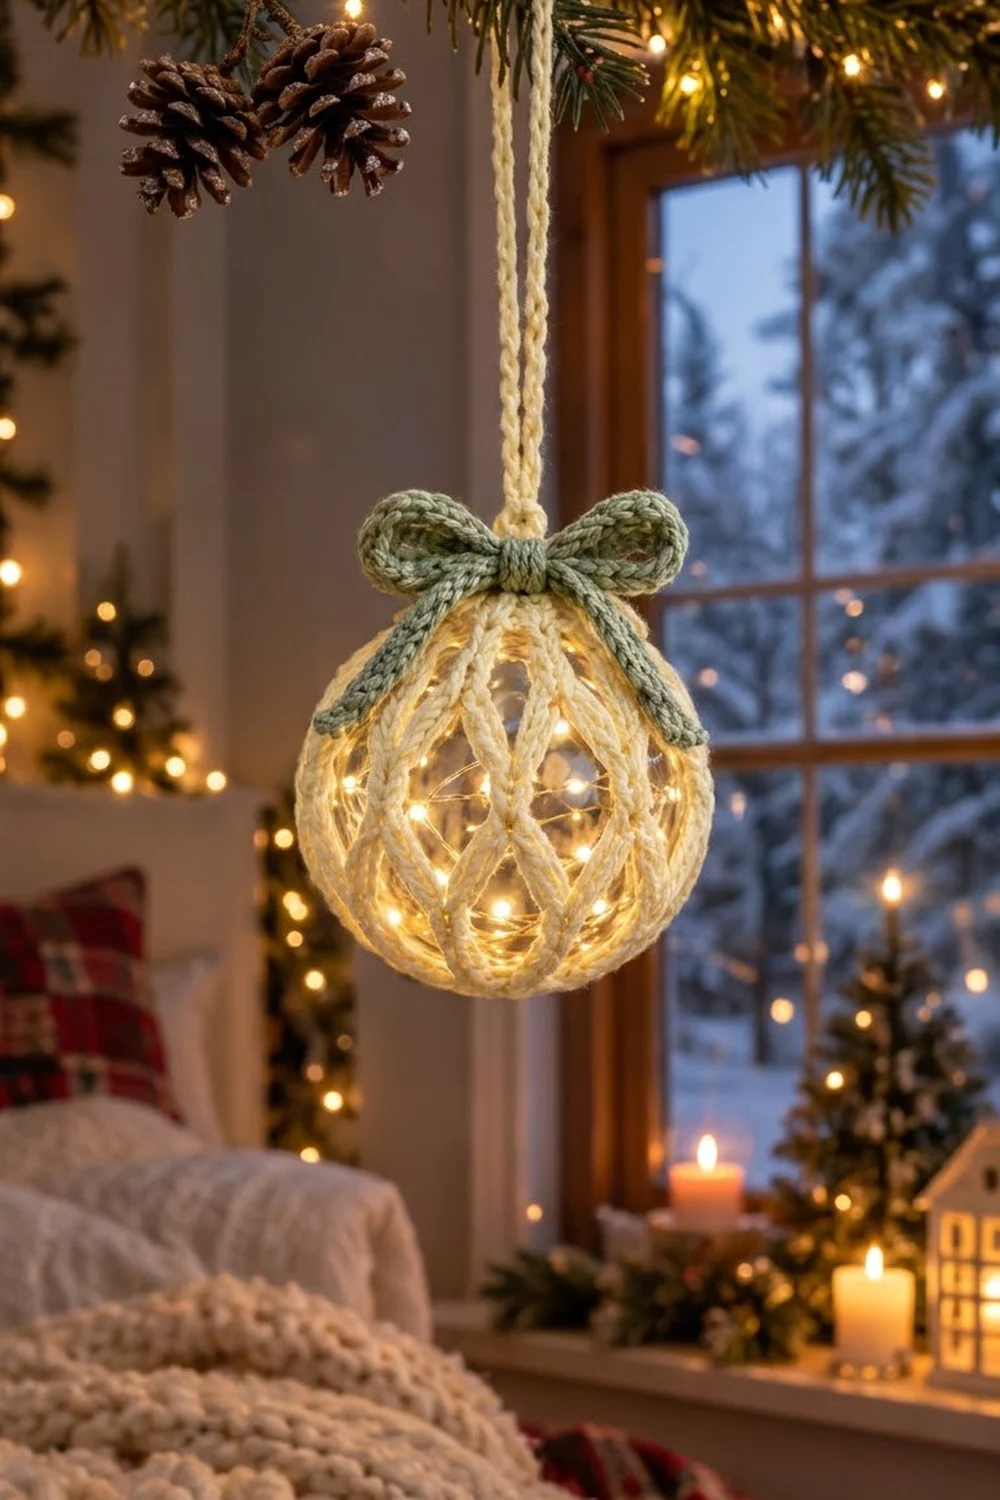
This cover turns a plain clear ornament into a small glowing lantern. Rope-like cream cords cross over the ball in a diamond lattice, so the fairy lights inside shine through every opening. A sage-green bow finishes the top, and a long cream cord lets it hang from a tree branch, window, or mantel.
The colors are soft and simple: creamy off-white for the cover and hanging cord, and muted sage for the bow. The style is cozy and Scandinavian, and it looks best with warm white lights.
The pattern uses US crochet terms. The finished cover fits a 3 in (7.6 cm) clear ornament, with a circumference of about 9.4 in (23.9 cm) at the widest part.
The cover is worked in one piece from the top down, in joined rounds. A small solid band fits around the ornament cap, six rounds of rope-chain loops form the lattice, and then the ornament goes inside. A solid bottom band closes the cover around it. Last, you add a rope-chain hanging cord and tie a rope-chain bow.
Finished Size and Construction
- Finished size: fits a 3 in (7.6 cm) ornament; about 9.4 in (23.9 cm) around the widest part
- Skill level: easy-intermediate
- Terminology: US
- Yarn weight: DK / light (#3), cotton or cotton blend
- Hook: 3.5 mm (E-4)
- Number of pieces: 1 cover, plus 1 hanging cord and 1 bow cord
- Layout: one cover worked in the round from top to bottom, with 8 lattice repeats
- Piece size: about 4.9 in (12.4 cm) measured along the curve from cap ring to bottom, before fitting
- Size before border: about 4.1 in (10.4 cm) along the curve (top band plus lattice)
- Border depth: 5 rounds, about 0.8 in (2.0 cm)
Materials
Use a smooth, tightly plied cotton. It gives the rope chains a crisp, braided look and holds the lattice shape over the curve. Fuzzy or very soft yarns blur the diamonds.
- Cream (Color A): 15 g, about 30 m (cover and hanging cord)
- Sage green (Color B): 5 g, about 10 m (bow)
These quantities include a margin for a gauge swatch and weaving in ends.
Tools:
- 3.5 mm (E-4) crochet hook
- One 3 in (7.6 cm) clear plastic or glass ornament with a removable cap
- One small battery-powered micro LED fairy-light string (copper wire type)
- Stitch marker
- Tapestry needle
- Scissors
- Measuring tape
Abbreviations (US Terms)
- ch – chain
- sl st – slip stitch
- sc – single crochet
- sc2tog – single crochet 2 together
- st(s) – stitch(es)
- rnd(s) – round(s)
- rch – rope chain (special stitch)
Special stitch – rope chain (rch): This is also called a double chain. It is thicker than a plain chain and looks braided.
- To start a rope chain from a slip knot: ch 2, then sc in the 2nd ch from the hook. This counts as the first rch.
- To work each following rch: insert your hook into the left vertical loop of the stitch you just made, yo, and pull up a loop (2 loops on hook). Yo and pull through both loops.
- To start a rope chain from a stitch in a round: work the first rch into the left loop of that stitch.
Each rch counts as 1 stitch.
Gauge and Checkpoints
Gauge: In sc, 20 sts and 24 rows = 4 in (10.2 cm), which is 5 sc and 6 rows per 1 in (2.5 cm). In rope chain, 4 rch = 1 in (2.5 cm).
Make one test cover first. Gauge decides whether the lattice sits snugly on the ball or sags.
Checkpoints:
- After Rnd 1: the ring measures about 2.4 in (6.1 cm) around and slips over the ornament cap with a little stretch.
- After Rnd 2: about 4.8 in (12.2 cm) around.
- After Rnd 4: about 6.4 in (16.3 cm) around, with a band depth of about 0.7 in (1.8 cm). The piece cups like a small bowl.
- Rope-chain loops: 5 rch = 1.25 in (3.2 cm), 6 rch = 1.5 in (3.8 cm), 7 rch = 1.75 in (4.4 cm).
- After Rnd 10: the lattice is about 3.4 in (8.6 cm) deep, and the whole piece is about 4.1 in (10.4 cm) along the curve.
If your work is too big (the ring slides down past the cap, or the loops hang loose), go down to a 3.25 mm hook.
If it is too small (the ring won’t pass over the cap, or the ornament won’t fit through the Rnd 10 opening), go up to a 3.75 mm hook.
Change only the hook, not the stitch counts, so the 8-repeat math stays the same.
Pattern: Top Band
With Color A, ch 12 and join with a sl st to the first ch to form a ring. Don’t twist the chain.
Rnd 1: Ch 1, sc in each ch around, sl st to first sc. (12 sc)
Rnd 2: Ch 1, 2 sc in each st around, sl st to first sc. (24 sc)
Rnd 3: Ch 1, sc in next 2 sts, 2 sc in next st; repeat from * 7 more times, sl st to first sc. (32 sc)
Rnd 4: Ch 1, sc in each st around, sl st to first sc. (32 sc)
Try the band over the ornament cap now. It should sit just under the cap rim, with Rnd 1 hugging the neck.
Pattern: Diamond Lattice
Each lattice round has 8 rope-chain loops anchored by 8 sc. Every new round anchors its sc around the center of a loop from the round before. This is what makes the diamonds, with the cords crossing in an X at every anchor point.
To begin each round from Rnd 6 onward, move to the first loop center like this: sl st in each of the next 3 rch, then ch 1 and sc around the loop at that point.
Rnd 5: Ch 1, sc in first st, rch 5, skip next 3 sts, sc in next st; repeat from * 6 more times. Then rch 5, skip the last 3 sts, and sl st to first sc. (8 sc + 40 rch = 8 loops of 5 rch)
The repeat math works because each repeat uses 4 band stitches (1 sc + 3 skipped), and 8 × 4 = 32, which matches Rnd 4.
Rnd 6: Move to the first loop center. Rch 6, sc around the center of the next loop; repeat from * 6 more times. Then rch 6 and sl st to first sc. (8 sc + 48 rch = 8 loops of 6 rch)
Rnd 7: Move to the first loop center. Rch 7, sc around the center of the next loop; repeat from * 6 more times. Then rch 7 and sl st to first sc. (8 sc + 56 rch = 8 loops of 7 rch)
Rnd 8: Repeat Rnd 7. (8 sc + 56 rch = 8 loops of 7 rch)
This is the equator. Rnds 7 and 8 span the widest part of the ball.
Rnd 9: Move to the first loop center. Rch 6, sc around the center of the next loop; repeat from * 6 more times. Then rch 6 and sl st to first sc. (8 sc + 48 rch = 8 loops of 6 rch)
Rnd 10: Move to the first loop center. Rch 5, sc around the center of the next loop; repeat from * 6 more times. Then rch 5 and sl st to first sc. (8 sc + 40 rch = 8 loops of 5 rch)
The loop lengths are mirrored (5-6-7-7-6-5), so the diamonds grow toward the equator and shrink toward the bottom, following the shape of the sphere.
Insert the ornament: Put the fairy-light string inside the clear ornament and replace the cap. Tuck the small battery pack inside too, or let its wire run out under the cap, depending on your light set.
Push the ornament up through the Rnd 10 opening, cap first, until the cap pokes through the Rnd 1 ring. The 40-rch opening stretches to about 10 in (25.4 cm), so the 9.4 in (23.9 cm) ball passes through easily. Ease the diamonds so all 8 are evenly spaced.
Border: Bottom Band
The bottom band is this piece’s border. It is worked directly on the ornament, the way you’d see a cover being finished on the hook. Border gauge is the same as the main sc gauge: 5 sc and 6 rnds per 1 in (2.5 cm).
Rnd 11 (conversion round): Sl st into the first loop. Ch 1, then work 4 sc around each of the 8 loops, skipping the anchor sc between them. Sl st to first sc. (4 sc × 8 loops = 32 sc)
Rnd 12: Ch 1, sc in each st around, sl st to first sc. (32 sc)
Rnd 13: Ch 1, sc in next 2 sts, sc2tog; repeat from * 7 more times, sl st to first sc. (24 sc)
Rnd 14: Ch 1, sc in next st, sc2tog; repeat from * 7 more times, sl st to first sc. (16 sc)
Rnd 15: Ch 1, sc2tog 8 times, sl st to first sc. (8 sc)
Fasten off and leave a 6 in (15.2 cm) tail. Thread the tail through the front loop of all 8 sts, pull it tight to close the bottom, and weave it in securely.
Why the math works: Rnd 11 gives 4 sc per lattice repeat. That makes 32 sc, exactly the 32 sc of top Rnd 4, so the top and bottom bands match and the lattice hangs straight, without twisting. The decreases then remove 8 sts per round (32, 24, 16, 8), one per repeat each time, so the bottom closes evenly over the curve.
Hanging Cord
With Color A, leave an 8 in (20.3 cm) starting tail and work 30 rch, about 7.5 in (19.1 cm). Fasten off, leaving another 8 in (20.3 cm) tail.
Fold the cord in half to make a loop about 3.75 in (9.5 cm) long. Sew both ends to Rnd 1, one on each side of the ornament’s wire hanger, so the two strands rise together from the top center. Weave in the ends.
Bow
With Color B, leave a 4 in (10.2 cm) tail and work 48 rch, about 12 in (30.5 cm). Fasten off.
Tie the cord into a bow with two loops, each about 1 in (2.5 cm) long. The finished bow should be about 2.5 in (6.4 cm) wide, with two tails about 2 in (5.1 cm) long.
Sew the bow knot to the front of Rnds 2–3, just below the hanging cord. Lay each tail down along a lattice cord and tack it at its tip with matching yarn, so the tails stay draped over the top of the ball. Weave in the ends.
Final Blocking
- Turn on the fairy lights and check the lattice in place. All 8 diamonds should be evenly spaced.
- Lightly mist the cover with water while it is on the ornament. Don’t soak it, because damp batteries and wire can fail.
- Using your fingers, ease each rope-chain cord into a smooth curve, and center each X crossing under the one above it.
- Pull the top band snug under the cap, and smooth the bottom band so the closing point sits at the bottom pole.
- Shape the bow loops round and arrange the tails along the diagonal cords.
- Leave it to dry completely, at least 4 hours, hanging by its cord. Turn the lights back on only once it is dry.
Final Quality-Control Checklist
- Rnd 1 ring fits snugly under the cap, about 2.4 in (6.1 cm) around.
- Top band has 32 sc and bottom band starts with 32 sc.
- Each of the 6 lattice rounds has 8 loops: 5, 6, 7, 7, 6, 5 rch.
- Every anchor sc sits at the center of a loop, forming a clean X crossing.
- The cover measures about 9.4 in (23.9 cm) around the equator on the ornament.
- The bottom closes with no visible hole.
- The hanging cord is 30 rch and sewn on securely at both ends.
- The bow is centered at the front, with even tails.
- All ends are woven in and nothing touches the light switch.
Troubleshooting
The diamonds lean to one side. You anchored to one side of each loop center. Count the rch and anchor exactly at the middle.
The lattice is baggy at the equator. Your rope chains are too loose. Go down a hook size, or redo Rnds 7–8 with 6 rch per loop.
The ornament won’t fit through Rnd 10. Your rope chains are too tight. Redo Rnd 10 loosely, or go up a hook size for that round only.
The bottom band ruffles. Rnd 11 has more than 32 sc. Recount: 4 sc per loop, 8 loops.
The cord looks flat instead of braided. Make sure you insert the hook into the left vertical loop of the previous stitch each time, not into the front loop.
The bow droops. Tack each bow loop to the band with one small hidden stitch.
Care
Remove the battery pack, or keep it dry, and spot clean the cover with a damp cloth. Store it flat in tissue paper so the cords and bow keep their shape.
Final Notes
The measurement chain is short. A 12-ch ring of about 2.4 in (6.1 cm) fits the cap, and the band grows to 32 sc, about 6.4 in (16.3 cm). The 32 sc split into 8 lattice repeats of 4 sts, and six rounds of 5-6-7-7-6-5 rope-chain loops stretch to about 9.4 in (23.9 cm) around the 3 in (7.6 cm) ball. Rnd 11 brings the count back to 32 sc, and the bottom band closes in steps of 8. As long as your gauge matches at each checkpoint, the lattice will sit evenly and glow.
Happy crocheting!