

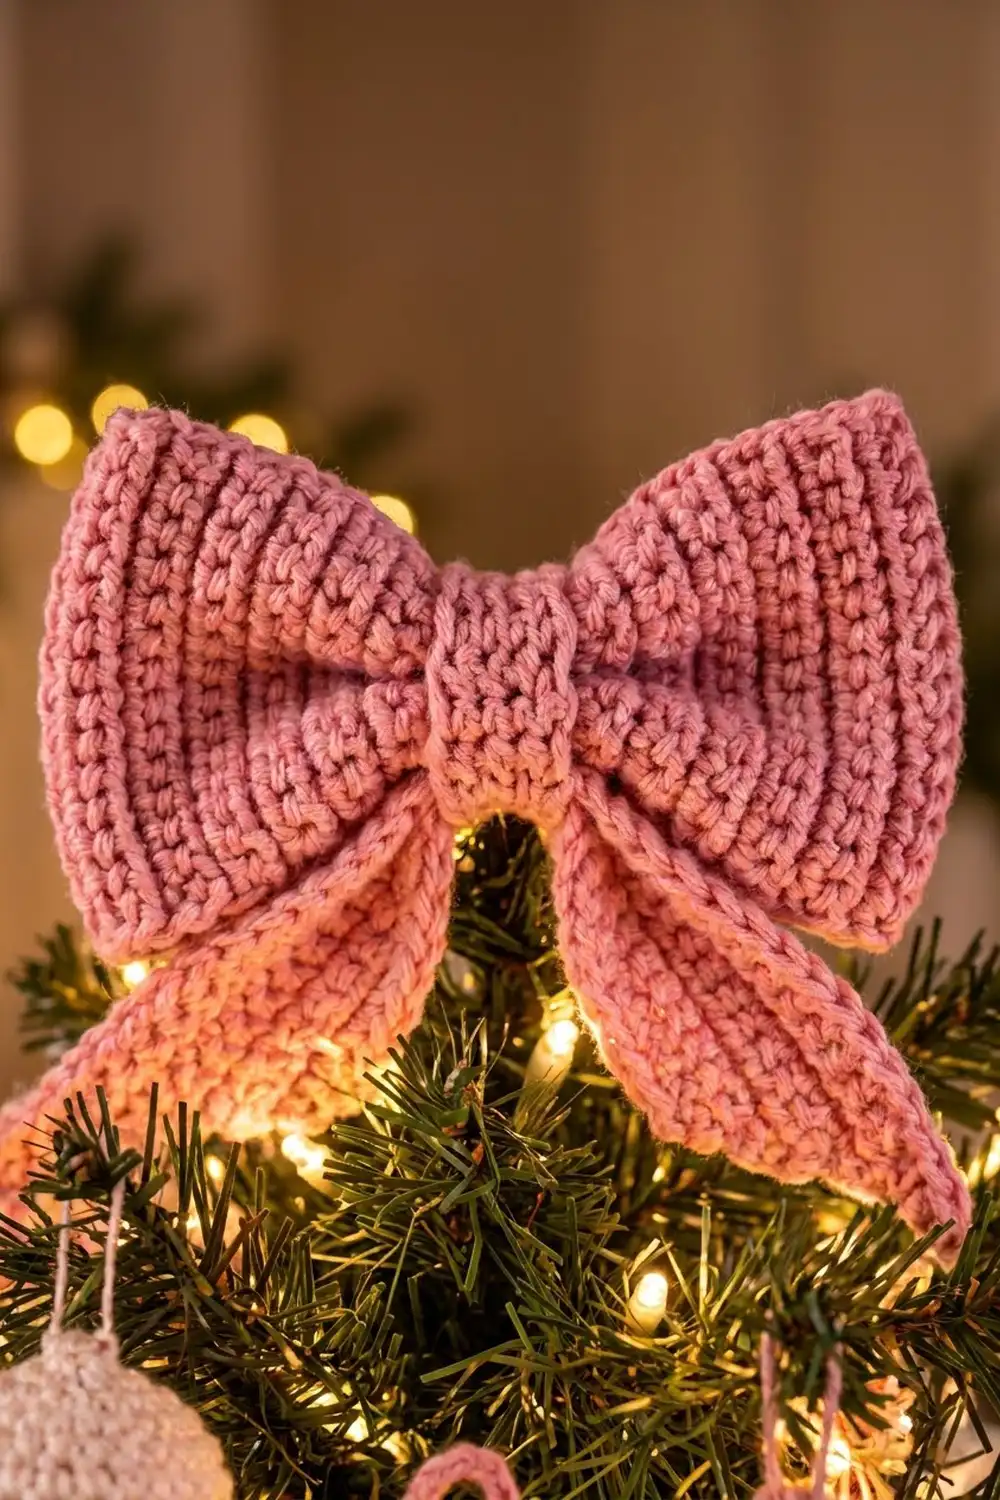
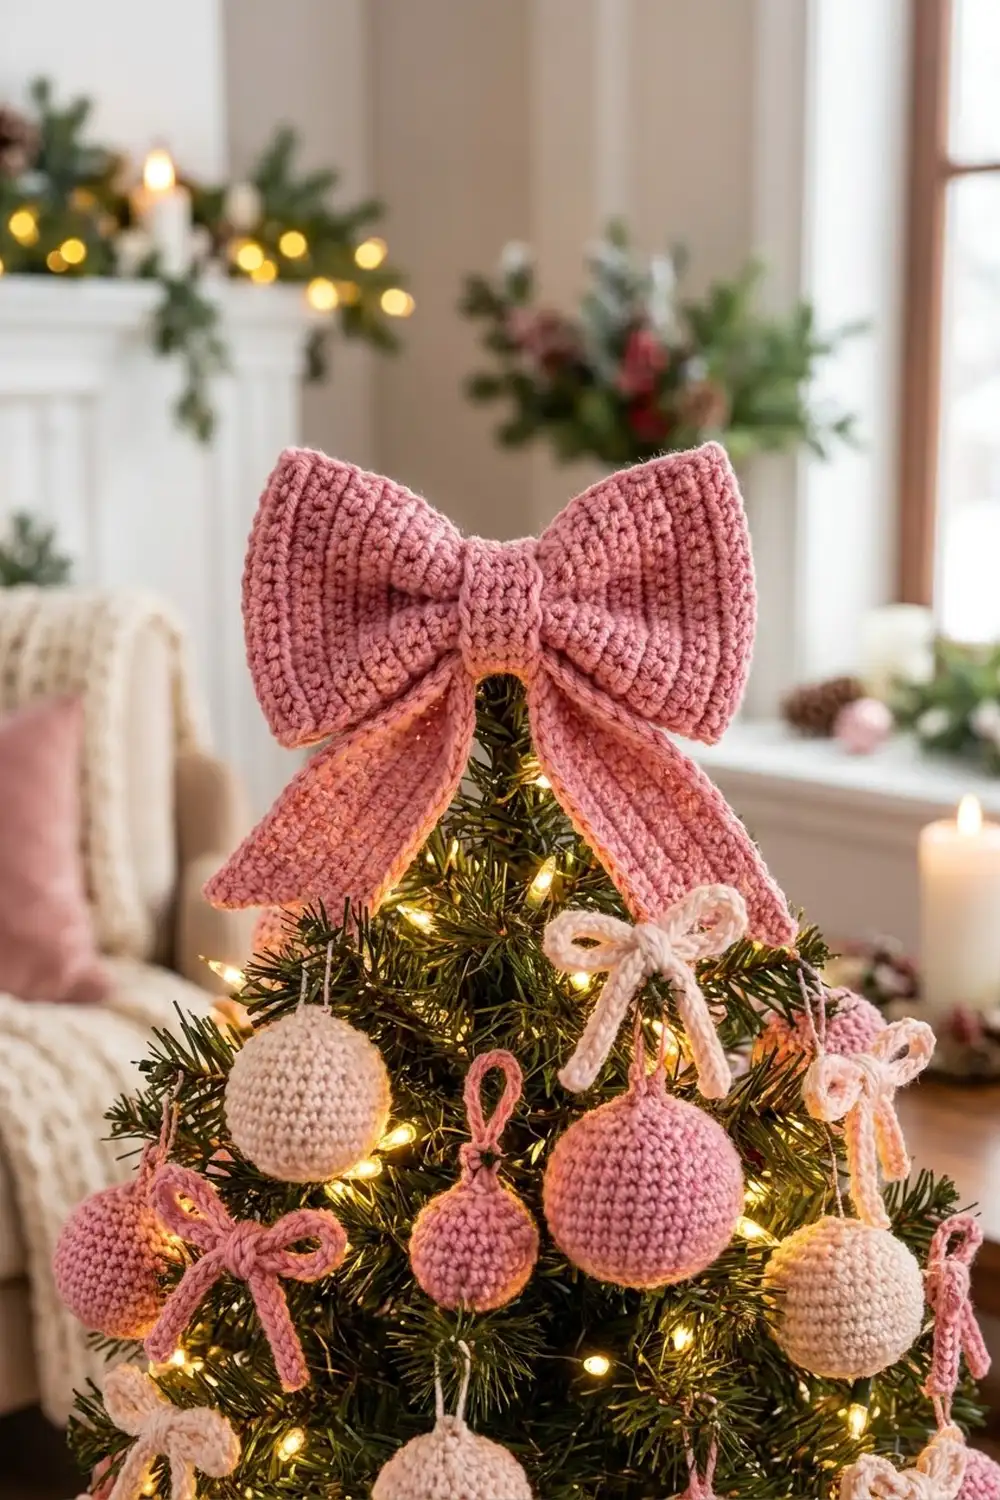
This oversized bow is made to sit at the very top of a small Christmas tree. It has two full wings, a narrow wrapped center band, and two tails with angled ends that hang below the wings. It’s worked in a single soft dusty pink, and the vertical ridges give it a knit-like texture.
The whole bow is single crochet worked in the back loop only. That one stitch makes the ribbing, holds the wings firm, and keeps the pattern easy for an advanced beginner. All instructions use US crochet terms.
The finished bow measures about 8 in (20.3 cm) wide and 5 1/2 in (14.0 cm) tall across the wings. With the tails included, it is about 7 1/2 in (19.1 cm) tall overall.
You crochet three flat parts: a long wing panel with a one-round border, a tail strip with slanted ends, and a short center band. Then you block them, fold the panel into a loop, cinch the middle, add the tails, and wrap everything with the band.
Finished Size and Construction
- Finished size: about 8 in (20.3 cm) wide x 5 1/2 in (14.0 cm) tall (wings); about 7 1/2 in (19.1 cm) tall with tails
- Skill level: Easy / advanced beginner
- Terminology: US crochet terms
- Yarn weight: Worsted (#4)
- Hook: 5.0 mm (H-8)
- Number of pieces: One bow, assembled from 3 parts (wing panel, tail strip, center band)
- Layout: Single item; no motif grid
- Wing panel size before border: 5 in x 16 in (12.7 cm x 40.6 cm)
- Wing panel size after border: 5 1/2 in x 16 1/2 in (14.0 cm x 41.9 cm)
- Border depth: 1 round of sc, about 1/4 in (0.6 cm) per side
- Tail strip: 2 in (5.1 cm) wide x about 9 1/2 in (24.1 cm) along the straight edge
- Center band: 1 1/2 in x 4 in (3.8 cm x 10.2 cm)
Materials
Yarn: Use a smooth worsted-weight yarn in acrylic, cotton blend, or wool blend. Choose a plied yarn with good stitch definition so the ridges show clearly. Avoid fuzzy or loosely spun yarn, because the ribbing will blur and the wings will droop.
- Dusty Pink: about 120 g / 240 m (262 yd)
That amount includes a margin of about 15 percent for the gauge check, sewing tails, and small tension differences. The bow itself uses close to 105 g.
Tools:
- 5.0 mm (H-8) crochet hook
- Tapestry needle
- 4 locking stitch markers
- Scissors and measuring tape
- Blocking mat, rust-proof pins, and a spray bottle
- One 12 in (30.5 cm) chenille stem (pipe cleaner), or two 12 in (30.5 cm) lengths of yarn, for tying the bow onto the tree
- Optional: spray starch
Abbreviations (US Terms)
- ch – chain
- sc – single crochet
- sc BLO – single crochet in the back loop only
- sc2tog – single crochet 2 together
- sl st – slip stitch
- st(s) – stitch(es)
- inc – 2 sc in the same stitch
- WS – wrong side
Special stitch: sc BLO. Insert the hook under the back loop only (the loop farther from you), yarn over, and pull up a loop. Yarn over again and pull through both loops on the hook. Because you work back and forth, every row leaves a raised ridge, and those ridges stack into the ribbing.
Turning chains: Ch 1 at the start of a row does not count as a stitch.
Gauge and Checkpoints
Gauge: 16 sts x 18 rows = 4 in (10.2 cm) in sc BLO, measured after light blocking.
Back-loop rows sit shorter than regular sc rows, so this fabric has more rows than stitches per inch. Every measurement below depends on that ratio.
Test one piece first. Make the center band (Part 3) before anything else. It’s only 6 sts x 18 rows, so it works as your swatch. It should measure 1 1/2 in (3.8 cm) wide and 4 in (10.2 cm) long.
Checkpoints:
- Center band: 1 1/2 in x 4 in (3.8 cm x 10.2 cm).
- Wing panel after Row 18: 5 in x 4 in (12.7 cm x 10.2 cm).
- Wing panel after Row 72: 5 in x 16 in (12.7 cm x 40.6 cm).
- Wing panel after border: 5 1/2 in x 16 1/2 in (14.0 cm x 41.9 cm).
- Assembled bow: about 8 in (20.3 cm) wide.
Too big? Go down to a 4.5 mm hook. Too small? Go up to a 5.5 mm hook. If your width is right but your length is off, keep the hook and change the number of panel rows. Always change it in multiples of 9 so the border math still works.
Part 1: Wing Panel (make 1)
You work the panel lengthwise. The foundation chain becomes one short end, and the rows build up the length, so every ridge runs across the 5 in (12.7 cm) width. That gives the vertical ribbing on the finished wings.
Foundation: Ch 21.
Row 1: Sc in the 2nd ch from the hook and in each ch across. (20 sts)
Row 2: Ch 1, turn. Sc BLO in each st across. (20 sts)
Rows 3–72: Repeat Row 2. (20 sts in every row)
Checkpoints: After Row 18, the panel should be 4 in (10.2 cm) long. After Row 72, it should be 16 in (40.6 cm) long and 5 in (12.7 cm) wide.
Don’t fasten off. Go straight on to the Border.
Part 2: Tail Strip (make 1)
The tail strip is a single trapezoid. The straight edge runs the full length. The opposite “slant edge” is shaped at both ends, so when you fold the strip in half each tail ends in a clean diagonal cut.
All shaping happens on the slant edge. That means increases and decreases fall at the end of odd rows and the beginning of even rows. Mark that edge after Row 2.
Foundation: Ch 2.
Row 1: Sc in the 2nd ch from the hook. (1 st)
Row 2: Ch 1, turn. Inc in the st. (2 sts)
Row 3: Ch 1, turn. Sc BLO in the first st, inc BLO in the last st. (3 sts)
Row 4: Ch 1, turn. Inc BLO in the first st, sc BLO in each remaining st. (4 sts)
Rows 5–8: Keep increasing 1 st on the slant edge each row, working odd rows like Row 3 and even rows like Row 4. The counts are 5, 6, 7, and 8 sts. (Row 8: 8 sts)
Rows 9–36: Ch 1, turn. Sc BLO in each st across. (8 sts in every row)
Row 37: Ch 1, turn. Sc BLO in each st to the last 2 sts, sc2tog BLO. (7 sts)
Row 38: Ch 1, turn. Sc2tog BLO, sc BLO in each remaining st. (6 sts)
Rows 39–43: Keep decreasing 1 st on the slant edge each row, working odd rows like Row 37 and even rows like Row 38. The counts are 5, 4, 3, 2, and 1 sts. (Row 43: 1 st)
Fasten off and weave in the ends.
Checkpoint: The strip is 2 in (5.1 cm) wide across Rows 9–36, and the straight edge is about 9 1/2 in (24.1 cm) long (43 rows).
Part 3: Center Band (make 1)
Foundation: Ch 7.
Row 1: Sc in the 2nd ch from the hook and in each ch across. (6 sts)
Rows 2–18: Ch 1, turn. Sc BLO in each st across. (6 sts in every row)
Fasten off and leave a 12 in (30.5 cm) tail for sewing.
Checkpoint: 1 1/2 in x 4 in (3.8 cm x 10.2 cm). The ridges run across the band, so they look horizontal once it wraps the bow’s center.
Border (Wing Panel Only)
Border gauge: The border uses the panel’s tension, 16 sc = 4 in (10.2 cm) along any edge. The tails and center band get no border.
Round 1: Continue from the end of Row 72 without turning.
- Short side 1 (top of Row 72): Ch 1. Work 3 sc in the first st, sc in each of the next 18 sts, then 3 sc in the last st. (24 sc)
- Long side 1 (row ends): Across the 72 row ends, sc in each of the next 8 row ends, skip 1 row end. Work this 8 times in total. (64 sc)
- Short side 2 (foundation chain): Work into the free loops of the chain. Work 3 sc in the first loop, sc in each of the next 18 loops, then 3 sc in the last loop. (24 sc)
- Long side 2 (row ends): Work as Long side 1. (64 sc)
- Join with a sl st to the first sc.
Round total: 24 + 64 + 24 + 64 = 176 sc. Each short-side count of 24 already includes its two 3-sc corner groups, so nothing is added at the corners twice.
Fasten off and leave an 18 in (45.7 cm) tail for sewing. Place a marker in the center sc of each corner group.
Why the math works:
- Short sides: The 20 original stitches stay 20 stitch positions wide, which is 5 in (12.7 cm). The extra 2 sc in each corner just let the corners turn without cupping.
- Long sides: At 18 rows = 4 in (10.2 cm), 72 rows = 16 in (40.6 cm). At 16 sc = 4 in (10.2 cm), that edge needs exactly 64 sc. Working 8 sc over every 9 row ends gives 72 ÷ 9 = 8 repeats x 8 sc = 64 sc. The counts match, so the edge lies flat.
- Depth: One sc round adds about 1/4 in (0.6 cm) on every side. The panel grows from 5 in x 16 in (12.7 cm x 40.6 cm) to 5 1/2 in x 16 1/2 in (14.0 cm x 41.9 cm).
Final Blocking
- Mist all three parts until they’re evenly damp.
- Pin the wing panel to 5 1/2 in x 16 1/2 in (14.0 cm x 41.9 cm). Pin the marked corners first, then pin the long sides every 2 in (5.1 cm), keeping the ridges straight.
- Pin the tail strip to 2 in (5.1 cm) wide, with its slanted ends crisp.
- Pin the center band to 1 1/2 in x 4 in (3.8 cm x 10.2 cm).
- Let everything dry completely. For stiffer wings, starch lightly while the pieces are still pinned.
- Form the loop. Fold both short ends of the panel to the center on the WS so they overlap by 1/2 in (1.3 cm). Whipstitch the overlap with the border tail. The loop is about 8 in (20.3 cm) wide, because the fold thickness takes up about 1/4 in (0.6 cm).
- Cinch the center. Pinch the loop over the seam to about 2 in (5.1 cm) tall. Wrap the remaining border tail tightly around the pinch 4–5 times and secure it.
- Add the tails. Fold the tail strip in half into an inverted V with the straight edges on the outside. Tack the fold behind the cinch. The tails should hang about 2 in (5.1 cm) below the wings.
- Wrap the band. Wrap the band around the cinch and the tail fold, overlap its ends at the back, and sew them together. Catch a few panel stitches as you sew so the band can’t slide.
- Add the hanger. Thread the chenille stem or yarn ties under the back of the band.
- Shape the wings. Stuff each wing loosely with tissue and leave it overnight.
Final Quality-Control Checklist
- Gauge: 16 sts x 18 rows = 4 in (10.2 cm) in sc BLO.
- Wing panel: 20 sts in every row, 72 rows.
- Border: 176 sc, with 24 per short side and 64 per long side.
- Bordered panel: 5 1/2 in x 16 1/2 in (14.0 cm x 41.9 cm), lying flat.
- Tail strip: 1 → 8 sts, 8 sts for Rows 9–36, then 8 → 1 st, with all shaping on one edge.
- Center band: 6 sts x 18 rows.
- Ridges run vertically on the wings and horizontally on the band.
- Bow: about 8 in (20.3 cm) wide and 5 1/2 in (14.0 cm) tall at the wings.
- Tails: even, hanging about 2 in (5.1 cm) below the wings.
- All ends are woven in on the back.
Troubleshooting
Faint ridges. Some rows were probably worked through both loops. Every row after Row 1 must be BLO.
Slanting panel edges. You’re gaining or losing a stitch at the row ends. Count to 20 often, and mark the first stitch of each row.
Ruffled long border sides. You’ve worked too many sc into the row ends. Recheck the “8 sc, skip 1” repeat.
Long sides pulling in. Your border tension is tighter than the panel’s. Use a hook half a size larger for the border round only.
Tails pointing in different directions. The shaping moved to the other edge partway through. Keep all increases and decreases on the marked slant edge.
Floppy wings. Starch them, stuff with tissue while they dry, or switch to a firmer yarn.
Band too tight or loose. Add or remove 2 rows.
Care
Hand wash in cool water, press the water out in a towel, and dry flat with tissue inside the wings. Re-starch if needed.
Final Notes
The bow’s size comes from one gauge: 16 sts x 18 rows = 4 in (10.2 cm). At that gauge, the 20-stitch panel is 5 in (12.7 cm) wide and 72 rows make it 16 in (40.6 cm) long. The 176-stitch border takes the panel to 5 1/2 in x 16 1/2 in (14.0 cm x 41.9 cm), and folding it gives a bow about 8 in (20.3 cm) wide. The tails and band use the same gauge, so they fit without any adjustment. If your swatch matches, every checkpoint after it will too.
Happy crocheting!