

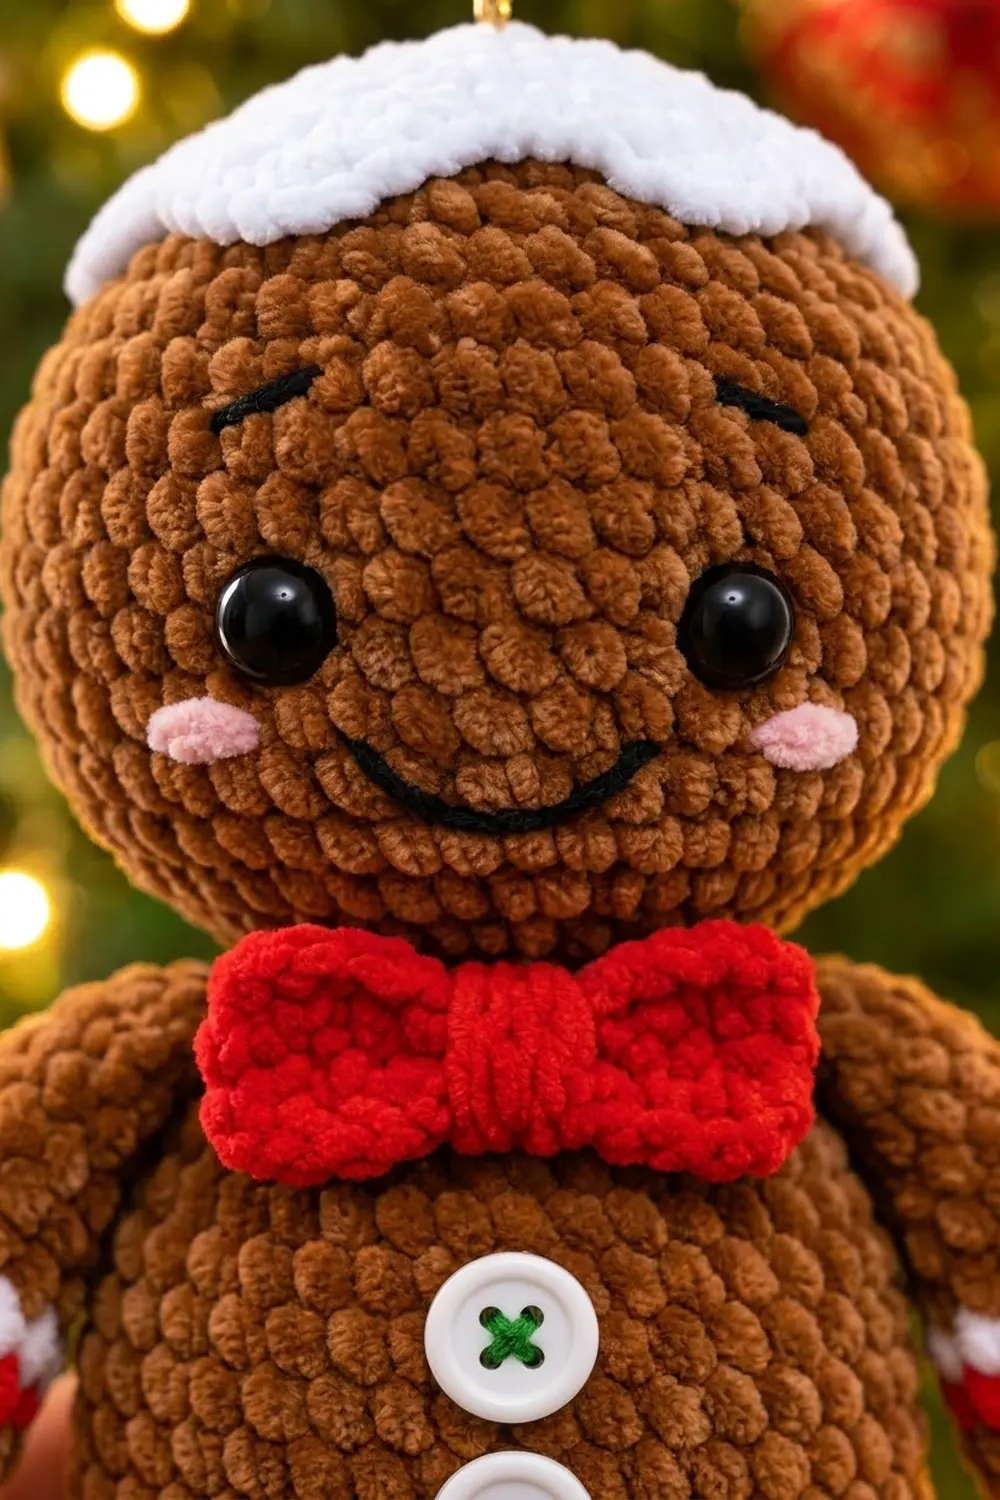
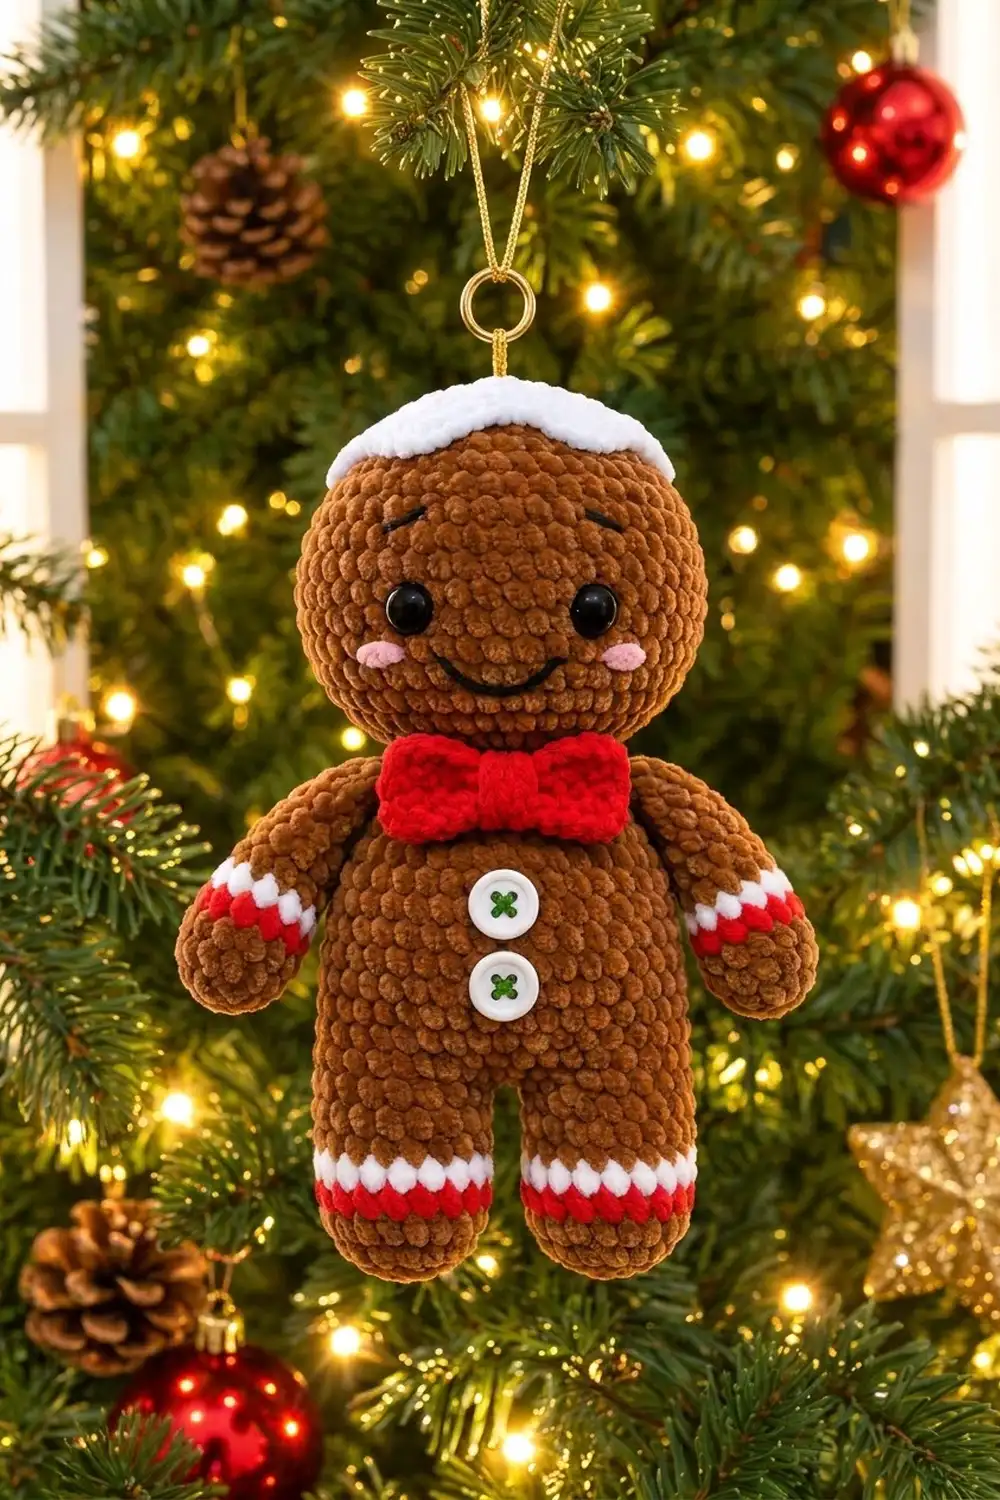
This plush gingerbread man looks like he just came out of the oven and got iced. He’s worked in a soft caramel-brown chenille, with a scalloped white icing cap, a bright red bow tie, two white buttons stitched with green crosses, and red-and-white stripes at every wrist and ankle. A sweet embroidered face with black safety eyes and pink cheeks finishes him off.
The palette is classic Christmas: warm brown, snowy white, and cherry red, plus small touches of black, pink, and green. Because of the velvety chenille, the stitches look rounded and plush, so he feels like a soft toy but is light enough to hang on a tree from a gold cord and ring.
This pattern uses US crochet terms. The finished ornament stands about 7.75 in (19.7 cm) tall, not counting the hanging loop, and measures about 6 in (15.2 cm) across the arms.
He is one finished ornament built from six crocheted components: a round head, a body worked up from two joined legs, two arms, a flat icing cap, and a small bow tie. Everything is worked in continuous spiral rounds except the bow, which is worked in rows. The cap gets a scalloped edging, and then everything is stuffed, sewn together, and embroidered.
Finished Size and Construction
- Finished size: about 7.75 in (19.7 cm) tall x 6 in (15.2 cm) across the arms
- Skill level: Advanced beginner / easy amigurumi
- Terminology: US crochet terms
- Yarn weight: Bulky chenille (velvet) yarn, weight 5–6
- Hook: 4.0 mm (US G-6)
- Number of pieces: 1 finished ornament, made from 6 components (head, body with legs, 2 arms, icing cap, bow tie)
- Layout: A single standing figure; no joined motifs or grid
- Head size: about 3.3 in (8.4 cm) wide when stuffed
- Cap size before edging: 2.3 in (5.8 cm) across
- Edging depth: about 0.25 in (0.6 cm), making the cap 2.8 in (7.1 cm) across
Materials
Pick a velvet or chenille yarn with a short, dense pile; that’s what gives the plush, rounded stitch look. Expect roughly 120 m per 100 g. Steer clear of loosely plied chenille, which tends to “worm” (pop loops out) on amigurumi.
- Caramel brown: 60 g (about 72 m)
- White: 8 g (about 10 m)
- Red: 10 g (about 12 m)
- Light pink: 1 g (about 1 m) of any fine yarn, for the cheeks
- Black embroidery floss: about 40 in (101.6 cm), for the eyebrows and smile
- Green embroidery floss: about 12 in (30.5 cm), for the button crosses
These amounts include a margin of about 15% for swatching and color changes.
Tools and notions
- 4.0 mm (US G-6) crochet hook
- Two 12 mm black safety eyes
- Two white 4-hole buttons, 0.6 in (1.5 cm) across
- Gold metal ring, 0.75 in (1.9 cm) across
- Gold cord, 10 in (25.4 cm)
- Polyester fiberfill, about 30 g
- Stitch marker, yarn needle, sharp embroidery needle, scissors, pins
Abbreviations (US Terms)
- MR – magic ring
- ch – chain
- sl st – slip stitch
- sc – single crochet
- hdc – half double crochet
- inc – 2 sc in the same stitch
- dec – single crochet decrease (an invisible decrease works best: insert hook in front loops only of the next 2 sts, yarn over, pull through both front loops, yarn over, pull through 2 loops)
- st(s) – stitch(es)
- ( ) x6 – repeat what’s inside the parentheses the stated number of times
- (N) – stitch count at the end of the round
Special stitch – Scallop: work 3 hdc in the same stitch.
Color change: work the last stitch of the old color until 2 loops remain, then pull the new color through. Carry the old color inside the piece for single-round stripes.
Gauge and Checkpoints
Gauge: 7 sc and 7 rounds = 2 in (5.1 cm) in tight spiral sc. That’s 3.5 stitches and 3.5 rounds per inch.
Test first. Work Head Rounds 1–4 and lay the disk flat. It should measure 2.3 in (5.8 cm) across. If it does, the rest of the pattern will come out to size.
- Too big: go down a hook size, to 3.5 mm. Chenille stretches, and loose stitches will let fiberfill show through.
- Too small: go up to 4.5 mm, or loosen your tension on the yarn-over.
Checkpoints along the way:
- Stuffed head: 3.3 in (8.4 cm) wide
- Each stuffed leg after Round 9: about 1.6 in (4.1 cm) wide
- Stuffed body at the hips: about 3.6 in (9.1 cm) wide
- Legs plus body: about 4.75 in (12.1 cm) tall
- Arm, flattened: about 2.75 in (7.0 cm) long x 1.7 in (4.3 cm) wide
- Bow before cinching: 2.6 in (6.6 cm) x 1.4 in (3.6 cm)
Head
With brown.
- Rnd 1: 6 sc in MR. (6)
- Rnd 2: inc in each st around. (12)
- Rnd 3: (sc, inc) x6. (18)
- Rnd 4: (2 sc, inc) x6. (24) — checkpoint: 2.3 in (5.8 cm) flat
- Rnd 5: (3 sc, inc) x6. (30)
- Rnd 6: (4 sc, inc) x6. (36)
- Rnds 7–15: sc in each st around. (36) — 9 rounds
- Rnd 16: (4 sc, dec) x6. (30)
Insert the safety eyes between Rounds 11 and 12, with 7 stitches between them, centered on the front. Don’t attach the backs yet—check placement first.
- Rnd 17: (3 sc, dec) x6. (24)
- Rnd 18: (2 sc, dec) x6. (18)
Lock the eye backs. Stuff the head firmly so it’s round, not egg-shaped.
- Rnd 19: (sc, dec) x6. (12)
- Rnd 20: dec x6. (6)
Fasten off. Use the tail to close the hole through the front loops, then weave it in. The closed point is the bottom of the head.
Legs and Body
The legs are worked from the feet up and then joined into one body. Each stripe is a single round.
Leg 1
With brown.
- Rnd 1: 6 sc in MR. (6)
- Rnd 2: inc in each st around. (12)
- Rnd 3: (sc, inc) x6. (18)
- Rnds 4–5: sc in each st around. (18)
- Rnd 6: change to red; sc in each st around. (18)
- Rnd 7: change to white; sc in each st around. (18)
- Rnds 8–9: change to brown; sc in each st around. (18)
Fasten off Leg 1 and stuff the foot lightly.
Leg 2
Repeat Rounds 1–9, but don’t fasten off. Stuff lightly. Line up both legs so the color jogs face the back.
Body
- Rnd 10 (join): ch 2, sc in any st of Leg 1 (place marker here), sc in the next 17 sts of Leg 1, sc in each of the 2 ch, sc in the next 18 sts of Leg 2, sc in the other side of each of the 2 ch. (40)
Count check: 18 + 2 + 18 + 2 = 40.
- Rnds 11–13: sc in each st around. (40) — 3 rounds
- Rnd 14: (8 sc, dec) x4. (36)
- Rnd 15: sc in each st around. (36)
- Rnd 16: (4 sc, dec) x6. (30)
- Rnd 17: sc in each st around. (30)
Stuff the legs and body firmly. Use a few small stitches at the crotch to close any gap left by the chains.
- Rnd 18: (3 sc, dec) x6. (24)
Sl st into the next stitch. Fasten off, leaving a 16 in (40.6 cm) tail for sewing on the head. Top up the stuffing at the neck.
Check: the legs and body should stand about 4.75 in (12.1 cm) tall and measure about 3.6 in (9.1 cm) across the hips.
Arms (Make 2)
Worked from the hand up.
With brown.
- Rnd 1: 6 sc in MR. (6)
- Rnd 2: inc in each st around. (12)
- Rnds 3–4: sc in each st around. (12)
- Rnd 5: change to red; sc in each st around. (12)
- Rnd 6: change to white; sc in each st around. (12)
- Rnds 7–10: change to brown; sc in each st around. (12) — 4 rounds
Lightly stuff the hand only and leave the upper arm nearly empty, so the arm angles outward.
- Rnd 11: flatten the opening and work 6 sc through both layers to close. (6)
Fasten off, leaving a 10 in (25.4 cm) tail.
Bow Tie
With red.
- Foundation: ch 10.
- Row 1: sc in 2nd ch from hook and in each ch across. (9) Ch 1, turn.
- Rows 2–5: sc in each st across. (9) Ch 1, turn. After Row 5, don’t chain.
Fasten off. The rectangle should measure 2.6 in (6.6 cm) x 1.4 in (3.6 cm).
Wrap a 20 in (50.8 cm) length of red tightly around the center 6–8 times to pinch it into a bow. It ends up about 1.25 in (3.2 cm) tall at the wings. Leave the ends for sewing.
Icing Cap
With white.
- Rnd 1: 6 sc in MR. (6)
- Rnd 2: inc in each st around. (12)
- Rnd 3: (sc, inc) x6. (18)
- Rnd 4: (2 sc, inc) x6. (24)
Keep the yarn attached and continue straight to the edging below. Before edging, the cap measures 2.3 in (5.8 cm) across.
Border: Icing Scallop Edge
The only true edging on this design is the wavy white icing around the cap. It is worked at the same gauge as everything else, and each scallop adds about 0.25 in (0.6 cm) of depth.
- Rnd 5 (trim): (sc in next st, Scallop in next st) x12. Sl st to the first sc. Fasten off, leaving a 16 in (40.6 cm) tail.
Count: 24 stitches worked into once (24) + 2 extra hdc in each of 12 Scallops (24) = 48 stitches, making 12 scallops and 12 valleys.
Why the math works: Round 4 has 24 stitches, and each repeat uses exactly 2 of them, so 24 ÷ 2 = 12 repeats with nothing left over. The extra 24 stitches all go into the outermost round, so it ruffles instead of lying flat. That ruffle is what lets the cap curve over the dome of the head like dripping icing. The cap ends up 2.3 in + 0.25 in + 0.25 in = 2.8 in (7.1 cm) across.
Assembly and Face
- Head: Pin the head on the neck so the closed point of Round 20 sits in the center of the opening. Whipstitch the 24 neck stitches around Rounds 17–18 of the head, adding stuffing just before you close so the head doesn’t wobble.
- Cap: Center the cap on the crown, tilted slightly toward the face so the scallops show from the front. Sew around Round 4, just inside the scallops, so the edge stays free.
- Arms: Sew the flat top edges to the sides of the body over Rounds 16–17, angled slightly downward.
- Bow: Sew it at the neck seam, centered under the chin.
- Buttons: Sew the buttons down the center front, one at Round 14 and one at Round 12, using green floss in an X through the holes.
- Face: Using black floss, backstitch a smile 2 rounds below the eyes, about 5 stitches wide. Add a short, slightly curved eyebrow above each eye, 2 rounds up. With pink, work 2–3 short horizontal stitches on each cheek, just outside and below each eye.
- Hanger: Thread the gold cord through the ring, then sew both cord ends securely under the center of the cap so the ring sits 0.5 in (1.3 cm) above the head.
Final Blocking
Chenille should not be wet-blocked or steamed hard, since heat crushes the pile. Shape it gently instead:
- Roll the head between your palms to even out the stuffing.
- Press the body front and back lightly so it sits slightly flat, like a cookie.
- Bend the arms outward and hold for a minute.
- Finger-press the bow wings open and fluff the cap scallops.
- If a stripe looks uneven, hold a steamer 2 in (5.1 cm) away for one second, then reshape with your fingers. Don’t let the steamer touch the yarn.
Final Quality-Control Checklist
- Height is 7.75 in (19.7 cm) and arm span is 6 in (15.2 cm), give or take 0.25 in (0.6 cm)
- Head is round and 3.3 in (8.4 cm) wide, with no stuffing showing through
- Eyes are level and 7 stitches apart
- Leg stripes run red at the bottom and white on top, and match on both legs
- Wrist stripes run red nearest the hand and white above
- All color jogs face the back
- Cap has 12 even scallops and sits centered
- Bow is centered at the neck
- Hanger is secure enough to bear the ornament’s full weight when tugged
- All tails are buried inside the stuffing
Troubleshooting
- Loops popping out (worming): tighten your tension, or drop to a 3.5 mm hook.
- Fiberfill showing: your stitches are too loose; switch to a smaller hook or use less stuffing.
- Visible color jog: turn it to the back, or work a sl st in place of the first stitch of each new color.
- Hole at the crotch: close it with 2–3 stitches of brown.
- Head flops forward: add more stuffing to the neck and sew again through the back loops of the head.
- Cap lies flat with no ripple: check you made 12 Scallops of 3 hdc each.
- Lost your place in chenille: move the marker every round. The stitches are hard to count.
Care
Spot-clean with mild soap and cool water, then air-dry flat. Don’t machine-wash, tumble-dry, or iron, since heat and agitation can crush the chenille pile.
Final Notes
Each stage builds on the one before it. Gauge of 3.5 stitches per inch gives a 2.3 in (5.8 cm) test disk. That disk becomes a 3.3 in (8.4 cm) head. Legs of 18 stitches join with a 2-chain bridge into a 40-stitch body that is 3.6 in (9.1 cm) wide and 4.75 in (12.1 cm) tall. The 24-stitch cap disk grows to 48 stitches in the scallop round, ending 2.8 in (7.1 cm) across, and the finished figure is 7.75 in (19.7 cm) tall. If you hit each checkpoint, your gingerbread man will come out plump, even, and ready for the tree.
Happy crocheting!