

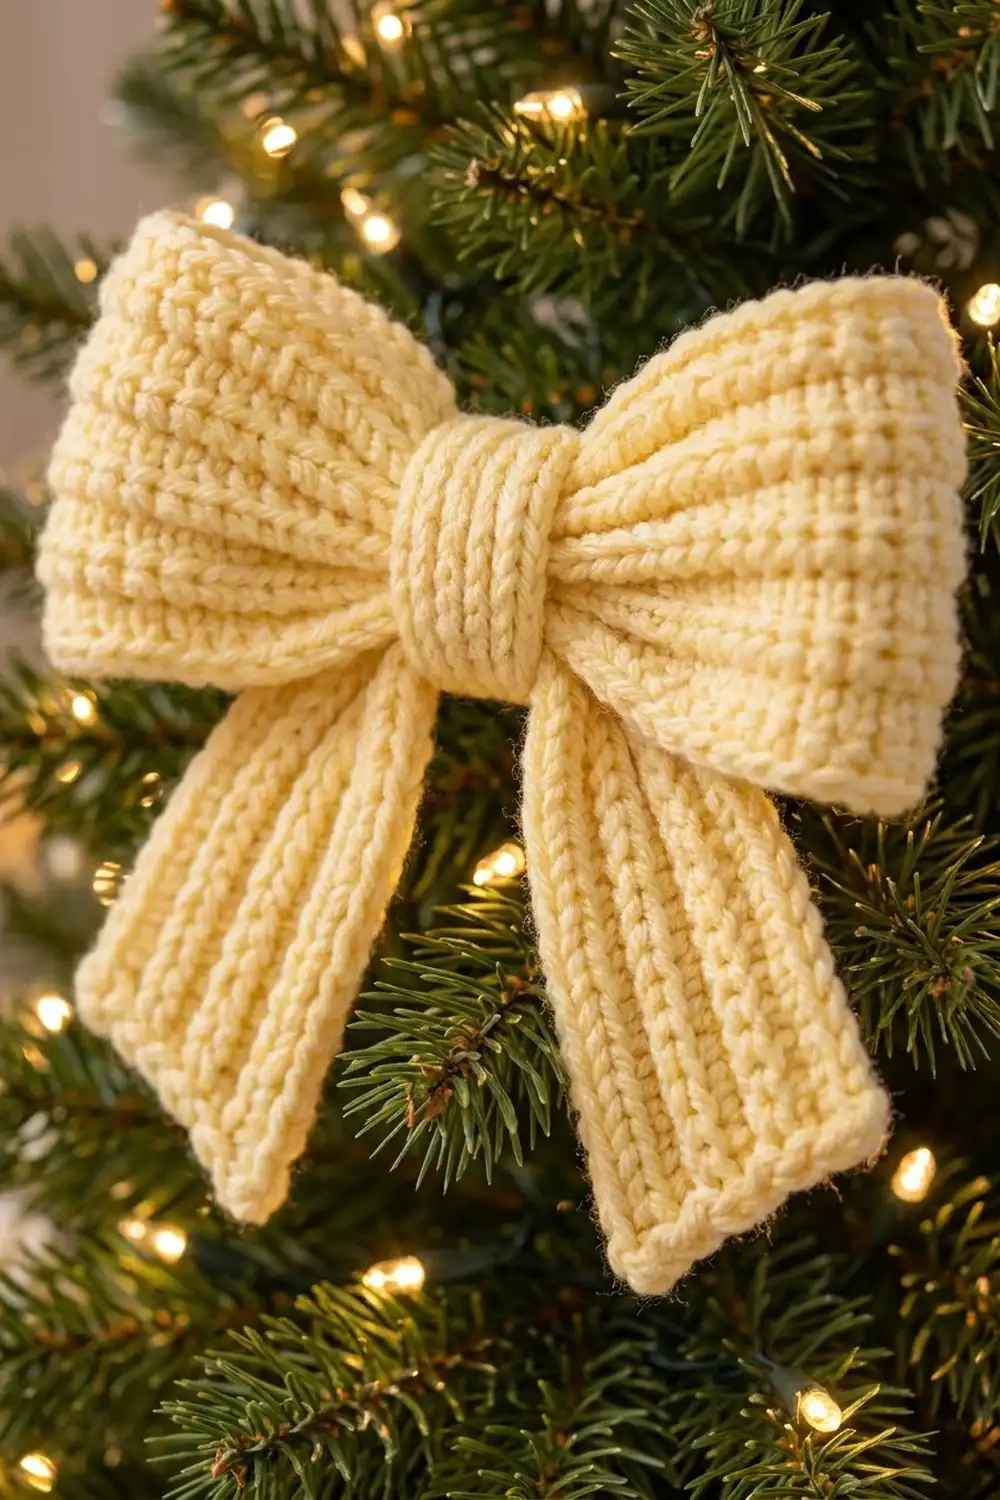
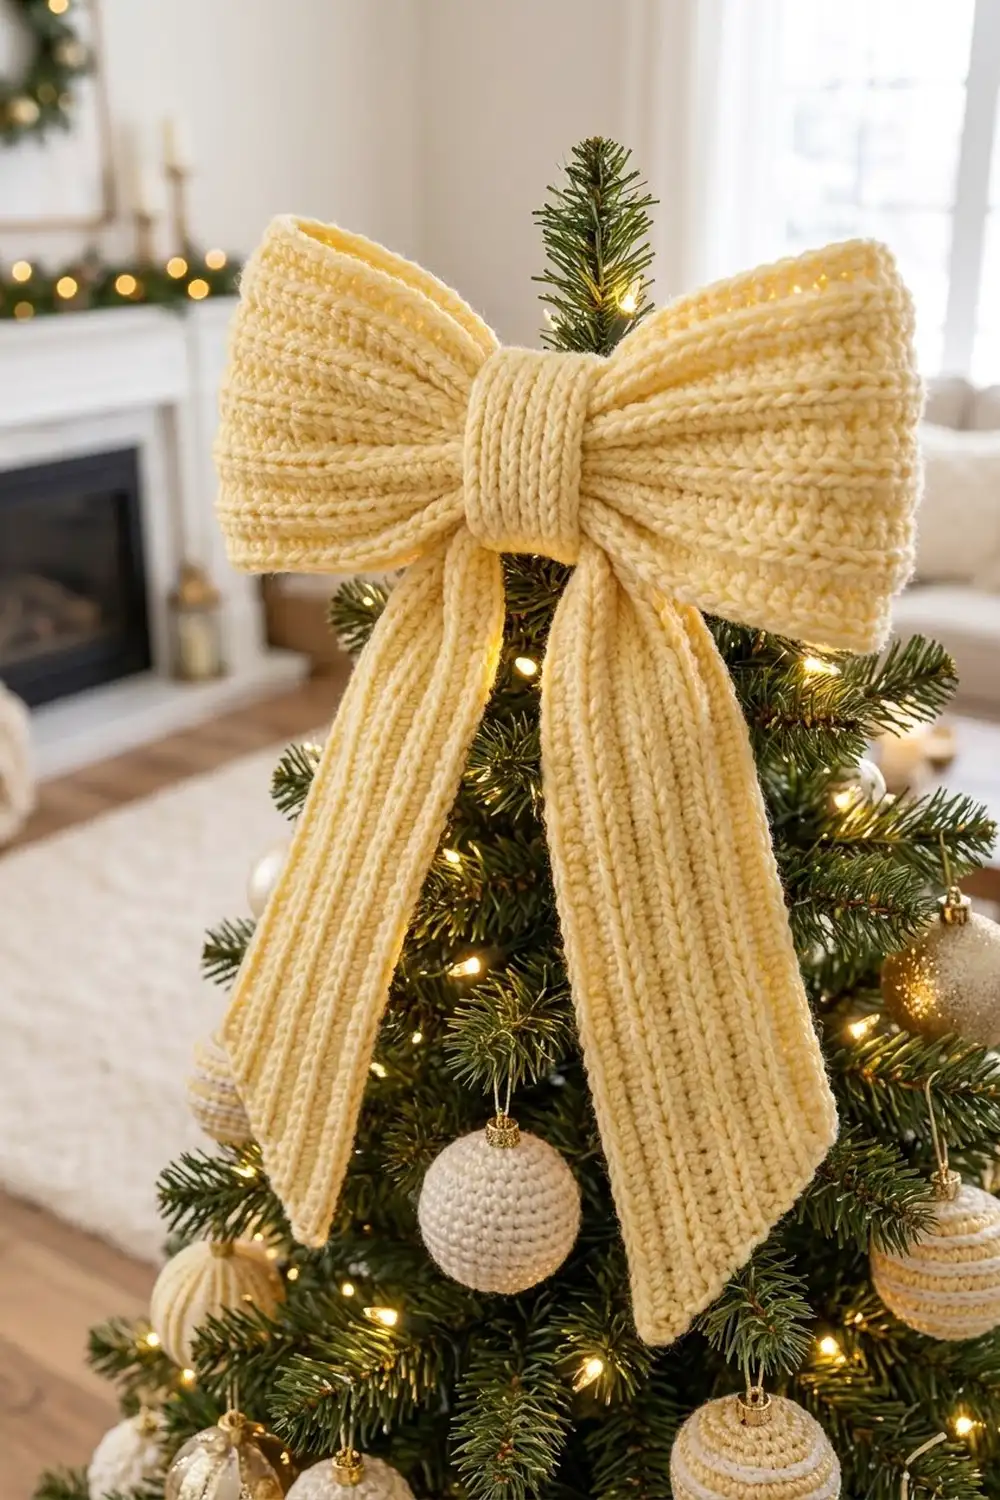
This oversized bow is made for the top of the tree. It has two full, rounded loops, a plump ribbed center knot and two long tails with slanted ends. Every part is worked in single crochet through the back loop only, so the fabric looks ribbed and knitted but stays firm enough to hold its shape.
The sample uses one pale butter-yellow yarn. This soft, warm shade suits cream, gold and white ornaments, but any solid color works. The pattern uses US crochet terms throughout.
The finished bow measures about 12 in (30.5 cm) wide and 10 in (25.4 cm) tall. That size suits a tabletop tree or a full-size tree up to about 7 ft.
The bow is made from four flat parts: one long band for the loops, two tails and one small center wrap. You add a simple single crochet edging to the band and tails, block them flat, then fold, cinch and wrap the parts into one bow. There is no stuffing and no shaping in the round.
Finished Size and Construction
- Finished size: about 12 in (30.5 cm) wide x 10 in (25.4 cm) tall
- Skill level: Easy
- Terminology: US crochet terms
- Yarn weight: worsted (#4, medium)
- Hook: 5.0 mm (H-8)
- Number of pieces: 1 finished bow, made from 4 parts (1 loop band, 2 tails, 1 center wrap)
- Layout: The band is folded into two loops, the tails are crossed behind the center in an inverted V, and the wrap goes around the middle
- Part sizes before edging: band 4 in x 26 in (10.2 cm x 66.0 cm); each tail 3 in x 8 in (7.6 cm x 20.3 cm); wrap 2.25 in x 5.1 in (5.7 cm x 13.0 cm)
- Part sizes after edging: band 4.5 in x 26.5 in (11.4 cm x 67.3 cm); each tail 3.5 in x 8.5 in (8.9 cm x 21.6 cm)
- Edging depth: 1 round of sc, about 0.25 in (0.6 cm) on each edge
Materials
Choose a smooth worsted-weight yarn with good stitch definition, such as acrylic, an acrylic-wool blend or soft cotton blend. Avoid fuzzy or very loosely plied yarns. They blur the ribbed texture and make the loops droop.
- Pale butter yellow: 120 g, about 220 m (240 yd)
These quantities include about a 20% margin for your gauge swatch and small tension differences.
Tools:
- 5.0 mm (H-8) crochet hook
- Tapestry needle
- Scissors
- Stitch markers (2-4)
- Rust-proof pins and a blocking mat or folded towel
- Spray bottle with water
- Two 12 in (30.5 cm) chenille stems or plastic-coated twist ties for attaching the bow to the tree
- Optional: fabric stiffener, diluted 1:1 with water
Abbreviations (US Terms)
- ch – chain
- sc – single crochet
- sl st – slip stitch
- st(s) – stitch(es)
- BLO – back loop only
- sc2tog – single crochet 2 together
- RS / WS – right side / wrong side
Special stitch – BLO sc: Insert the hook under the back loop only of the next stitch (the loop farther from you), yarn over, pull up a loop, yarn over and pull through both loops on the hook. When you work row after row this way, the unused front loops form raised ridges that run parallel to the rows.
BLO sc2tog: Insert the hook in the back loop of the next st and pull up a loop. Insert the hook in the back loop of the following st and pull up a loop. Yarn over and pull through all 3 loops.
Gauge and Checkpoints
Gauge: 14 sts and 16 rows = 4 in (10.2 cm) in BLO sc, before blocking.
That works out to 1 st = about 0.29 in (0.7 cm) and 1 row = 0.25 in (0.6 cm). Every size in this pattern comes from these two numbers.
Make the loop band first and treat it as your test piece. Check it at these points:
- After Row 16: the band measures 4 in x 4 in (10.2 cm x 10.2 cm).
- After Row 52: the band measures 13 in (33.0 cm) long.
- After Row 104: the band measures 26 in (66.0 cm) long.
If your band is wider than 4 in (10.2 cm), go down to a 4.5 mm hook and start again. If it is narrower, go up to a 5.5 mm hook. If the width is right but the length runs long, keep your row count at 104 anyway. The bow will just be slightly wider. Firm tension matters more than exact length here. A loose fabric will not hold the loops up.
Loop Band (make 1)
The band is worked in short rows across its width, so the ridges run across the band.
Foundation: Ch 15.
Row 1 (RS): Sc in 2nd ch from hook and in each ch across. Turn. (14 sts)
Row 2: Ch 1 (does not count as a st), BLO sc in each st across. Turn. (14 sts)
Rows 3–104: Repeat Row 2. (14 sts in every row)
Check: 104 rows = 26 in (66.0 cm). Do not fasten off. Go straight on to the edging in the Border section.
Tails (make 2)
The tails are worked lengthwise, so the ridges run along the tail. Moving 1 st over on every even row slants both short ends and gives the parallelogram shape.
Tail A
Foundation: Ch 29.
Row 1 (RS): Sc in 2nd ch from hook and in each ch across. Turn. (28 sts)
Row 2 (shift row): Ch 1, BLO sc2tog over first 2 sts, BLO sc in next 25 sts, 2 BLO sc in last st. Turn. (1 + 25 + 2 = 28 sts)
Row 3: Ch 1, BLO sc in each st across. Turn. (28 sts)
Rows 4–12: Repeat Rows 2–3 four more times, then work Row 2 once more. (28 sts in every row)
You have now worked 6 shift rows (Rows 2, 4, 6, 8, 10 and 12). Each short end leans by 6 sts, about 1.7 in (4.3 cm). The tail measures 3 in (7.6 cm) wide and 8 in (20.3 cm) along each long edge. Do not fasten off. Continue to the Border section.
Tail B (mirror image)
Work as for Tail A, but replace every shift row with this one:
Shift row: Ch 1, 2 BLO sc in first st, BLO sc in next 25 sts, BLO sc2tog over last 2 sts. Turn. (2 + 25 + 1 = 28 sts)
This makes the ends slant the other way, so the two tails hang as a matched pair.
Center Wrap (make 1)
The wrap is worked lengthwise, so the ridges run in the same direction it wraps. They show as vertical ribs on the front of the bow.
Foundation: Ch 19.
Row 1: Sc in 2nd ch from hook and in each ch across. Turn. (18 sts)
Rows 2–9: Ch 1, BLO sc in each st across. Turn. (18 sts)
Fasten off and leave a 12 in (30.5 cm) tail for sewing. The wrap measures 5.1 in x 2.25 in (13.0 cm x 5.7 cm). It gets no edging, because its long edges need to stay soft enough to pull tight around the center.
Border
The edging is 1 round of sc worked around the band and both tails. It tidies the row-end edges, firms them up and keeps them from curling. It is worked at the same gauge as the body: 1 sc in each st along the top and bottom, and 1 sc in each row-end along the sides.
In the counts below, the 3-sc corner groups are counted separately from the side stitches.
Loop Band Edging
At the end of Row 104, do not turn. Ch 1 and work around the band:
- Short side (Row 104): 3 sc in first st (corner), sc in next 12 sts, 3 sc in last st (corner).
- Long side: 1 sc in each of the 104 row-ends.
- Short side (foundation): 3 sc in first ch (corner), sc in next 12 ch, 3 sc in last ch (corner).
- Long side: 1 sc in each of the 104 row-ends.
- Join with sl st to first sc. Fasten off and weave in the ends.
Count: 104 + 104 + 12 + 12 = 232 side sts, plus 4 corners x 3 sc = 12, for a total of 244 sts. You can also check it this way: (104 + 104 + 14 + 14) worked 1 per st = 236, plus 2 extra sts at each of 4 corners = 8, which also gives 244 sts.
Tail Edging (both tails)
At the end of Row 12, do not turn. Ch 1 and work around:
- Long side (Row 12): 3 sc in first st (corner), sc in next 26 sts, 3 sc in last st (corner).
- Slanted end: 1 sc in each of the 12 row-ends.
- Long side (foundation): 3 sc in first ch (corner), sc in next 26 ch, 3 sc in last ch (corner).
- Slanted end: 1 sc in each of the 12 row-ends.
- Join with sl st to first sc. Fasten off and weave in the ends.
Count: 26 + 26 + 12 + 12 = 76 side sts, plus 4 corners x 3 sc = 12, for a total of 88 sts. As a check: (28 + 28 + 12 + 12) = 80, plus 8 corner extras, gives 88 sts.
Why the Math Works
At 16 rows per 4 in, rows are 0.25 in tall. At 14 sts per 4 in, stitches are about 0.29 in wide. One sc per row-end therefore fits the side edges almost exactly, with no ruffling and no pulling. The 3-sc corners give just enough extra to turn each corner flat. The single round adds about 0.25 in (0.6 cm) to every edge. That takes the band from 4 in to 4.5 in (10.2 cm to 11.4 cm) wide and from 26 in to 26.5 in (66.0 cm to 67.3 cm) long. It takes each tail from 3 in to 3.5 in (7.6 cm to 8.9 cm) wide and from 8 in to 8.5 in (20.3 cm to 21.6 cm) long.
Final Blocking
Blocking flattens the parts. Shaping and assembly then turn them into the finished bow.
- Mist: Lay the band and both tails RS up on a blocking mat and spray them evenly until damp, not soaked.
- Pin: Pin the band to 4.5 in x 26.5 in (11.4 cm x 67.3 cm) and each tail to 3.5 in (8.9 cm) wide, with its long edges at 8.5 in (21.6 cm). Keep the ribs straight and the tail slants crisp.
- Dry: Leave everything to dry completely. For a firmer bow, brush on diluted stiffener now and let it dry again.
- Form the loops: Lay the band WS up. Fold both short ends in to the center so they overlap by 1 in (2.5 cm). Sew through both layers of the overlap with whipstitch. You now have a flat tube with two loops of equal size.
- Cinch: Put the seam at the center back. Using a length of yarn, work a running stitch straight across the center through all layers. Pull it up until the center is 1.75 in (4.4 cm) tall, then knot it firmly.
- Add the tails: Lay the tails behind the center with their top ends overlapping by 1 in (2.5 cm), angled down and out in an inverted V. Make sure the slanted ends point outward. Tack the tails to the back of the cinched center.
- Wrap: Place the center wrap vertically over the front of the cinch, with the ribs running up and down. Bring its short ends round to the back and sew them together with the long tail, pulling snugly so the wrap looks plump. Fasten off and weave in the end.
- Shape and attach: Push your fingers into each loop to round it out. Thread the two chenille stems through the back of the wrap so you can twist them around the top branch of the tree.
Final Quality-Control Checklist
- Bow measures about 12 in (30.5 cm) wide and 10 in (25.4 cm) tall.
- Both loops are the same size, and the overlap seam is hidden at the back.
- The ridges run across the loops, along the tails and up and down the wrap.
- The tails mirror each other, and both slanted ends point outward.
- The edging lies flat, with no ruffling or cupping.
- The wrap is snug, sits at the center and hides the cinch.
- All ends are woven in securely and the attaching stems are hidden at the back.
Troubleshooting
The loops sag. The fabric is too loose. Go down a hook size, or apply diluted stiffener and dry the loops stuffed with tissue.
The edging ruffles. You have added extra stitches along the sides. Work exactly 1 sc per row-end: 104 on each long side of the band and 12 on each end of the tails.
The edging puckers. Your edging tension is tighter than your row tension. Work the edging round with a hook one size larger.
The tails don’t mirror. Both were probably worked as Tail A. Remake one using the Tail B shift row.
The wrap won’t close. Your gauge is tight or the center is too bulky. Cinch the center tighter, or add 2 sts to the foundation chain.
The tail ends are not crisp. Pin each slant along a ruler while blocking.
Care
Spot clean with mild soap and cool water, then reshape and lay flat to dry. If you stiffened the bow, do not soak it. Store it flat with tissue in the loops.
Final Notes
The measurements follow one chain: 14 sts and 16 rows make 4 in (10.2 cm). The 104-row band is 26 in (66.0 cm) and edges to 26.5 in (67.3 cm). The 28-st tails are 8 in (20.3 cm) and edge to 8.5 in (21.6 cm). The 18-st wrap is 5.1 in (13.0 cm). Fold, cinch and wrap the parts, and you have a 12 in x 10 in (30.5 cm x 25.4 cm) bow. If you check your gauge on the band first, everything else will fit.
Happy crocheting!