

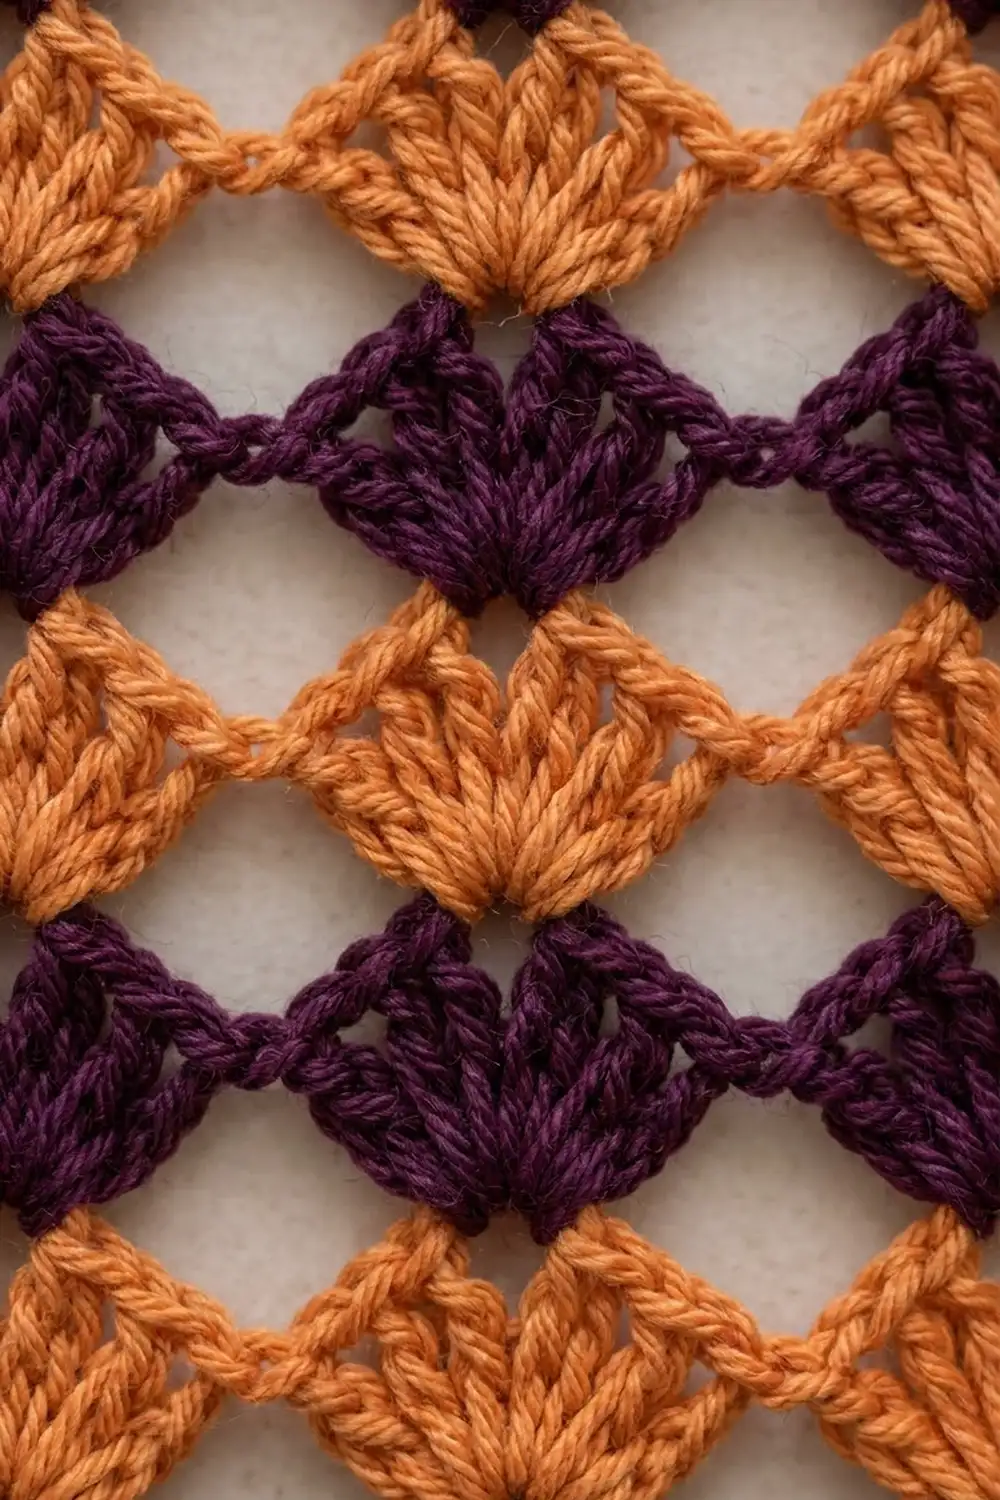
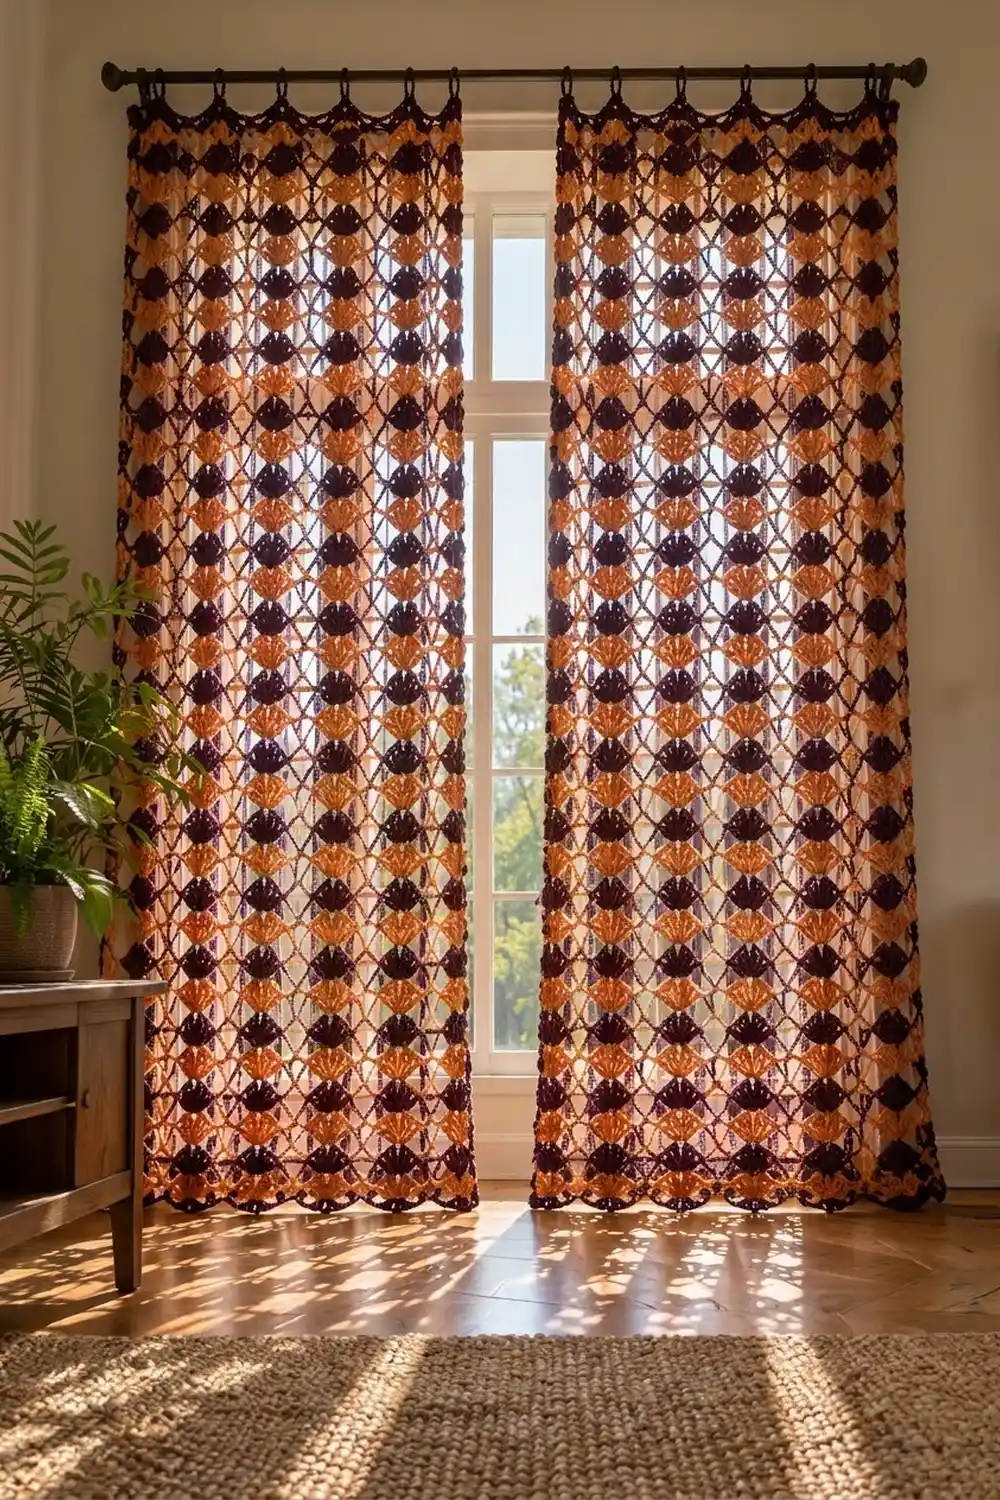
The Ember Lattice Curtain Panel is a tall, airy lace curtain made from rows of upward-opening fans joined by chain arches. Each fan sits in the dip of the row below, so the rows lock together and leave open diamond-shaped windows between them. Light comes through every diamond, and the fans add color and texture.
The panel alternates one row of burnt orange with one row of deep plum from bottom to top. From a distance the stripes read as a lattice; up close you see the separate fans. The hem ends in plum scallops, and a row of chain loops across the top slides straight onto a curtain rod.
This pattern uses US crochet terms. One finished panel measures 40.5 in (102.9 cm) wide by 82.75 in (210.2 cm) long, plus 2.5 in (6.4 cm) hanging loops. That suits a standard 84 in (213.4 cm) curtain drop. The photo shows a matching pair, so make two identical panels.
Each panel is one single piece worked flat in rows from the bottom up, with no motifs and no seams. You work a foundation row of fans and repeat a two-row lace pattern. Then you level the top with a plum band, add the hanging loops, and finish with a scalloped hem and plain side edges.
Finished Size and Construction
- Finished size (one panel): 40.5 in x 82.75 in (102.9 cm x 210.2 cm), plus 2.5 in (6.4 cm) loops
- Skill level: Intermediate
- Terminology: US crochet terms
- Yarn weight: Worsted (#4), cotton or cotton blend
- Hook: 5 mm (H-8)
- Number of pieces: 1 per panel (make 2 for a pair)
- Layout: worked flat in rows, bottom to top
- Piece size before border: 40 in x 82 in (101.6 cm x 208.3 cm), lace body plus top band
- Border depth: 0.75 in (1.9 cm) scallops at the hem; 0.25 in (0.6 cm) sc edging on each side
Materials
Choose a smooth worsted-weight cotton, either mercerized or matte. Cotton hangs straight, stretches less than acrylic, and keeps the fan shapes crisp. Avoid fuzzy yarns, which blur the open diamonds.
Quantities for one panel (about 170 m per 100 g skein):
- Color A, deep plum: 700 g (1,190 m)
- Color B, burnt orange: 550 g (935 m)
For a pair, double these amounts: 1,400 g (2,380 m) plum and 1,100 g (1,870 m) orange. You need more plum because it also works the top band, loops, hem, and side edging. All quantities include a margin of about 10 percent for swatching and small differences in tension.
Tools:
- 5 mm (H-8) crochet hook
- 2 locking stitch markers (to hold dropped loops)
- Tapestry needle
- Scissors
- Measuring tape
- Rust-proof pins and a spray bottle for blocking
Abbreviations (US Terms)
- ch – chain
- sc – single crochet
- hdc – half double crochet
- dc – double crochet
- sl st – slip stitch
- sp – space
- st(s) – stitch(es)
- rep – repeat
Special stitches:
- Shell: 5 dc in the same stitch. The 3rd dc is the center dc.
- Half shell: 3 dc in the same stitch. At the start of a row, ch 3 counts as the first dc, so work ch 3 and 2 dc.
Gauge and Checkpoints
Gauge matters on a piece this size because a small error multiplies across 108 rows. Make a swatch before you start the panel.
Gauge: 1 pattern repeat (one shell plus one sc) = 2 in (5.1 cm) wide; 4 rows = 3 in (7.6 cm) tall, measured after light blocking.
Swatch: With plum, ch 34. Work Row 1 (25 sts), then alternate Rows 2 and 3 in the two colors until you have 12 rows. Every row from Row 2 onward has 49 sts. The swatch should measure 8 in (20.3 cm) wide by 9 in (22.9 cm) tall. Mist it, pin it flat, and measure once it is dry.
- Too big: go down to a 4.5 mm (US 7) hook.
- Too small: go up to a 5.5 mm (I-9) hook.
- Width is right but rows are too tall: snug each dc before you finish it, and work the ch-3 arches a little tighter.
Checkpoints on the panel (lay it flat and don’t stretch it):
- After Row 1: 40 in (101.6 cm) wide
- After Row 12: 9 in (22.9 cm) tall
- After Row 40: 30 in (76.2 cm) tall
- After Row 80: 60 in (152.4 cm) tall
- After Row 108: 81 in (205.7 cm) tall
Color Management
Don’t cut the yarn between stripes. At the end of each row, drop your loop and hold it with a locking marker. The other color is always waiting at one of the two ends.
- If the next color is waiting at the end where you just finished, turn and work as usual.
- If it is waiting at the opposite end, don’t turn. Go to that end and work the next row with the same side facing.
The lace pattern is symmetrical, so the instructions work in either direction. “First” and “last” always mean the edge stitch where that row starts and ends. The side edging will cover the short strands carried up the sides.
Panel Body
Foundation: With plum (A), ch 162.
Row 1 (A): Sc in 2nd ch from hook, skip 3 ch, shell in next ch, skip 3 ch, sc in next ch; rep from * 19 more times. Drop A. (20 shells, 21 sc = 121 sts)*
Row 2 (B): Join orange (B) in first sc. Ch 3 (counts as dc), 2 dc in same sc (half shell made), ch 3, sc in center dc of next shell, ch 3, shell in next sc; rep from * 18 more times, ch 3, sc in center dc of last shell, ch 3, half shell (3 dc) in last sc. Drop B. (2 half shells, 19 shells, 20 sc, 40 ch-3 sps = 6 + 95 + 20 + 120 = 241 sts)*
Row 3 (A): Pick up A. Ch 1, sc in first dc (the edge of the half shell), ch 3, shell in next sc, ch 3, sc in center dc of next shell; rep from * 18 more times, ch 3, shell in last sc, ch 3, sc in last edge st (top of the ch-3). Drop A. (20 shells, 21 sc, 40 ch-3 sps = 100 + 21 + 120 = 241 sts)*
These two rows set up the lattice. Each new shell grows from a sc in the row below, and each new sc sits on the center of a shell below. That half-repeat offset is what opens the diamonds.
Rows 4–108: Repeat Row 2 on every even row with B and Row 3 on every odd row with A. Every row from Row 2 onward has 241 sts. End after Row 108 (a B row). Cut B, leaving a 6 in (15.2 cm) tail.
The body now measures 40 in (101.6 cm) by 81 in (205.7 cm).
Top Band
The band fills the dips between the last fans so the top edge is straight and strong enough to carry the panel’s weight. Work every band row with A.
Row 109 (leveling row): Pick up A. Ch 1, sc in each of first 3 dc (half shell), 3 hdc in next ch-3 sp, dc in next sc, 3 hdc in next ch-3 sp, sc in each of next 5 dc; rep from * 18 more times, 3 hdc in next ch-3 sp, dc in next sc, 3 hdc in next ch-3 sp, sc in each of last 3 dc. Turn. (3 + 19 x 12 + 7 + 3 = 241 sts)*
Short sc sit on the high fan tops, and taller dc fill the low sc points, so the row comes out level.
Rows 110–111: Ch 1, sc in each st across. Turn. (241 sts)
The band measures about 1 in (2.5 cm), which brings the piece to 40 in x 82 in (101.6 cm x 208.3 cm).
Hanging Loops
Row 112: Ch 1, sc in first st, ch 18, skip 11 sts, sc in next st; rep from * 19 more times. Turn. (21 sc, 20 ch-18 loops; 1 + 20 x 12 = 241 sts used)*
Row 113: Ch 1, sc in first sc, 22 sc in next ch-18 loop, sc in next sc; rep from * 19 more times. Fasten off. (21 + 440 = 461 sts)*
Each loop spans 2 in (5.1 cm) and hangs about 2.5 in (6.4 cm), which fits a rod up to about 1.25 in (3.2 cm) across. Covering the chains with sc stops them from stretching under the panel’s weight.
Border
Border gauge: 2 sc per body row end (8 sc per 3 in / 7.6 cm of side) and 1 sc per band row end. Along the hem, the border uses each foundation chain once.
Hem scallops: With RS facing and A, work along the opposite side of the foundation chain. Join with a sl st in the first ch, at the base of the first Row 1 sc. Ch 1, sc in same ch, skip 3 ch, 7 dc in next ch, skip 3 ch, sc in next ch; rep from * 19 more times. (20 scallops, 21 sc = 140 + 21 = 161 sts)* Do not fasten off.
Side edging, first side: Ch 1 and work up the side edge: 2 sc in each row end of Rows 1–108 (216 sc), then 1 sc in each row end of Rows 109–111 (3 sc). Stop at the base of the loops and fasten off. (219 sc)
Side edging, second side: Join A at the top of the other side, at the end of Row 111. Ch 1, work 1 sc in each row end of Rows 111–109 (3 sc), then 2 sc in each row end of Rows 108–1 (216 sc). Sl st to the first sc of the hem and fasten off. (219 sc)
Why the math works: Each 8-chain section of the foundation holds one Row 1 shell and one sc. The hem uses the same chain positions (161 = 8 x 20 + 1), so every scallop hangs directly under a Row 1 fan and every sc sits under a sc. On the sides, 2 sc per 0.75 in (1.9 cm) row suits the open lace without pulling it in or making it ruffle. The 219 sc cover the full 82 in (208.3 cm) side and add 0.25 in (0.6 cm) of width per side.
Finished panel: 40.5 in (102.9 cm) wide x 82.75 in (210.2 cm) long, plus 2.5 in (6.4 cm) loops.
Weave in all ends along the side edging or inside the solid band, never across an open diamond.
Final Blocking
- Soak the panel in cool water for 15 minutes.
- Press out the water without wringing, then roll the panel in towels to remove more.
- Lay it flat on a clean sheet or blocking mats.
- Measure the width at the hem, the middle, and Row 108. All three should be 40.5 in (102.9 cm), including the edging.
- Ease the fans open so the diamonds are even, and pin the tip of every hem scallop.
- Pin the sides straight and check that the length is 82.75 in (210.2 cm).
- Let the panel dry completely, then hang it for 24 hours so the lace can settle.
Final Quality-Control Checklist
- Every row from Row 2 to Row 108 has 241 sts.
- Colors alternate one row each, with plum on every odd row.
- Each shell sits on a sc, and each sc sits on a shell center.
- The diamonds are a similar size across the width.
- The top band is level, with no dips at the old sc points.
- There are 20 even loops, each covered with 22 sc.
- The hem has 20 scallops lined up under the first row of fans.
- Each side edge has 219 sc and lies flat.
- Both panels in a pair measure the same within 0.5 in (1.3 cm).
Troubleshooting
The panel is getting narrower. You are probably missing a half shell or the last sc at one edge. Count the edge stitches every few rows.
Shells lean to one side. Make sure you are working into the center (3rd) dc of each shell, not the 2nd or 4th.
Diamonds look squashed. Your ch-3 arches are too tight. Relax your chains, or use a hook one size larger just for the chains.
The side edge ruffles. There are too many sc. On that side, work 3 sc for every 2 rows instead of 2 sc per row.
The side edge pulls in. There are too few sc. Check that every body row end has 2 sc.
Carried strands show at the sides. Keep the dropped loop close to the edge and pick it up without stretching it.
Care
Hand wash in cool water, or machine wash on a gentle cycle inside a mesh bag. Dry flat, then hang the panel right away to keep the length even.
Final Notes
The measurements build like this. One repeat is 2 in (5.1 cm), so 20 repeats give 40 in (101.6 cm). Four rows are 3 in (7.6 cm), so 108 rows give 81 in (205.7 cm). The top band adds 1 in (2.5 cm), the hem adds 0.75 in (1.9 cm), and the side edging adds 0.25 in (0.6 cm) per side. The result is a 40.5 in x 82.75 in (102.9 cm x 210.2 cm) panel with 2.5 in (6.4 cm) loops.
Check your gauge, count 241 stitches on every lace row, and make the second panel to match the first.
Happy crocheting!