

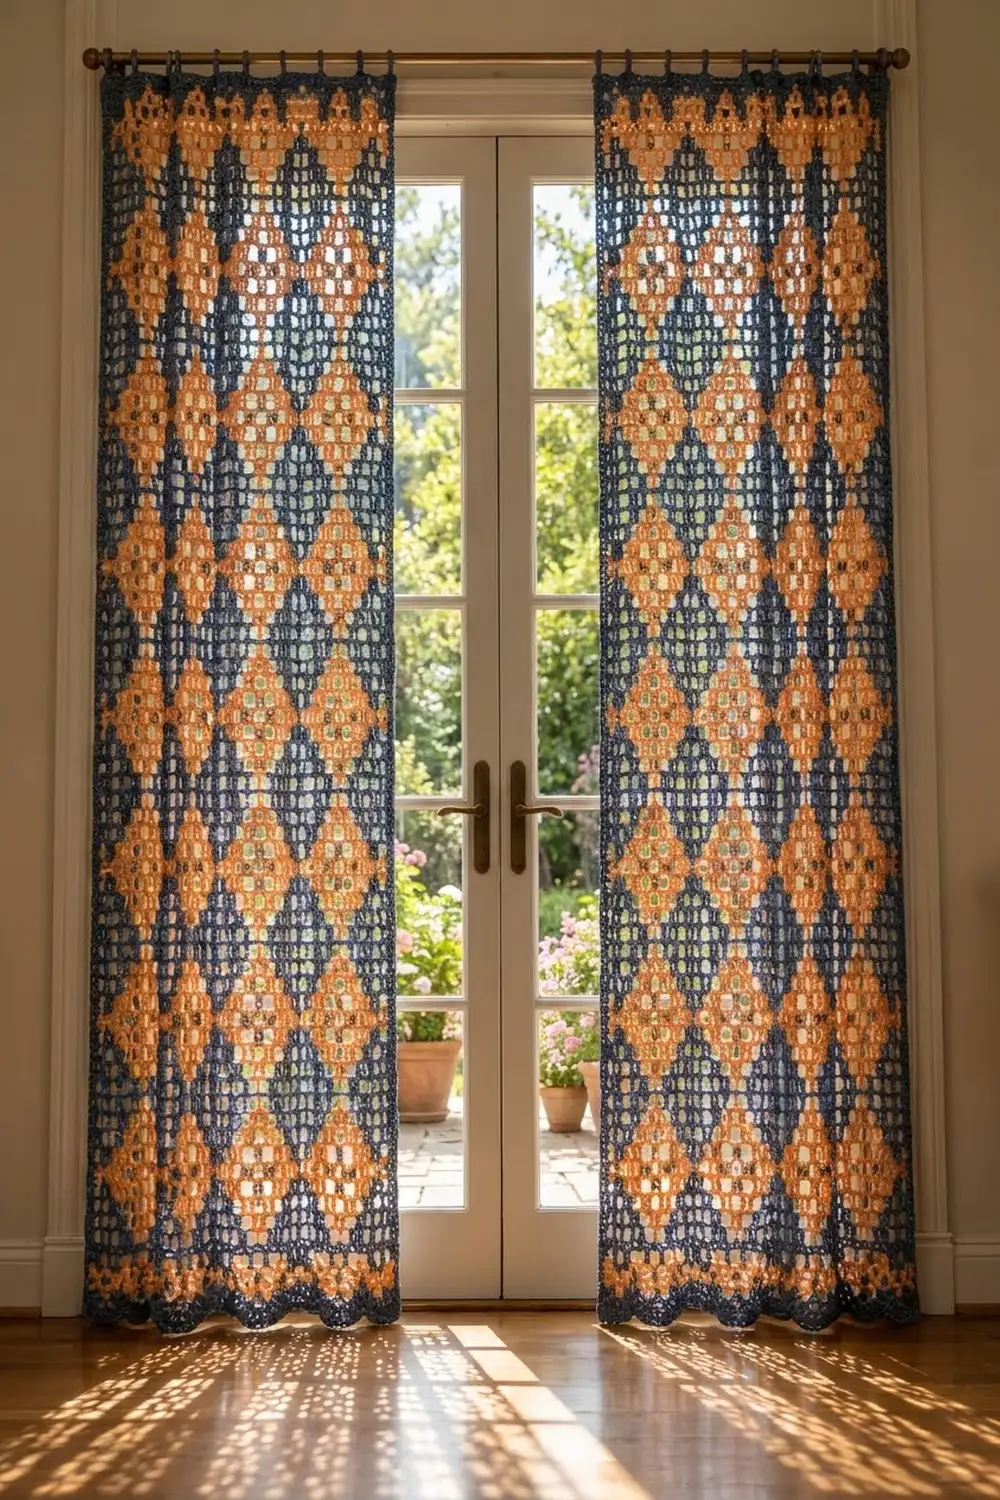
The Harbor Diamond panels are a pair of filet mesh curtains. Warm apricot diamonds sit on a cool denim-navy background, and the open mesh lets daylight through, so sunny floors get a soft lattice of shadows.
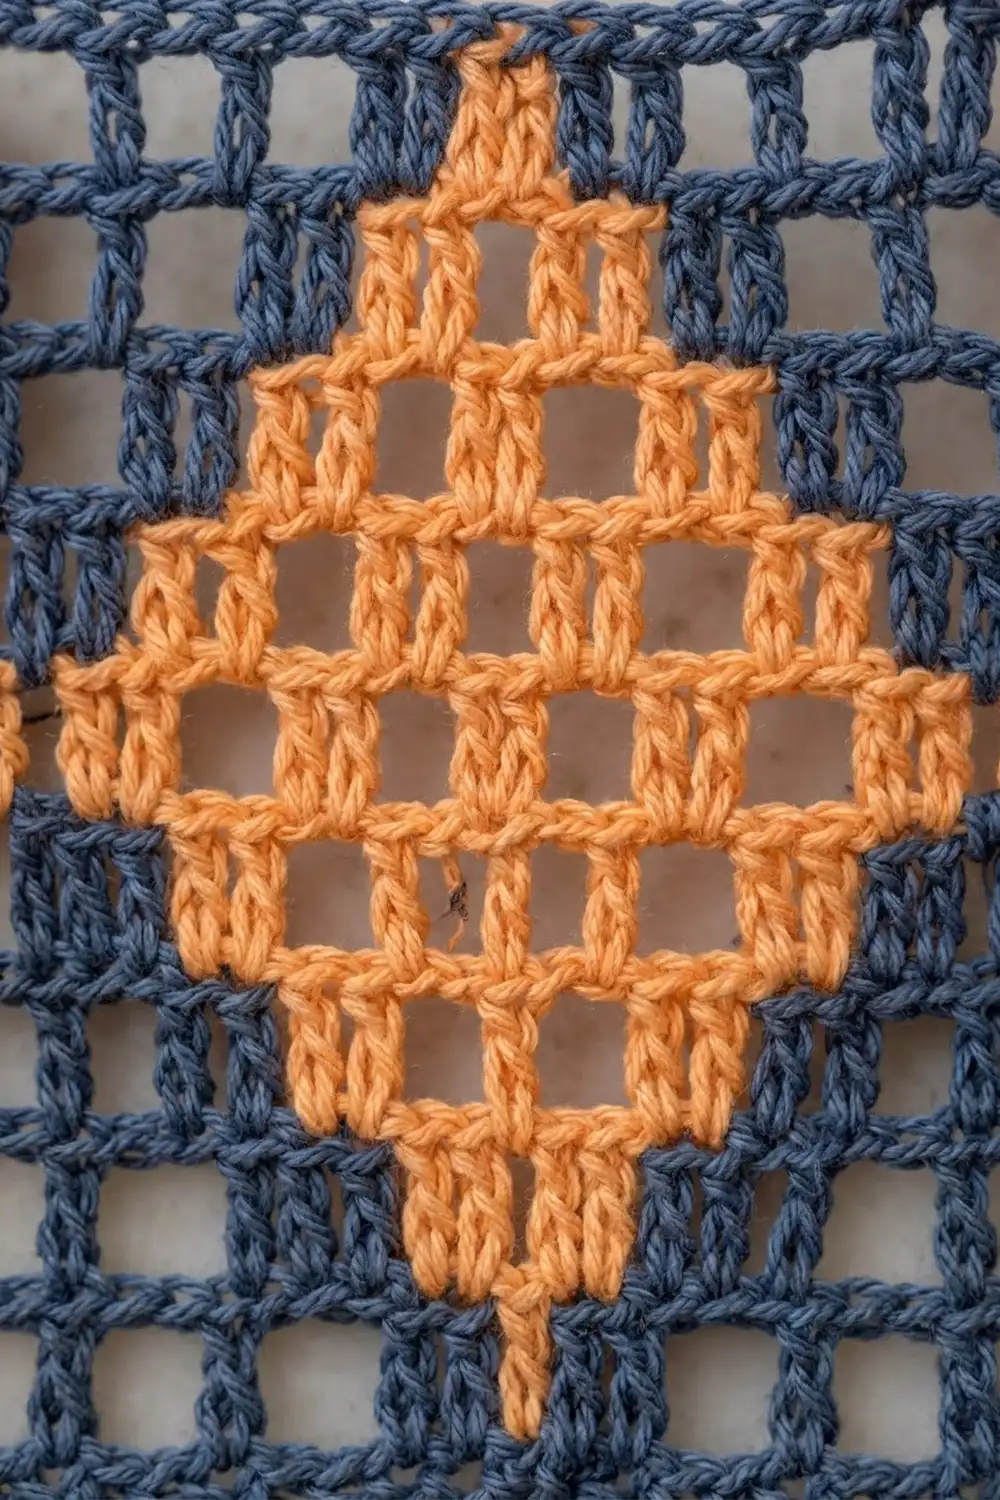
Each panel is one rectangle of filet mesh. The orange diamonds are outlined with solid blocks and filled with open orange mesh, so the motifs read clearly from across the room and stay airy. The diamond columns are set in a half-drop, which gives the classic argyle look. A navy scalloped hem finishes the bottom, and seven navy tabs at the top slip over a standard rod.
This pattern uses US crochet terms. Each finished panel measures 31 in (78.7 cm) wide by 81 in (205.7 cm) long, plus 3 in (7.6 cm) tab loops above the top edge. That gives about 84 in (213.4 cm) from the top of the rod to the hem.
You work each panel flat in rows from the bottom up, changing colors with the intarsia method (separate bobbins). After the body is done, you add a scalloped border to the bottom, single crochet edging to both sides, and tabs to the top. You make two identical panels.
Finished Size and Construction
- Finished size (per panel): 31 in × 81 in (78.7 cm × 205.7 cm), plus 3 in (7.6 cm) tab loops
- Skill level: Intermediate (intarsia color changes in filet)
- Terminology: US
- Yarn weight: Worsted (#4) cotton
- Hook: 5.0 mm (H-8)
- Number of pieces: 2 separate panels, not joined
- Layout: One panel on each side of a window or door
- Panel body size before border: 30.5 in × 79 in (77.5 cm × 200.7 cm)
- Border depth: Bottom scallops 2 in (5.1 cm); side edging 0.25 in (0.6 cm) per side
Materials
Use a smooth mercerized or combed worsted cotton, or a cotton blend, at about 170 m per 100 g. Cotton holds the square mesh shape, blocks crisply, and doesn’t stretch much while hanging. Avoid 100% acrylic, which can grow in length under the weight of a long curtain.
Yarn for both panels:
– Navy (Color A): 1,200 g, about 2,040 m
– Apricot orange (Color B): 900 g, about 1,530 m
Each panel uses roughly half of each amount. These quantities include about a 10% safety margin for swatching and tension differences. Buy all of each color from one dye lot.
Tools:
– 5.0 mm (H-8) crochet hook
– 11 yarn bobbins (6 navy, 5 orange)
– Stitch markers
– Tapestry needle
– Scissors
– Measuring tape
– Blocking mats or a clean carpeted floor, rustproof pins, spray bottle
Abbreviations (US Terms)
- ch – chain
- sc – single crochet
- dc – double crochet
- sk – skip
- st(s) – stitch(es)
- sp – space
- RS / WS – right side / wrong side
Special stitches and terms:
- Mesh cell (open): Ch 2, sk next 2 sts (or the ch-2 sp), dc in next dc. Uses 3 sts.
- Block cell (solid): Dc in each of next 2 dc (or 2 dc in the ch-2 sp), dc in next dc. Uses 3 sts.
- Color change: When the next cell is a different color, work the dc that closes the current cell up to its last yarn-over. Drop the old color to the WS, yarn over with the new color, and pull through. Each color area has its own bobbin, and nothing is carried across the back.
- Cell color: A cell takes the color of its ch-2 (or 2 dc) and its closing dc.
Gauge and Checkpoints
Gauge: 8 cells and 8 rows = 4 in (10.2 cm) in filet mesh, after blocking.
One cell is 0.5 in (1.3 cm) square, and one row is 0.5 in (1.3 cm) tall.
Test piece first: Ch 51. Dc in 4th ch from hook and in each ch across (49 dc). Work 15 rows of mesh cells (16 cells per row), changing to orange for a few cells in the middle so you can practice the color change. Block the swatch. It should measure 8 in × 8 in (20.3 cm × 20.3 cm).
- Too big: Change to a 4.5 mm hook.
- Too small: Change to a 5.5 mm hook.
- Cells taller than wide: Keep your chains the same size but pull your dc slightly snug. Square cells matter because the diamonds are charted on a square grid.
Checkpoints per panel:
– After Row 2: width 30.5 in (77.5 cm)
– After Row 24 (first full diamond in Column A): height 12 in (30.5 cm)
– After Row 156: height 78 in (198.1 cm)
– After Row 158: height 79 in (200.7 cm)
– After border and edging: 31 in × 81 in (78.7 cm × 205.7 cm)
Panel Layout
Each row has 61 cells, which is 184 sts (1 starting dc + 61 cells × 3 sts). From edge to edge, the cells are:
Edge (1) | Zone A (11) | Channel (1) | Zone B (11) | Channel (1) | Zone A (11) | Channel (1) | Zone B (11) | Channel (1) | Zone A (11) | Edge (1)
Edge and channel cells are always navy mesh, which makes 6 navy cells per row. The layout is symmetrical, so you read it the same way on RS and WS rows.
Diamond widths by motif row (1–22):
1, 1, 3, 3, 5, 5, 7, 7, 9, 9, 11, 11, 9, 9, 7, 7, 5, 5, 3, 3, 1, 1
Each diamond is 11 cells wide, or 5.5 in (14.0 cm), and 22 rows tall, or 11 in (27.9 cm).
How to work a zone at width w:
1. Work (11 − w) ÷ 2 navy mesh cells.
2. Work the orange section:
– If w = 1, work 1 orange block cell.
– Otherwise, work 1 orange block, (w − 2) orange mesh cells, and 1 orange block.
3. Work (11 − w) ÷ 2 navy mesh cells.
For example, at w = 7: 2 navy mesh, then orange block + 5 orange mesh + orange block, then 2 navy mesh. That’s 11 cells.
Half-drop: Zones A and B are 11 rows out of step with each other.
– For pattern row p (p = 1 to 154), Zone A uses motif row ((p − 1) mod 22) + 1.
– Zone B uses motif row ((p + 10) mod 22) + 1.
– So pattern row 1 = A motif row 1 (w = 1) and B motif row 12 (w = 11).
Each row has 5 orange areas and 6 navy areas, so you need 11 bobbins.
Panel Body
Foundation: With navy, ch 186.
Row 1 (RS, navy): Dc in 4th ch from hook (skipped 3 ch count as dc) and in each ch across. Turn. (184 dc)
Row 2 (navy): Ch 3 (counts as dc), then work 61 mesh cells across, ending with a dc in the top of the turning ch. Turn. (184 sts: 61 cells)
Checkpoint: Width = 30.5 in (77.5 cm).
Rows 3–156 (pattern rows 1–154):
1. Ch 3 (counts as dc).
2. Work 1 navy mesh cell (edge).
3. Work the zones and channels in order: Zone A, channel, Zone B, channel, Zone A, channel, Zone B, channel, Zone A.
4. Work 1 navy mesh cell (edge), with the last dc in the top of the turning ch.
5. Turn.
Every row has 184 sts (61 cells).
Pattern rows 1–154 cover exactly 7 repeats of 22 rows.
– Zone A starts and ends with diamond tips.
– Zone B starts and ends with half diamonds cut at their widest row.
Before each row, wind fresh bobbins as needed. Twist the old and new colors once at each change on the WS so the two areas lock together without a hole.
Checkpoint after Row 24: 12 in (30.5 cm) tall. Zone A shows one complete diamond, and Zone B shows a half diamond at the bottom with the start of the next diamond above it.
Row 157 (navy): Ch 3, then work 61 navy mesh cells. Turn. (184 sts)
Row 158 (navy): Ch 3, then work 61 block cells (184 dc). Don’t fasten off.
Checkpoint: 79 in (200.7 cm) tall. The solid top row gives the tabs a firm base.
Tabs
Count the 184 dc of Row 158 from right to left, with the RS facing.
There are 7 tabs, each 10 sts wide, with 19-st gaps between them:
– Tab 1: sts 1–10
– Tab 2: sts 30–39
– Tab 3: sts 59–68
– Tab 4: sts 88–97
– Tab 5: sts 117–126
– Tab 6: sts 146–155
– Tab 7: sts 175–184
Check the total: 7 × 10 + 6 × 19 = 70 + 114 = 184.
Each tab:
1. Join navy in the first st of the tab.
2. Row 1: Ch 1, sc in each of 10 sts. Turn. (10 sc)
3. Rows 2–24: Ch 1, sc in each sc. Turn. (10 sc)
4. Fasten off, leaving a 12 in (30.5 cm) tail.
Each strip is 6 in (15.2 cm) long and about 1.7 in (4.3 cm) wide. Fold it to the WS and sew the last row to the back of Row 158, right behind the tab’s base. That makes a 3 in (7.6 cm) loop that fits rods up to 1.25 in (3.2 cm) in diameter. The gaps between tabs are about 3.1 in (7.9 cm).
Make Both Panels
Work two identical panels. Because the layout is symmetrical, either panel can hang on either side.
Per panel: about 600 g navy and 450 g orange.
Both panels: 1,200 g navy and 900 g orange (including the margin).
[ ROD ========================================== ]
[ Left Panel ]   [ door / window ]   [ Right Panel ]
  31 in wide                            31 in wide
The panels are hung separately and are never joined, so there’s no joining step.
Border
Border gauge: 1 scallop is 8 sts and about 1.3 in (3.3 cm) wide. A sc row adds 0.25 in (0.6 cm). The border needs no gauge of its own; it follows the body stitch count.
Bottom Scalloped Hem
Turn the panel upside down so you’re working into the free loops of the foundation chain. Each of the 184 Row 1 dc sits on one ch, so there are 184 working loops.
Border Row 1 (navy):
1. Join in the first loop. Ch 1, sc in each of the next 183 loops.
2. Work 2 sc in the last loop.
3. Turn.
Count: 184 sc worked 1 per loop + 1 extra sc = 185 sc.
Border Row 2:
1. Ch 1, sc in the first sc.
2. Sk 3 sc, 7 dc in next sc, sk 3 sc, sc in next sc. Repeat from * 22 more times (23 scallops).
3. Turn.
Count: 1 sc + 23 × (7 dc + 1 sc) = 185 sts, with 23 shells and 24 sc.
Border Row 3:
1. Ch 1, sc in the first sc.
2. Sc in next 3 dc, (sc, ch 3, sc) in center dc, sc in next 3 dc, sc in next sc. Repeat from * 22 more times.
3. Fasten off.
Count: 1 + 23 × 9 = 208 sc, plus 23 ch-3 picots.
Why the math works: The scallop needs a multiple of 8 sts plus 1. The foundation gives 184 loops, which is 1 short, so the single extra sc in Border Row 1 brings the count to 185 = 8 × 23 + 1. All 23 scallops then fit exactly, with a sc anchoring both ends.
The hem is 2 in (5.1 cm) deep, which brings the length to 81 in (205.7 cm).
Side Edging
Work along each long edge, over the row ends of Rows 1–158 only. Don’t work into the hem.
- With the RS facing, join navy at a corner of the body.
- Work 2 sc around each dc row-end post.
- Fasten off.
Count: 158 rows × 2 sc = 316 sc per side.
Two sc per 0.5 in (1.3 cm) row lie flat. If the edge ruffles, you have too many stitches; if it pulls, you have too few. The edging adds 0.25 in (0.6 cm) per side, so the panel is now 31 in (78.7 cm) wide.
Final Blocking
- Weave in all ends inside matching-color block cells. Never run a navy tail through orange cells or the other way around.
- Lay the panel flat, RS up, on mats or a clean carpet.
- Pin the corners to 31 in × 81 in (78.7 cm × 205.7 cm).
- Pin along the sides every 4 in (10.2 cm), checking that the mesh rows run straight.
- Pin each scallop at its picot so all 23 points line up.
- Spray until the panel is evenly damp, then smooth the cells into squares with your palms.
- Let it dry completely before unpinning. With cotton, this usually takes 24 hours.
- Repeat for the second panel, pinning to the same measurements.
Final Quality-Control Checklist
- Each row has 61 cells (184 sts), with navy edge and channel cells.
- Zone A diamonds end in tips at the top and bottom, and Zone B has half diamonds at both ends.
- Each diamond is 11 cells wide at its widest row.
- Every diamond outline is solid blocks, and the centers are open orange mesh.
- There are no loose strands across the back.
- The hem has 23 even scallops with picots.
- There are 316 sc on each side edge.
- All 7 tabs are evenly spaced and sewn securely.
- Each panel measures 31 in × 81 in (78.7 cm × 205.7 cm).
- Both panels match in length to within 0.5 in (1.3 cm).
Troubleshooting
- Holes at color changes: Twist the two yarns once on the WS at every change.
- Panel is getting narrower: You’re probably skipping the dc in the turning ch. Recount to 184 sts every 10 rows.
- Diamonds look squat: Your rows are short. Loosen your dc, or check that you’re working 2 chains per mesh cell.
- Bobbins are tangling: Turn the work clockwise on RS rows and counterclockwise on WS rows to undo twists.
- Hem flares: Your shells are too loose. Go down 0.5 mm for Border Rows 2–3 only.
- Panels are different lengths: Block the shorter one with a little extra tension to the target length.
Care
Hand wash or machine wash on a cool delicate cycle in a mesh bag. Reshape and dry flat; don’t tumble dry or hang wet.
Final Notes
The measurement chain works like this:
– 8 cells = 4 in (10.2 cm).
– 61 cells = 30.5 in (77.5 cm) of width.
– 158 rows = 79 in (200.7 cm) of length.
– Adding the 2 in (5.1 cm) scalloped hem and 0.25 in (0.6 cm) side edging gives 31 in × 81 in (78.7 cm × 205.7 cm).
– The 3 in (7.6 cm) tabs bring the drop to about 84 in (213.4 cm).
If your swatch gauge is right, every later number follows from it. Happy crocheting!