

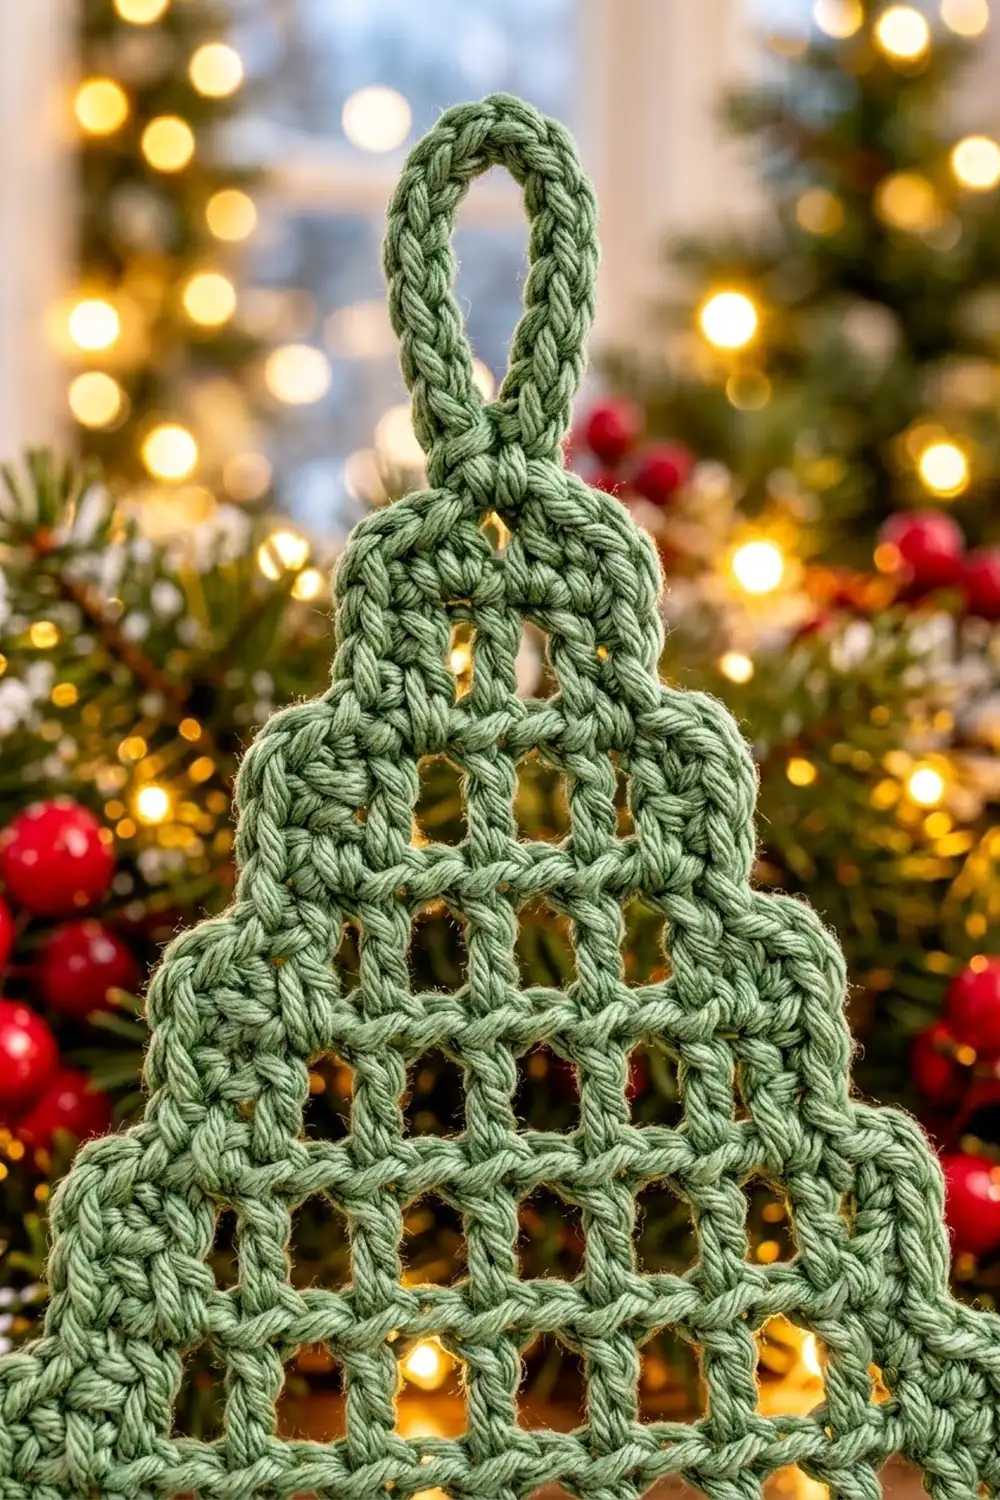
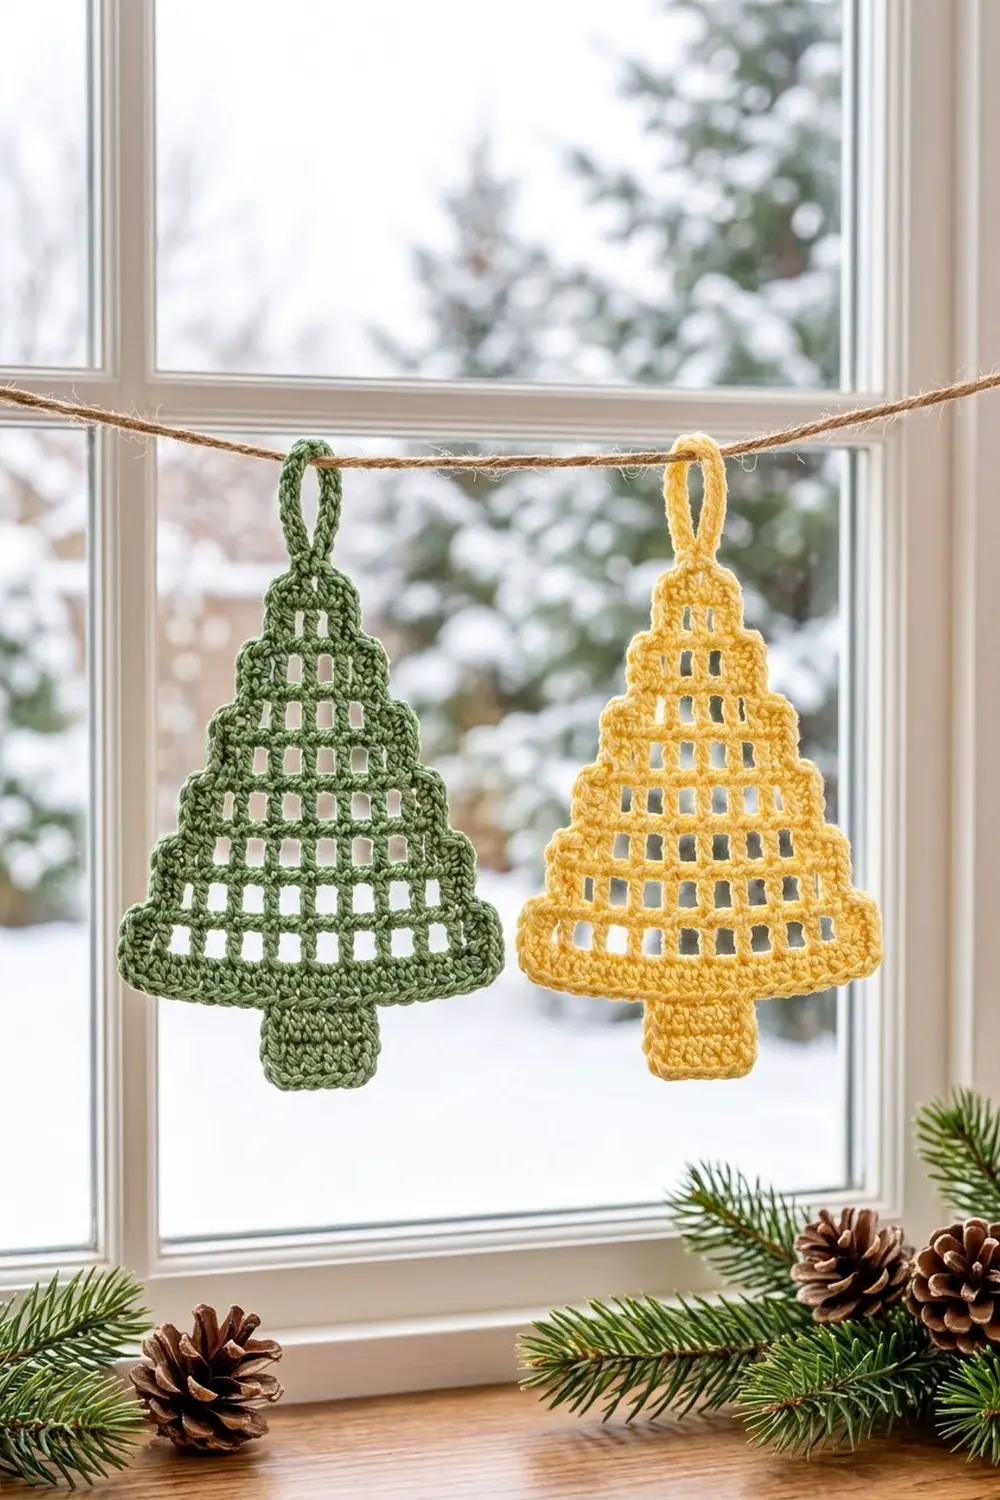
This little tree is all windows. The body is an open filet mesh of tiny squares that narrows row by row into a stepped, tiered silhouette. A small solid trunk anchors the bottom, and a neat round of single crochet frames every edge. A sturdy covered loop at the tip lets it hang from a tree branch, a gift tag, or a cord.
The samples are worked in soft sage green and pale butter yellow. The flat, airy look suits Scandinavian-style décor, and light shows through the mesh beautifully on a window or a lit tree. Make each tree in one solid color.
This pattern uses US crochet terms. The finished ornament measures about 4.4 in (11.2 cm) wide and 5.15 in (13.1 cm) tall without the loop. With the loop it is about 6 in (15.2 cm) tall.
Construction is simple. You work the mesh body flat from the bottom row up, dropping one mesh at the end of every row. Then you add the trunk into the foundation chain, work one single crochet border round all the way around, and cover the hanging loop.
Finished Size and Construction
- Finished size: 4.4 in (11.2 cm) wide x 5.15 in (13.1 cm) tall; about 6 in (15.2 cm) with the loop
- Skill level: Easy
- Terminology: US crochet terms
- Yarn weight: DK / light (#3)
- Hook: 3.5 mm (E-4)
- Number of pieces: 1 (single flat piece, no joining)
- Layout: one stepped mesh triangle with a centered trunk
- Piece size before border: body 4 in (10.2 cm) wide x 4 in (10.2 cm) tall; trunk 1 in (2.5 cm) wide x 0.75 in (1.9 cm) tall
- Border depth: 1 round of sc, about 0.2 in (0.5 cm) on every edge
Materials
Choose a smooth DK cotton or cotton blend with good stitch definition. Mercerized cotton gives the crisp, square windows shown. Fuzzy or very splitty yarns blur the mesh, so they are best avoided here.
- Color A, sage green: 10 g, about 23 m (25 yd), for one green tree
- Color B, butter yellow: 10 g, about 23 m (25 yd), for one yellow tree
You only need one color per ornament. These quantities include a safety margin, since one tree uses about 6 to 7 g.
Tools:
– 3.5 mm (E-4) crochet hook
– Tapestry needle
– Scissors
– Stitch marker
– Ruler or tape measure
– Blocking mat, rustproof pins, and a spray bottle
Abbreviations (US Terms)
- ch – chain
- sl st – slip stitch
- sc – single crochet
- dc – double crochet
- sk – skip
- sp – space
- st(s) – stitch(es)
- rep – repeat
- RS – right side
Special stitch: mesh. One mesh is one open square: (ch 1, sk 1 st or ch-1 sp, dc in next st). At the start of a row, “ch 4” counts as the first dc plus ch 1. A row with M mesh has M + 1 dc posts and M ch-1 spaces, for a total of 2M + 1 sts.
Standing sc: Start with a slip knot on the hook, insert the hook into the stitch, and complete a sc.
Gauge and Checkpoints
The tree body is your gauge swatch. Work Row 1, measure it, and only continue if it matches.
Mesh gauge: 10 mesh = 4 in (10.2 cm) wide; 9 mesh rows = 4 in (10.2 cm) tall. One mesh is about 0.4 in (1.0 cm) wide.
Border gauge: 5 sc = 1 in (2.5 cm).
Checkpoints:
1. After Row 1: 4 in (10.2 cm) wide.
2. After Row 2: 3.6 in (9.1 cm) across the top edge.
3. After Row 5: body is about 2.2 in (5.6 cm) tall.
4. After Row 9: body is 4 in (10.2 cm) tall, and the top row is 0.8 in (2.0 cm) wide.
5. After the trunk: trunk is 1 in (2.5 cm) wide x 0.75 in (1.9 cm) tall.
6. After the border: 4.4 in (11.2 cm) wide x 5.15 in (13.1 cm) tall.
If Row 1 is too wide, go down a hook size (3.25 mm). If it is too narrow, go up a size (3.75 mm). If only the height is off, check your dc height. Pull the first loop up to full height, and don’t yank the ch-1 spaces tight.
Tree Body
Work in rows, turning at the end of every row. Never work into the turning chain at the end of a row. Each row stops one mesh short, so the last mesh of the previous row is left bare. Because you turn every time, the dropped mesh alternates sides. This creates the stair-step edges, with each side stepping in once every 2 rows.
Foundation: With Color A or B, ch 24.
Row 1: Dc in 6th ch from hook (the skipped 5 ch count as dc, ch 1, and 1 skipped base ch), ch 1, sk next ch, dc in next ch; rep from * 8 more times. Turn. (10 mesh: 11 dc + 10 ch-1 sp = 21 sts)*
Check your gauge now: 4 in (10.2 cm) wide.
Row 2: Ch 4 (counts as dc + ch 1, now and throughout), sk ch-1 sp, dc in next dc, ch 1, sk ch-1 sp, dc in next dc; rep from * 7 more times, leaving the last ch-1 sp and turning ch unworked. Turn. (9 mesh: 10 dc + 9 ch-1 sp = 19 sts)*
Rows 3–9: Work the same as Row 2, but repeat from * one fewer time in each row. Every row ends one mesh before the end of the previous row. Turn at the end of each row.
| Row | Repeats of * | Mesh | Dc posts | Total sts |
|---|---|---|---|---|
| 3 | 6 | 8 | 9 | 17 |
| 4 | 5 | 7 | 8 | 15 |
| 5 | 4 | 6 | 7 | 13 |
| 6 | 3 | 5 | 6 | 11 |
| 7 | 2 | 4 | 5 | 9 |
| 8 | 1 | 3 | 4 | 7 |
| 9 | 0 | 2 | 3 | 5 |
In Row 9, work ch 4, sk ch-1 sp, dc in next dc, ch 1, sk ch-1 sp, dc in next dc, and stop. Fasten off.
Tips for crisp mesh: Insert your hook under both top loops of each dc, not into the ch-1 spaces. Keep every ch 1 the same size as a normal stitch. Count your dc posts at the end of every row. One missed or extra post shifts the whole stair pattern.
Body check: 9 rows, 4 in (10.2 cm) tall. Row 9 sits centered over Row 1 because you dropped 4 mesh on each side. Each side has 4 steps.
Trunk
Turn the body so the foundation chain is at the top. Number the dc posts of Row 1 from 1 to 11, starting at either corner. The 6th post is the center.
Row 1: With RS facing, join the yarn in the free loop of the foundation ch at the base of the 5th post. Ch 1, sc in the same ch and in each of the next 4 chs, ending at the base of the 7th post. Turn. (5 sc)
Rows 2–4: Ch 1, sc in each sc across. Turn. (5 sc)
Fasten off. The trunk covers foundation chs 12–16 (counting from the hook end of the original chain) and is centered under post 6.
Trunk check: 1 in (2.5 cm) wide x 0.75 in (1.9 cm) tall.
Border and Hanging Loop
Border gauge: 5 sc = 1 in (2.5 cm). The border is one round worked with these rules:
- Dc row-end: 2 sc around the post (a dc is about as tall as 2 sc).
- Sc row-end (trunk): 1 sc.
- Horizontal st or ch-1 sp: 1 sc.
- Outer (convex) corner: 3 sc in the corner st.
- Inner (concave) corner: no extra sts. Go straight to the next edge.
Round 1: With RS facing, join with a standing sc in the center dc of Row 9. Ch 10 for the loop, then sc in the same dc.
Top, first half: Sc in next ch-1 sp, then 3 sc in top of the turning ch at the corner.
First side, working down:
– 2 sc around each of the next 2 row-ends (Rows 9 and 8). (4 sc)
– Inner corner: sc in the bare ch-1 sp of the step below, then 3 sc in the bare corner post. (4 sc)
– 2 sc around each of the next 2 row-ends. (4 sc)
– Repeat the last 2 bullets 2 more times. (16 sc)
– Sc in the bare ch-1 sp of Row 1, 3 sc in the Row 1 corner post, then 2 sc around the Row 1 row-end. (6 sc)
Side total: 4 + 4 + 4 + 16 + 6 = 34 sc.
Bottom:
– 3 sc in the corner foundation ch (ch 4).
– Sc in each of the 7 free foundation chs up to the trunk (chs 5–11).
– 1 sc in each of the 4 trunk row-ends.
– 3 sc in the first st of trunk Row 4, sc in the next 3 sc, then 3 sc in the last sc. (9 sc)
– 1 sc in each of the 4 trunk row-ends on the other side.
– Sc in each of the 7 free foundation chs (chs 17–23), then 3 sc in the corner ch (ch 24).
Bottom total: 3 + 7 + 4 + 9 + 4 + 7 + 3 = 37 sc.
Second side, working up: This side mirrors the first side.
– 2 sc around each of the Row 1 and Row 2 row-ends. (4 sc)
– Work 3 times: 3 sc in the bare corner post, sc in the bare ch-1 sp, then 2 sc around each of the next 2 row-ends. (24 sc)
– 3 sc in the bare corner post of Row 8, sc in its bare ch-1 sp, then 2 sc around the Row 9 row-end. (6 sc)
Side total: 4 + 24 + 6 = 34 sc.
Top, second half: 3 sc in the last dc of Row 9 (the corner), then sc in the next ch-1 sp. Join with a sl st to the first sc.
Top total: 2 (center dc) + 1 + 3 + 3 + 1 = 10 sc.
Round total: 10 + 34 + 37 + 34 = 115 sc, plus the ch-10 loop.
Covering the loop: Sl st into the ch-10 loop, work 16 sc around the loop, then sl st in the first sc of Round 1. Fasten off. Weave in all ends through the solid border or the trunk, never across the open mesh, where they would show.
Why the math works: A dc row is about twice the height of a sc, so 2 sc per dc row-end keeps the sides flat without rippling or pulling. The 3 sc at each outer corner turn the 90-degree corners cleanly, and skipping extras at the inner corners stops the steps from bulging. The two sides use identical counts (34 sc each), so the tree stays symmetrical.
The border adds 0.2 in (0.5 cm) all around. That gives a width of 4 + 0.2 + 0.2 = 4.4 in (11.2 cm) and a height of 4 + 0.75 + 0.2 + 0.2 = 5.15 in (13.1 cm). The covered loop adds about 0.85 in (2.2 cm), for a total of 6 in (15.2 cm).
Final Blocking
- Lightly spray the ornament with water until it is evenly damp, or wet it and roll it in a towel.
- Lay it RS up on the blocking mat.
- Pin the two bottom corners 4.4 in (11.2 cm) apart.
- Pin the tip so the tree measures 5.15 in (13.1 cm) from the trunk bottom to the top border.
- Pin each step corner so the stairs on both sides match.
- Use a pin or a blunt needle to square up any mesh windows that look crooked.
- Pin the trunk straight and square.
- Let it dry completely before unpinning. For a stiffer ornament, use a light spray starch at this stage.
Final Quality-Control Checklist
- Row 1 has 10 mesh and Row 9 has 2 mesh.
- Each side has 4 matching steps.
- The trunk is 5 sc wide, 4 rows tall, and centered under the 6th post.
- The border has 115 sc: 10 on top, 34 on each side, and 37 on the bottom.
- No edge ruffles or cups.
- The loop is fully covered with 16 sc and stands upright.
- All ends are hidden in solid stitches.
- The blocked size is 4.4 in (11.2 cm) x 5.15 in (13.1 cm).
Troubleshooting
Tree leans to one side: Check that each row stops exactly one mesh short. Count the dc posts against the table.
Mesh windows look like rectangles: Your dc stitches are too tall or too short. Adjust your yarn-over height, or try a different hook size.
Border ruffles along the sides: You may be working 3 sc into some row-ends. Keep it to exactly 2 sc per dc row-end.
Border pulls and the steps curl: You missed the 3 sc at the outer corners. Add them back.
Trunk sits off-center: Recount the posts. The trunk must start at the base of post 5 and end at the base of post 7.
Foundation edge is tighter than Row 1: Your chain is too tight. Make the foundation chain with a hook one size larger.
Loop flops over: Pack all 16 sc snugly around the loop, or add 2 more sc.
Care
Hand wash in cool water with mild soap, then lay flat to dry and re-pin the shape if needed. Store it flat or hanging so the loop and steps keep their shape.
Final Notes
The measurement chain is short and easy to check. Row 1 sets the width at 4 in (10.2 cm), and 9 mesh rows set the body height at 4 in (10.2 cm). The trunk adds 0.75 in (1.9 cm), the border adds 0.2 in (0.5 cm) on every edge, and the covered loop adds about 0.85 in (2.2 cm). That gives a finished tree of 4.4 in (11.2 cm) x 5.15 in (13.1 cm), or 6 in (15.2 cm) tall with the loop. Check each stage as you go and every tree will match.
Happy crocheting!