

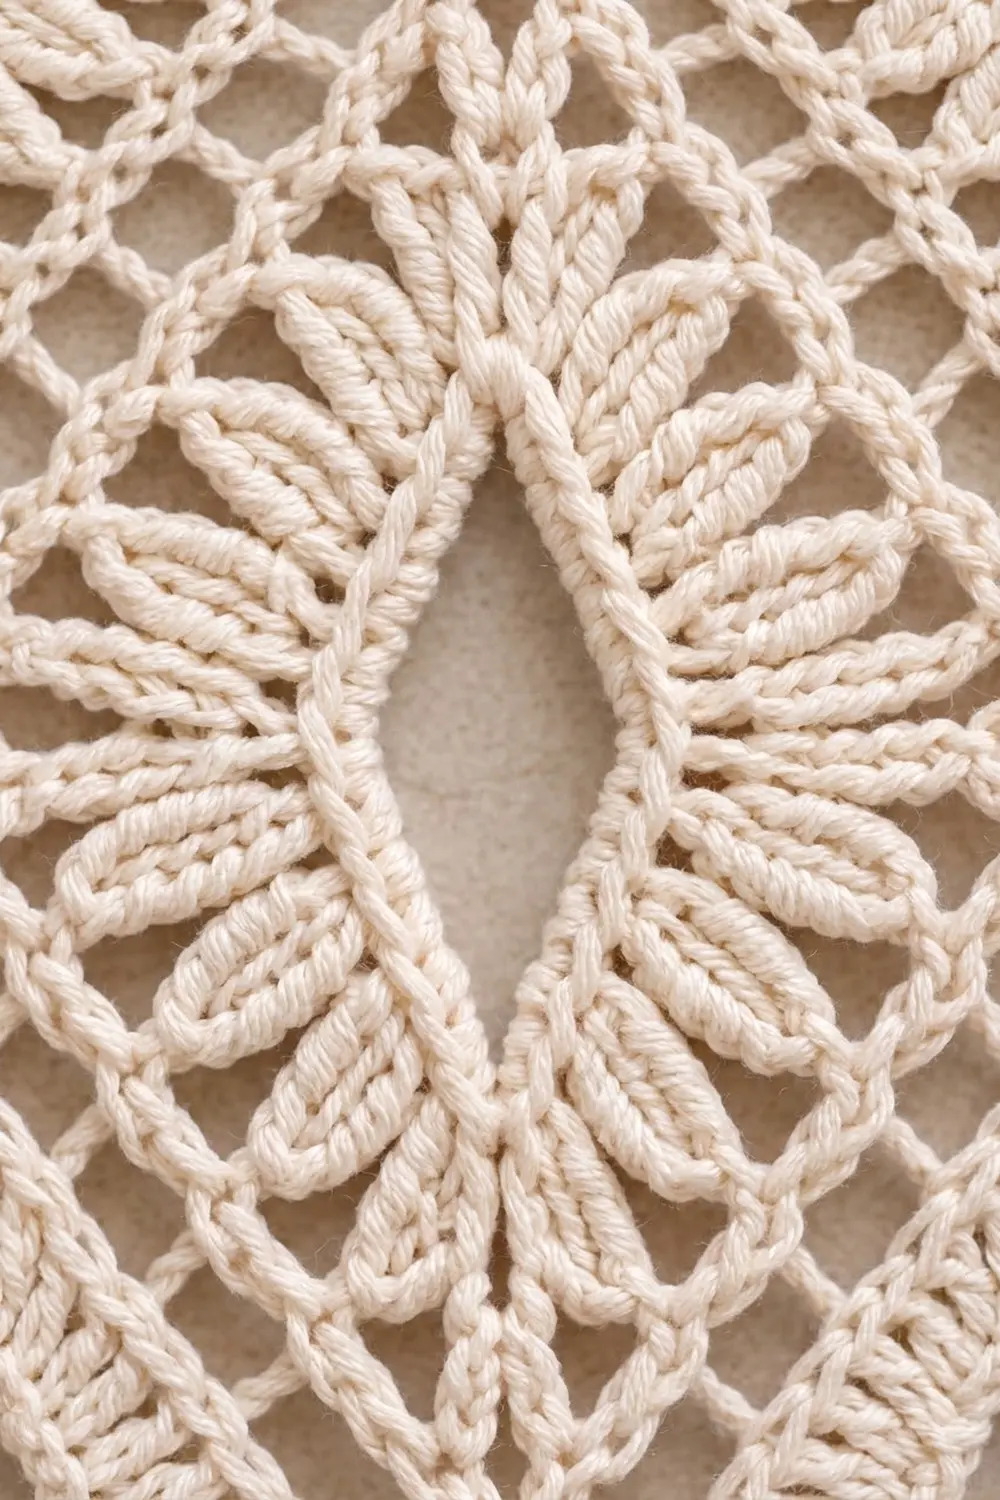
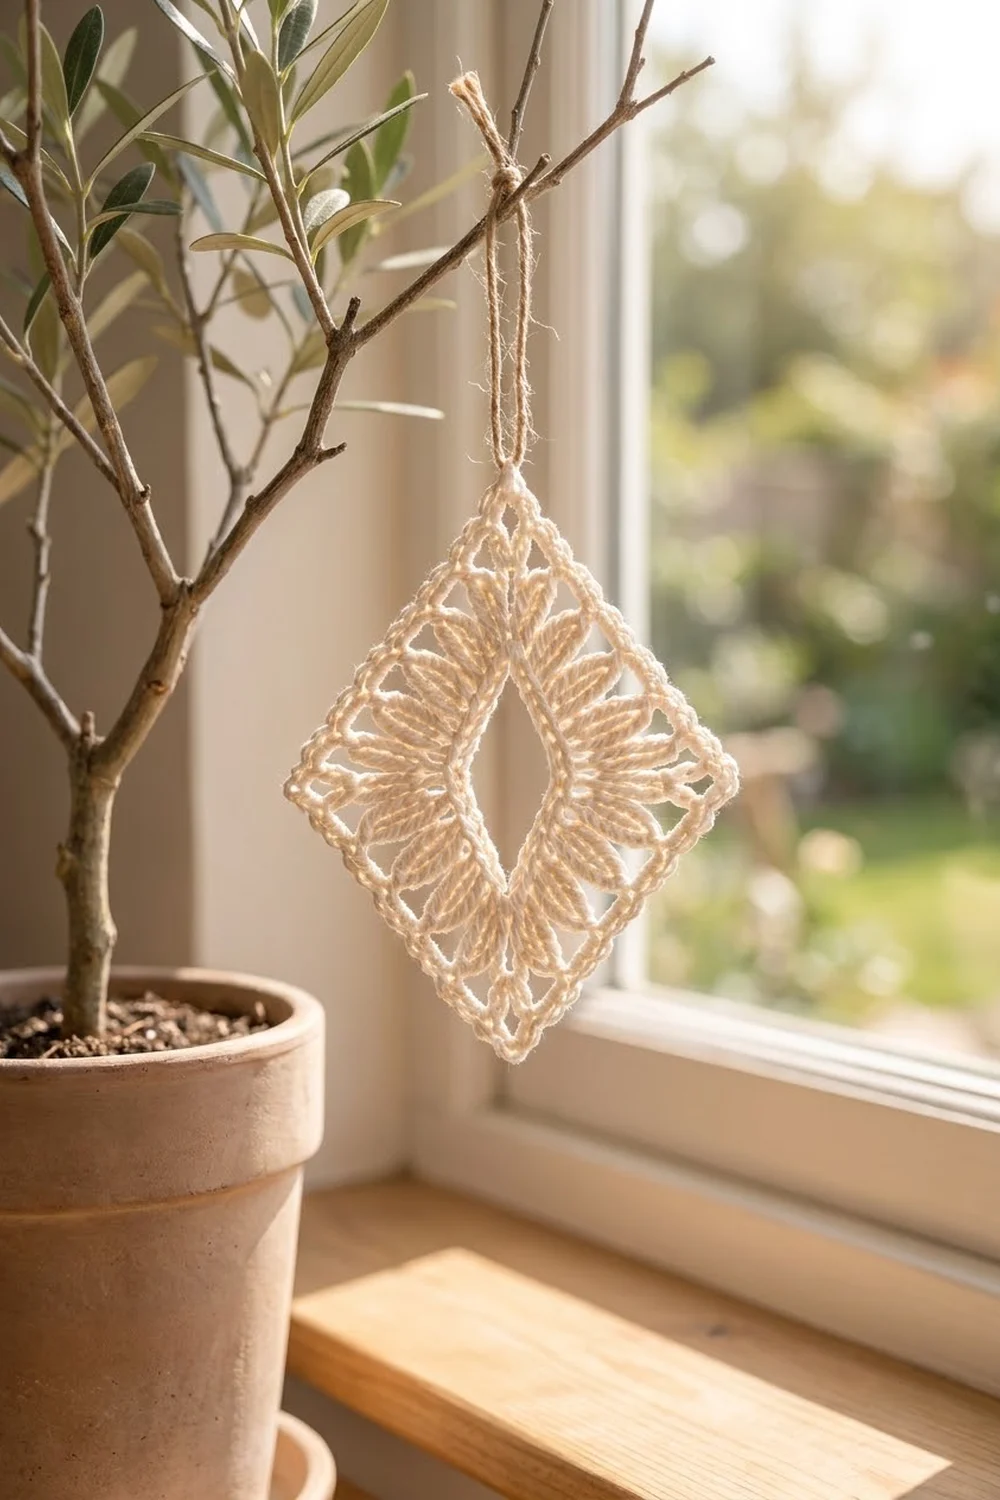
The Ivory Lantern Diamond is a single lace motif shaped like a tall diamond. An open, diamond-shaped window sits at its center. Fans of tall treble stitches radiate out from that window like petals, a light chain mesh surrounds them, and a crisp picot edge outlines the whole shape.
The motif uses one color, a soft ivory cotton. Since there are no color changes, the texture carries the design: ridged petals, airy mesh and a beaded outline. It has the look of classic heirloom lace while still feeling clean and modern.
This pattern uses US crochet terms. After blocking, the finished motif measures 5 in wide x 6 in tall (12.7 x 15.2 cm), measured point to point.
The construction is simple. You start with a chain ring that becomes the center window. Then you work six rounds outward: a single crochet frame, the petal fans, an arch round, a shaping mesh round, and a two-round border. There is no joining or sewing. You only need to weave in three ends.
Finished Size and Construction
- Finished size: 5 in wide x 6 in tall (12.7 x 15.2 cm), point to point
- Skill level: Intermediate (fans, trebles, mesh with graded stitch heights)
- Terminology: US crochet terms
- Yarn weight: Size 3 cotton crochet thread (Super Fine, #1)
- Hook: 2.25 mm (US B/1)
- Number of pieces: 1
- Layout: Single motif, worked in the round, displayed on point (corners at top, bottom, left and right)
- Piece size: 5 x 6 in (12.7 x 15.2 cm) finished
- Size before border: 4.5 x 5.5 in (11.4 x 14.0 cm)
- Border depth: 0.25 in (0.6 cm) on every side
Materials
Yarn: Choose a smooth, tightly twisted, mercerized cotton thread in size 3. Mercerized cotton gives the petals clear stitch definition and holds a sharp point after blocking. Avoid fuzzy or loosely plied thread, because it blurs the mesh.
- Ivory (the only color): about 8 g, approximately 30 m (33 yd)
This amount includes a margin of about 20 percent to cover your gauge test, one round you may need to pull out, and weaving in ends.
Tools:
- 2.25 mm (US B/1) crochet hook
- 4 locking stitch markers
- Tapestry needle with an eye large enough for size 3 thread
- Small sharp scissors
- Blocking mat or folded towel
- Rust-proof pins
- Spray bottle with clean water
- Ruler or tape measure
Abbreviations (US Terms)
- ch – chain
- sl st – slip stitch
- sc – single crochet
- hdc – half double crochet
- dc – double crochet
- tr – treble crochet (yarn over twice)
- st(s) – stitch(es)
- sp(s) – space(s)
- sk – skip
- rep – repeat
Special stitches:
- 7-tr fan: (tr, ch 1) 6 times, then tr, all in the same stitch. Makes 7 tr and 6 ch-1 sps.
- Picot: ch 3, sl st in the 3rd ch from the hook.
- Standing sc: with a slip knot on the hook, insert the hook in the stitch or space, pull up a loop, and finish as a normal sc.
Gauge and Checkpoints
Gauge matters more for the shape than for the exact size. If your stitches are too loose, the fans flare and the edges ripple. If they are too tight, the motif cups.
Use Rounds 1–2 as your test piece. That small diamond should measure 3.25 x 4 in (8.3 x 10.2 cm) point to point when lightly flattened with your hand.
Checkpoints (measured point to point, lightly flattened):
- After Round 1: 1.5 x 2 in (3.8 x 5.1 cm), with a center window of about 0.75 x 1.25 in (1.9 x 3.2 cm)
- After Round 2: 3.25 x 4 in (8.3 x 10.2 cm)
- After Round 3: 3.75 x 4.5 in (9.5 x 11.4 cm)
- After Round 4: 4.5 x 5.5 in (11.4 x 14.0 cm)
- After Round 6, blocked: 5 x 6 in (12.7 x 15.2 cm)
Border gauge: 9 sc = 1 in (2.5 cm) along the edge in Round 5.
If your piece is too big by more than 0.25 in (0.6 cm) at the Round 2 checkpoint, switch to a 2.0 mm hook. If it is too small by the same amount, switch to a 2.5 mm hook. If only the fans flare while the frame measures correctly, keep the same hook and work each tr a little shorter.
Pattern
Round 1 – Center Frame
Ch 20, then sl st in the first ch to form a ring. Keep the ring flat and untwisted.
Ch 1. *Work 7 sc into the ring (around the chain), ch 3; rep from * 3 more times. Sl st in the first sc to join.
Count: 28 sc (7 per side) and 4 ch-3 corner sps.
Put a marker in the first ch-3 sp. This is the top point. The second ch-3 sp is the right point, the third is the bottom point and the fourth is the left point. Spread the 28 sc evenly around the ring so the center window forms a small diamond.
Round 2 – Petal Fans
Ch 1, then sc in the same sc as the join (the first sc of the side).
*Ch 3, sk next 2 sc, 7-tr fan in next sc (the 4th sc of the side), ch 3, sk next 2 sc, sc in next sc (the 7th sc), (sc, ch 3, sc) in the corner ch-3 sp, sc in first sc of next side; rep from * 3 more times, leaving out the final sc on the last repeat. Sl st in the first sc to join.
Count: 28 tr (four fans of 7), 16 sc, 24 ch-1 sps inside the fans, 8 ch-3 side sps and 4 ch-3 corner sps.
Each fan radiates out from the middle of a side, and these fans form the petals. Pull each tr up to its full height. Short trebles crowd the fan, and the petals lose their leaf shape.
Round 3 – Petal Arches
Sl st in each of the next 3 ch of the ch-3 sp, then sl st in the first tr of the fan.
Ch 1, sc in the same tr. *(Ch 3, sc in next tr) 6 times, ch 4, (tr, ch 5, tr) in the next corner ch-3 sp, ch 4, sc in the first tr of the next fan; rep from * 3 more times, leaving out the final sc on the last repeat. Sl st in the first sc to join.
Count: 28 sc (one on top of each tr), 24 ch-3 arches (6 per fan), 8 ch-4 sps, 8 corner tr and 4 ch-5 corner sps.
The ch-4 bridges pass over the side sc and ch-3 sps of Round 2. Those stitches stay visible behind the mesh as an inner frame. Move the top-point marker up into the new top ch-5 sp.
On each fan, call the arches L1 through L6, from first to last.
Round 4 – Shaping Mesh
This round straightens the outer edges. The stitches get taller toward the corners and shorter over the top of each fan, so the curved fans become a diamond with straight sides.
Sl st in the next ch-3 arch (L1). Ch 3 (counts as dc), ch 2, hdc in L2, ch 2, sc in L3, ch 2, sc in L4, ch 2, hdc in L5, ch 2, dc in L6, ch 2, tr in the next ch-4 sp, ch 2.
Work the top corner in the ch-5 sp: (tr, ch 5, tr). Ch 2.
*Tr in next ch-4 sp, ch 2, dc in L1, ch 2, hdc in L2, ch 2, sc in L3, ch 2, sc in L4, ch 2, hdc in L5, ch 2, dc in L6, ch 2, tr in next ch-4 sp, ch 2, work the corner, ch 2; rep from * 2 more times.
After the top, the corners are worked in this order: right point (dc, ch 3, dc); bottom point (tr, ch 5, tr); left point (dc, ch 3, dc).
After the left point and its ch 2, tr in the last ch-4 sp, ch 2, then sl st in the 3rd ch of the beginning ch-3 to join.
Count per side: 8 sts (tr, dc, hdc, sc, sc, hdc, dc, tr) with 7 ch-2 sps between them.
Round total: 32 side sts, 8 corner sts (4 tr at the top and bottom, 4 dc at the left and right), 36 ch-2 sps (7 per side plus 2 per corner), 2 ch-5 sps and 2 ch-3 sps.
The taller top and bottom corners make the diamond longer than it is wide. Checkpoint: 4.5 x 5.5 in (11.4 x 14.0 cm). Each straight edge should measure about 3.5 in (8.9 cm).
Border
The border is two rounds of edging based on sc. It gives the lace a firm outline and adds 0.25 in (0.6 cm) all around.
Border gauge: 9 sc = 1 in (2.5 cm).
In this border, “per side” means the sc between two corner chain spaces. Corner chains are counted separately.
Round 5 – Edge Round
Ch 1, sc in the same st as the join. Working around, sc in each st and 2 sc in each ch-2 sp.
Work the corners like this:
- Top and bottom points: (2 sc, ch 3, 2 sc) in the ch-5 sp
- Left and right points: (2 sc, ch 1, 2 sc) in the ch-3 sp
Sl st in the first sc to join. Fasten off.
Count per side, from one corner chain to the next: 2 sc (from the first corner sp) + 1 sc (corner st) + 2 sc (ch-2 sp) + 8 sc (side sts) + 14 sc (7 ch-2 sps) + 2 sc (ch-2 sp) + 1 sc (corner st) + 2 sc (into the next corner sp) = 32 sc.
Round total: 128 sc, 2 ch-3 corner sps and 2 ch-1 corner sps.
Round 6 – Picot Edge
Work a standing sc in the top-point ch-3 sp, then ch 5, sc in the same sp.
Along each side, work: sc in next 2 sc, picot, (sc in next 4 sc, picot) 7 times, sc in next 2 sc.
At the next corner, work:
- Left and right points: (sc, ch 2, sc) in the ch-1 sp
- Bottom point: (sc, ch 5, sc) in the ch-3 sp
Repeat around. After the fourth side, sl st in the first sc to join and fasten off. The top ch-5 also works as a tiny hanging loop.
Count per side: 2 + (7 x 4) + 2 = 32 sc, each worked into one existing sc, plus 8 picots added. No extra sc are added along the side.
Round total: 128 side sc + 8 corner sc = 136 sc, plus 32 picots, 2 ch-5 points and 2 ch-2 points.
Why the math works: After Round 4, each edge of the diamond is about 3.5 in (8.9 cm). At 9 sc per inch, 32 sc cover 3.56 in (9.0 cm), which matches the edge closely, so the border lies flat without ruffling or pulling. Round 6 keeps the same 32 sc per side. Its picots sit outside the edge and don’t change the edge length. Together the two rounds add 0.25 in (0.6 cm) of depth all around, so 4.5 x 5.5 in (11.4 x 14.0 cm) becomes 5 x 6 in (12.7 x 15.2 cm).
Final Blocking
Cotton thread lace needs blocking. This step opens the center window and sharpens the points.
- Weave in all three ends along the back of the sc rounds. Don’t trim them yet.
- Soak the motif in cool water for 10 minutes. Press the water out gently in a towel. Do not wring it.
- Mark a diamond on your mat: 5 in (12.7 cm) between the left and right points and 6 in (15.2 cm) between the top and bottom points.
- Pin the four corner points first, through the ch-5 and ch-2 corner loops.
- Pin the middle of each edge so it runs in a straight line between the corners.
- Pin each picot outward along the edges.
- Use two pins at the top and bottom of the center window to open it into a narrow diamond of about 0.75 x 1.25 in (1.9 x 3.2 cm).
- Ease each fan into an even spread so the petals radiate straight out from the window.
- Let the motif dry completely, for at least 12 hours. Unpin it, then trim the woven ends.
Final Quality-Control Checklist
- The motif measures 5 x 6 in (12.7 x 15.2 cm) point to point.
- All four edges are straight, each about 3.9 in (9.9 cm) long.
- Every fan has 7 tr, with one sc in the arch round on top of each tr.
- The center window is an open diamond, not a round hole.
- Each side has 32 sc and 8 evenly spaced picots.
- The top and bottom points are sharper and longer than the side points.
- The piece lies flat with no cupping or rippling.
- All ends are woven in securely and can’t be seen from the front.
Troubleshooting
The fans ripple or curl. Your trebles are too long or too loose. Work each tr a little more snugly, or go down half a hook size for Round 2 only.
The motif cups like a bowl. Your chain spaces are too tight. Loosen each ch slightly, especially the ch-4 bridges and ch-5 corners in Round 3.
The edges bow outward in the middle. The sc and hdc over L3 and L4 in Round 4 are too tall. Keep them short and snug.
The edges dip inward in the middle. The mesh over the fan tops is too tight. Loosen the ch-2 sps in the center of each side.
Your border count is off. Recount Round 5 one side at a time using the 32-sc breakdown. The most common mistake is working 1 sc instead of 2 into a ch-2 sp.
The diamond looks square. Check that the top and bottom corners in Round 4 are tr with ch 5, not dc with ch 3. Then pin those points firmly when blocking.
Care
Hand wash in cool water with mild soap, press out the water in a towel, and dry flat, pinning back to 5 x 6 in (12.7 x 15.2 cm). If the points soften over time, cotton can take a warm iron under a pressing cloth.
Final Notes
The measurement chain is short and easy to check. The ring and Round 1 make a 0.75 x 1.25 in (1.9 x 3.2 cm) window inside a 1.5 x 2 in (3.8 x 5.1 cm) frame. The fans bring the motif to 3.25 x 4 in (8.3 x 10.2 cm), the arches to 3.75 x 4.5 in (9.5 x 11.4 cm), and the shaping mesh to 4.5 x 5.5 in (11.4 x 14.0 cm). The border adds 0.25 in (0.6 cm) all around, giving a blocked motif of 5 x 6 in (12.7 x 15.2 cm).
If you measure at each checkpoint, the stitch counts will hold the shape: 28 sc, then 28 tr, 24 arches, 32 side stitches, and 32 sc per side in the border.
Happy crocheting!