

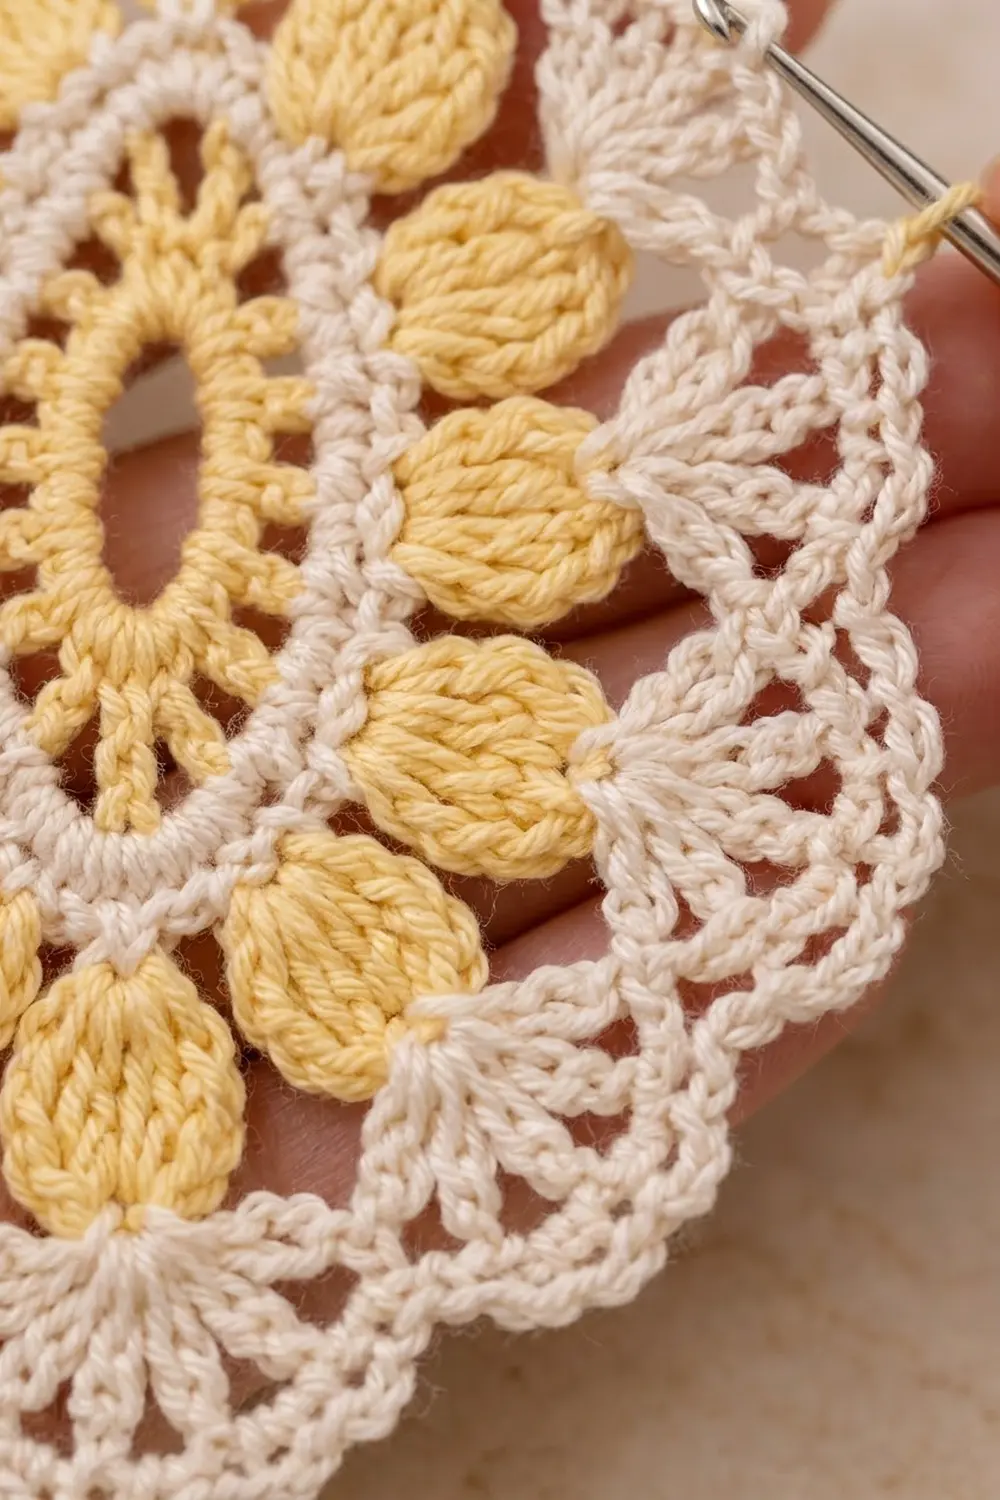
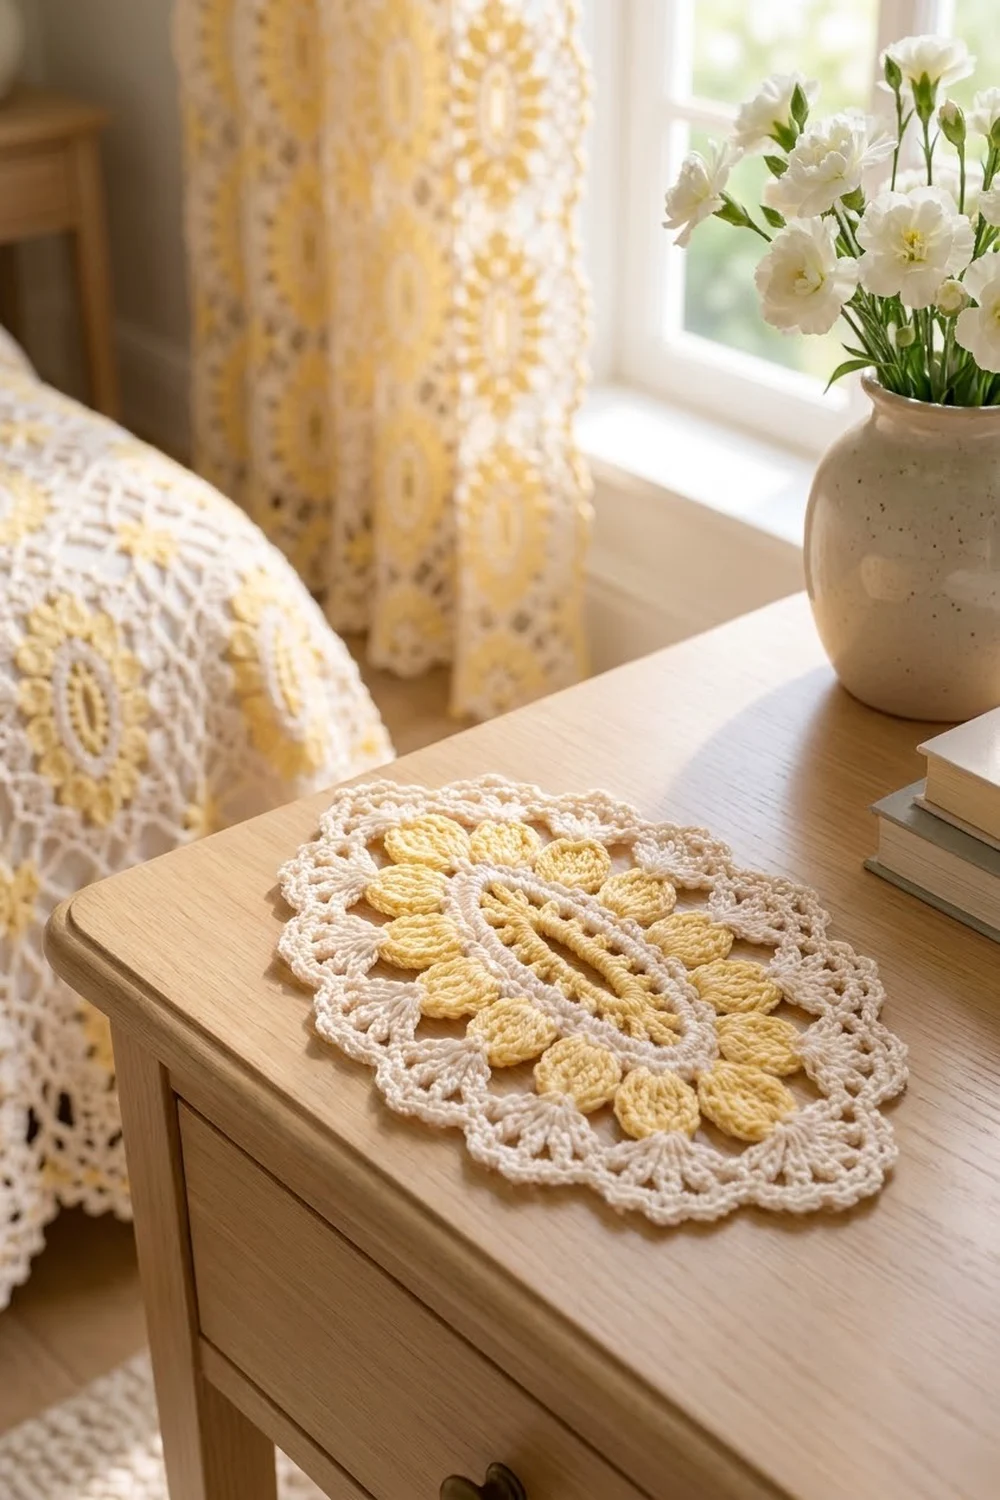
This oval lace motif pairs warm butter yellow with soft ivory for a fresh, sunny, vintage-cottage look. It has a narrow open slit at the center, ribbed yellow rounds, a ring of plump cluster petals, and an airy ivory lace edge finished with small picots.
The pattern uses US crochet terms throughout. The finished motif measures 7 x 8.75 inches (17.8 x 22.2 cm) after blocking.
You work the motif in one piece, in joined rounds, starting from a long chain ring. The yellow center rounds grow only at the two curved ends, so the oval keeps its shape. The ivory rounds frame it, the yellow petals circle it, and three ivory rounds plus a two-round scalloped border finish the edge.
It works as a doily, a table accent, or a decorative appliqué. Make one, block it, and enjoy it as a standalone piece.
Finished Size and Construction
- Finished size: 7 x 8.75 in (17.8 x 22.2 cm)
- Skill level: Intermediate
- Terminology: US
- Yarn weight: Fingering (#1 super fine) mercerized cotton
- Hook: 2.5 mm
- Number of pieces: 1
- Layout: Single oval motif, no joining
- Piece size: 7 x 8.75 in (17.8 x 22.2 cm)
- Size before border (after Rnd 7): 6 x 7.75 in (15.2 x 19.7 cm)
- Border depth: 0.5 in (1.3 cm) on every edge
Materials
Choose a smooth, mercerized cotton in fingering weight. It gives crisp stitch definition, petals that hold their shape, and lace that blocks flat. Avoid fuzzy or very soft yarns, because the picots and fans will blur.
- Color A, Butter Yellow: 10 g (about 34 m)
- Color B, Ivory/Cream: 15 g (about 51 m)
Tools:
– 2.5 mm crochet hook
– Tapestry needle
– Scissors
– Rustproof pins
– Blocking mat or folded towel
– Spray bottle
– Ruler or measuring tape
The quantities include a margin of about 25% for your gauge swatch and weaving in ends.
Abbreviations (US Terms)
- ch – chain
- sl st – slip stitch
- sc – single crochet
- hdc – half double crochet
- dc – double crochet
- tr – treble crochet
- st(s) – stitch(es)
- sp – space
- sk – skip
- rnd – round
- beg – beginning
Special stitches
Petal (5-tr cluster): Work everything in the same space. Yo twice, insert hook, yo and pull up a loop, (yo, pull through 2 loops) twice. Repeat from * to * 4 more times (6 loops on hook), yo and pull through all 6 loops.
Beg petal: Ch 4 (this counts as the first tr). Work a 4-tr cluster in the same space by repeating from * to * 4 times (5 loops on hook), then yo and pull through all 5 loops.
Fan: 5 dc in the same space.
Gauge and Checkpoints
The motif is your gauge swatch, so make one and check it against these numbers before buying extra yarn or adapting the design. Measure flat, without stretching, across the narrow width and then down the long length.
- After Rnd 1: 1.25 x 2.75 in (3.2 x 7.0 cm)
- After Rnd 2: 2 x 3.5 in (5.1 x 8.9 cm)
- After Rnd 3: 2.5 x 4 in (6.4 x 10.2 cm)
- After Rnd 5: 4.25 x 6 in (10.8 x 15.2 cm)
- After Rnd 7: 6 x 7.75 in (15.2 x 19.7 cm)
- After Rnd 9 (blocked): 7 x 8.75 in (17.8 x 22.2 cm)
If your motif is too big: Go down 0.25 mm in hook size. Also check that the chains in Rnds 4, 5, and 7 aren’t loose, since long chains are where lace grows most.
If it’s too small: Go up 0.25 mm in hook size. If only the outer rounds feel tight, loosen your chains and fans rather than changing hooks.
If the ends cup or ripple but the width is right: Your tension at the curved ends is off. See Troubleshooting.
Pattern
Foundation
With Color A, ch 26 and sl st into the first ch to form a long, narrow ring. Lay it flat as an oval: 1 ch at each tip (End A and End B) and 12 ch along each long side. The open center of this ring becomes the slit in the middle of the motif.
Rnd 1 (Color A)
Ch 3 (counts as dc). Work 5 dc in the same ch at End A, dc in each of the next 12 ch, 6 dc in the End B ch, and dc in each of the last 12 ch. Join with a sl st to the top of the beg ch-3.
Stitch count: 36 dc (6 at End A + 12 on the side + 6 at End B + 12 on the side).
The long sides get no increases, so the center stays a slim slit, framed by upright dc that read as ribs.
Rnd 2 (Color A)
Ch 3 (counts as dc). Dc in the same st (an increase), 2 dc in each of the next 5 sts, dc in each of the next 12 sts, 2 dc in each of the next 6 sts, and dc in each of the next 12 sts. Join to the top of the beg ch-3. Fasten off Color A.
Stitch count: 48 dc. That’s 36 worked 1-per-stitch plus 12 increases, which makes 12 at each end and 12 on each side.
Rnd 3 (Color B)
Join Color B with a sl st in the top of the beg ch-3. Ch 1. [Sc in the next st, 2 sc in the next st] 6 times across the end, then sc in each of the next 12 sts. Repeat from * to * once more. The first sc goes into the joining stitch. Join to the first sc.
Stitch count: 60 sc. That’s 48 worked 1-per-stitch plus 12 increases, which makes 18 at each end and 12 on each side.
Rnd 4 (Color B)
Ch 1, sc in the first st. Ch 3, sk 2 sts, sc in the next st. Repeat from * to * around, ending with ch 3, sk 2. Join to the first sc.
Stitch count: 20 sc and 20 ch-3 sps (6 sps at each end and 4 along each side).
Rnds 3 and 4 make the raised ivory frame around the yellow center. Fasten off Color B.
Rnd 5 (Color A): Petals
Join Color A in any ch-3 sp. Work a beg petal in that sp, then ch 4. Petal in the next ch-3 sp, ch 4. Repeat from * to * 18 more times. Join to the top of the beg petal. Fasten off.
Stitch count: 20 petals and 20 ch-4 sps.
Push each cluster gently to the front of the work with your fingertip so it puffs into a leaf shape.
Checkpoint: 4.25 x 6 in (10.8 x 15.2 cm).
Rnd 6 (Color B): Fans
Join Color B in the top of any petal. Ch 1, sc in the same st. Ch 2, fan in the next ch-4 sp, ch 2, sc in the top of the next petal. Repeat from * to * 18 more times. Then ch 2, fan in the last ch-4 sp, ch 2, and join to the first sc.
Stitch count: 20 sc, 20 fans (100 dc), and 40 ch-2 sps.
Each ivory fan sits between two yellow petals, as in the photo.
Rnd 7 (Color B): Mesh
Sl st in the next ch-2 sp, then sl st in each of the next 3 dc. You are now in the center dc of the fan. Ch 1, sc in that same center dc, ch 6. Sc in the center dc of the next fan, ch 6. Repeat from * to * 18 more times. Join to the first sc.
Stitch count: 20 sc and 20 ch-6 loops.
Checkpoint: 6 x 7.75 in (15.2 x 19.7 cm). This is the size before the border.
Border
Border gauge: Each blocked scallop measures about 1.2 in (3.0 cm) along the outer edge. The border adds 0.5 in (1.3 cm) all the way around.
For counting, divide the oval into 4 sections. Each curved end holds 6 loops, and each long side holds 4 loops (6 + 4 + 6 + 4 = 20).
Rnd 8 (Color B): Scallops
Sl st into the first ch-6 loop. Ch 1. In each ch-6 loop, work (sc, hdc, 2 dc, ch 3, 2 dc, hdc, sc). Join to the first sc.
Stitch count: 160 sts (8 per scallop) and 20 ch-3 tips.
- Each end: 48 sts and 6 tips
- Each side: 32 sts and 4 tips
Rnd 9 (Color B): Picot Edge
Ch 1. Sc in each of the next 4 sts, then (sc, ch 3, sc) in the ch-3 tip, then sc in each of the next 4 sts. Repeat from * to * around. Join to the first sc and fasten off.
Stitch count: 200 sc and 20 ch-3 picots. That’s 160 sc worked 1-per-stitch plus 40 sc added in the tips.
- Each end: 60 sc and 6 picots (48 worked 1-per-stitch + 12 added)
- Each side: 40 sc and 4 picots (32 worked 1-per-stitch + 8 added)
- Check: 60 + 40 + 60 + 40 = 200
Why the math works: Every loop from Rnd 7 becomes exactly one scallop, so the border can’t add or lose repeats. Each scallop’s height comes from its hdc-dc-dc build. The extra 2 sc at each tip spread the point just enough to sit flat, without ruffling the long sides or cupping the curved ends.
Final Blocking
- Weave in all ends along stitches of the same color. Don’t trim them yet.
- Soak the motif in lukewarm water for 10 minutes, then press out the water in a towel. Don’t wring it.
- Mark an oval on your mat that is 7 x 8.75 in (17.8 x 22.2 cm).
- Pin the 4 points first: the tip of each end and the middle of each long side.
- Pin each of the 20 picots evenly around the marked oval, keeping each scallop about 1.2 in (3.0 cm) wide.
- Open each fan and shape each petal with your fingers, so the petals stay puffed and point outward.
- Ease the center slit straight and narrow, about 0.25 in (0.6 cm) wide.
- Mist lightly and let it dry completely, about 24 hours.
- Unpin, trim the ends, and re-measure: it should be 7 x 8.75 in (17.8 x 22.2 cm).
Final Quality-Control Checklist
- The center slit is open, straight, and centered.
- Rnd 2 has 48 dc, and the long sides are straight with no extra stitches.
- The ivory frame has 60 sc with no gaps.
- There are exactly 20 petals, evenly spaced, all puffed toward the front.
- There are 20 fans, each sitting between two petals.
- There are 20 mesh loops and 20 scallops.
- There are 20 picots, evenly spaced, with 200 sc in the final round.
- The size before the border was 6 x 7.75 in (15.2 x 19.7 cm), and the finished size is 7 x 8.75 in (17.8 x 22.2 cm).
- The ends are woven in securely with no color showing through.
Troubleshooting
The center ring twists: Check that the chain isn’t twisted before you join. If Rnd 1 is already done, redo it from the foundation.
The center slit closes or gapes: Make sure you didn’t add stitches along the 12-stitch sides in Rnds 1–3.
The ends cup: Your increases are too tight. Loosen the 2-dc increases in Rnd 2, or the chains in Rnd 4.
The ends ripple: You have too many stitches or chains that are too long. Recount Rnd 3 (18 sc per end), and keep the Rnd 7 chains at exactly 6.
The petals look flat: Pull up taller loops on each tr and push the cluster forward before you start Rnd 6.
The scallops flare: Check that Rnd 9 adds only 2 sc per tip, not 3.
The motif is uneven after blocking: Re-wet it and re-pin, starting from the 4 points.
Care
Hand wash in cool water with a mild soap, press out the water in a towel, and dry flat, reshaping the petals while damp. Steam lightly from the back if it needs refreshing.
Final Notes
Follow the measurement chain and the motif will come out right:
- Rnd 1: 1.25 x 2.75 in (3.2 x 7.0 cm)
- Rnd 3: 2.5 x 4 in (6.4 x 10.2 cm)
- Rnd 5: 4.25 x 6 in (10.8 x 15.2 cm)
- Rnd 7: 6 x 7.75 in (15.2 x 19.7 cm)
- Finished: 7 x 8.75 in (17.8 x 22.2 cm), after the 0.5 in (1.3 cm) border
Count at every checkpoint, keep your chains even, and let blocking bring out the petals. Happy crocheting!