

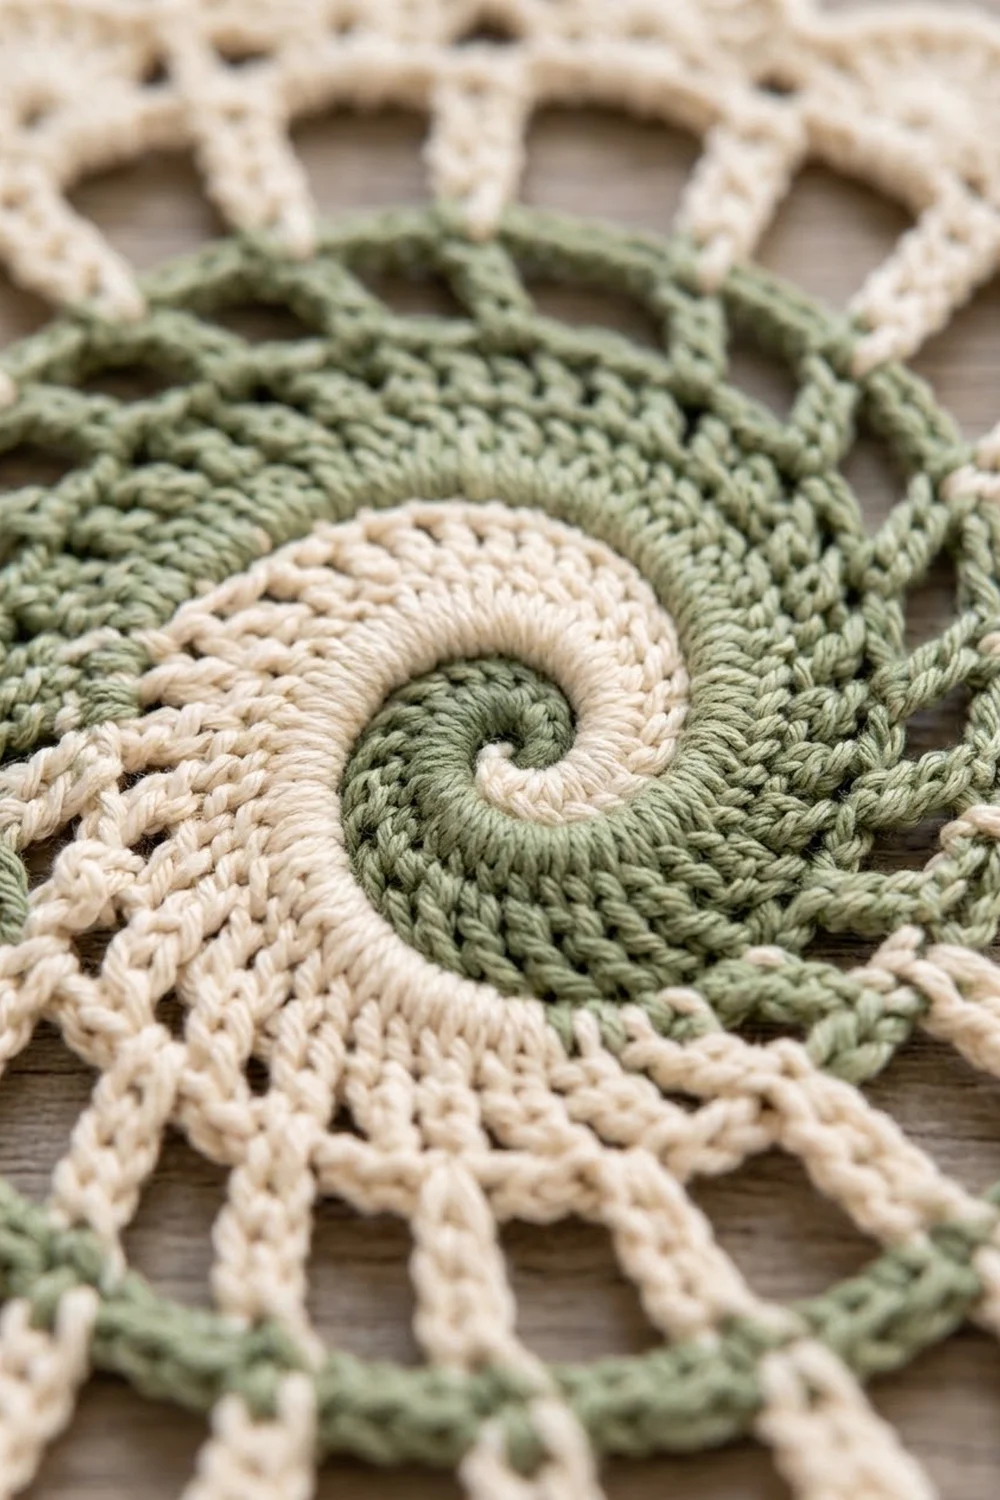
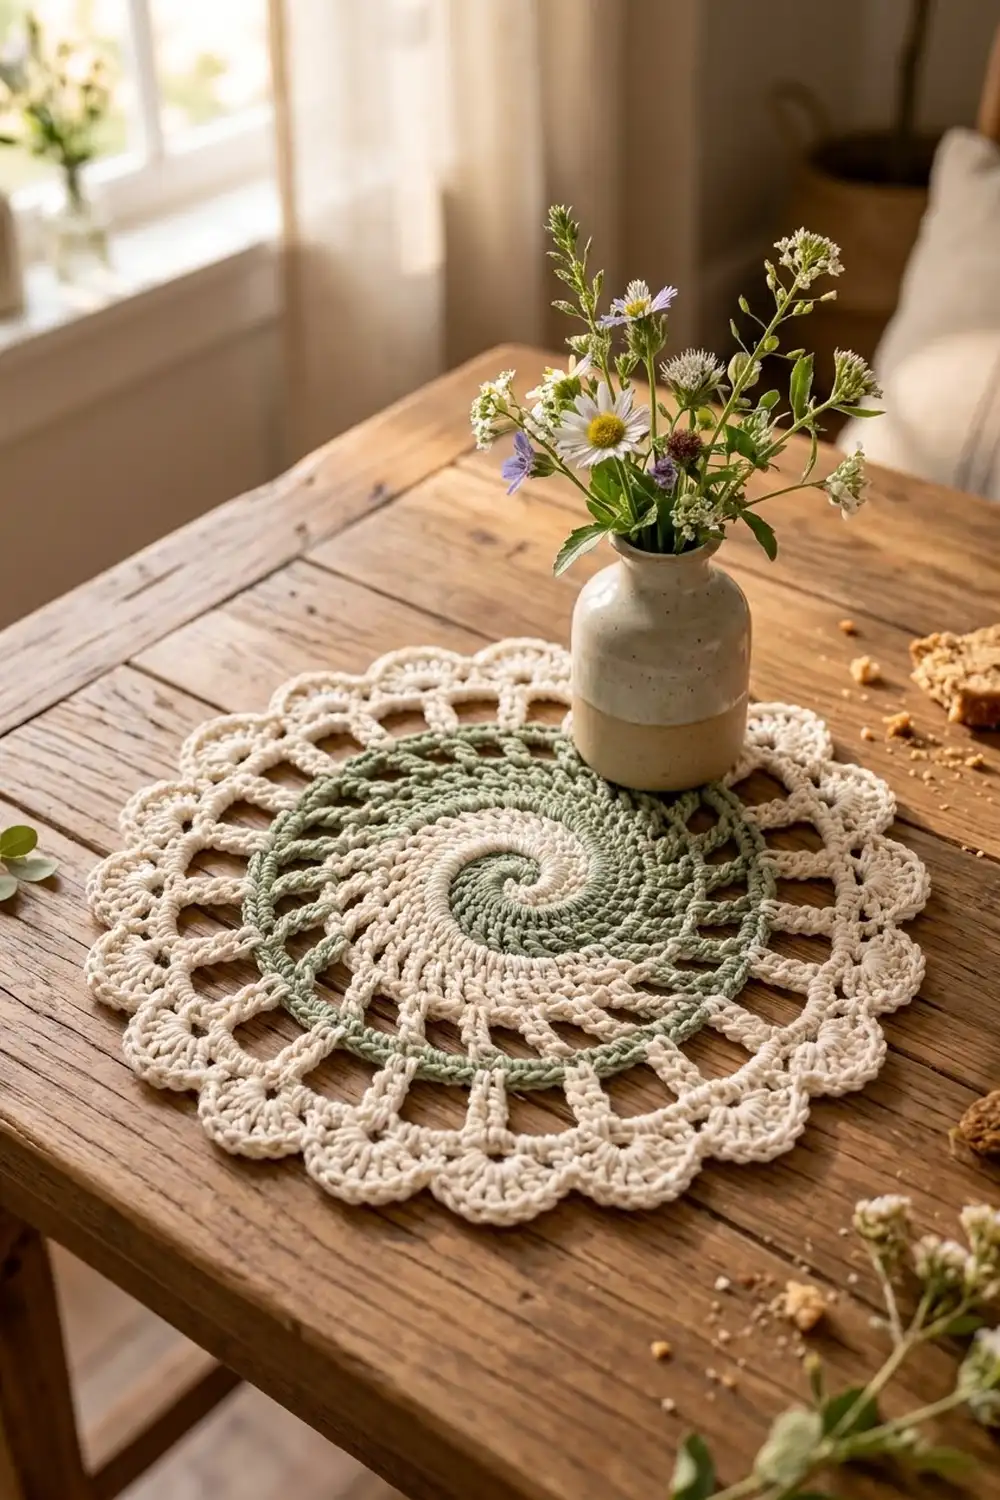
The Sage Nautilus Swirl Doily is a single round motif with a two-color spiral at its center. A sage green arm and a cream arm wind around each other from the middle outward, like the inside of a seashell. A solid sage ring closes the swirl. After that, cream lace takes over: a ring of open ladder spokes, a solid band, and a scalloped shell edge with soft loops.
The colors are quiet and natural. Sage green and warm cream work well in a cottage, farmhouse, or botanical room. The doily looks lovely laid flat on a wooden table under a vase, a candle, or a small potted plant, and it makes a thoughtful handmade gift.
This pattern uses US crochet terms. The finished doily measures 8.5 in (21.6 cm) across after blocking.
Once the swirl is set up, the construction is simple. For Rounds 1–6 you work both colors at the same time in a continuous spiral. Then you finish the swirl in sage and switch to cream for the lace rounds and the scalloped border. The whole doily is worked in the round as one piece, so there’s no sewing.
Finished Size and Construction
- Finished size: 8.5 in (21.6 cm) diameter after blocking
- Skill level: Intermediate (the two-color swirl is the only unusual step)
- Terminology: US crochet terms
- Yarn weight: DK / light worsted (weight 3) cotton
- Hook: 4.0 mm (G-6)
- Number of pieces: 1
- Layout: a single round motif, worked from the center out
- Swirl center size (after Rnd 8): 4.75 in (12.1 cm)
- Size before border (after Rnd 11): 7.5 in (19.1 cm)
- Border depth: 0.5 in (1.3 cm) on each side, which adds 1 in (2.5 cm) to the diameter
Materials
Choose a smooth mercerized or combed cotton in DK weight. Cotton shows the spiral clearly and blocks flat. Avoid fuzzy or splitty yarn, because the swirl depends on crisp stitch definition.
- Color A, sage green: 10 g, about 25 m
- Color B, cream: 20 g, about 50 m
These amounts include a margin of about 20 percent to cover your gauge test, differences in tension, and weaving in ends.
Tools:
- 4.0 mm (G-6) crochet hook
- 2 locking stitch markers to hold the two working loops, plus 14 extra markers (optional)
- Tapestry needle
- Scissors
- Ruler or tape measure
- Blocking mat or folded towel, rustproof pins, and a spray bottle
Abbreviations (US Terms)
- ch – chain
- sl st – slip stitch
- sc – single crochet
- hdc – half double crochet
- dc – double crochet
- tr – treble crochet
- sk – skip
- sp – space
- st(s) – stitch(es)
- Rnd – round
Special technique – two-color swirl: You keep two working loops live at the same time. Work a section with one color, pull its loop up to about 1 in (2.5 cm), and hold it with a stitch marker. Then pick up the other color. Each color always works into the stitches directly in front of its own loop. It stops when it reaches the other color’s parked loop. Never turn the work.
Gauge and Checkpoints
Gauge matters more than usual in a lace doily, because a small difference in each round adds up over 13 rounds. Make the swirl center first and measure it before you go on.
Gauge: Rnds 1–4 of the swirl = 2.75 in (7.0 cm) across, measured flat.
How to measure: Lay the piece flat without stretching it. Measure straight across the center in two directions and average the two numbers.
Checkpoints:
- After Rnd 1: about 1 in (2.5 cm)
- After Rnd 4: 2.75 in (7.0 cm)
- After Rnd 6: 4 in (10.2 cm)
- After Rnd 8: 4.75 in (12.1 cm)
- After Rnd 9: 6 in (15.2 cm)
- After Rnd 10: 6.75 in (17.1 cm)
- After Rnd 11: 7.5 in (19.1 cm)
- After Rnd 13 and blocking: 8.5 in (21.6 cm)
If your piece is too big, go down to a 3.75 mm (F-5) hook. If it’s too small, go up to a 4.5 mm (7) hook. If the center cups, your stitches are too tight. If it ruffles, they’re too loose or you added extra stitches. Check your stitch count before you change hooks.
Pattern: Swirl Center
You’ll use Color A (sage) and Color B (cream). Work both colors together for Rnds 1–6.
Rnd 1 (setup): With A, make a magic ring. Into the ring, work sc, hdc, 2 dc. Pull the A loop long and put it on a marker. With B, work into the same ring: sc, hdc, 2 dc. Pull the B loop long and put it on a marker. Pull the ring closed. (8 sts: 4 A, 4 B)
From here on, each color works into the stitches the other color made in the previous pass. Count each round as A’s half plus B’s half.
Tip: Keep each parked loop long enough that it can’t pull free, but not so long that it tangles. When you pick up a color, tighten its loop back to normal size before you make the first stitch. The sc and hdc at the start of each arm in Rnd 1 are what give the spiral its pointed, tapered tip.
Rnd 2: Pick up A. Work 2 dc in each of the next 4 sts (8 A sts). Park A. Pick up B. Work 2 dc in each of the next 4 sts (8 B sts). Park B. (16 sts)
Rnd 3: With A, dc in next st, 2 dc in next st; repeat from * 3 more times (12 A sts). Park A. With B, repeat the same sequence (12 B sts). (24 sts)*
Rnd 4: With A, dc in next 2 sts, 2 dc in next st; repeat from * 3 more times (16 A sts). Park A. With B, repeat (16 B sts). (32 sts)*
Checkpoint: 2.75 in (7.0 cm) across. You should see two clear arms curling in the same direction.
Rnd 5: With A, dc in next 3 sts, 2 dc in next st; repeat from * 3 more times (20 A sts). Park A. With B, repeat (20 B sts). (40 sts)*
Rnd 6: With A, dc in next 4 sts, 2 dc in next st; repeat from * 3 more times (24 A sts). Park A.
With B, dc in next 4 sts, 2 dc in next st; repeat from * 2 more times (18 B sts). Taper the last repeat: dc in next 2 sts, hdc in next st, sc in next st, (sc, sl st) in next st (6 B sts). Fasten off B. (48 sts: 24 A, 24 B)
The taper lets the cream arm fade smoothly into the sage ring instead of ending in a step.
Rnd 7 (A only): Pick up A. Work all the way around, first over the 24 B sts and then over the 24 A sts from Rnd 6: dc in next 5 sts, 2 dc in next st; repeat from * 7 more times. Sl st in the first dc of this round. (56 sts)*
Rnd 8 (A): Ch 1, sc in each st around. Join with sl st to first sc. (56 sc) Fasten off A.
Checkpoint: the swirl center is 4.75 in (12.1 cm) across and lies flat.
Pattern: Lace Rounds
Work the rest of the doily in Color B (cream).
Rnd 9 (spokes): Join B with a sl st in any sc. Ch 4 (counts as tr), ch 3, sk next 3 sts, tr in next st, ch 3, sk next 3 sts; repeat from * 12 more times. Join with sl st to top of ch-4. (14 tr, 14 ch-3 sps)*
Check: 14 repeats × 4 base sts = 56, which matches Rnd 8.
Rnd 10 (ladder): Ch 3 (counts as dc), ch 5, dc in next tr, ch 5; repeat from * 12 more times. Join with sl st to top of ch-3. (14 dc, 14 ch-5 sps)*
Each dc sits directly on a tr, so the spokes line up into straight ladder rungs that radiate out from the sage ring. Checkpoint: 6.75 in (17.1 cm).
Rnd 11 (solid band, conversion round): Ch 3 (counts as dc), 5 dc in next ch-5 sp, dc in next dc, 5 dc in next ch-5 sp; repeat from * 12 more times. Join with sl st to top of ch-3.
(84 dc = 14 dc worked 1-per-existing-dc + 70 dc worked into the ch-5 sps)*
Checkpoint: 7.5 in (19.1 cm). This is your size before the border.
Border
Border gauge: one shell repeat (6 base sts) = about 1.7 in (4.3 cm) along the outer edge of Rnd 11.
Optional: before you start, place a marker in every 6th st of Rnd 11, starting with the joining st. Each marked st gets an sc, so you can check your spacing as you go.
Rnd 12 (shells): Ch 1, sc in same st as join, sk next 2 sts, 7 dc in next st, sk next 2 sts, sc in next st; repeat from * 12 more times, sk next 2 sts, 7 dc in next st, sk last 2 sts. Join with sl st to first sc.
(14 shells: 98 dc + 14 sc = 112 sts)*
Rnd 13 (loop trim, conversion round): Sl st in next sc, [sc in next dc, ch 1] 6 times, sc in next dc; repeat from * 13 more times. Join with sl st to first sl st. Fasten off.
(196 sts = 112 sts worked 1-per-existing-st + 84 ch-1 added)*
Each repeat is 1 sl st + 7 sc + 6 ch = 14 sts, and 14 × 14 = 196.
Why the math works: Rnd 11 has 84 sts, and each shell repeat uses exactly 6 of them: the sc, 2 skipped sts, the shell st, and 2 more skipped sts. 84 ÷ 6 = 14 shells with nothing left over. That means the scallops are evenly spaced and the last shell meets the first sc without crowding. The 14 shells also match the 14 spokes from Rnds 9–10, so each scallop sits evenly around the spoke rounds. The ch-1 spaces in Rnd 13 lengthen the outer edge so it can stretch to the larger circumference without pulling the doily into a bowl.
Final Blocking
- Weave in all ends on the wrong side, following the direction of the stitches. Weave sage ends into sage stitches and cream ends into cream stitches so nothing shows through the lace.
- Spray the doily until it’s evenly damp. Or soak it in cool water and squeeze the water out in a towel without wringing.
- Lay it right side up on a blocking mat. Draw an 8.5 in (21.6 cm) circle in light pencil on paper and put it under the mat as a guide.
- Pin the center flat, then pin each of the 14 spokes straight out from the middle.
- Pin the tip of each scallop to the 8.5 in (21.6 cm) line. Work in opposite pairs so the circle stays round.
- Gently open each ch-1 loop of Rnd 13 with your fingertip.
- Let it dry completely before you unpin it, usually 6–12 hours.
Final Quality-Control Checklist
- The diameter is 8.5 in (21.6 cm) in every direction.
- The two swirl arms curl in the same direction, and both reach the sage ring.
- The cream arm tapers smoothly at the end of Rnd 6 with no hard step.
- Rnd 8 has 56 sc and forms an even sage ring.
- There are 14 spokes, 14 ladder spaces, and 14 scallops.
- The doily lies flat without cupping or ruffling.
- All ends are woven in and invisible from the right side.
Troubleshooting
The swirl looks like stripes instead of a spiral. You worked past the other color’s loop. Each color has to stop at the other color’s parked loop.
The center cups. Your dc are too tight. Loosen your tension, or go up one hook size for Rnds 1–8 only.
The center ruffles. Count Rnds 5–7. One extra increase in either half throws the circle off quickly.
The yarns twist together. Always park the color you dropped in front of the work and pick up the new color from behind it. Or untwist the yarns by turning the doily back every few rounds.
The spokes lean to one side. Make sure each Rnd 10 dc goes into the top of a tr and not into a ch-3 sp.
The last shell is crowded. Rnd 11 doesn’t have 84 sts. Recount the 5-dc groups in each ch-5 sp.
The edge flips up. Your Rnd 13 chains are too tight. Rework the round with looser ch-1s, or block more firmly at 8.5 in (21.6 cm).
Care
Hand wash in cool water with mild soap. Roll the doily in a towel to remove water, then dry it flat, reshaping it to 8.5 in (21.6 cm).
Final Notes
The measurement chain is easy to follow. Rnds 1–4 measure 2.75 in (7.0 cm), and the finished sage swirl measures 4.75 in (12.1 cm). The spoke and ladder rounds bring it to 6 in (15.2 cm) and then 6.75 in (17.1 cm). The solid band reaches 7.5 in (19.1 cm), and the scalloped border brings the doily to 8.5 in (21.6 cm). If you match each checkpoint, the finished piece will match too.
The stitch counts follow just as clearly: 8, 16, 24, 32, 40, 48, 56, and 56 in the center. Then come 14 spokes, an 84-dc band, 14 shells totaling 112 sts, and a 196-st trim. Measure early, count often, and enjoy watching the shell-like spiral open up under your hook.
Happy crocheting!