

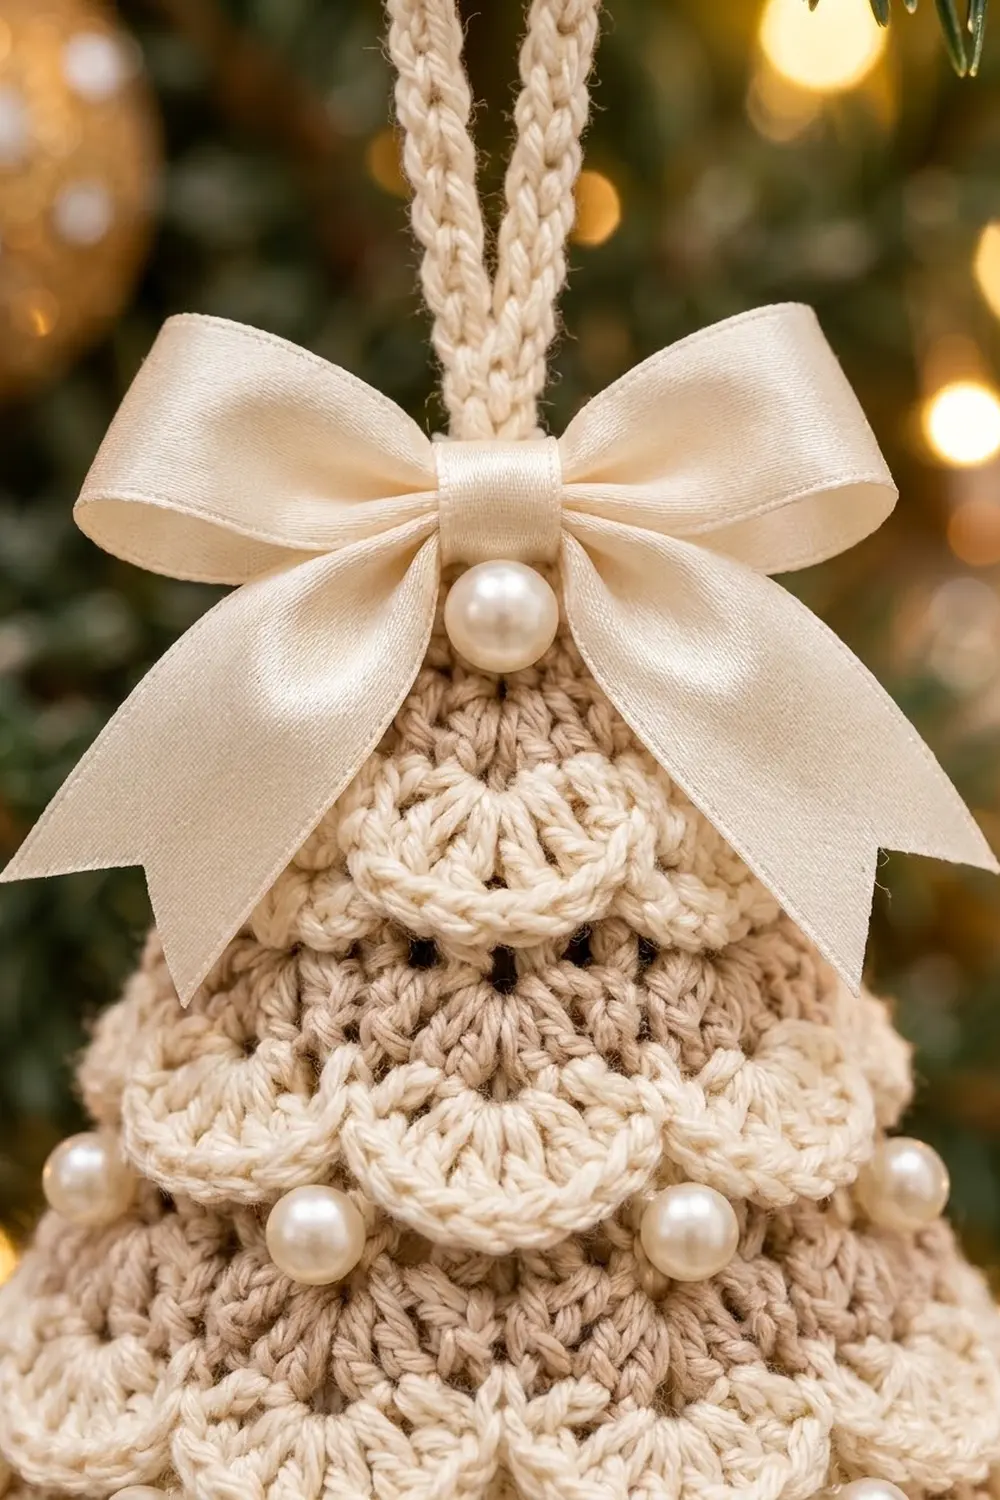
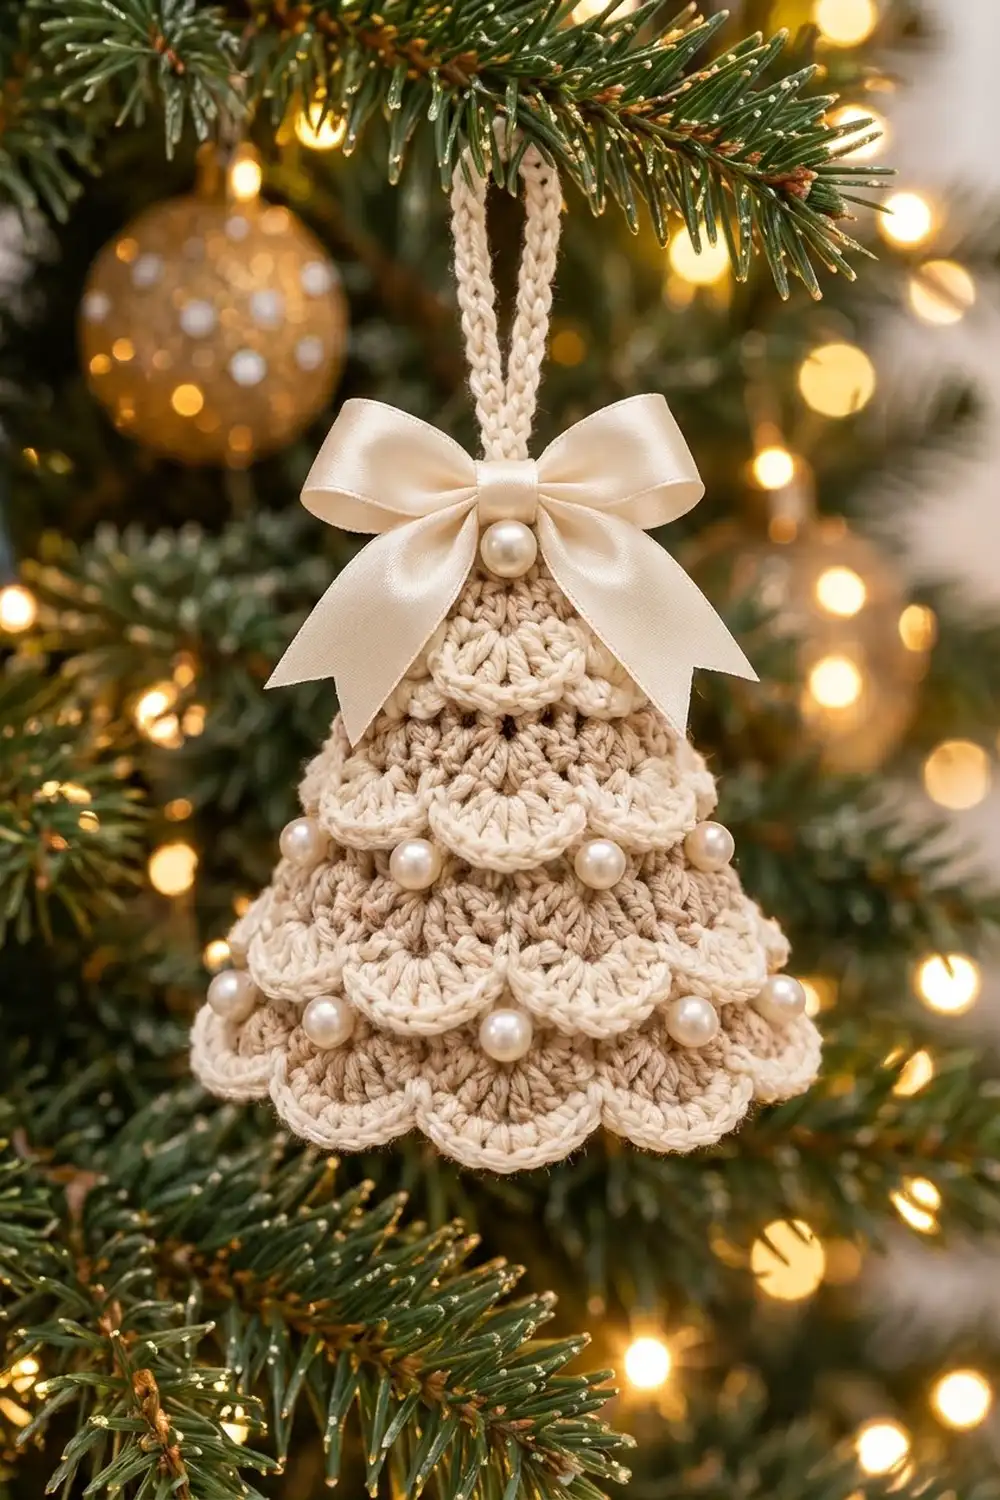
The Pearl Cascade Christmas Tree Ornament is a small, flat tree made of six tiers of soft fans. Each tier has a light beige body edged with a raised cream scallop, so the tree looks layered, like frosted boughs. Ivory pearls sit where the scallops meet, and a satin bow and a crocheted cord loop finish the top.
The palette stays neutral: cream, oatmeal beige and ivory. That fits a vintage, farmhouse or white-and-gold tree, and a set of these looks good on one tree, a garland hook or a gift package.
This pattern uses US crochet terms. The finished ornament is 4.5 in (11.4 cm) wide at the base and 4.125 in (10.5 cm) tall from tip to bottom scallop. The hanging loop adds 2.5 in (6.4 cm) above the tip.
The tree is one piece, worked from the tip down in rows. Beige rows of 7-dc fans alternate with cream rows that outline each fan in single crochet. Each new beige row adds one fan, which forms the triangle. A single cream border runs up one side, around the tip and down the other side. Pearls, the bow and the cord are added last.
Finished Size and Construction
- Finished size: 4.5 in (11.4 cm) wide × 4.125 in (10.5 cm) tall, not counting the loop
- Skill level: Easy-intermediate
- Terminology: US crochet terms
- Yarn weight: Sport (#2) cotton
- Hook: 3.0 mm
- Number of pieces: 1 tree, plus 1 hanging cord
- Layout: Single flat triangle of 6 tiers (1, 2, 3, 4, 5 and 6 fans)
- Piece size before border: 4.25 in (10.8 cm) wide × 4 in (10.2 cm) tall
- Border depth: 0.125 in (0.3 cm) along each slanted side and at the tip; the bottom scallops have no border
Materials
Use a smooth, mercerized or combed cotton in sport weight. Cotton gives the fans clear edges and holds the scallops after blocking. Avoid fuzzy or very stretchy yarns, because the stitch definition carries the whole design.
Yarn:
– Color A – Oatmeal Beige: 6 g, about 18 m (19.7 yd)
– Color B – Cream/Ivory: 8 g, about 24 m (26.2 yd), covering the scallop rows, border and hanging cord
These amounts include a margin of about 25% for swatching and tails.
Tools and notions:
– 3.0 mm crochet hook
– Tapestry needle
– Sewing needle and ivory sewing thread
– 22 ivory pearl beads, 6 mm (buy a few spares)
– 12 in (30.5 cm) of ivory satin ribbon, 1 in (2.5 cm) wide
– Scissors
– Stitch marker
– Blocking mat, rust-proof pins and a spray bottle
– Optional: light spray starch
Abbreviations (US Terms)
- ch – chain
- sl st – slip stitch
- sc – single crochet
- dc – double crochet
- sk – skip
- sp – space
- st(s) – stitch(es)
- RS – right side
Special stitch – Fan: 7 dc worked into the same stitch or space.
Trim group: The 9 sc worked across one fan in a cream row: sc in each of the first 3 dc, 3 sc in the center (4th) dc, then sc in each of the last 3 dc.
Gap: The space between two neighboring trim groups. It sits directly above the sc you skipped in the beige row.
Gauge and Checkpoints
Gauge is measured by fan size, not by a square swatch.
- Fan gauge: One fan with its cream trim group (Rows 1–2) measures 0.75 in (1.9 cm) across and about 0.6 in (1.5 cm) tall.
- Fan pitch in later rows: 0.7 in (1.8 cm) from the center of one fan to the next.
- Border gauge: 5.5 sc = 1 in (2.5 cm) along an edge.
Work Rows 1–4 as your test piece. You can keep it as the start of your ornament if it measures correctly.
Checkpoints:
– After Row 2: 0.75 in (1.9 cm) wide × 0.6 in (1.5 cm) tall
– After Row 4: 1.5 in (3.8 cm) wide × 1.25 in (3.2 cm) tall
– After Row 8: 2.9 in (7.4 cm) wide × 2.75 in (7.0 cm) tall
– After Row 12: 4.25 in (10.8 cm) wide × 4 in (10.2 cm) tall
Measure with the piece lying flat and relaxed. Each tier adds about 0.67 in (1.7 cm) of height.
If your piece is too big: Change to a 2.75 mm hook, or pull the dc a little shorter.
If your piece is too small: Change to a 3.25 mm hook.
A difference of 0.125 in (0.3 cm) at Row 4 grows to about 0.375 in (1.0 cm) by Row 12, so fix it early.
Pattern Notes
- Work every row with the RS facing you and do not turn.
- Fasten off at the end of every row, leaving a 3 in (7.6 cm) tail. Join the next color at the starting edge.
- At the start of each row, crochet over the tails at that edge. The border will cover the rest.
- The beginning ch-3 of each beige row counts as the first dc of the first fan.
- Fans open downward. The tip is at the top of the work.
Tree Body
Row 1 (Color A, tip fan): Ch 4. Work 6 dc in the 4th ch from the hook. The skipped ch-3 counts as 1 dc. Fasten off. (7 dc, 1 fan)
Row 2 (Color B, trim): With RS facing, join Color B in the top of the beginning ch-3. Ch 1. Sc in the same st and in each of the next 2 dc, 3 sc in the next dc, then sc in each of the last 3 dc. Fasten off. (9 sc, 1 trim group)
Row 3 (Color A): Join Color A with a sl st in the first sc. Ch 3 (counts as dc) and work 6 dc in the same sc (first fan made). Sk 3 sc, sc in the next sc (the center sc of the group). Sk 3 sc, then work a fan in the last sc. Fasten off. (2 fans + 1 sc = 15 sts)
Row 4 (Color B, trim): Join Color B in the top of the beginning ch-3. Ch 1. Work a trim group across the first fan, starting in the same st. Sk the sc, then work a trim group across the next fan. Repeat from * once more if any fans remain; in this row there is 1 fan left. Fasten off. (18 sc, 2 trim groups)
Beige fan rows (Rows 5, 7, 9 and 11):
1. Join Color A with a sl st in the first sc. Ch 3 and work 6 dc in the same sc (first fan).
2. Sk 3 sc, then sc in the next sc, which is the center of the first group.
3. Sk 4 sc, fan in the gap, sk 4 sc, sc in the next sc (the center of the next group). Repeat from * until you have worked the sc in the center of the last group.
4. Sk 3 sc, then work a fan in the last sc. Fasten off.
The repeat runs one time fewer than the number of trim groups in the row above.
Cream trim rows (Rows 6, 8, 10 and 12):
1. Join Color B in the top of the beginning ch-3. Ch 1.
2. Work a trim group across the first fan, starting in the same st.
3. Sk the sc, then work a trim group across the next fan. Repeat from * across.
4. Fasten off.
Stitch counts:
| Row | Color | Fans / groups | Sc between fans | Total sts |
|---|---|---|---|---|
| 1 | A | 1 fan | 0 | 7 |
| 2 | B | 1 group | – | 9 |
| 3 | A | 2 fans | 1 | 15 |
| 4 | B | 2 groups | – | 18 |
| 5 | A | 3 fans | 2 | 23 |
| 6 | B | 3 groups | – | 27 |
| 7 | A | 4 fans | 3 | 31 |
| 8 | B | 4 groups | – | 36 |
| 9 | A | 5 fans | 4 | 39 |
| 10 | B | 5 groups | – | 45 |
| 11 | A | 6 fans | 5 | 47 |
| 12 | B | 6 groups | – | 54 |
How the counts work:
– Each beige row with n fans has (7 × n) dc plus (n − 1) sc. For Row 11, that is 42 + 5 = 47.
– Each cream row works 9 sc over each fan’s 7 dc and skips the sc between fans, so it has 9 × n sts. For Row 12, that is 9 × 6 = 54.
– Each beige row works a fan in the first sc, in every gap and in the last sc. That gives (groups above + 1) fans, so each tier gains exactly one fan.
The cream trim groups sit across the beige fans, which makes the raised scalloped edge. Each new fan starts in a gap, so each tier is offset by half a fan from the one above, like the boughs of a tree.
Hanging Cord
With Color B, ch 36. Sl st in the back bump of the 2nd ch from the hook and in each ch across. (35 sl st)
The cord measures about 6 in (15.2 cm). Leave long tails at both ends for sewing. Set it aside until finishing.
Border
Border gauge: 5.5 sc = 1 in (2.5 cm). Each slanted side of the tree measures about 4.53 in (11.5 cm), or about 0.75 in (1.9 cm) per tier.
Border Row (Color B):
1. With RS facing, join Color B in the right edge of Row 12, at the bottom-right corner.
2. Right side: Work up the edge of the tree, enclosing the tails as you go. Put 3 sc in the edge of each beige row and 1 sc in the edge of each cream row. Over 6 tiers that is 6 × (3 + 1) = 24 sc.
3. Tip: Work 3 sc into the foundation ch at the tip. This tip group is separate from the side counts. (3 sc)
4. Left side: Work down the edge in the same way, with 3 sc in each beige row edge and 1 sc in each cream row edge. (24 sc)
5. End at the bottom-left corner of Row 12. Fasten off.
Total: 24 + 3 + 24 = 51 sc. The bottom scallops have no border.
Why the math works: 24 sc over 4.53 in (11.5 cm) is about 5.3 sc per inch, which is very close to the 5.5 sc border gauge. The edge will lie flat without rippling or pulling in. Each sc adds about 0.125 in (0.3 cm) on each side, so the width grows from 4.25 in (10.8 cm) to 4.5 in (11.4 cm). The tip group adds about 0.125 in (0.3 cm) of height, so the height grows from 4 in (10.2 cm) to 4.125 in (10.5 cm).
Weave in the border tails, then trim the enclosed row tails close to the edge.
Final Blocking
- Draw a triangle on paper: a 4.5 in (11.4 cm) base and 4.125 in (10.5 cm) tall from the base to the tip. Place it under clear plastic on your blocking mat.
- Spray the ornament until it is damp, not soaked.
- Lay it face up on the template. Pin the tip, then the two bottom corners.
- Pin the center of each of the six bottom scallops so they curve evenly.
- Ease the sides straight along the template lines. Lift each cream scallop edge slightly so it sits over the beige tier below.
- Mist with starch if you want a crisp ornament. Let it dry completely.
- Pearls: Sew one 6 mm pearl at each gap of Rows 4, 6, 8, 10 and 12 (1 + 2 + 3 + 4 + 5 = 15). Sew one more at each side end of Rows 6, 8 and 10 (6 pearls). That is 21 pearls on the tree.
- Cord: Fold the cord in half. Sew both ends to the back of the tip, overlapping 0.5 in (1.3 cm), so a 2.5 in (6.4 cm) loop rises above the tip.
- Bow: Tie the ribbon into a bow about 2.25 in (5.7 cm) wide. Trim the tails at an angle. Sew the bow over the front of the tip, then sew the 22nd pearl to the bow knot.
Final Quality-Control Checklist
- Tier fan counts are 1, 2, 3, 4, 5 and 6, from the tip down
- Row 11 has 47 sts and Row 12 has 54 sc
- The border has 24 sc on each side and 3 sc at the tip, for a total of 51
- The piece measures 4.5 in (11.4 cm) × 4.125 in (10.5 cm)
- Both slanted sides are straight and the same length
- All six bottom scallops are the same size
- No tails show on the front
- 21 pearls on the tree and 1 on the bow, all sewn firmly
- The loop is centered and 2.5 in (6.4 cm) tall
- The bow is level and covers the tip
Troubleshooting
The tree curls or cups. The fans are tighter than the trim. Block firmly, or redo the trim rows a little looser.
The scallops are flat or wavy. Check that you worked 3 sc in each center dc and skipped the sc between fans.
A tier has the wrong number of fans. Count the trim groups in the row above. A beige row always has one more fan than the row above has trim groups.
The sides ripple. Too many border sc. Use 2 sc in the beige row edges instead of 3.
The sides pull in. Too few border sc. Check that each cream row edge has 1 sc.
The tree is lopsided. Make sure you skipped 3 sc at the start and end of each beige row and 4 sc on each side of each gap.
Care
Hand wash in cool water with mild soap and lay flat to dry, re-pinning the scallops if needed. Do not machine wash, because the pearls and satin bow can be damaged.
Final Notes
Everything depends on one measurement: the fan gauge.
- One fan with trim is 0.75 in (1.9 cm) wide.
- Later fans repeat every 0.7 in (1.8 cm).
- Six tiers give a 4.25 in (10.8 cm) × 4 in (10.2 cm) tree.
- The border brings it to 4.5 in (11.4 cm) × 4.125 in (10.5 cm).
- The cord adds a 2.5 in (6.4 cm) loop.
Check the size at Rows 2, 4, 8 and 12, and keep the counts at 47 and 54 in the last two rows. If those match, the ornament will come out as designed.
Happy crocheting!