

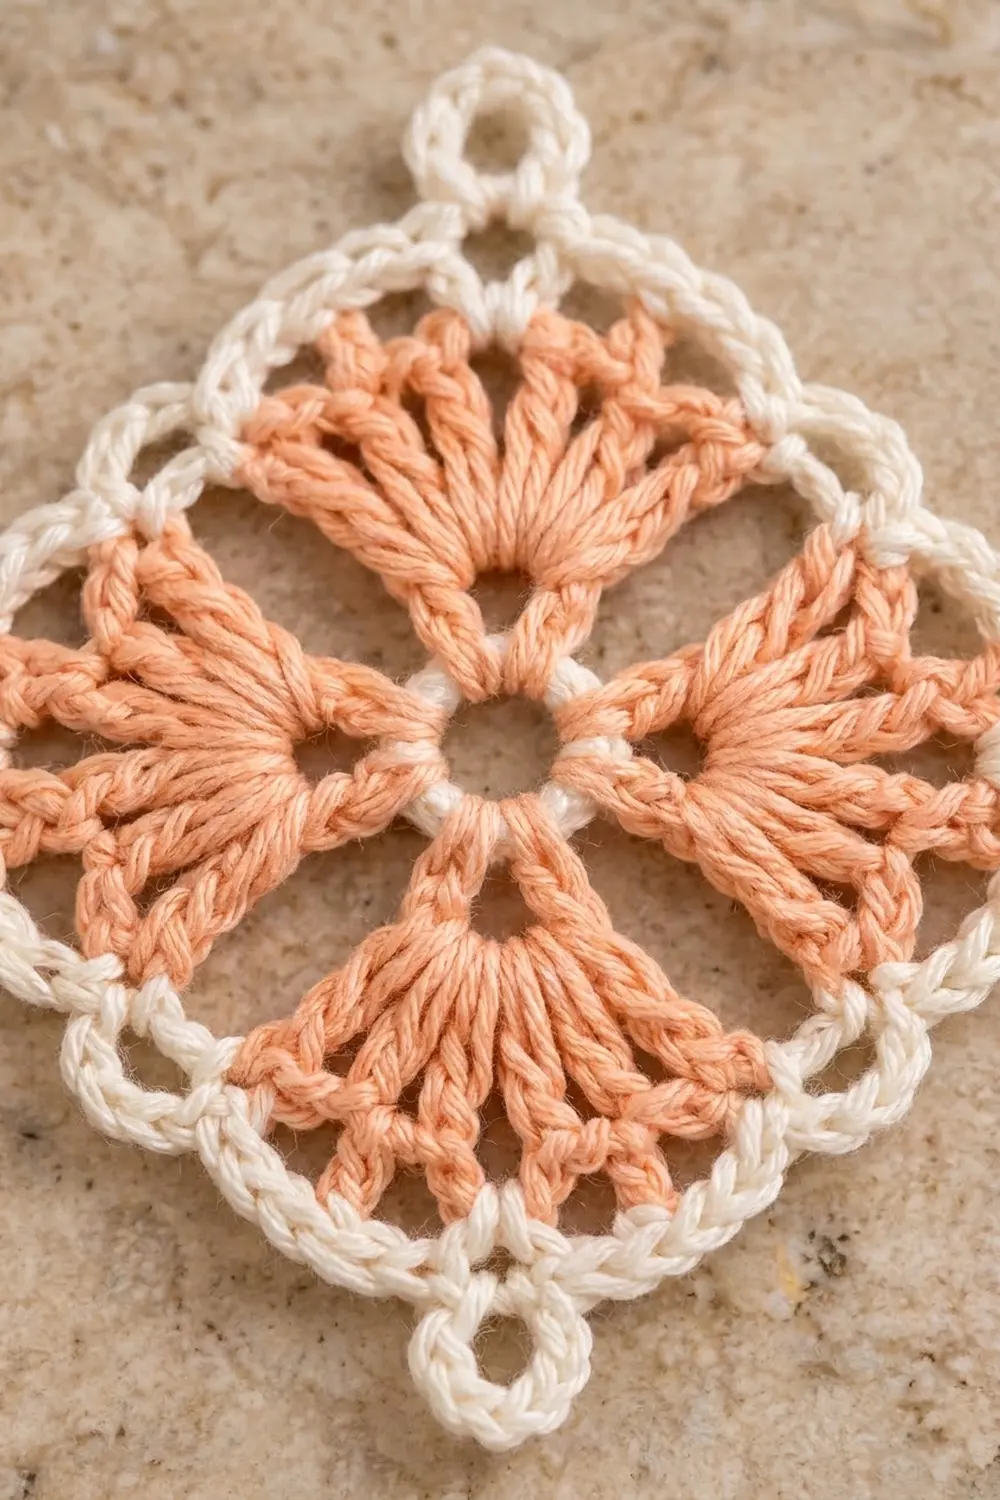
The Peach Blossom Diamond is a light, lacy motif made in two colors. Soft peach fans open out from a small center ring, and a crisp white border frames them. Small rings at each of the four points and little picots along each side give the edge a delicate finish.
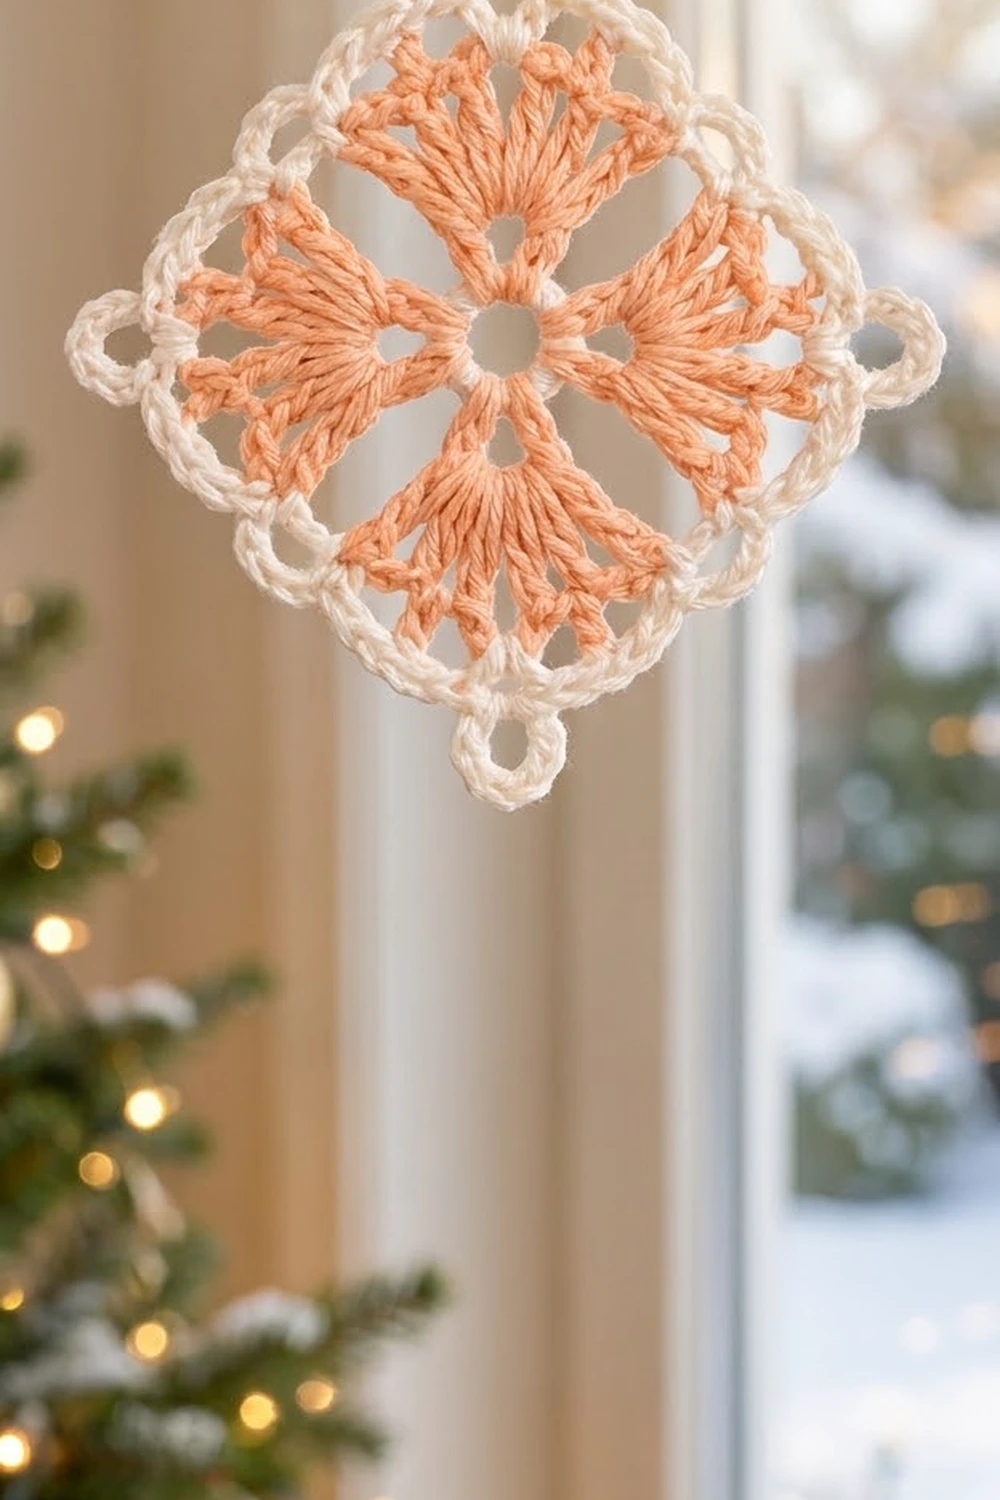
The finished motif sits on point as a diamond. Each side measures about 4 in (10.2 cm), and it measures about 6.5 in (16.5 cm) from point to point including the corner rings. You can use it as a coaster, an ornament, a gift-tag topper, or a small table accent.
This pattern uses US crochet terms throughout. The construction is simple. Four peach rounds build the center and fans, a fifth peach round squares the shape, and two white rounds form the border.
Each stage has a measurement checkpoint, so you can catch size problems early. The stitch counts are listed after every round.
Finished Size and Construction
- Finished size: 4 in (10.2 cm) per side; 6.5 in (16.5 cm) point to point including the corner rings
- Skill level: Easy–intermediate
- Terminology: US crochet terms
- Yarn weight: DK / light (#3) cotton
- Hook: 3.5 mm (E/4)
- Number of pieces: 1 single motif
- Layout: Square worked in the round, displayed on point as a diamond
- Piece size before border (after Rnd 4): 3.25 in (8.3 cm) per side
- Border depth (Rnds 5–6): about 3/8 in (1.0 cm) per side
Materials
Yarn advice: Use a smooth mercerized or combed cotton in DK weight (about 110 m per 50 g). Cotton gives the fans clear stitch definition and holds its shape when blocked. Avoid fuzzy or very stretchy yarns, because they blur the open spaces.
- Color A, Peach: 8 g (about 18 m)
- Color B, Creamy White: 6 g (about 13 m)
These quantities include a margin for the test motif, weaving in ends and gauge differences.
Tools:
– 3.5 mm (E/4) crochet hook
– Tapestry needle
– Scissors
– Stitch marker
– Rust-proof pins and a blocking mat or foam board
– Spray bottle with cool water
– Ruler or tape measure
Abbreviations (US Terms)
- ch – chain
- sl st – slip stitch
- sc – single crochet
- dc – double crochet
- tr – treble crochet
- sp(s) – space(s)
- st(s) – stitch(es)
- rnd – round
- [ ] – repeat the instructions inside the brackets the stated number of times
- *** – repeat from the asterisk as directed
Special stitch:
– Picot: Ch 3, then sl st in the first of those 3 ch. It makes a small bump and does not count as a stitch.
Gauge and Checkpoints
Make one test motif before you commit to your final yarn. The checkpoints below are your gauge:
- After Rnd 1: about 1 in (2.5 cm) across
- After Rnd 2: about 1.75 in (4.4 cm) across
- After Rnd 3: about 2.75 in (7.0 cm) across, measured from fan tip to opposite fan tip
- After Rnd 4: 3.25 in (8.3 cm) per side
- Border gauge (Rnd 5): 6 sc = 1 in (2.5 cm)
- After Rnd 6: 4 in (10.2 cm) per side, 6.5 in (16.5 cm) point to point
If your motif is too big: Go down to a 3.25 mm hook, or check that your dc stitches aren’t too loose at the top.
If your motif is too small: Go up to a 3.75 mm hook. Tight fans also curl, so relaxing your tension often fixes both problems.
Measure on a flat surface without stretching. A difference of 1/8 in (0.3 cm) per side at Rnd 4 grows to about 1/4 in (0.6 cm) by the end, so correct it early.
Motif Pattern
Center and Fans (Color A, Peach)
Foundation: With peach, ch 6 and sl st in the first ch to form a ring.
Rnd 1: Ch 3 (counts as dc), 2 dc in ring, ch 2, [3 dc in ring, ch 2] 3 times. Sl st in the top of the beginning ch-3 to join.
Count: 12 dc in four 3-dc groups, 4 ch-2 sps.
Each 3-dc group is the base of one fan. Each one points toward a future corner.
Rnd 2: Ch 3 (counts as dc), dc in the same st, 2 dc in each of the next 2 dc, ch 3, skip the ch-2 sp. 2 dc in each of the next 3 dc, ch 3, skip the ch-2 sp; repeat from * 2 more times. Sl st in the top of the beginning ch-3 to join.
Count: 24 dc in four 6-dc groups, 4 ch-3 sps.*
Rnd 3: Ch 3 (counts as dc), dc in the same st, dc in the next dc, [2 dc in the next dc, dc in the next dc] 2 times. Then ch 2, sc in the ch-3 sp, ch 2. [2 dc in the next dc, dc in the next dc] 3 times, ch 2, sc in the next ch-3 sp, ch 2; repeat from * 2 more times. Sl st in the top of the beginning ch-3 to join.
Count: 36 dc in four 9-dc fans, 4 sc, 8 ch-2 sps.*
Each fan now has 9 dc. The 5th dc of each fan is its center stitch, and it marks a corner of the square. The sc between the fans anchors the small open space you can see between them.
Checkpoint: The piece should measure 2.75 in (7.0 cm) from fan tip to fan tip and lie flat.
Squaring Round (Color A, Peach)
Rnd 4: Ch 1. Sc in the same st and in each of the next 3 dc (4 sc). Work (sc, ch 4, sc) in the next dc for the corner. Sc in each of the next 4 dc, ch 3, tr in the next sc, ch 3. *Sc in each of the next 4 dc, (sc, ch 4, sc) in the next dc, sc in each of the next 4 dc, ch 3, tr in the next sc, ch 3; repeat from * 2 more times. Sl st in the first sc to join. Fasten off peach.
The ch-3 at each side passes over the ch-2 spaces of Rnd 3. Don’t work into those spaces.
Count: 40 sc (10 per fan), 4 ch-4 corner loops, 4 tr, 8 ch-3 sps.
How the squaring works: Each fan tip becomes a corner, with its ch-4 loop. The tr lifts the middle of each side up to the height of the fan tips, which straightens the side. One side runs from a corner to the next corner like this: 5 sc (the corner sc plus 4), ch 3, tr, ch 3, then 5 sc (4 plus the next corner sc).
Checkpoint: 3.25 in (8.3 cm) per side, measured straight along the edge between corner loops.
Border
Border gauge: 6 sc = 1 in (2.5 cm) along the side.
Rnd 5 (Color B, White)
Join white with a sl st in any ch-4 corner loop.
Ch 1, then work (2 sc, ch 6, 2 sc) in the same loop. *Sc in each of the next 5 sc, 3 sc in the ch-3 sp, sc in the tr, 3 sc in the next ch-3 sp, sc in each of the next 5 sc. Work (2 sc, ch 6, 2 sc) in the next corner loop. Repeat from * 2 more times, then work the last side: sc in each of the next 5 sc, 3 sc in the ch-3 sp, sc in the tr, 3 sc in the next ch-3 sp, sc in each of the next 5 sc. Sl st in the first sc to join.
Count per side: 2 + 5 + 3 + 1 + 3 + 5 + 2 = 21 sc between one ch-6 loop and the next. That count includes the 2 sc on each side of each corner loop.
Round total: 21 × 4 = 84 sc, plus 4 ch-6 corner loops.
Then sl st in the next sc and sl st into the ch-6 loop to move to the corner.
Rnd 6 (Color B, White)
Ch 1. Work 9 sc in the ch-6 loop to form the first corner ring. *[Sc in each of the next 3 sc, picot] 6 times, sc in each of the next 3 sc, 9 sc in the next ch-6 loop; repeat from * 2 more times. Then [sc in each of the next 3 sc, picot] 6 times and sc in each of the next 3 sc. Sl st in the first sc to join. Fasten off.
On the last side, the first 2 sc of Rnd 5 have slip stitches on top of them. Work into the sc underneath, not into the slip stitches.
Count per side: 21 sc as 7 groups of 3 sc, with 6 picots.
Corner rings: 9 sc each, 36 in total.
Round total: 84 + 36 = 120 sc, plus 24 picots.
Why the Border Math Works
Rnd 4 gives exactly the same structure on all four sides, so Rnd 5 produces exactly 21 sc on every side. Because 21 = 7 × 3, Rnd 6 splits each side into seven equal groups with six picots between them. That makes each side symmetrical: there are 3 picots on each side of the center group, which sits right over the tr.
At the corners, 9 sc packed into a ch-6 loop is more stitches than the loop needs. The extra stitches push the loop into the firm, rounded ring you see at each point. At 6 sc per inch, the 21 side stitches span 3.5 in (8.9 cm) between rings. The rings and the border height bring each finished side to 4 in (10.2 cm).
Final Blocking
- Weave in all ends inside stitches of the same color: peach tails into peach, white tails into white.
- Spray the motif with cool water until it is evenly damp, or soak it briefly and roll it in a towel.
- Lay it on the blocking mat on point, as a diamond.
- Pin all four corner rings first, so each side measures 4 in (10.2 cm).
- Check that the distance between opposite points is 6.5 in (16.5 cm) both vertically and horizontally.
- Pin through the center of each ring to keep it round.
- Gently open each fan with your fingertips so the dc spread evenly, and open the center ring.
- Pin the side picots lightly if they lean.
- Leave it pinned until completely dry, at least 6 hours.
Final Quality-Control Checklist
- Rnd 1 has 12 dc in 4 groups.
- Rnd 2 has 24 dc in 4 groups.
- Rnd 3 has 36 dc in 4 fans of 9 dc each.
- Rnd 4 has 40 sc, 4 tr and 4 corner loops.
- Rnd 5 has 21 sc on each side, 84 sc in total.
- Rnd 6 has 7 groups of 3 sc and 6 picots on each side, plus 4 rings of 9 sc.
- Each side measures 4 in (10.2 cm).
- Point to point measures 6.5 in (16.5 cm) in both directions.
- The fans point straight to the corners.
- No peach shows through the white border.
- All ends are woven in securely and invisibly.
Troubleshooting
Fans cup or ruffle: Your dc tension is uneven. Ruffling means too many stitches or loose tension; cupping means tight tension. Check that you have 9 dc per fan.
Sides bow inward: Your tr in Rnd 4 is too short. Make sure to yarn over twice. You can also loosen the ch-3 sections slightly.
Sides bow outward: Your ch-3 sections are too loose. Try a smaller hook for the chains only.
Corner rings look flat or twisted: Check that you worked all 9 sc into the ch-6 loop, and pin through the center of each ring when blocking.
Picots are lopsided: Always sl st into the first of the 3 ch. Don’t skip that ch.
Wrong count on Rnd 5: Recount the sc on each Rnd 4 side. There should be 5 before and 5 after the tr section.
Care
Hand wash in cool water with mild soap, press out the water in a towel, and dry flat. Re-pin to 4 in (10.2 cm) per side if needed.
Final Notes
The measurement chain is short and easy to track. The motif should be 1 in (2.5 cm) across after Rnd 1 and 1.75 in (4.4 cm) after Rnd 2. After Rnd 3 it measures 2.75 in (7.0 cm) fan to fan. After Rnd 4 it is 3.25 in (8.3 cm) per side.
The white border, worked at 6 sc per 1 in (2.5 cm), brings each side to 4 in (10.2 cm). That makes the motif 6.5 in (16.5 cm) point to point with its corner rings.
If each checkpoint matches, your finished motif will match too. If you make more than one later, the corner rings are a natural place to link them point to point.
Happy crocheting!