

The Lilac Meadow Window Panel is a lacy hanging curtain made from sixteen flower squares joined in a four-by-four grid. Each square has a loop-petal daisy with a cream center, set in an open cream lattice with a small green leaf cluster in each corner.
The flowers alternate between deep plum and soft lavender in a checkerboard. The colors read clearly from across the room but still look delicate up close. A cream border goes around the grid, eight hanging loops along the top hold it on a curtain rod, and the bottom edge breaks into four shallow points, each finished with a tassel.
This pattern uses US crochet terms. The finished panel is 25.2 in (64.0 cm) wide and 28.7 in (72.9 cm) tall from the top of the hanging loops to the tips of the points. With tassels it is 32.2 in (81.8 cm) tall.
The construction is modular. You crochet 16 squares in the round, join them with flat slip-stitch seams and work two border rounds. Then you add the hanging loops, the four points and the tassels.
Finished Size and Construction
- Finished size: 25.2 in (64.0 cm) wide x 28.7 in (72.9 cm) tall without tassels; 32.2 in (81.8 cm) tall with tassels
- Skill level: Intermediate
- Terminology: US crochet terms
- Yarn weight: DK cotton (light worsted, #3)
- Hook: 4.0 mm (G-6)
- Number of pieces: 16 squares, plus 4 tassels
- Layout: 4 squares wide x 4 squares tall, plum and lavender flowers in a checkerboard
- Square size: 6 in (15.2 cm), 27 sc per side
- Grid size before border: 24 in x 24 in (61.0 cm x 61.0 cm)
- Border depth: 0.6 in (1.5 cm), two rounds
- Extras: 8 hanging loops about 1.5 in (3.8 cm) tall, 4 points 2 in (5.1 cm) deep, 4 tassels 3.5 in (8.9 cm) long
Materials
Use a smooth mercerized or combed DK-weight cotton with about 115 m per 50 g. Cotton gives crisp petals and a lattice that keeps its shape in a window. Fuzzy yarns blur the open petal loops, so avoid them.
- Cream (A): 200 g, about 460 m (centers, frames, joining, border, loops, points)
- Plum (B): 75 g, about 173 m (8 flowers, 2 tassels)
- Lavender (C): 75 g, about 173 m (8 flowers, 2 tassels)
- Sage green (D): 30 g, about 69 m (leaf clusters)
These amounts include a margin of about 15 percent to allow for gauge differences.
Tools:
- 4.0 mm (G-6) crochet hook
- Tapestry needle
- 8 locking stitch markers
- Scissors
- A 4 in (10.2 cm) piece of stiff card for the tassels
- Blocking mats, rust-proof pins and a spray bottle
- Measuring tape
Abbreviations (US Terms)
- ch: chain
- sl st: slip stitch
- sc: single crochet
- hdc: half double crochet
- dc: double crochet
- sp: space
- sk: skip
- st(s): stitch(es)
- RS / WS: right side / wrong side
- BLO: back loop only
Special stitches:
- tr3tog (leaf cluster): *Yarn over twice, insert hook in the space, yarn over and pull up a loop, [yarn over, pull through 2 loops] twice; repeat from * 2 more times in the same space (4 loops on hook). Yarn over and pull through all 4 loops.
- hdc3tog: [Yarn over, insert hook in next st, yarn over and pull up a loop] 3 times (7 loops on hook). Yarn over and pull through all 7 loops.
- hdc4tog: Work as hdc3tog, but over 4 sts (9 loops on hook).
Gauge and Checkpoints
Gauge: 18 sc = 4 in (10.2 cm) in the final round of a square, which is 4.5 sc per inch.
Make one full square first, block it lightly and measure it. The whole panel depends on this one number.
Checkpoints for one square:
- After Round 1: cream center about 1.25 in (3.2 cm) across
- After Round 3: flower about 4.5 in (11.4 cm) across, tip to tip
- After Round 6: about 5.5 in (14.0 cm) square
- After Round 7: 6 in (15.2 cm) square, 27 sc per side
If your square is too big (6.25 in / 15.9 cm or more), change to a 3.75 mm hook. If it is too small (5.75 in / 14.6 cm or less), change to a 4.5 mm hook. Don’t change the stitch counts, because the joining and border math depends on 27 sc per side.
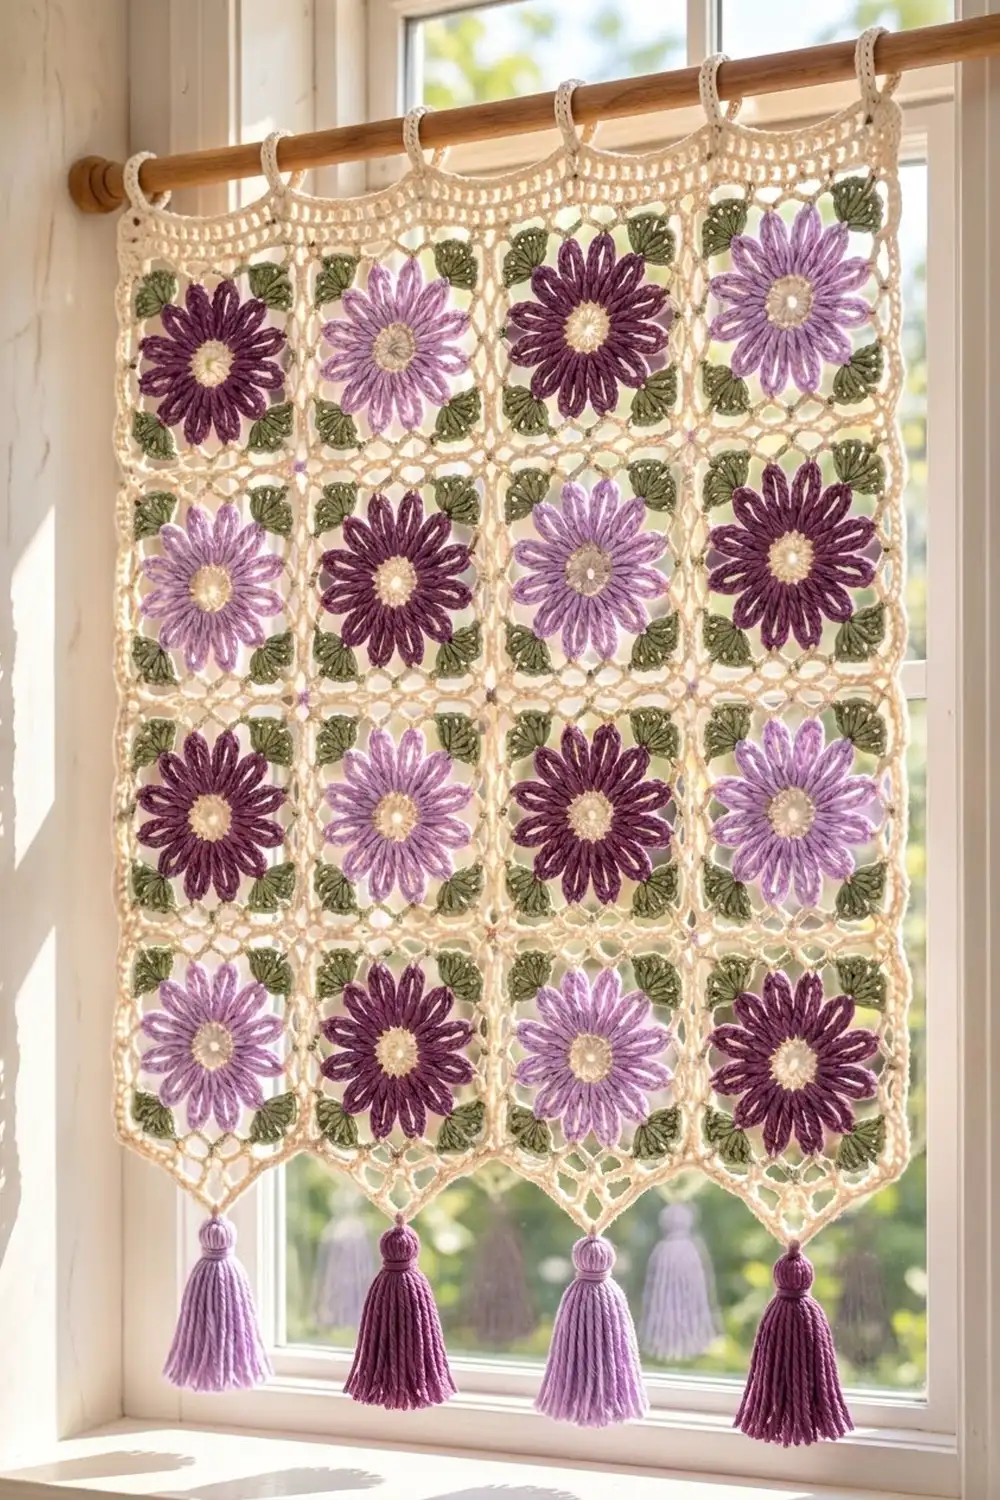
Flower Square
Make 16 squares: 8 with plum (B) flowers and 8 with lavender (C) flowers. Every square uses cream (A) for the center and frame and green (D) for the leaves.
Round 1 (A): Make a magic ring. Ch 3 (counts as dc), then work 15 dc in the ring. Pull the ring snug but leave a small open eye about 0.25 in (0.6 cm) wide. Sl st to the top of the beginning ch-3 and fasten off. (16 dc)
Round 2 (B or C): Join the petal color in any dc. Sc in dc, ch 10; repeat from * 15 more times. Sl st to the first sc. (16 sc, 16 ch-10 loops)*
Each ch-10 loop runs from one sc to the next and forms the frame of one long petal.
Round 3 (same color): Sl st into the first ch-10 loop. In each ch-10 loop, work 7 sc, ch 1, 7 sc. Sl st to the first sc and fasten off. (224 sc, 16 ch-1 petal tips)
The sc cover the chain but leave the inside of each loop open, which gives the outlined, open-centered petals. Each petal is about 1.75 in (4.4 cm) long.
Round 4 (A): Join cream with a sc in any ch-1 petal tip. Ch 4, sc in next tip, ch 4, sc in next tip, ch 4, sc in next tip, ch 7, sc in next tip; repeat from * 3 more times, leaving out the final sc on the last repeat. Sl st to the first sc. (16 sc, 12 ch-4 sps, 4 ch-7 corner sps)*
This round turns the round flower into a square. Four petal tips sit on each side, and the longer ch-7 spaces become the corners.
Round 5 (D), leaf clusters: Join green in any ch-7 corner sp. Work (tr3tog, ch 3, tr3tog, ch 3, tr3tog) in that sp and fasten off. Repeat in each of the other three corners. (3 clusters and 2 ch-3 sps per corner; 12 clusters total)
The three clusters fan out into a three-lobed leaf group. Weave in the short green tails now on the WS.
Round 6 (A): Join cream in the top of the middle cluster of any corner. Ch 3 (counts as dc), dc in same st, ch 2, 2 dc in same st. This makes the first corner.
Along each side: 3 dc in next ch-3 sp, dc in top of next cluster, dc in next sc, [3 dc in next ch-4 sp, dc in next sc] 3 times, dc in top of first cluster of next corner group, 3 dc in next ch-3 sp. At the next corner, work (2 dc, ch 2, 2 dc) in the top of the middle cluster.
Repeat around. End the last side with 3 dc in the ch-3 sp, then sl st to the top of the beginning ch-3.
(Per side, between corner ch-2 sps: 2 + 3 + 1 + 1 + 12 + 1 + 3 + 2 = 25 dc; total 100 dc and 4 ch-2 corner sps)
Round 7 (A): Ch 1. Sc in each dc around, working (sc, ch 2, sc) in each corner ch-2 sp. Sl st to the first sc. Fasten off, leaving a 6 in (15.2 cm) tail.
(100 sc worked one per dc + 8 corner sc = 108 sc; per side: 1 corner sc + 25 sc + 1 corner sc = 27 sc, plus 4 ch-2 corner sps)
The 27 sc per side already include the two corner sc on that side. The ch-2 corner spaces don’t count as stitches.
Make All Pieces
- 8 squares with plum (B) flowers
- 8 squares with lavender (C) flowers
- All 16 squares use cream (A) centers and frames and green (D) leaves
Lay the squares out RS up in a checkerboard (P = plum, L = lavender):
Row 1 (top):    P  L  P  L
Row 2:          L  P  L  P
Row 3:          P  L  P  L
Row 4 (bottom): L  P  L  P
Block every square to 6 in (15.2 cm) before you join them.
Joining
Method: Flat slip-stitch join through the back loops, in cream (A).
Hold two squares with WS together. Start in the matching corner ch-2 sps. Insert the hook through the BLO of the facing sc on both squares and sl st. Work 27 sl st across, one through each matched pair of sc, and end in the opposite corner ch-2 sps.
Stitch-to-stitch logic: Each side has exactly 27 sc, so every stitch on one square meets exactly one stitch on its neighbor. If a stitch is left over, recount before you go on.
Order:
- Join the four squares of each row into a strip, working the three seams continuously.
- Join the four strips with three long seams of 4 x 27 = 108 sl st each, passing through the corner sps at each square junction.
Tension: Keep your slip stitches as loose as the sc beside them. A tight seam puckers the grid. If you need to, use a 4.5 mm hook for joining only.
The seams add no stitches to the outer edges. The corner ch-2 sps at seam junctions are used only for joining and are skipped in the border.
Checkpoint: The joined grid measures 24 in x 24 in (61.0 cm x 61.0 cm).
Border
Border gauge: The border uses the square gauge of 4.5 sc per inch. Each side has 4 squares x 27 sc = 108 sc, and 108 ÷ 4.5 = 24 in (61.0 cm). The border count matches the grid exactly, so the edges lie flat without ruffling or cupping.
Border Round 1 (A): With RS facing, join cream in any outer corner ch-2 sp. Ch 1, then work 3 sc in the same sp. Along each side, work 1 sc in each of the 27 sc of each square, skipping the seam corner sps. Work 3 sc in each outer corner ch-2 sp. Sl st to the first sc.
(108 sc per side + 3 sc in each of 4 corners = 432 + 12 = 444 sc)
Border Round 2 (A): Sl st into the center sc of the corner. Ch 3 (counts as dc), 2 dc in same st. Dc in each sc around, working 3 dc in the center sc of each corner. Sl st to the top of the ch-3 and fasten off.
(444 dc worked one per stitch + 8 extra corner dc = 452 dc; 112 dc per side between the 4 corner-center dc)
The border is 0.6 in (1.5 cm) deep. The panel body is now 25.2 in x 25.2 in (64.0 cm x 64.0 cm).
Hanging Loops (Top Edge)
Along the top edge, use markers to set off the 112 dc between the two corner-center dc. These stitches make 8 groups of 14.
Row 1 (A): With RS facing, join in the first of the 112 dc. Sc in next 4 sts, ch 16, sk 6 sts, sc in next 4 sts; repeat from * 7 more times. Turn. (64 sc, 8 ch-16 loops)*
Row 2 (A): Ch 1. Sc in next 4 sc, 20 sc in ch-16 loop, sc in next 4 sc; repeat from * 7 more times. Fasten off. (64 sc + 160 sc in loops = 224 sc)*
Each loop stands about 1.5 in (3.8 cm) above the border and fits a rod up to 1 in (2.5 cm) thick.
Points (Bottom Edge)
Along the bottom edge, divide the 112 dc between the two corner-center dc into 4 sections of 28 sts, one under each column. Work each point separately in rows. The ch 1 at the start of each row doesn’t count as a stitch.
Row 1: With RS facing, join cream in the first st of a section. Ch 1, hdc3tog, hdc in next 22 sts, hdc3tog. Turn. (24 sts)
Row 2: Ch 1, hdc3tog, hdc in next 18 sts, hdc3tog. Turn. (20 sts)
Row 3: Ch 1, hdc3tog, hdc in next 14 sts, hdc3tog. Turn. (16 sts)
Row 4: Ch 1, hdc3tog, hdc in next 10 sts, hdc3tog. Turn. (12 sts)
Row 5: Ch 1, hdc3tog, hdc in next 6 sts, hdc3tog. Turn. (8 sts)
Row 6: Ch 1, hdc3tog, hdc in next 2 sts, hdc3tog. Turn. (4 sts)
Row 7: Ch 1, hdc4tog. Fasten off, leaving a 12 in (30.5 cm) tail. (1 st)
Repeat for the other three sections. Each row uses up all the stitches of the row below (3 + 22 + 3 = 28, and so on). Each point is 2 in (5.1 cm) deep, and the four points meet at shallow valleys between the columns.
Tassels
Make 4 tassels: 2 plum and 2 lavender. For each one, wrap yarn 30 times around the 4 in (10.2 cm) card. Tie the top with a 12 in (30.5 cm) strand and cut the bottom loops. Wrap the neck 0.5 in (1.3 cm) below the top, then trim the tassel to 3.5 in (8.9 cm).
Tie one tassel to each point tip. From left to right, the order is lavender, plum, lavender, plum.
Final Blocking
- Weave in all tails, keeping cream tails inside cream areas.
- Soak the panel in cool water for 10 minutes, then press out the water in a towel. Don’t wring it.
- Lay it flat on blocking mats, RS up.
- Pin the body to 25.2 in x 25.2 in (64.0 cm x 64.0 cm), starting at the seam junctions.
- Pin each point so its tip sits 2 in (5.1 cm) below the border.
- Open each petal loop gently with your fingers.
- Pin the hanging loops upward so they dry straight.
- Let the panel dry completely, then unpin it. Steam the tassels lightly and trim them.
Final Quality-Control Checklist
- 16 squares, 8 plum and 8 lavender, in a checkerboard
- Every square measures 6 in (15.2 cm) with 27 sc per side
- 3 leaf clusters in every corner, 12 per square
- All seams lie flat, with 27 sl st per square edge
- Border has 444 sc in Round 1 and 452 dc in Round 2
- 8 evenly spaced hanging loops
- 4 points, each 2 in (5.1 cm) deep
- 4 tassels, each 3.5 in (8.9 cm), in alternating lavender and plum
- Panel measures 25.2 in (64.0 cm) wide x 28.7 in (72.9 cm) tall without tassels
Troubleshooting
Petals twist: The ch-10 loops twisted in Round 2. Keep each chain flat while you work Round 3.
Flower ruffles in Round 4: The ch-4 spaces are too long for your tension. Try ch 3 instead, and keep the ch-7 corners.
Square isn’t square: Check that a ch-7 corner falls after every fourth petal tip.
Leaf clusters lean: Work all three clusters into the same ch-7 sp.
Seams pucker: Rework them with a larger hook and looser slip stitches.
Border ruffles or cups: Recount Round 1. It should have 108 sc per side. Extra or missing stitches at the seams are the usual cause.
Points curl: Block them firmly and pin the tips down.
Care
Hand wash in cool water with mild soap, press out the water and dry flat. Reshape the petals and points while damp, and don’t put the panel in the dryer.
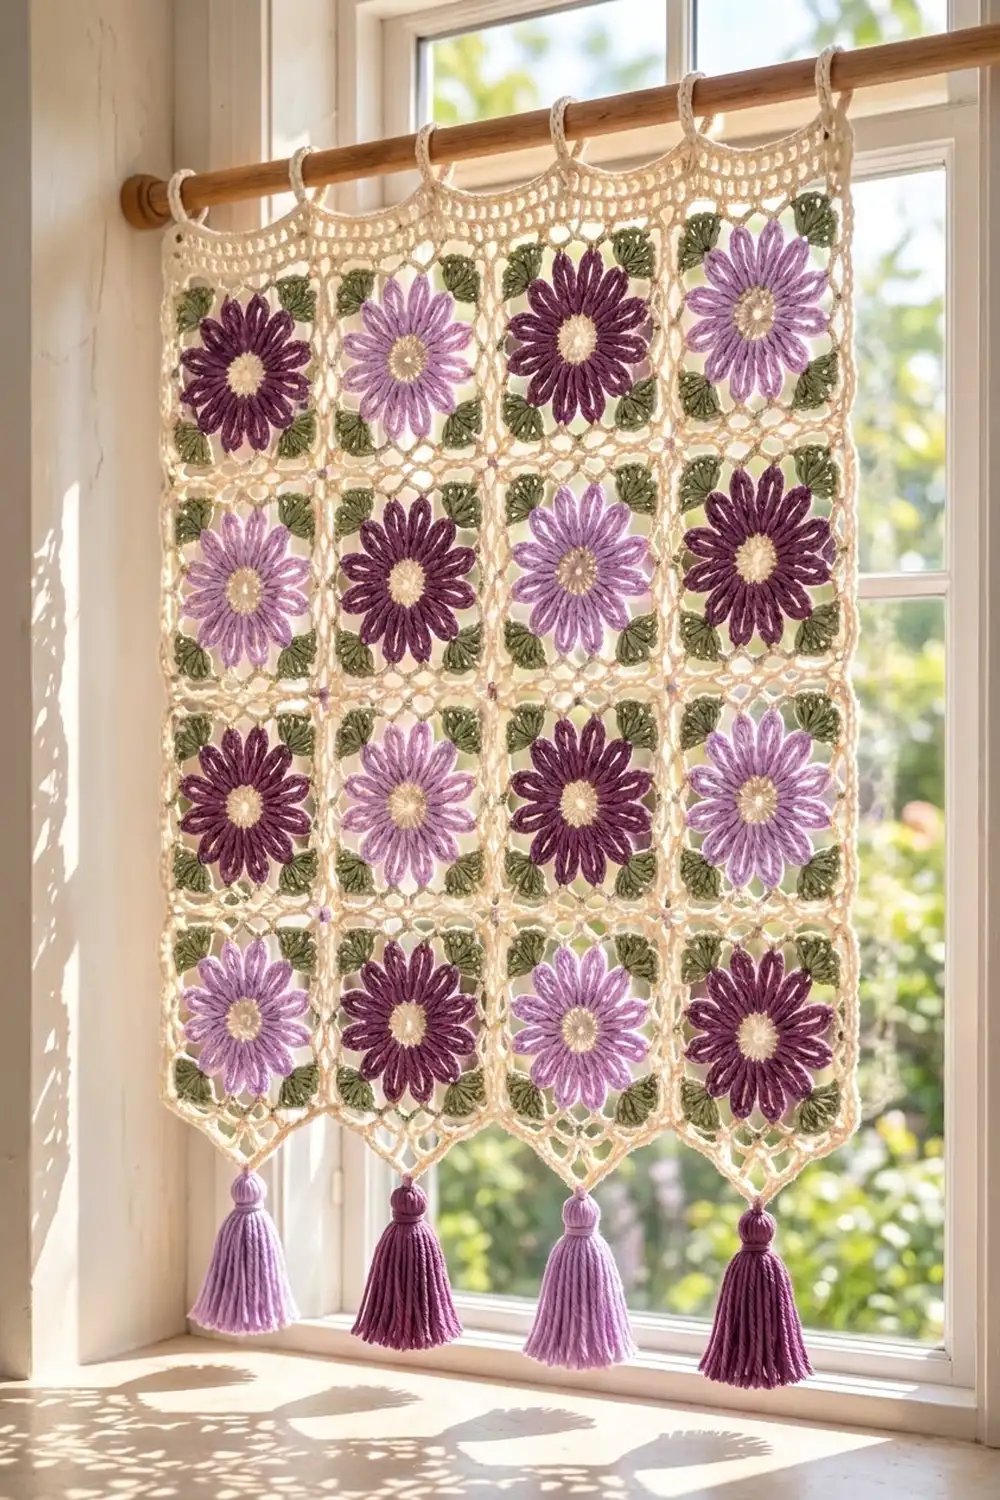
Final Notes
Here is the measurement chain. One square of 6 in (15.2 cm) with 27 sc per side makes a 24 in (61.0 cm) grid with 108 sc per side. Two border rounds bring the body to 25.2 in (64.0 cm). The loops add 1.5 in (3.8 cm) and the points add 2 in (5.1 cm), for a full height of 28.7 in (72.9 cm), or 32.2 in (81.8 cm) with tassels. If your first square measures correctly, the rest of the panel will come out to size.
Happy crocheting!