

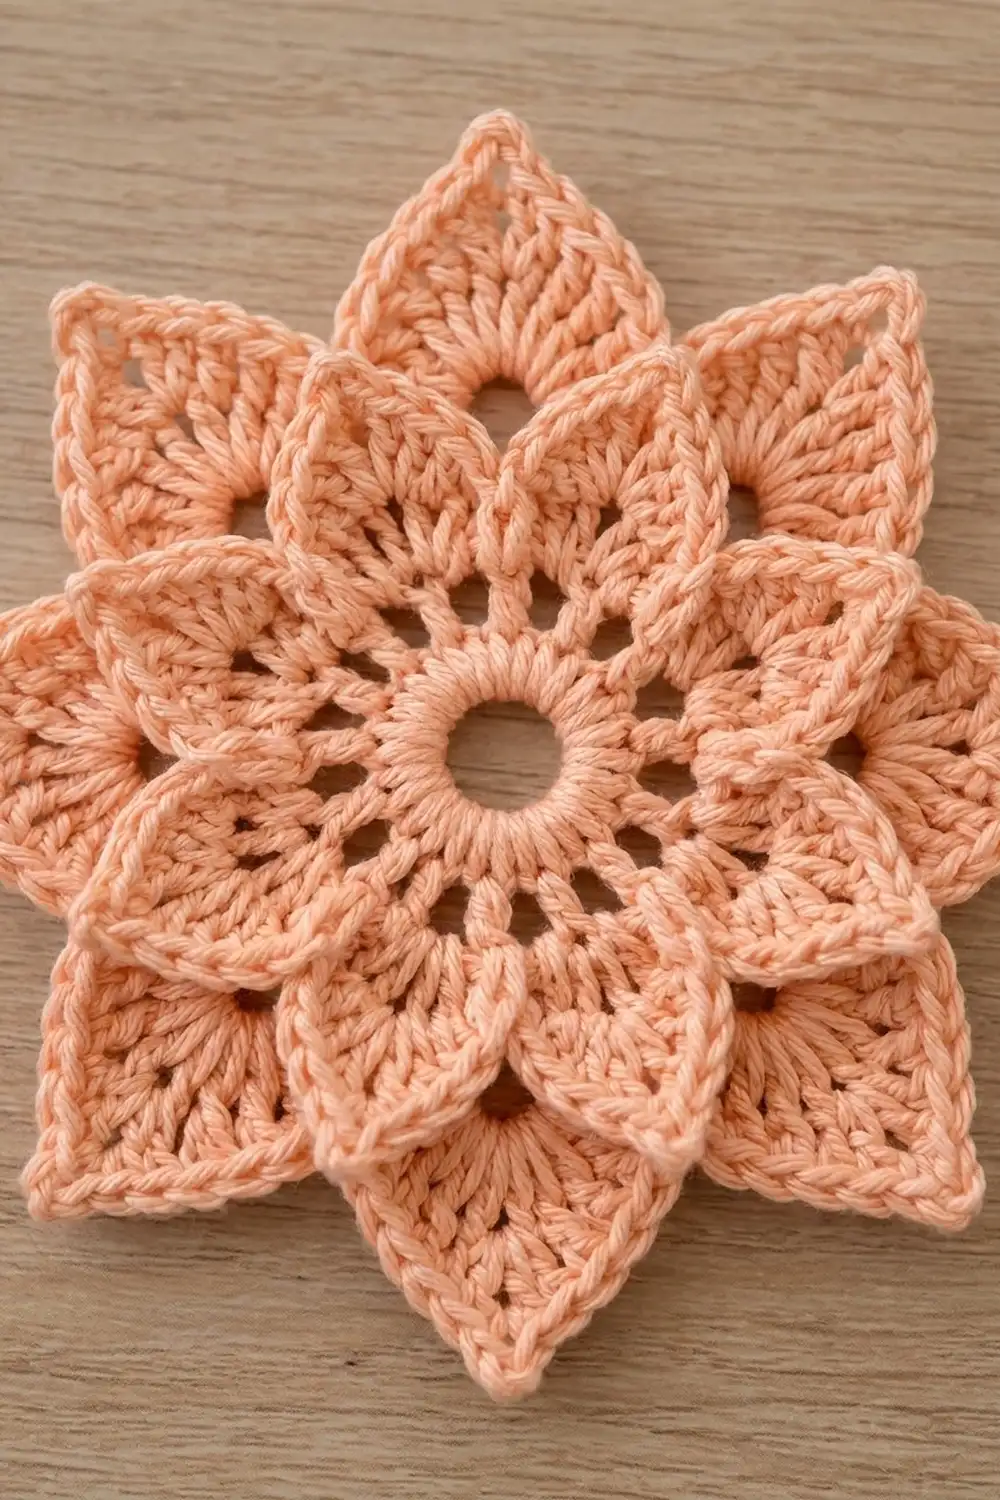
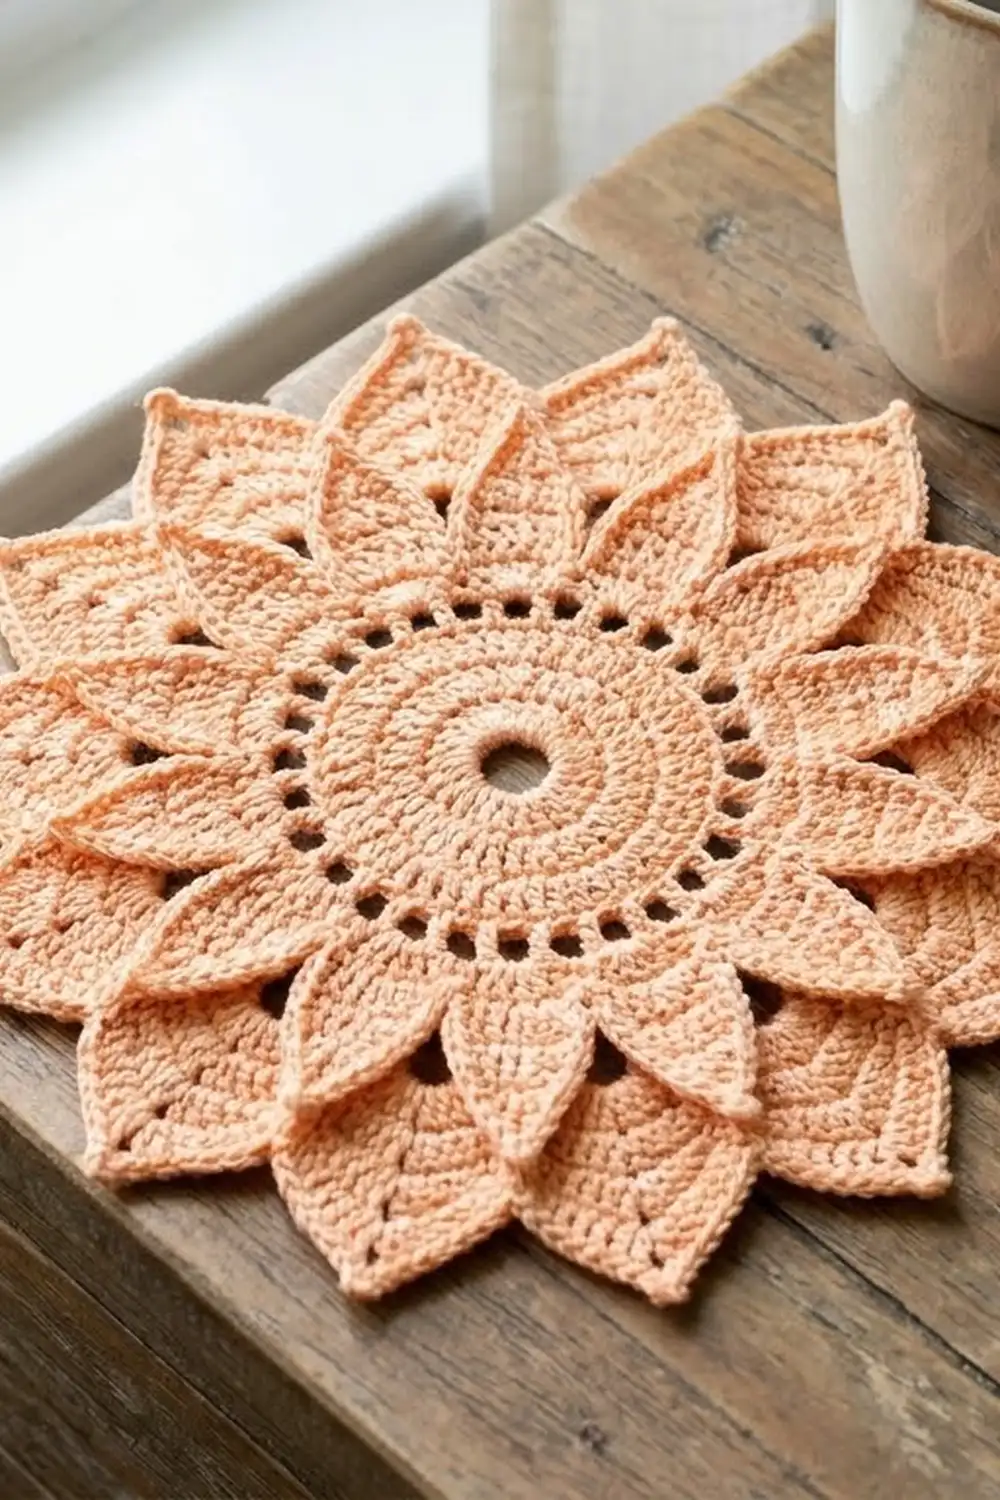
The Apricot Lotus Star is a layered flower motif with a sculpted, almost 3D look. It has 8 pointed front petals, with 8 larger pointed petals behind them. The back petals are offset, so the finished flower reads as a 16-point star around an open center.
The sample uses one soft peach cotton. A single color lets the shadows between the layers do the work, so the texture shows clearly. It suits a romantic, vintage-inspired style. Use it as an appliqué, a coaster, a decoration, or as a test motif before a bigger plan.
This pattern uses US crochet terms. The finished motif measures 6.5 in (16.5 cm) from petal tip to opposite petal tip.
You’ll work the flower in the round, all in one piece:
- Start with a dc ring and a round of small windows.
- Add a chain-loop base and work the 8 front petals.
- Outline the front petals.
- Work chain loops behind the front petals, then the 8 back petals.
- Finish with a single-crochet edging around the back petals.
Finished Size and Construction
- Finished size: 6.5 in (16.5 cm) tip to tip
- Skill level: Intermediate (you’ll work behind finished petals)
- Terminology: US crochet terms
- Yarn weight: DK / light worsted (#3), cotton
- Hook: 3.5 mm (E-4)
- Number of pieces: 1 motif
- Layout: single motif, no joining
- Piece size: 6.5 in (16.5 cm) tip to tip
- Size before border: 6.25 in (15.9 cm) tip to tip after Round 7
- Border depth: about 0.125 in (0.3 cm) per side (Round 8 sc edging)
Materials
Yarn: A smooth mercerized or combed cotton in DK weight gives the crisp petal edges seen in the sample. Cotton holds the pointed tips well after blocking. Acrylic blends work too, but the petals will be softer and less defined.
- Peach / apricot: 15 g, about 35 m (38 yd)
That quantity includes a margin of roughly 20% for your gauge swatch and weaving in ends. One motif uses about 12 g.
Tools:
– 3.5 mm (E-4) crochet hook
– Tapestry needle
– Scissors
– Stitch marker
– Rustproof pins and a foam blocking mat
– Spray bottle or steamer
– Ruler or tape measure
Abbreviations (US Terms)
- ch – chain
- sl st – slip stitch
- sc – single crochet
- hdc – half double crochet
- dc – double crochet
- tr – treble crochet (yo twice, insert, pull up a loop, [yo, pull through 2] three times)
- sp – space
- st(s) – stitch(es)
- yo – yarn over
Special stitch: Post sc (behind)
- Hold the motif with the back facing you.
- Insert the hook from right to left around the post of the indicated dc.
- Yo, pull up a loop, yo, pull through both loops.
The stitch sits flat behind the front layer and anchors the back petal loops.
Gauge and Checkpoints
Gauge matters less for one motif than for a garment. Still, it controls whether the petals sit flat or cup. Make one complete test motif first and measure it at each checkpoint.
Checkpoints:
- After Round 1: 1.5 in (3.8 cm) across, center hole about 0.5 in (1.3 cm)
- After Round 2: 2.5 in (6.4 cm) across
- After Round 5: front flower 4.5 in (11.4 cm) tip to tip
- After Round 7: 6.25 in (15.9 cm) tip to tip
- After Round 8 and blocking: 6.5 in (16.5 cm) tip to tip
Too big? Try a 3.25 mm (D-3) hook, or check that your tr stitches aren’t loose at the top.
Too small, or petals curling forward? Try a 3.75 mm (F-5) hook. Tight chain loops in Rounds 3 and 6 are the most common cause of cupping, so relax your hand on those chains.
Pattern
Round 1 – Center Ring
- Ch 6 and sl st to the first ch to form a ring.
- Ch 3 (counts as dc), then work 15 dc into the ring.
- Sl st to the top of the beginning ch-3.
Count: 16 dc.
The ring stays open, giving the visible center hole. Checkpoint: 1.5 in (3.8 cm).
Round 2 – Window Round
- Ch 5 (counts as dc + ch 2).
- *Dc in next dc, ch 2; repeat from * 14 more times.
- Sl st to the 3rd ch of the beginning ch-5.
Count: 16 dc and 16 ch-2 sps.
These ch-2 sps form the ring of small openings around the center. Number the dc in your head as 1 through 16. Dc 1 is the beginning chain. Checkpoint: 2.5 in (6.4 cm).
Round 3 – Front Petal Base
- Ch 1, sc in the same st (dc 1).
- Ch 5, skip next dc (dc 2).
- *Sc in next dc (odd-numbered), ch 5, skip next dc (even-numbered); repeat from * 6 more times.
- Sl st to the first sc.
Count: 8 sc and 8 ch-5 loops.
The sc land on dc 1, 3, 5, 7, 9, 11, 13 and 15. The even dc stay unworked; you’ll use them in Round 6.
Round 4 – Front Petals
- Sl st into the first ch-5 loop.
- In each ch-5 loop, work: sc, hdc, dc, 2 tr, ch 3, 2 tr, dc, hdc, sc.
- Sl st to the first sc.
Count per petal: 10 sts plus 1 ch-3 tip.
Total: 80 sts, 8 ch-3 tips.
The tall stitches in the middle of the shell push up into a pointed tip. Each front petal sits centered over an even-numbered dc from Round 2.
Round 5 – Front Petal Outline
Each petal is outlined separately, with a sl st into the Round 3 sc between petals:
- Ch 1.
- For each petal: sc in each of the next 5 sts, then (sc, ch 2, sc) in the ch-3 tip, then sc in each of the next 5 sts.
- Between petals, sl st into the Round 3 sc. This sl st isn’t counted.
- Repeat steps 2–3 around, then sl st to the first sc.
Count per petal: 10 sc (1 per stitch) + 2 sc added at the tip = 12 sc, plus a ch-2 point.
Total: 96 sc, 8 ch-2 points.
Checkpoint: the front flower measures 4.5 in (11.4 cm) tip to tip, and each petal stands about 1 in (2.5 cm) beyond the window ring. Fasten off or keep going. The sample keeps going by sl st-ing to the back.
Round 6 – Back Loops (worked behind)
Fold the front petals forward and turn the motif so the back faces you. If you fastened off, join yarn here.
- Work a post sc (behind) around the post of dc 2 from Round 2. This dc sits directly behind the center of a front petal.
- Ch 7.
- *Post sc (behind) around the next even-numbered dc, ch 7; repeat from * 6 more times.
- Sl st to the first post sc.
Count: 8 post sc and 8 ch-7 loops.
Why the offset works: each ch-7 loop runs from behind the center of one front petal to behind the center of the next. Its midpoint falls behind the gap between two front petals. Each back petal therefore peeks out between two front petals, which gives the 16-point star silhouette.
Round 7 – Back Petals
- Sl st into the first ch-7 loop.
- In each ch-7 loop, work: sc, hdc, 2 dc, 3 tr, ch 3, 3 tr, 2 dc, hdc, sc.
- Sl st to the first sc.
Count per petal: 14 sts plus 1 ch-3 tip.
Total: 112 sts, 8 ch-3 tips.
The back petals are wider and longer than the front ones because of the 3-tr groups and the longer loop. Checkpoint: 6.25 in (15.9 cm) tip to tip.
Border (Round 8 – Back Petal Outline)
Border gauge: a single round of sc adds about 0.125 in (0.3 cm) per side, which takes the motif from 6.25 in (15.9 cm) to 6.5 in (16.5 cm) tip to tip.
Round 8:
- Ch 1.
- For each back petal: sc in each of the next 7 sts, then (2 sc, ch 2, 2 sc) in the ch-3 tip, then sc in each of the next 7 sts.
- Sl st between petals, into the space between the last sc of one petal and the first sc of the next. This sl st isn’t counted.
- Repeat steps 2–3 around, then sl st to the first sc and fasten off.
Count per petal: 14 sc (1 per stitch) + 4 sc added at the tip = 18 sc, plus a ch-2 point.
Total: 8 × 18 = 144 sc, 8 ch-2 points.
Why the math works:
– Each petal side gets exactly one sc per stitch (7 + 7 = 14). That keeps the sides flat with no ruffling.
– All the extra stitches go into the tip (2 sc on each side of the ch-2). That turns the corner sharply and keeps the point crisp instead of rounding it off.
– The front petals use (sc, ch 2, sc) for the same reason. Their smaller tip needs only 1 extra sc per side.
Final Blocking
- Weave in all ends along the back of the Round 2 dc ring, where they’re hidden behind both petal layers.
- Spray the motif lightly with water until it’s damp, not soaked.
- Place it face up on the blocking mat and draw or imagine a 6.5 in (16.5 cm) circle.
- Pin the 8 back petal tips through the ch-2 points so they sit evenly on that circle, about 2.5 in (6.4 cm) apart along its edge.
- Leave the front petals unpinned so they stay slightly raised. Gently pinch each front tip into a point with your fingers.
- Shape the center hole round with a fingertip.
- Let it dry completely. For cotton, you can hover steam over it without touching the iron down, then let it cool before unpinning.
Final Quality-Control Checklist
- Center hole is open and round, about 0.5 in (1.3 cm)
- Round 2 shows 16 even windows
- There are 8 front petals, each with 12 outline sc and a ch-2 point
- There are 8 back petals, each with 18 outline sc and a ch-2 point
- Every back petal is centered between two front petals
- Motif measures 6.5 in (16.5 cm) tip to tip after blocking
- Motif lies flat, with no cupping or ruffling
- No ends show on the front
Troubleshooting
Back petals sit directly behind front petals. The Round 6 post sc went around odd-numbered dc. Rework them around the even-numbered dc (the ones skipped in Round 3).
Motif cups like a bowl. The Round 3 or Round 6 chains are too tight. Rework those rounds with looser chains, or go up a hook size for those rounds only.
Edges ruffle. You’ve added extra sc along the petal sides. Recount: 5 per side on front petals and 7 per side on back petals.
Tips look rounded. Make sure the ch-2 point is worked in Rounds 5 and 8, and pin through it when blocking.
Center hole closes up. Your starting ch-6 is too tight. Use ch 7, or chain more loosely.
Care
Hand wash in cool water with mild soap, roll it in a towel to remove the water, and dry it flat. Reshape the petal tips while damp.
Final Notes
The measurement chain is simple:
- Round 1 is 1.5 in (3.8 cm).
- Round 2 is 2.5 in (6.4 cm).
- The front flower is 4.5 in (11.4 cm).
- The back petals bring it to 6.25 in (15.9 cm).
- The sc border finishes it at 6.5 in (16.5 cm).
If each checkpoint matches, the final motif will too. Stitch counts never change unexpectedly along the way. The window round has 16 dc, each of the two base rounds has 8 loops, the petals have 10 and 14 stitches, and their outlines have 12 and 18 stitches.
Happy crocheting!