

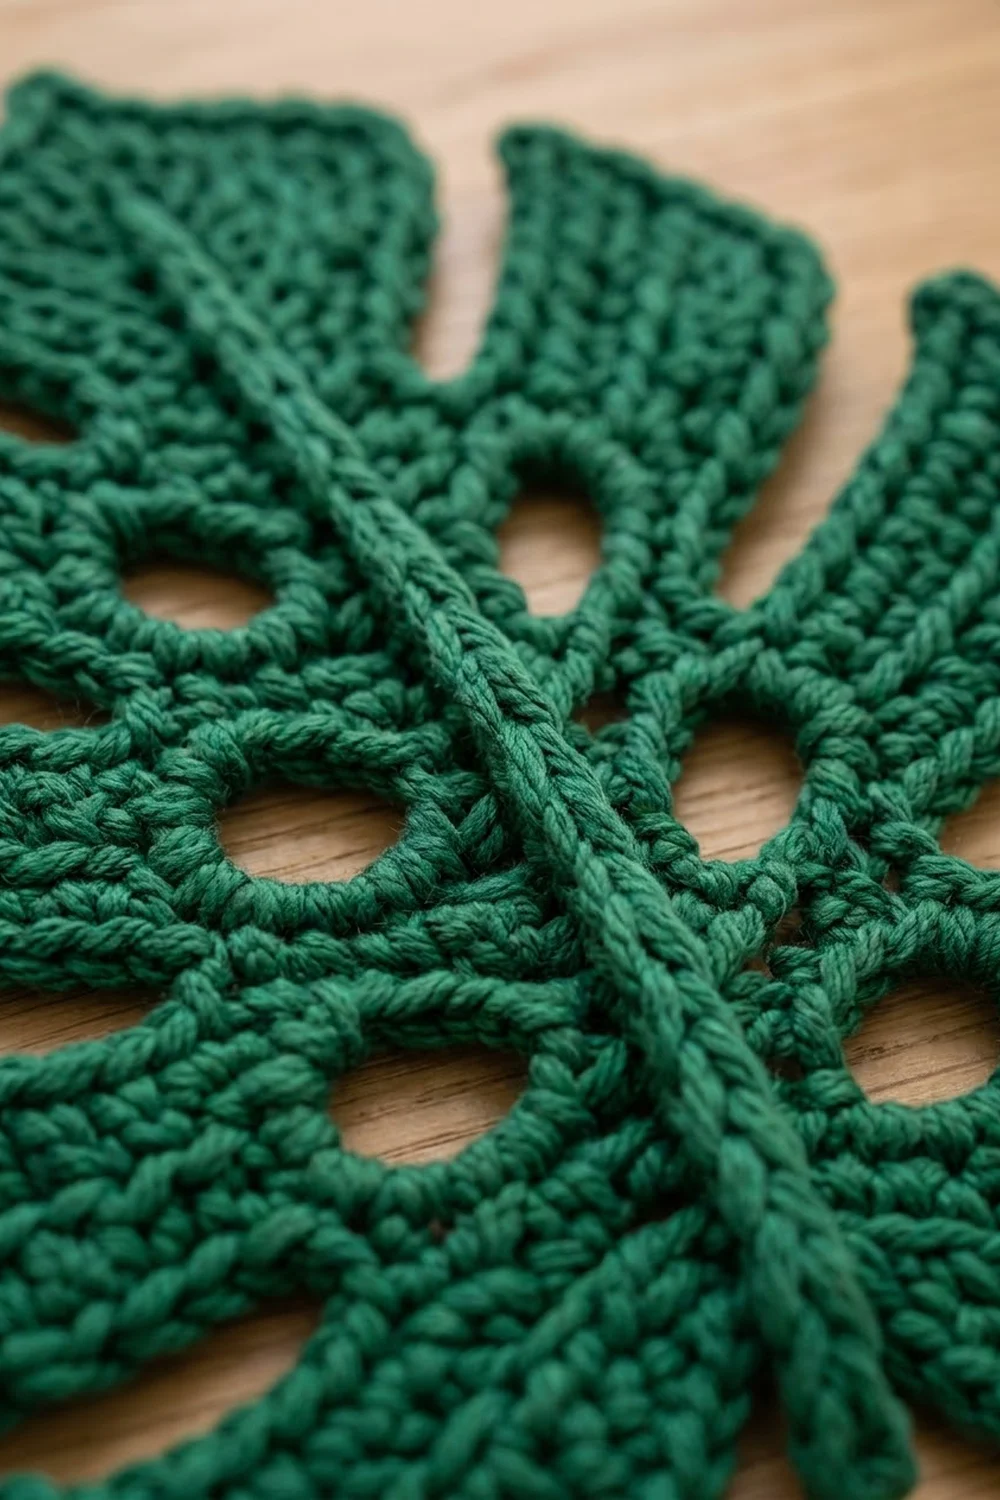
This Emerald Monstera Leaf is a single, flat crochet leaf with deep slits, little oval “windows,” and a bold braided midrib running from stem to tip. It is worked in one solid shade of deep green, so the texture of the rows does all the talking.
The style is modern botanical: clean rounded lobes, a crisp single-crochet outline, and a pointed apex. Use it as a coaster, a wall accent, a bag patch, or a table scatter. This pattern covers one leaf.
The pattern uses US crochet terms. The finished leaf measures 8.5 in (21.6 cm) wide by 8.6 in (21.8 cm) tall, plus a 1.25 in (3.2 cm) stem.
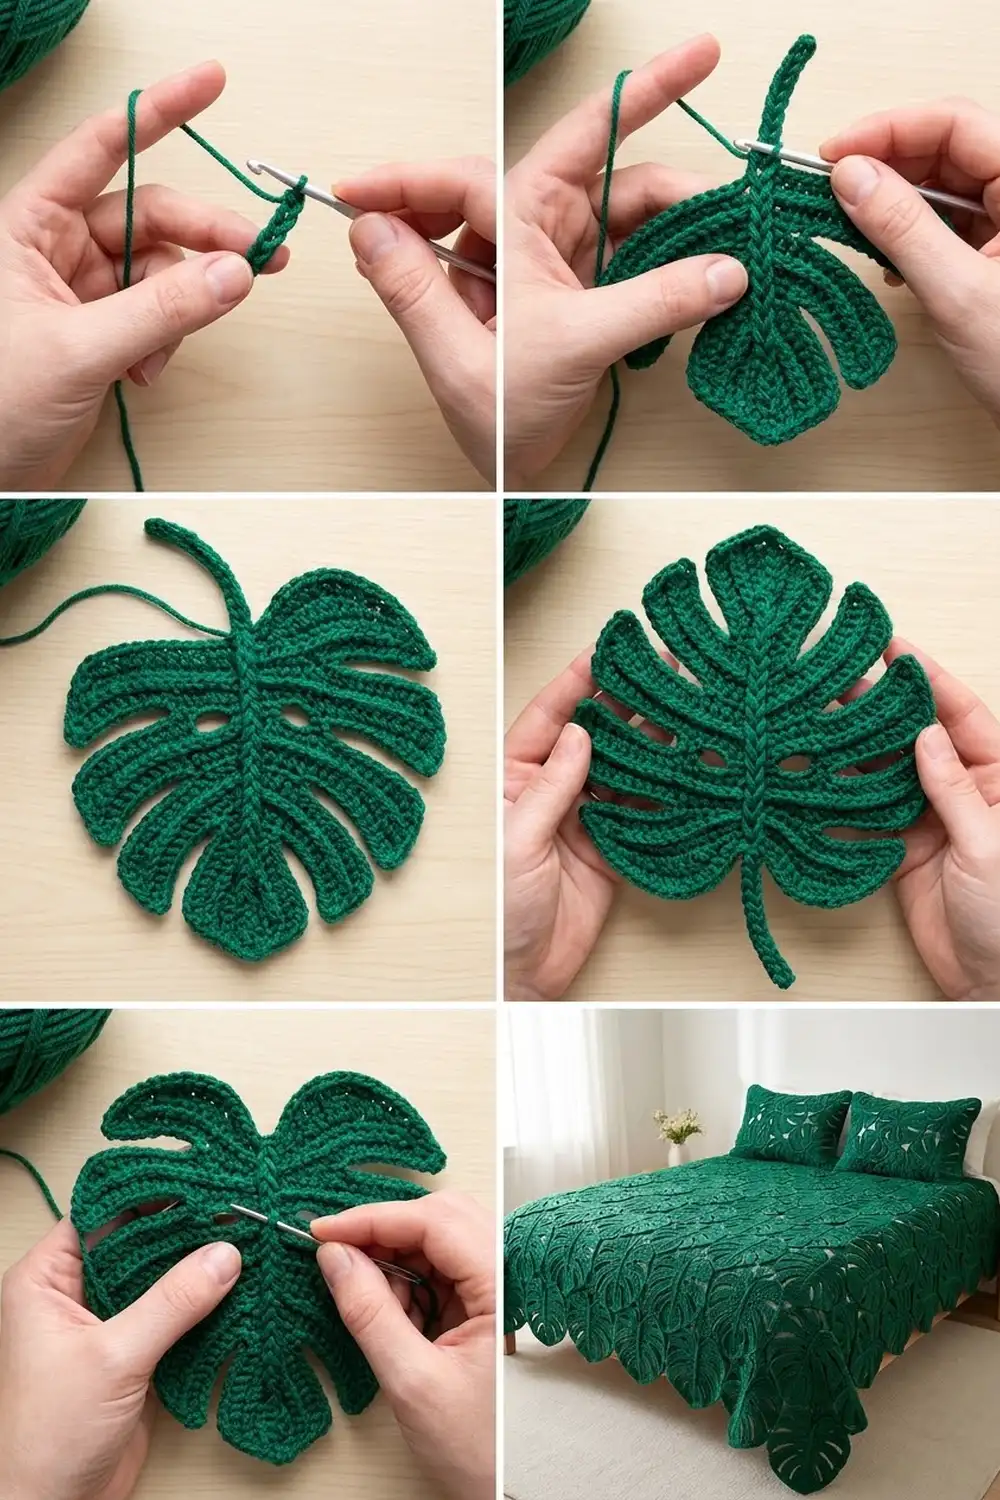
The construction is simple. You make a foundation chain for the midrib, work Half A in rows along one side of it, then work Half B along the other side. Each half splits into four lobes worked separately, which creates the slits. A small triangle forms the apex, one round of edging joins up the outline, and a line of surface slip stitch makes the raised vein.
Finished Size and Construction
- Finished size: 8.5 in (21.6 cm) wide x 8.6 in (21.8 cm) tall, plus 1.25 in (3.2 cm) stem
- Skill level: Intermediate
- Terminology: US
- Yarn weight: Worsted (#4)
- Hook: 5.0 mm (H-8)
- Number of pieces: 1 (single leaf)
- Layout: One leaf, symmetrical around the midrib
- Piece size before edging: 8.0 in (20.3 cm) wide x 8.1 in (20.6 cm) tall
- Edging depth: 0.25 in (0.6 cm) on every side
Materials
Choose a smooth worsted-weight cotton or cotton blend for crisp lobes and clear holes. Acrylic works too, but it will be slightly softer and may need firmer blocking.
- Emerald green: 25 g, about 50 m (55 yd)
Quantities include a margin of roughly 20 percent, which also covers the optional doubled strand for the midrib.
Tools:
- 5.0 mm (H-8) crochet hook
- Tapestry needle
- Scissors
- Stitch markers (4)
- Rust-proof pins and a blocking mat
- Tape measure or ruler
- Spray bottle
Abbreviations (US Terms)
- ch – chain
- sl st – slip stitch
- sc – single crochet
- hdc – half double crochet
- sc2tog – single crochet 2 together
- sc3tog – single crochet 3 together
- hdc2tog – half double crochet 2 together
- sk – skip
- sp – space
- st(s) – stitch(es)
- RS / WS – right side / wrong side
Surface slip stitch: Hold the yarn under the work. Insert the hook from the front through the fabric, yarn over, and pull up a loop through the fabric and the loop on the hook. Move one stitch along and repeat. This draws a braided chain across the surface.
Turning chains: In this pattern, the ch 2 at the start of an hdc row and the ch 1 at the start of an sc row never count as stitches.
Gauge and Checkpoints
- Hdc gauge: 14 hdc and 10 rows = 4 in (10.2 cm)
- Sc gauge: 16 sc and 16 rows = 4 in (10.2 cm)
Because this is a single piece, the leaf is its own gauge test. Check these points as you go:
- Foundation: 24 hdc in Row 1 should measure 6.9 in (17.5 cm).
- After Row 5 of Half A: the half should measure 2.0 in (5.1 cm) from chain to edge.
- After both halves (before lobes): 4.0 in (10.2 cm) wide across the body.
- After all lobes: 8.0 in (20.3 cm) across the middle lobes.
- After the apex: 8.1 in (20.6 cm) from base to point.
- After edging: 8.5 in (21.6 cm) wide x 8.6 in (21.8 cm) tall.
If Row 1 is longer than 6.9 in (17.5 cm), go down half a hook size. If it is shorter, go up half a size. Rip back and restart straight away, because the lobe and edging counts depend on this length.
Foundation and Half A
Foundation: Ch 26. The first chain you make sits at the base of the leaf; the last one sits at the tip.
Row 1: Hdc in 3rd ch from hook (the 2 skipped ch form the tip end) and in each ch across, working toward the base. Turn. (24 hdc)
Row 2: Ch 2, hdc in each st across. Turn. (24 hdc)
Row 3 (hole row): Ch 2, hdc in next 5 sts, ch 2, sk 2, hdc in next 4 sts, ch 2, sk 2, hdc in next 4 sts, ch 2, sk 2, hdc in last 5 sts. Turn. (21 hdc + 3 ch-2 sps = 24 sts)
The holes sit over stitches 6–7, 12–13, and 18–19, exactly on the boundaries between the four lobes you will make later. The row is symmetrical, so it reads the same from either end.
Row 4: Ch 2, hdc in each hdc and 2 hdc in each ch-2 sp across. Turn. (24 hdc)
Row 5: Ch 2, hdc in each st across. Do not fasten off. (24 hdc)
Row 5 ends at the base. Place markers after stitches 6, 12, and 18 to divide the row into four groups of 6 stitches. Group 1 sits at the base and Group 4 at the tip.
Lobes for Half A
Each lobe is worked on its own 6-stitch group. Leaving the groups unconnected creates the deep slits.
Short lobe (Lobes 1 and 4) – 4 rows:
- Lobe Row 1: Ch 2, turn, hdc in each of 6 sts. (6 hdc)
- Lobe Row 2: Ch 2, turn, hdc in each st. (6 hdc)
- Lobe Row 3: Ch 2, turn, hdc2tog, hdc in next 2 sts, hdc2tog. (4 hdc)
- Lobe Row 4: Ch 2, turn, (hdc2tog) twice. (2 hdc)
Fasten off with a 4 in (10.2 cm) tail.
Long lobe (Lobes 2 and 3) – 5 rows:
- Lobe Rows 1–3: Ch 2, turn, hdc in each of 6 sts. (6 hdc each row)
- Lobe Row 4: Ch 2, turn, hdc2tog, hdc in next 2 sts, hdc2tog. (4 hdc)
- Lobe Row 5: Ch 2, turn, (hdc2tog) twice. (2 hdc)
Fasten off.
Order: Work Lobe 1 (short) straight from the end of Row 5, on Group 1. For Lobes 2, 3, and 4, join the yarn in the first stitch of the next group with the same side facing as for Lobe 1’s first row. Ch 2 and continue; do not turn before Lobe Row 1 after joining. Work Lobe 2 (long), then Lobe 3 (long), then Lobe 4 (short).
Checkpoint: Half A now measures 3.6 in (9.1 cm) from the chain to the short lobe tips and 4.0 in (10.2 cm) to the long lobe tips.
Half B
Turn the piece so the free loops of the foundation chain face up.
Row 1: Join yarn in the free loop of the first foundation ch (the base end, which holds the last hdc of Half A Row 1). Ch 2, hdc in the same loop and in each free loop across, stopping at the last ch that holds a Half A hdc. Turn. (24 hdc)
Rows 2–5: Work exactly as Half A Rows 2–5, including the hole row. (24 sts each row)
Row 5 of Half B ends at the tip, so Group 1 is now at the tip. Mark the groups and work the lobes in the same order: Lobe 1 short, Lobe 2 long, Lobe 3 long, Lobe 4 short. The short lobes land at the tip and base, mirroring Half A.
Checkpoint: The body measures 8.0 in (20.3 cm) across the long lobes and 7.2 in (18.3 cm) across the short lobes, with three holes on each side of the chain.
Apex Triangle
The tip edge is made up of the row ends of Rows 1–5 on both halves, with the 2 skipped chains in the middle.
Row T1: With the tip edge on top, join yarn at the Row 5 end of Half A. Ch 1. Work 7 sc across the Half A row ends (1 sc in Row 5, 2 in Row 4, 1 in Row 3, 2 in Row 2, 1 in Row 1). Work 1 sc in the skipped-ch space. Work 7 sc across the Half B row ends (1, 2, 1, 2, 1 from Row 1 to Row 5). Turn. (7 + 1 + 7 = 15 sc)
Row T2: Ch 1, sc3tog, sc in next 9 sts, sc3tog. Turn. (11 sc)
Row T3: Ch 1, sc3tog, sc in next 5 sts, sc3tog. Turn. (7 sc)
Row T4: Ch 1, sc3tog, sc in next st, sc3tog. Turn. (3 sc)
Row T5: Ch 1, sc3tog. Fasten off. (1 sc)
Checkpoint: T1 measures 3.75 in (9.5 cm) wide and the triangle is 1.25 in (3.2 cm) tall. The leaf now measures 8.1 in (20.6 cm) from base to point.
Border: Edging Round and Stem
Border gauge: Along hdc row ends, alternate 1 sc and 2 sc (3 sc per 2 rows). Along sc row ends, work 1 sc per row. Each lobe tip gets 2 sc in each of its 2 stitches.
Edging Round: With RS facing, join yarn at the base of the midrib (the first foundation ch).
- Base center and stem: Ch 1, sc in base of midrib, ch 7, sl st in 2nd ch from hook and in next 5 ch, then sc in base of midrib again. (2 sc + stem)
- Half A base edge: 7 sc across the row ends of Rows 1–5 (1, 2, 1, 2, 1).
- Lobe 1 (short): Work 6 sc up the lower side (1, 2, 1, 2), 2 sc in each of the 2 tip sts (4 sc), and 5 sc down the upper side (2, 1, 2). Then sc2tog over the Lobe Row 1 ends of Lobes 1 and 2. (16 sts)
- Lobe 2 (long): Work 6 sc up (2, 1, 2, 1), 4 sc at the tip, and 6 sc down (1, 2, 1, 2). Then sc2tog over the Lobe Row 1 ends of Lobes 2 and 3. (17 sts)
- Lobe 3 (long): Work as Lobe 2, ending with sc2tog over Lobes 3 and 4. (17 sts)
- Lobe 4 (short): Work 5 sc up (2, 1, 2), 4 sc at the tip, and 5 sc down (2, 1, 2). Then sc2tog over the Lobe Row 1 end of Lobe 4 and the end of Row T1. (15 sts)
- Apex side A: 1 sc in each row end of T2, T3, and T4. (3 sc)
- Apex point: (Sc, ch 2, sc) in the T5 stitch. (2 sc + ch-2 sp)
- Apex side B: 1 sc in each row end of T4, T3, and T2, then sc2tog over the end of T1 and the Lobe Row 1 end of the tip lobe. (4 sts)
- Half B lobes:
- Short tip lobe: 5 + 4 + 5 + sc2tog = 15 sts
- Long lobe: 6 + 4 + 6 + sc2tog = 17 sts
- Long lobe: 17 sts
- Short base lobe: 5 up (2, 1, 2), 4 at the tip, 6 down (2, 1, 2, 1) = 15 sts
- Half B base edge: 7 sc across the row ends of Rows 5–1 (1, 2, 1, 2, 1).
Sl st to first sc. Fasten off.
Per-side totals:
- Half A side (steps 2–7) = 7 + 16 + 17 + 17 + 15 + 3 = 75 sts
- Half B side (steps 9–11) = 4 + 15 + 17 + 17 + 15 + 7 = 75 sts
- Round total = 2 (base) + 75 + 2 (apex) + 75 = 154 sts, plus the apex ch-2 sp and the stem
Why the math works: An hdc row is 0.4 in (1.0 cm) tall and one sc is 0.25 in (0.6 cm) wide. Three sc across two rows fill 0.8 in (2.0 cm) of edge with 0.75 in (1.9 cm) of stitch width, so the edge lies flat with a little ease. On the sc apex, 1 sc per row matches 1:1. The 4 sc at each lobe tip round the outer curve, and each sc2tog pulls an inside corner neatly closed so the slits stay crisp.
Midrib
Hold the yarn double for a bolder braid, or single for a finer one. Work surface slip stitch along the foundation chain line. Start at the base just above the stem and work 1 sl st per foundation ch (24 sl sts). Then continue up the center of the apex with 1 sl st per row (5 sl sts). (29 sl sts) Fasten off on the WS and weave in all ends along the slit edges.
Final Blocking
- Spray the leaf until damp, or soak it briefly and roll it in a towel.
- Lay it flat on the mat and straighten the midrib with pins at the base and the apex.
- Pin the width to 8.5 in (21.6 cm) across the long lobes.
- Pin the height to 8.6 in (21.8 cm) from the base edge to the apex point.
- Pin each lobe tip, angling the lobes slightly upward for a natural shape.
- Open each slit to an even width and push each oval hole into shape with a finger.
- Let it dry completely before unpinning.
Final Quality-Control Checklist
- Four lobes per side, short-long-long-short from base to tip
- Three oval holes per side, each centered between two lobes
- Slits open to the edging and closed cleanly by sc2tog at their base
- Edging round totals 154 sts plus the apex ch-2 sp and the stem
- Apex comes to one sharp point
- Midrib runs straight and even from stem to tip
- Finished size 8.5 in (21.6 cm) x 8.6 in (21.8 cm)
- All ends woven in invisibly
Troubleshooting
- Leaf cups or ruffles: The edging is too loose or has extra sts on the row ends. Recheck the 1, 2, 1, 2 rhythm.
- Edges pucker: There are too few edging sts or your tension is tight. Go up a hook size for the edging only.
- Holes are off-center: Recount Row 3. The groups must be 5, 4, 4, and 5 hdc.
- Slits gape at the base: Work each sc2tog firmly and pull it snug.
- Apex is blunt: Make sure T5 is a true sc3tog, and pin the point when blocking.
- Midrib is wavy: Keep the surface slip stitches loose and even, one per chain.
Care
Hand wash in cool water with mild soap, press out the excess water, and dry flat, reshaping the lobes while damp. Do not tumble dry.
Final Notes
The whole leaf depends on one chain of measurements:
- 24 hdc at 6.9 in (17.5 cm) set the midrib.
- Five rows per half make a body 4.0 in (10.2 cm) wide.
- The lobes bring the width to 8.0 in (20.3 cm).
- The apex adds 1.25 in (3.2 cm).
- The 0.25 in (0.6 cm) edging brings the leaf to 8.5 in (21.6 cm) by 8.6 in (21.8 cm).
Check your gauge at the foundation and every later step falls into place.
Happy crocheting!