

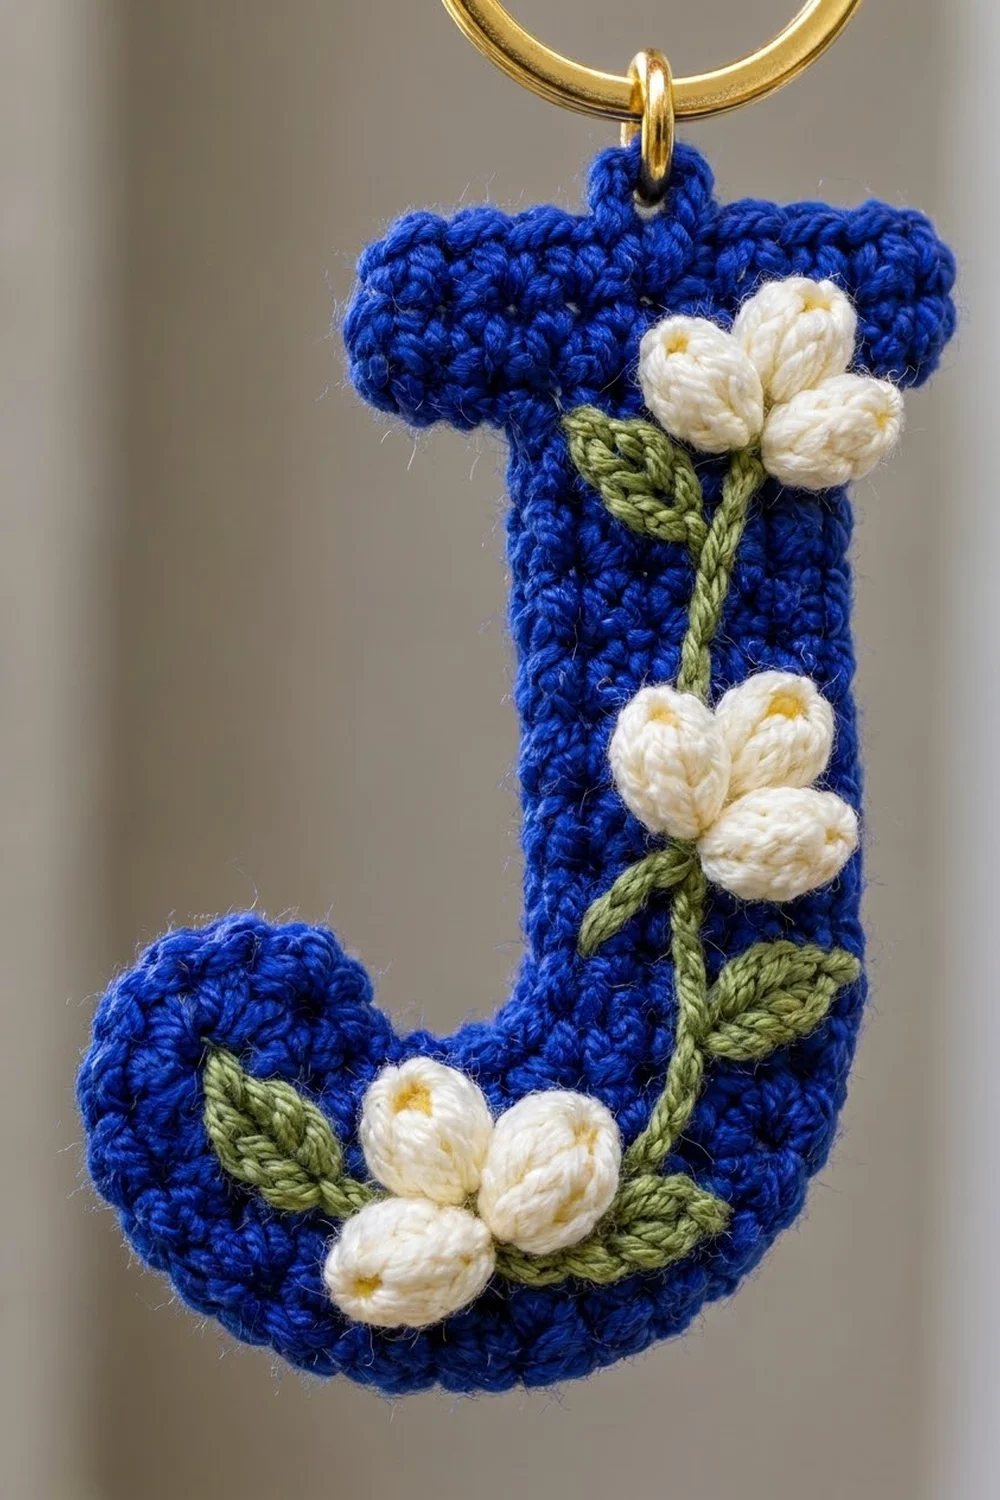
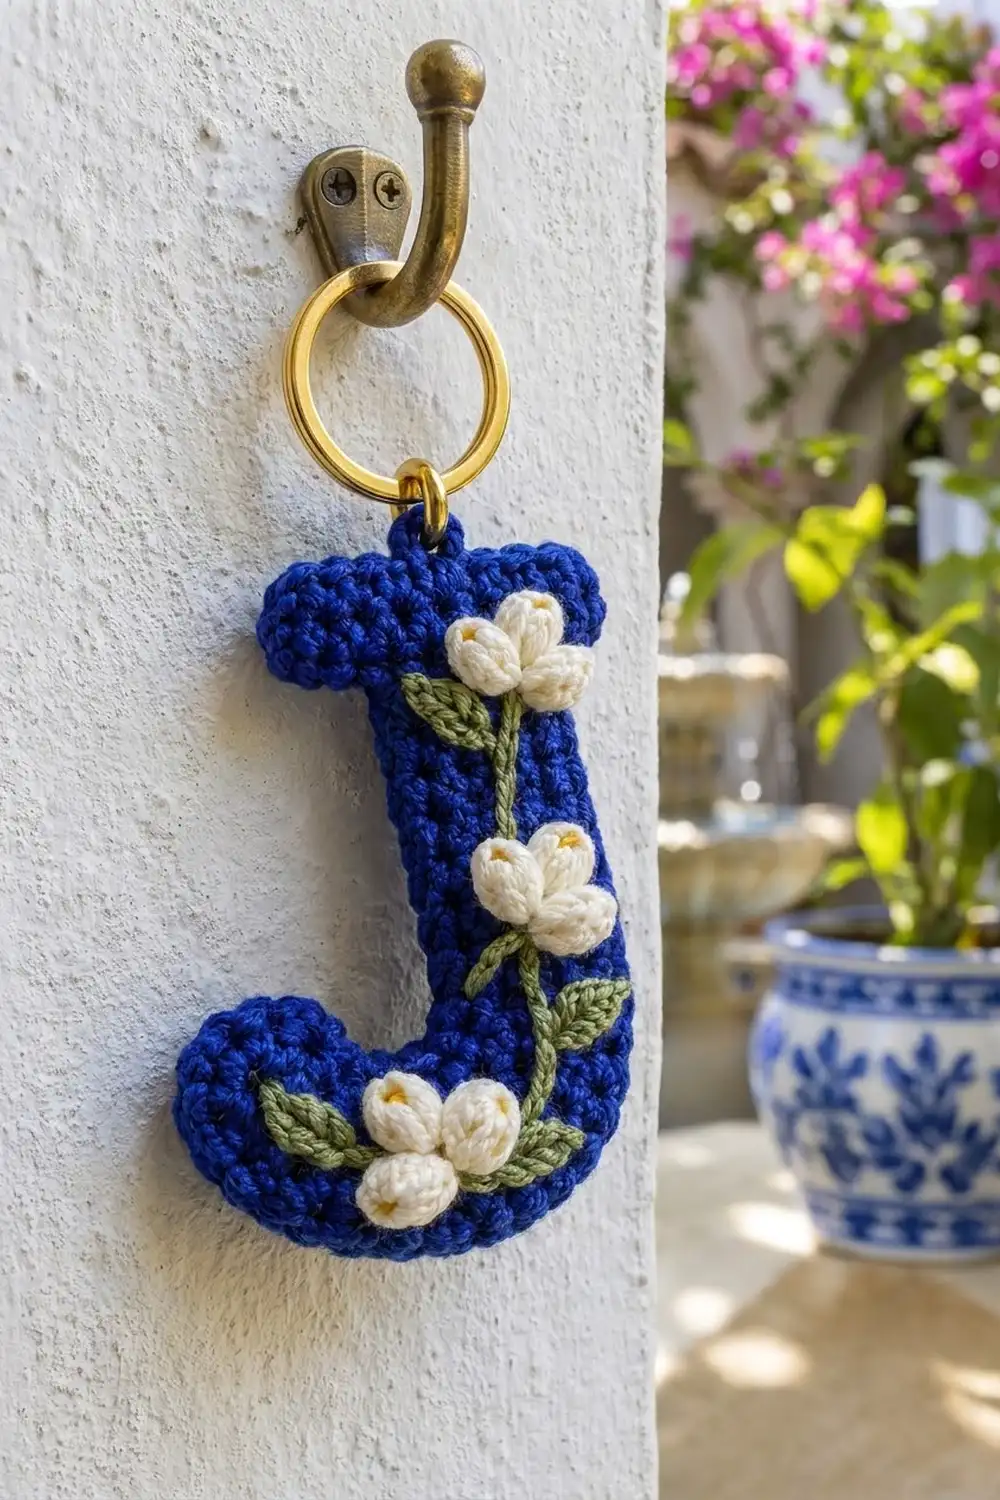
This little letter J is a dense, royal-blue keychain with a tiny spring garden climbing up its front. A soft green vine runs from the curl of the J up the stem, with small pointed leaves along it and three cream flowers, each made of three plump bobble petals. A gold split ring at the top makes it ready to clip onto keys, a bag, or a hook by the door.
The palette is three colors only: royal blue for the letter, cream for the flowers, and sage green for the vine and leaves. The style is crisp and graphic, a bit like painted blue-and-white tiles, with a firm single crochet fabric and a neat raised rim all the way around the edge.
This pattern uses US crochet terms. The finished keychain measures 2.45 in (6.2 cm) wide and 3.75 in (9.5 cm) tall, not counting the ring.
The letter is worked flat in single crochet rows from the bottom up: first the rounded base, then the hook tip, then the stem, and finally the crossbar, which grows out past the stem on both sides. One round of single crochet border neatens the outline. The flowers and leaves are made separately and sewn on, and the vine is a line of surface slip stitch.
Finished Size and Construction
- Finished size: 2.45 in (6.2 cm) wide x 3.75 in (9.5 cm) tall
- Skill level: Advanced beginner
- Terminology: US
- Yarn weight: Sport weight (2) cotton
- Hook: 2.75 mm (C-2)
- Number of pieces: 1 letter body, plus 3 flowers and 5 leaves sewn on as appliqués
- Layout: Single piece, no joining
- Body size before border: 2.2 in (5.6 cm) wide x 3.5 in (8.9 cm) tall (11 stitches x 21 rows at the widest and tallest points)
- Border depth: about 1/8 in (0.3 cm) on every edge, so the border adds 0.25 in (0.6 cm) to each dimension
Materials
Choose a smooth, mercerized sport-weight cotton. It gives the tight, glossy single crochet texture that makes the letter look crisp, and it holds its shape on a keychain that gets handled every day. Avoid fuzzy or very soft acrylics, which blur the stitch definition and the bobble petals.
- Royal blue: 6 g / 18 m (20 yd)
- Cream: 3 g / 9 m (10 yd)
- Sage green: 2 g / 6 m (7 yd)
These amounts include a comfortable margin for a gauge swatch and for weaving in ends.
Tools:
- 2.75 mm (C-2) crochet hook
- Tapestry needle
- Sharp scissors
- 2 locking stitch markers
- Gold split key ring, 1 in (2.5 cm) diameter
- Gold jump ring, 6 mm, plus two pairs of flat-nose pliers
- Pins and a foam blocking mat with a grid
- Spray bottle with water
Abbreviations (US Terms)
- ch – chain
- sl st – slip stitch
- sc – single crochet
- hdc – half double crochet
- dc – double crochet
- sc2tog – single crochet 2 together
- st(s) – stitch(es)
- RS / WS – right side / wrong side
Special stitch – 3-dc bobble (bob): Yarn over, insert hook in the ring, pull up a loop, yarn over and pull through 2 loops (2 loops left on hook). Repeat 2 more times in the ring (4 loops on hook). Yarn over and pull through all 4 loops.
Gauge and Checkpoints
Gauge: 10 sc x 12 rows = 2 in (5.1 cm) square in royal blue with the 2.75 mm hook. That is 5 sts and 6 rows per 1 in (2.5 cm).
Make one swatch before you start: ch 11, work 10 sc per row for 12 rows, and measure without stretching. Gauge matters here because the letter’s shape depends on exact stitch and row counts.
Measurement checkpoints:
- After Row 5: 2.0 in (5.1 cm) wide x 0.83 in (2.1 cm) tall
- After the hook tip (Row 8): the tip is 0.6 in (1.5 cm) wide, and the piece is 1.33 in (3.4 cm) tall at the tip
- After Row 17: the stem is 1.0 in (2.5 cm) wide, and the piece is 2.83 in (7.2 cm) tall
- After Row 21: 2.2 in (5.6 cm) wide x 3.5 in (8.9 cm) tall
- After the border: 2.45 in (6.2 cm) x 3.75 in (9.5 cm)
If your piece is too big, switch to a 2.5 mm hook. If it is too small, try a 3.0 mm hook. Don’t add or remove stitches, because every count below shapes the letter.
Letter Body
Work in royal blue. The ch 1 at the start of each row does not count as a stitch. Odd rows are RS rows. To keep track, think of the letter as 11 columns wide, numbered 1 to 11 from left to right as seen from the RS.
Base
Row 1 (RS): Ch 9, sc in 2nd ch from hook and in each ch across. (8 sc, columns 2–9)
Row 2: Ch 1, turn, 2 sc in first st, sc in next 6 sts, 2 sc in last st. (10 sc, columns 1–10)
Rows 3–5: Ch 1, turn, sc in each st across. (10 sc)
Row 5 ends at the left edge (column 1) as seen from the RS. Checkpoint: 2.0 in (5.1 cm) wide.
Hook Tip
Row 6: Ch 1, turn, sc in first 3 sts. Leave the remaining 7 sts unworked. (3 sc, columns 1–3)
Row 7: Ch 1, turn, sc in each st across. (3 sc)
Row 8: Ch 1, turn, sc2tog, sc in last st. (2 sts)
Fasten off. This short raised piece is the tip of the J’s curl.
Stem
Row 6: With the same side facing as for hook-tip Row 6 (WS), skip the next 2 unworked sts of Row 5 (columns 4–5). Join royal blue in the following st (column 6), ch 1, then sc in the same st and in the next 4 sts. (5 sc, columns 6–10)
The 2 skipped sts form the floor of the gap between the hook tip and the stem.
Rows 7–17: Ch 1, turn, sc in each st across. (5 sc)
That makes 12 stem rows in total (Rows 6–17). Row 17 ends at the left edge of the stem (column 6). Checkpoint: the piece is 2.83 in (7.2 cm) tall overall, and the stem is 1.0 in (2.5 cm) wide.
Crossbar
The crossbar extends 2 sts past the stem on the left and 1 st past it on the right, like the slightly off-center top of a printed J.
Row 18: Ch 3, turn. Sc in 2nd ch from hook and in next ch (2 sc, columns 4–5), sc in next 4 sts (columns 6–9), 2 sc in last st (columns 10–11). (8 sc)
Count check: 2 new + 4 + 2 = 8 sc.
Rows 19–21: Ch 1, turn, sc in each st across. (8 sc)
Fasten off. Checkpoint: the piece is 2.2 in (5.6 cm) wide from the left edge of the curl to the right end of the crossbar, and 3.5 in (8.9 cm) tall. The crossbar is 1.6 in (4.1 cm) wide and 0.67 in (1.7 cm) tall.
Border
Border gauge: Work 1 sc per stitch along top and bottom edges and 1 sc per row end along side edges. Outer corners get 3 sc (or 2 sc at rounded spots). Inner corners get a single plain sc, with nothing skipped. The border adds about 1/8 in (0.3 cm) all around.
Round 1 (RS): Join royal blue in the top-left corner st of the crossbar (last st of Row 21, column 4). Ch 1, then work counterclockwise:
- Top-left corner: 3 sc in the joining st. (3)
- Left end of crossbar: 1 sc in each row end of Rows 20 and 19. (2)
- Bottom-left corner of crossbar: 3 sc in the Row 18 corner ch. (3)
- Underside of crossbar: 1 sc in the remaining ch (column 5). (1)
- Left (inner) side of stem: 1 sc in each row end of Rows 17 down to 6. (12)
- Gap floor: 1 sc in each of the 2 skipped sts of Row 5. (2)
- Inner side of hook tip: 1 sc in each row end of Rows 6 and 7. (2)
- Top of hook tip: 2 sc in each of the 2 sts of Row 8. (4)
- Outer side of curl: 1 sc in each row end of Rows 7 down to 2. (6)
- Bottom curve: 2 sc in the Row 1 left row end, 1 sc in each of the 8 foundation chs, 2 sc in the Row 1 right row end. (12)
- Right side of base: 1 sc in each row end of Rows 2–5. (4)
- Right side of stem: 1 sc in each row end of Rows 6–17. (12)
- Right end of crossbar: 1 sc in each row end of Rows 18–20. (3)
- Top-right corner: 3 sc in the last st of Row 21 (column 11). (3)
- Top edge: 1 sc in each of the 6 remaining sts of Row 21. (6)
Sl st to first sc. Fasten off. Total: 75 sc.
Why the math works: Each edge gets exactly one border stitch per existing stitch or row end, so the letter keeps its width and height and grows only by the rim. The top edge totals 3 + 6 + 3 = 12 sc, which is the 8 sts of Row 21 plus 2 extra at each corner (8 + 4 = 12). The bottom also totals 12 sc: 8 chs plus 2 sc at each rounded end. Single crochet rows are slightly shorter than single crochet stitches are wide (6 rows vs 5 sts per inch), so 1 sc per row end lies flat without ruffling.
Flowers (Make 3)
With cream, make a magic ring.
Round 1: *Ch 2, bob in ring, ch 2, sl st in ring.* Repeat from * to * 2 more times. (3 bobble petals)
Pull the ring tight so the three petals fan out from one point. Fasten off, leaving a 6 in (15.2 cm) tail for sewing. Each flower is about 0.6 in (1.5 cm) wide and 0.5 in (1.3 cm) tall.
Leaves (Make 5)
With sage green, ch 5. Sl st in 2nd ch from hook, hdc in next 2 chs, sc in last ch, ch 1. Working along the other side of the foundation, sc in first ch, hdc in next 2 chs, sl st in last ch. Sl st in the tip. (8 sts plus tip)
Fasten off, leaving a 6 in (15.2 cm) tail. Each leaf is about 0.4 in (1.0 cm) long, and the foundation chain shows as a center vein.
Vine and Assembly
Vine: With sage green and the RS of the letter facing, work surface sl st from the base of the curl up to the crossbar. Start at Row 3, column 5. Curve gently right to reach column 8 by Row 7, then continue straight up the center of the stem to Row 18. The vine is about 2.75 in (7.0 cm) long. Keep the slip stitches loose enough that the blue fabric doesn’t pucker.
Layout, bottom to top:
- Bottom flower: centered over the start of the vine in the curl (Rows 2–5, columns 3–6), with petals fanned up and slightly left
- Middle flower: centered on the stem over Rows 10–13
- Top flower: at the end of the vine, over Rows 17–20, with petals reaching onto the crossbar
- Leaves: 2 beside the bottom flower (one left, one right), 2 below the middle flower (one on each side of the vine), and 1 to the left of the top flower
Pin all the appliqués first. Tuck the base of each leaf under the vine or the edge of a flower, then sew the flowers on top so the petals overlap the leaf bases. Sew through the back loops of the flower stitches only, keeping your stitches small so the petals stay puffy. Weave all ends into the back of the letter.
Ring: Open the 6 mm jump ring with two pliers. Pass it through the center of the top border (between the 6th and 7th sc of the 12-sc top edge), add the split ring, and close the jump ring sideways.
Final Blocking
- Lay the letter RS up on a gridded blocking mat.
- Pin the four corners of the crossbar first. The piece should measure 2.45 in (6.2 cm) wide overall, from curl to crossbar end, and 3.75 in (9.5 cm) tall.
- Pin both sides of the stem so it is straight and 1.25 in (3.2 cm) wide including the border.
- Pin the outer edge of the curl and the hook tip into a smooth arc.
- Mist the blue fabric lightly, avoiding the flowers so the bobbles stay rounded.
- Let it dry completely, at least 2 hours, before unpinning.
Final Quality-Control Checklist
- The body is 11 sts wide and 21 rows tall at its widest and tallest points
- Base Rows 2–5 have 10 sc each, stem rows have 5 sc each, and crossbar rows have 8 sc each
- The gap between the hook tip and the stem is exactly 2 sts wide
- The border has 75 sc and lies flat, with no ruffles or cupping
- The finished size is 2.45 in (6.2 cm) x 3.75 in (9.5 cm)
- There are 3 flowers with 3 petals each and 5 leaves, and the vine is continuous
- The jump ring is fully closed with no gap
Troubleshooting
The border ruffles on the stem sides: Your rows are shorter than gauge (more than 6 rows per inch). Work sc2tog once at the middle of each long side, and note it for next time.
The border cups or pulls the curl: Make the bottom corners rounder by working 3 sc instead of 2 at each Row 1 row end. The total becomes 77 sc.
The bobble petals look flat: Pull up taller loops on each dc of the bobble, and push the petals to the RS before closing the ring.
The vine puckers the fabric: Go up one hook size for the surface slip stitch only.
The crossbar leans: Recount Row 18. The 2 new chain sts must be on the left and the increase on the right.
Care
Hand wash in cool water with mild soap, press the water out in a towel, and dry flat. Do not tumble dry, and do not iron the flowers.
Final Notes
The measurement chain is simple. A gauge of 5 sts and 6 rows per 1 in (2.5 cm) gives a body of 11 sts x 21 rows, or 2.2 in (5.6 cm) x 3.5 in (8.9 cm). The 75-sc border adds 1/8 in (0.3 cm) on every edge, for a finished keychain of 2.45 in (6.2 cm) x 3.75 in (9.5 cm). Check your size at Row 5, Row 17, and Row 21, and the letter will come out true every time.
Happy crocheting!