

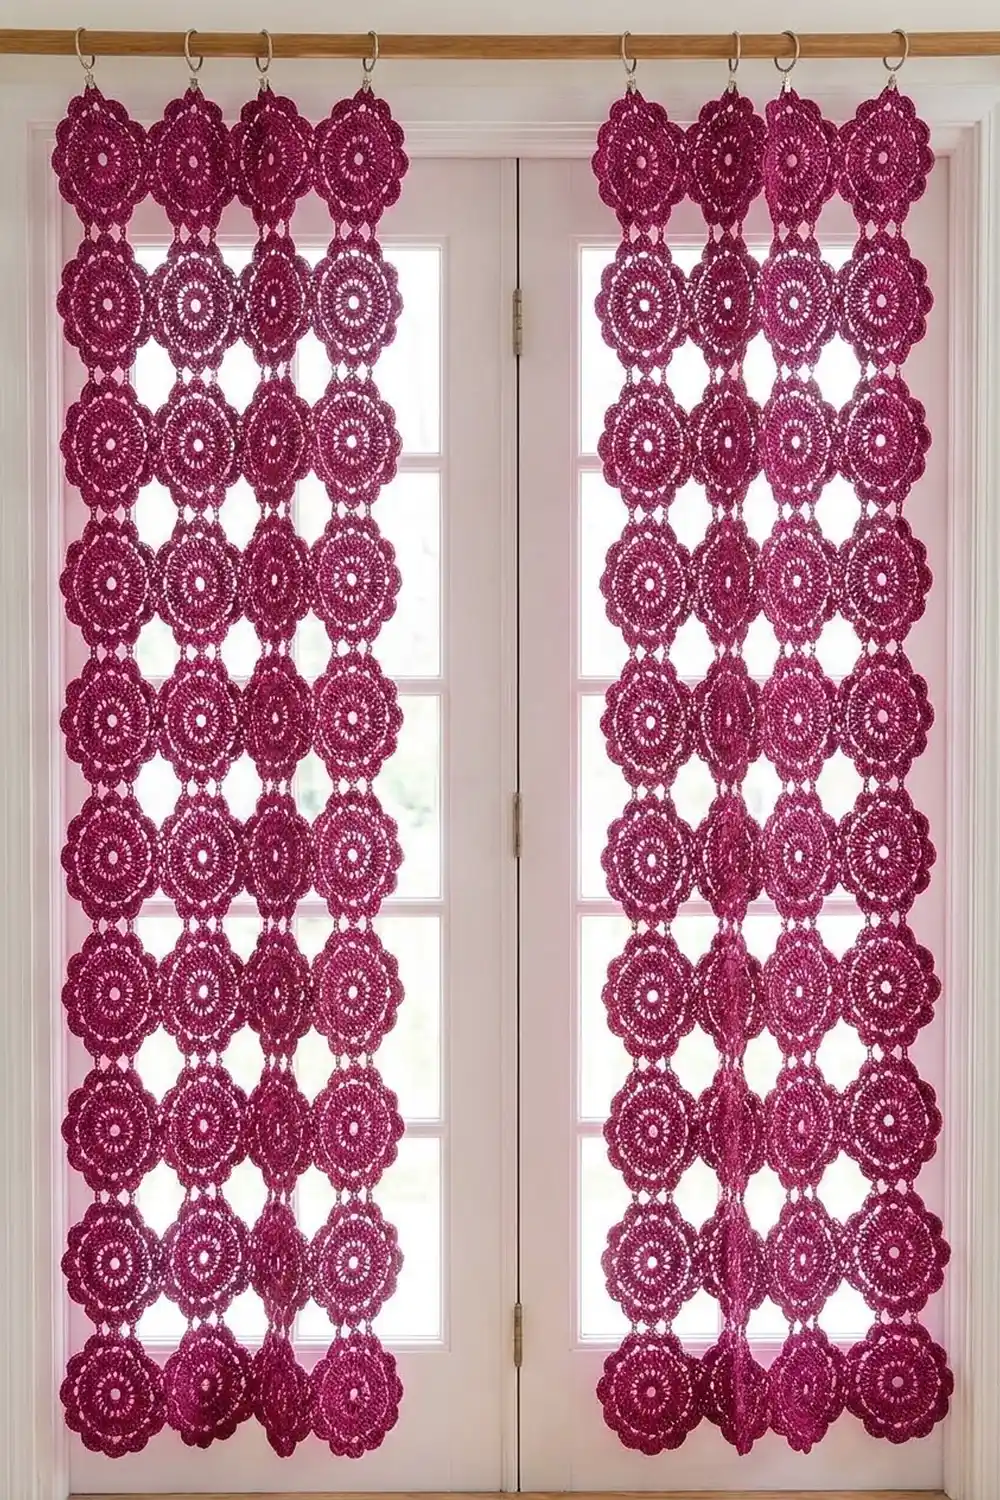
These curtains are made from lace medallions in one rich berry-magenta cotton. Each medallion has a small open center, a ring of 24 spokes and a scalloped edge of 12 fan petals. Joined into columns, the motifs make a tall lace panel with open gaps that let soft light through.
The style is vintage lace with a modern, single-color look. One shade keeps the focus on the texture: spokes, fans and chain-loop scallops. The pattern uses US crochet terms throughout.
Each finished panel measures about 19 in x 85 in (48.3 cm x 215.9 cm) after the border. The pattern makes two panels. Each panel is 3 motifs wide and 14 motifs tall, and each motif is 6 in (15.2 cm) across.
You work each motif in 5 rounds. From the second motif on, you join it to its neighbors during the last round (join-as-you-go). A 2-round border straightens the outer edges, and the panels hang from clip rings.
Finished Size and Construction
- Finished size (per panel): 19 in x 85 in (48.3 cm x 215.9 cm)
- Skill level: Intermediate
- Terminology: US crochet terms
- Yarn weight: DK / light worsted (weight 3) cotton
- Hook: 4.0 mm (G-6)
- Number of pieces: 84 motifs (42 per panel)
- Layout: 3 motifs wide x 14 motifs tall, per panel
- Motif size: 6 in (15.2 cm) across, petal tip to petal tip
- Size before border: 18 in x 84 in (45.7 cm x 213.4 cm)
- Border depth: about 0.5 in (1.3 cm) beyond the petal tips
Materials
Yarn advice: Use a smooth mercerized or combed cotton in DK weight. Cotton gives the sharp spokes and firm scallops shown, and it hangs straight without stretching too much. Avoid fuzzy blends, which blur the lace.
- Berry / magenta: 750 g, about 1,800 m
This covers 84 motifs at about 7 g / 17 m each (588 g / 1,428 m), plus about 40 g / 100 m of border per panel. Quantities include a margin of about 10% for gauge swatches and joining tails. Buy all the yarn from one dye lot.
Tools:
– 4.0 mm (G-6) crochet hook
– Tapestry needle
– Scissors
– Rust-proof pins and blocking mats (or a large towel-covered surface)
– Spray bottle
– Measuring tape
– 14 curtain clip rings (7 per panel)
– Optional: removable stitch markers
Abbreviations (US Terms)
- ch – chain
- sl st – slip stitch
- sc – single crochet
- hdc – half double crochet
- dc – double crochet
- tr – treble crochet
- dtr – double treble crochet
- sk – skip
- sp(s) – space(s)
- st(s) – stitch(es)
- MR – magic ring
Special stitches
- Fan: (dc, ch 1) 4 times in the same st, then dc in that same st. This makes 5 dc and 4 ch-1 sps.
- Joining loop: ch 1, sl st into the matching ch-3 loop of the neighboring motif, ch 1. It replaces one ch-3 loop.
- dtr2tog (border): Yo 3 times, insert hook in the indicated loop, yo and pull up a loop, (yo, pull through 2) 3 times. Repeat from * in the second indicated loop, then yo and pull through all 3 loops on the hook.
Gauge and Checkpoints
Test one motif first. Make a full motif and block it before starting the panel. Everything else depends on the motif size.
Checkpoints (unblocked, lightly pressed flat):
– After Round 1: 1.25 in (3.2 cm) across
– After Round 2: 2.75 in (7.0 cm) across
– After Round 3: 3 in (7.6 cm) across
– After Round 4: 5 in (12.7 cm) across
– After Round 5: 6 in (15.2 cm) across, petal tip to petal tip (after blocking)
If your motif is too big: Go down to a 3.75 mm hook, or tighten the spokes in Round 2.
If your motif is too small: Go up to a 4.5 mm hook.
An error of only 0.25 in (0.6 cm) per motif adds up to 3.5 in (8.9 cm) over 14 motifs of panel length. Fix gauge before you continue.
Medallion Motif
Make 1 motif fully (Rounds 1–5). For all other motifs, work Rounds 1–4, then do Round 5 using the joining instructions.
Round 1: Make a MR. Ch 3 (counts as dc), 11 dc in the ring. Pull the ring closed, leaving a small open center. Join with sl st to the top of the beginning ch-3. (12 dc)
Round 2 (spokes): Ch 5 (counts as tr + ch 1). In the same st, work tr, ch 1. (Tr, ch 1) twice in the next dc; repeat from * 10 more times. Join with sl st to the 4th ch of the beginning ch-5. (24 tr, 24 ch-1 sps)
The spokes should lie flat and evenly spaced. If they ruffle, your tr are too loose.
Round 3 (solid circle): Ch 1. Sc in the same st as the join, then sc in each ch-1 sp and each tr around. Join to the first sc. (48 sc: 24 sc worked 1 per existing tr + 24 sc worked in the ch-1 sps)
Round 4 (fans): Ch 1. Sc in the same st, sk 1 sc, Fan in the next sc, sk 1 sc. Sc in the next sc, sk 1 sc, Fan in the next sc, sk 1 sc; repeat from * 10 more times. Join to the first sc. (12 sc, 12 Fans = 60 dc and 48 ch-1 sps)
Each Fan uses exactly 4 sc of Round 3 (12 x 4 = 48).
Round 5 (scallop loops): Sc in the next ch-1 sp, ch 3. Repeat from * 3 more times (4 sc in the 4 ch-1 sps of the Fan). Then sc in the sc between Fans, ch 3. Repeat this sequence around all 12 petals. Join to the first sc. Fasten off and weave in the ends. (60 sc, 60 ch-3 loops)*
To start Round 5: sl st into the first ch-3 loop… no, keep it simple: ch 1 and start in the joining sc of Round 4, so each petal reads as follows.
Petal numbering (for joining and border): Each petal has 5 ch-3 loops. Loop 1 sits just after the sc between petals, and loop 5 sits just before the next one. Loops 2, 3 and 4 form the petal tip, and loop 3 is centered over the middle dc of the Fan.
Number the petals clockwise: petal 1 at 12 o’clock, petal 4 at 3 o’clock, petal 7 at 6 o’clock and petal 10 at 9 o’clock.
Make All Pieces
- Berry / magenta: 84 motifs total (42 per panel)
- First motif of each panel: complete, no joins
- Remaining 41 motifs per panel: joined in Round 5
Layout grid (one panel, 3 wide x 14 tall, M = motif):
Row 1:   M  M  M
Row 2:   M  M  M
Row 3:   M  M  M
Row 4:   M  M  M
Row 5:   M  M  M
Row 6:   M  M  M
Row 7:   M  M  M
Row 8:   M  M  M
Row 9:   M  M  M
Row 10:  M  M  M
Row 11:  M  M  M
Row 12:  M  M  M
Row 13:  M  M  M
Row 14:  M  M  M
Work Row 1 from left to right, then each following row from left to right.
Joining
Method: Join-as-you-go in Round 5. Join each new motif to the motif on its left (if there is one) and the motif above it (if there is one).
Stitch-to-stitch logic:
– To the left neighbor: On the new motif, work loops 2, 3 and 4 of petal 10 as Joining loops. Join them to loops 4, 3 and 2 of the left neighbor’s petal 4, in that mirrored order.
– To the motif above: On the new motif, work loops 2, 3 and 4 of petal 1 as Joining loops. Join them to loops 4, 3 and 2 of the upper motif’s petal 7.
All other loops are worked as normal ch-3 loops. Each join uses 3 loops per motif, and only petal tips are joined. This leaves the open lacy gaps between motifs, which are part of the design.
Free loops per motif after joining:
– Corner motif: 54
– Edge motif: 51
– Interior motif: 48
Tension advice: Keep the ch 1 on each side of the joining sl st the same size as your normal chains. If they are tight, the panel will pucker. If they are loose, it will sag between motifs. Lay the work flat every few joins.
Size checkpoint: After Row 2, the joined work should be 18 in (45.7 cm) wide and 12 in (30.5 cm) tall. Motif centers sit 6 in (15.2 cm) apart. After all 14 rows, the panel measures 18 in x 84 in (45.7 cm x 213.4 cm).
Border
The border runs around the whole panel. It works only into the outward-facing loops and bridges each valley (the dip where two edge motifs meet) with a dtr2tog.
Border gauge: In Round 2, 6 sc = about 1.25 in (3.2 cm) along a straight run.
Outward petals per motif: A petal is outward-facing if it is not joined and not right next to a joined petal. The petals right next to a joined petal are the valley petals.
- Side motifs (12 per long side, not corners): petals 9, 10 and 11 on the left side, or petals 3, 4 and 5 on the right side. That is 15 loops.
- Top middle motif: petals 12, 1 and 2. Bottom middle motif: petals 6, 7 and 8. That is 15 loops each.
- Corner motifs: 6 petals, which is 30 loops.
- Top-left: petals 9–12, 1, 2
- Top-right: petals 12, 1–5
- Bottom-right: petals 2–7
- Bottom-left: petals 6–11
Round 1 (straightening): Join yarn in the first outward loop of the top-left corner motif. Ch 1, then sc in the same loop.
- Along each motif’s outward run: Ch 3, sc in the next loop. Repeat to the end of that motif’s outward loops.
- At each valley: Ch 3. Work dtr2tog: first leg in loop 3 of this motif’s valley petal, second leg in loop 3 of the next motif’s valley petal. Ch 3, then sc in the next motif’s first outward loop.
Continue around and join to the first sc.
Round 1 counts:
– Each long side, between corners: 12 motifs x 15 sc = 180 sc; 13 dtr2tog; 194 ch-3 sps (12 x 14 inside the runs + 13 x 2 at the valleys)
– Each short side, between corners: 15 sc; 2 dtr2tog; 18 ch-3 sps (14 + 2 x 2)
– Each corner motif: 30 sc; 29 ch-3 sps
– Total: 510 sc, 30 dtr2tog, 540 ch-3 sps
Round 2 (firm edge): Ch 1. Sc in each sc and each dtr2tog, and work 2 sc in each ch-3 sp. Join and fasten off.
Round 2 counts (stitches worked 1 per existing st + 2 per ch-3 sp):
– Each long side, between corners: 193 + 388 = 581 sc
– Each short side, between corners: 17 + 36 = 53 sc
– Each corner motif: 30 + 58 = 88 sc
– Total: 540 + 1,080 = 1,620 sc
Why the math works: Every outward run of n loops gives n sc and n − 1 ch-3 sps. Every valley adds 1 dtr2tog and 2 ch-3 sps.
There are 30 motifs on the perimeter, so the closed loop has 30 runs and 30 valleys:
– Total sc: 4 x 30 + 26 x 15 = 510
– Total ch-3 sps: (510 − 30) + 60 = 540
– The per-side figures add up the same way: 2 x 581 + 2 x 53 + 4 x 88 = 1,620
The dtr2tog fills each valley level with the petal tips. That keeps the edges straight without pulling the motifs.
Hanging: Clip 7 rings along the top of each panel:
– 1 at the petal-1 tip of each of the 3 top motifs
– 1 at each of the 2 top valleys
– 1 at each top corner (petal 12 of the top-left motif, petal 2 of the top-right motif)
Final Blocking
- Weave in all ends before blocking.
- Soak one panel in cool water for 10 minutes. Press the water out gently; do not wring.
- Roll the panel in towels to remove extra water.
- Lay it flat on mats in sections, working from the top down.
- Pin each motif center row so it measures 18 in (45.7 cm) across the petal tips.
- Pin the motif rows every 6 in (15.2 cm) down the length.
- Open each spoke and Fan with your fingers so the chain-loop scallops are round.
- Pin the border straight: 19 in (48.3 cm) wide, 85 in (215.9 cm) long.
- Let it dry completely. Then hang it for 24 hours; gravity evens out the length.
Final Quality-Control Checklist
- Every motif has 24 spokes, 12 Fans and 60 ch-3 loops.
- All joins use loops 2–4 of the matching petals, in mirrored order.
- No joins are twisted, and the gaps between motifs look the same.
- The panel is 3 x 14 motifs, 18 in x 84 in (45.7 cm x 213.4 cm) before the border.
- Border Round 2 totals 1,620 sc.
- The finished panel is 19 in x 85 in (48.3 cm x 215.9 cm).
- Both panels match in length to within 0.5 in (1.3 cm).
- All ends are woven in along solid stitches, not through the chain loops.
Troubleshooting
- Motif cups or bowls: Your Round 2 tr are too tight, or the Fans are too short. Loosen your tension or go up a hook size.
- Motif ruffles: Your stitches are too loose, or you added stitches by mistake. Recount Round 3 (48 sc) and Round 4 (12 Fans).
- Joins misaligned: You joined the wrong petal. Recount the petals from petal 1 at the top before you start Round 5.
- Panel leans to one side: You joined in a different order on some rows. Always join left first, then top.
- Border edge waves: Your dtr2tog is too long. Shorten it to a tr2tog if your tension is loose.
- Panels differ in length: Block both panels at the same time to the same measurements.
Care
Hand wash cold or machine wash on a gentle cycle in a mesh laundry bag, then lay flat to dry and re-pin if needed. Avoid hot dryers, which can shrink cotton and change the panel length.
Final Notes
The measurement chain is simple:
– The motif reaches 3 in (7.6 cm) after Round 3, 5 in (12.7 cm) after Round 4 and 6 in (15.2 cm) after Round 5.
– 3 x 14 motifs make 18 in x 84 in (45.7 cm x 213.4 cm).
– The 2-round border, ending at 1,620 sc, brings each panel to 19 in x 85 in (48.3 cm x 215.9 cm).
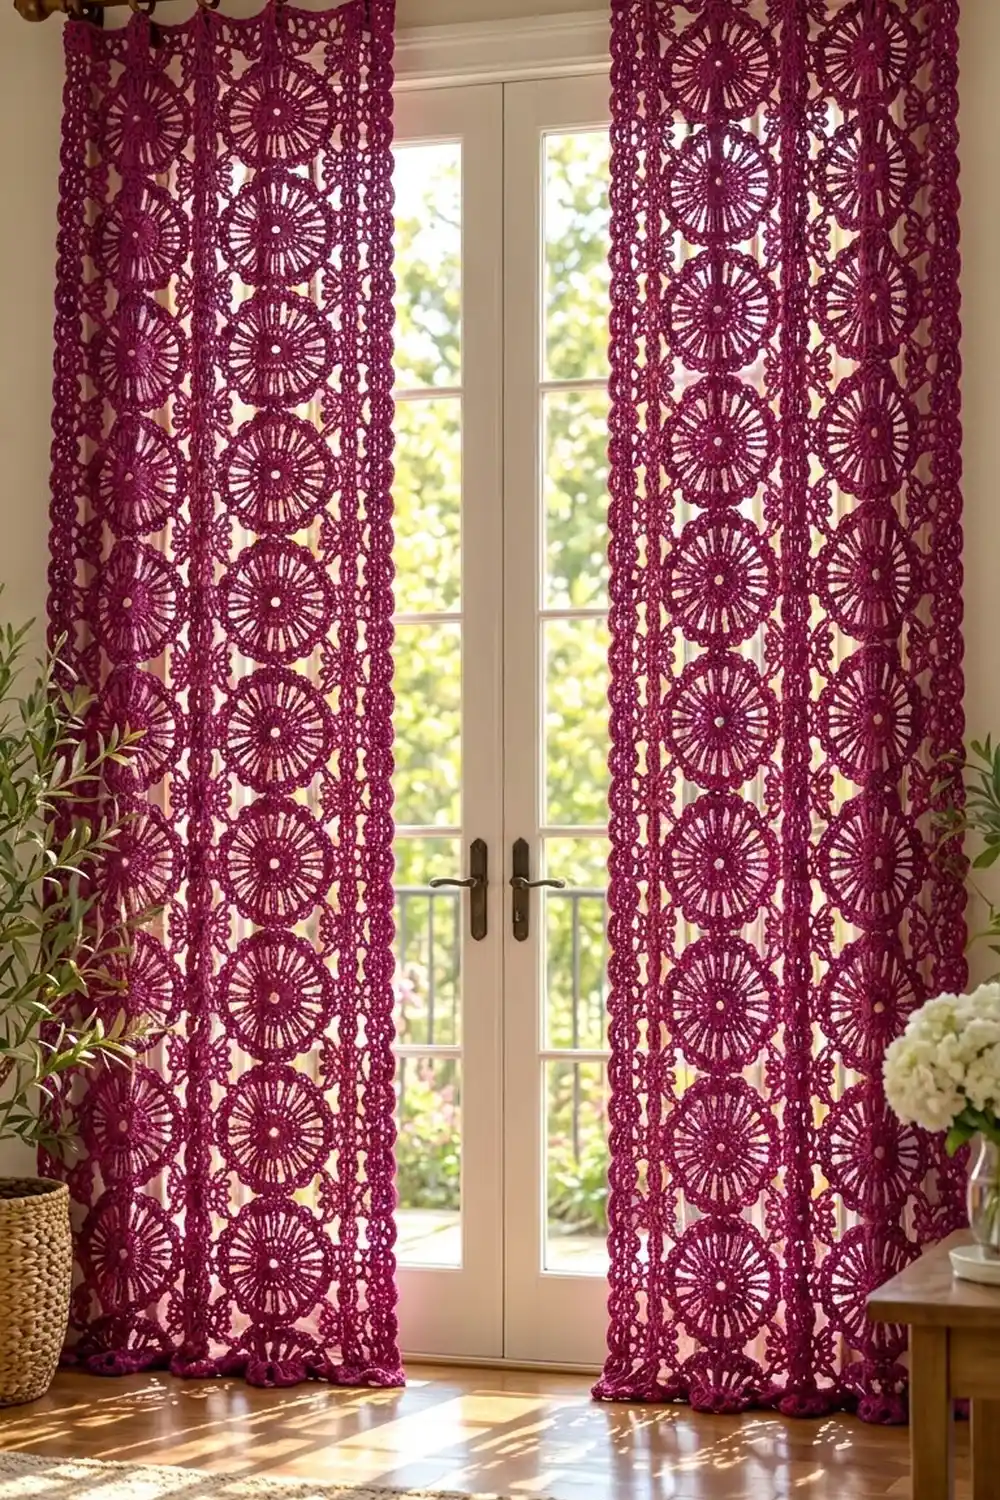
Check your first motif carefully and the rest of the panel will follow. Enjoy watching the light come through your berry lace.
Happy crocheting!