

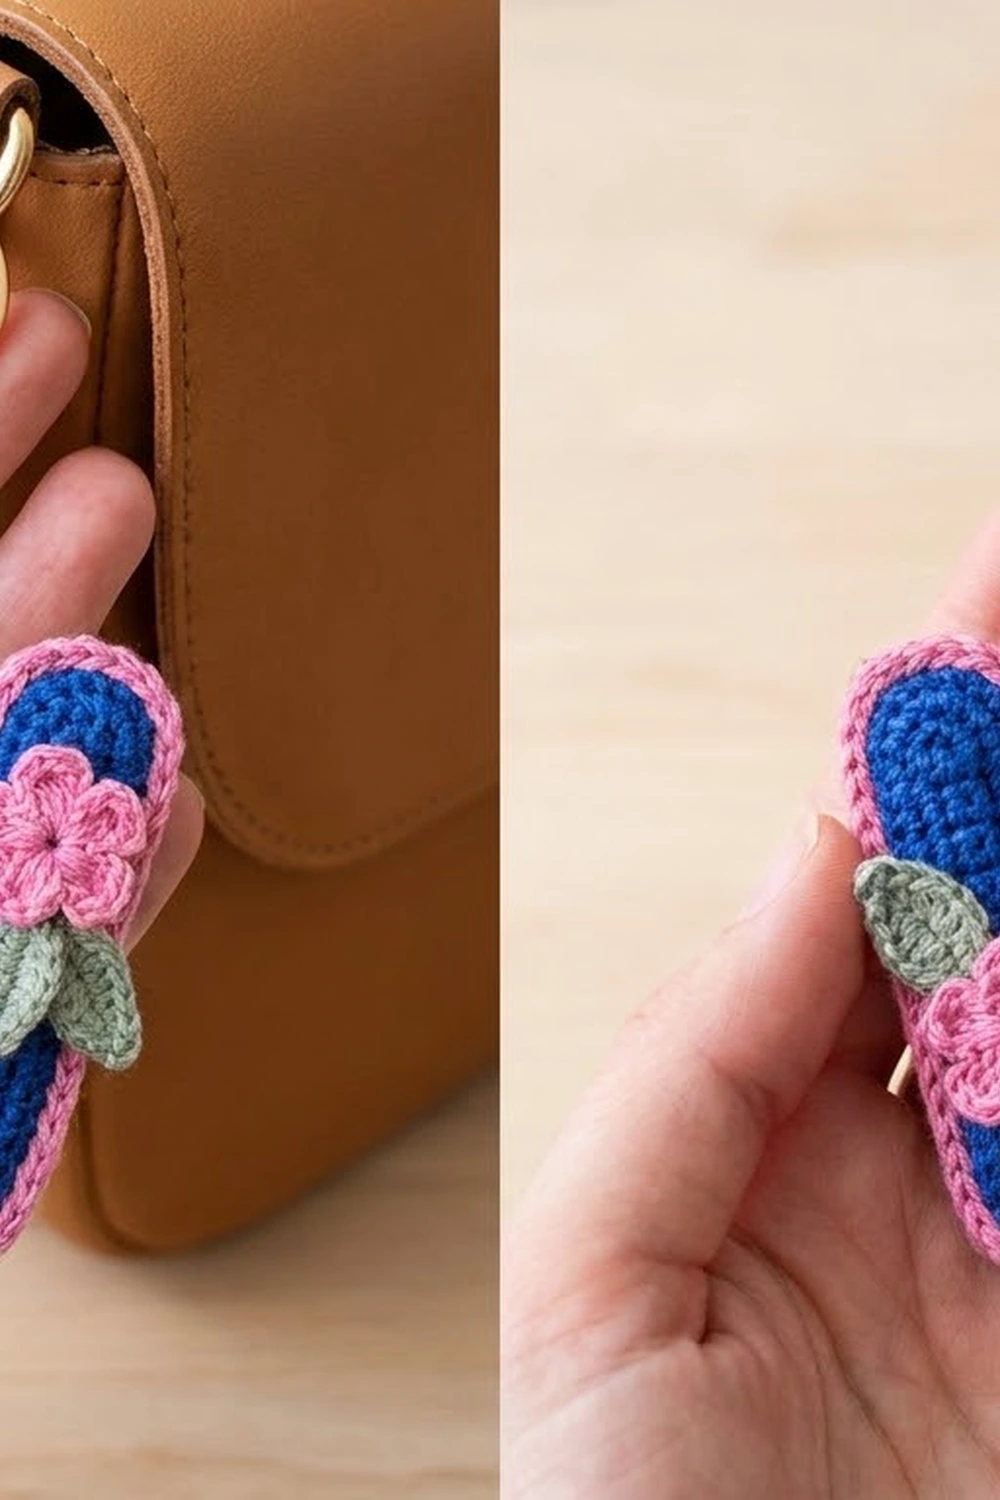
This little letter W is a bag charm with a lot of personality. The body is cobalt blue V-stitch mesh, so every row shows neat pairs of double crochets with tiny open triangles between them. A light pink corded border outlines the letter. Three pink five-petal flowers with mustard-yellow centers and sage-green leaves sit on top like a small spring bouquet.
From a distance it looks crisp and graphic. Up close it looks soft and floral. It works as a quick personalized gift, a backpack tag or a matching charm for a tote.
All terms are US crochet terms. The finished letter measures 4.3 in wide x 2.8 in tall (10.9 cm x 7.1 cm), not counting the hanging loop and keyring.
Once you see the layout, the construction is simple. You work the two feet of the W separately from the bottom up, connect them with a short chain bridge, then add the two arms and the small center peak. A two-round pink border smooths the stepped edges into clean diagonals. The flowers and leaves are made separately and sewn on.
Finished Size and Construction
- Finished size: 4.3 in x 2.8 in (10.9 cm x 7.1 cm)
- Skill level: Advanced beginner to intermediate
- Terminology: US crochet terms
- Yarn weight: Fingering (#1) cotton
- Hook: 2.5 mm
- Number of pieces: 1 letter body, plus 3 flower appliqués and 6 leaf appliqués
- Layout: One letter, nothing to join
- Piece size before border: 3.9 in x 2.4 in (9.9 cm x 6.1 cm)
- Border depth: 0.2 in (0.5 cm) per side, 2 rounds
- Flower size: 0.9 in (2.3 cm) across
- Leaf length: 0.5 in (1.3 cm)
Materials
Choose a smooth, mercerized fingering-weight cotton. Cotton holds the mesh shape, resists pilling on a bag and shows the V-stitches clearly. Avoid fuzzy or very stretchy yarns, which blur the open triangles.
- Color A, cobalt blue (letter body): 5 g, approx. 17 m
- Color B, light pink (border and flowers): 5 g, approx. 17 m
- Color C, mustard yellow (flower centers): 1 g, approx. 3 m
- Color D, sage green (leaves): 1 g, approx. 3 m
All quantities include a margin of about 25 percent for a test foot and for weaving in ends.
Tools:
- 2.5 mm crochet hook
- Tapestry needle with a sharp point
- 4 locking stitch markers
- Scissors
- 1 gold split keyring, 1 in (2.5 cm) diameter
- 1 short gold chain, about 0.75 in (1.9 cm), with 2 jump rings
- Flat-nose pliers
- Blocking mat, pins and a spray bottle
Abbreviations (US Terms)
- ch chain
- sl st slip stitch
- sc single crochet
- hdc half double crochet
- dc double crochet
- sp space
- st(s) stitch(es)
- tch turning chain
- RS / WS right side / wrong side
- rev sc reverse single crochet (crab stitch), worked left to right if you crochet right-handed
Special stitches:
- V-st: (dc, ch 1, dc) in the same st or sp. One V-st counts as 3 sts: dc, ch-1 sp, dc.
- Start-inc: ch 3 (counts as dc), V-st in the first dc at the base of the ch-3.
- End-inc: V-st in the top of the tch, dc in the same tch.
- Peak shell: (2 dc, ch 2, 2 dc) in the same sp.
Each increase adds 1 V-st (3 sts) to that row.
Gauge and Checkpoints
Gauge: 8 sts and 2.5 rows of V-st mesh = 1 in (2.5 cm). Each row is 0.4 in (1.0 cm) tall.
Make one foot first and use it as your swatch. It takes only a few grams, and every measurement below depends on it.
Checkpoints:
- Foot, Row 1: 8 sts, 1.0 in (2.5 cm) wide, 0.4 in (1.0 cm) tall
- Foot, Row 4: 14 sts, 1.75 in (4.4 cm) wide, 1.6 in (4.1 cm) tall
- Body after Row 5: 3.9 in (9.9 cm) across the widest row
- Body after Row 6: 2.4 in (6.1 cm) tall
- After border: 4.3 in x 2.8 in (10.9 cm x 7.1 cm)
If your foot is too big, go down 0.25 mm in hook size. If it is too small, go up 0.25 mm. Height matters as much as width. If your rows are taller than 0.4 in (1.0 cm), try a ch-2 turning chain and keep each yarn-over snug.
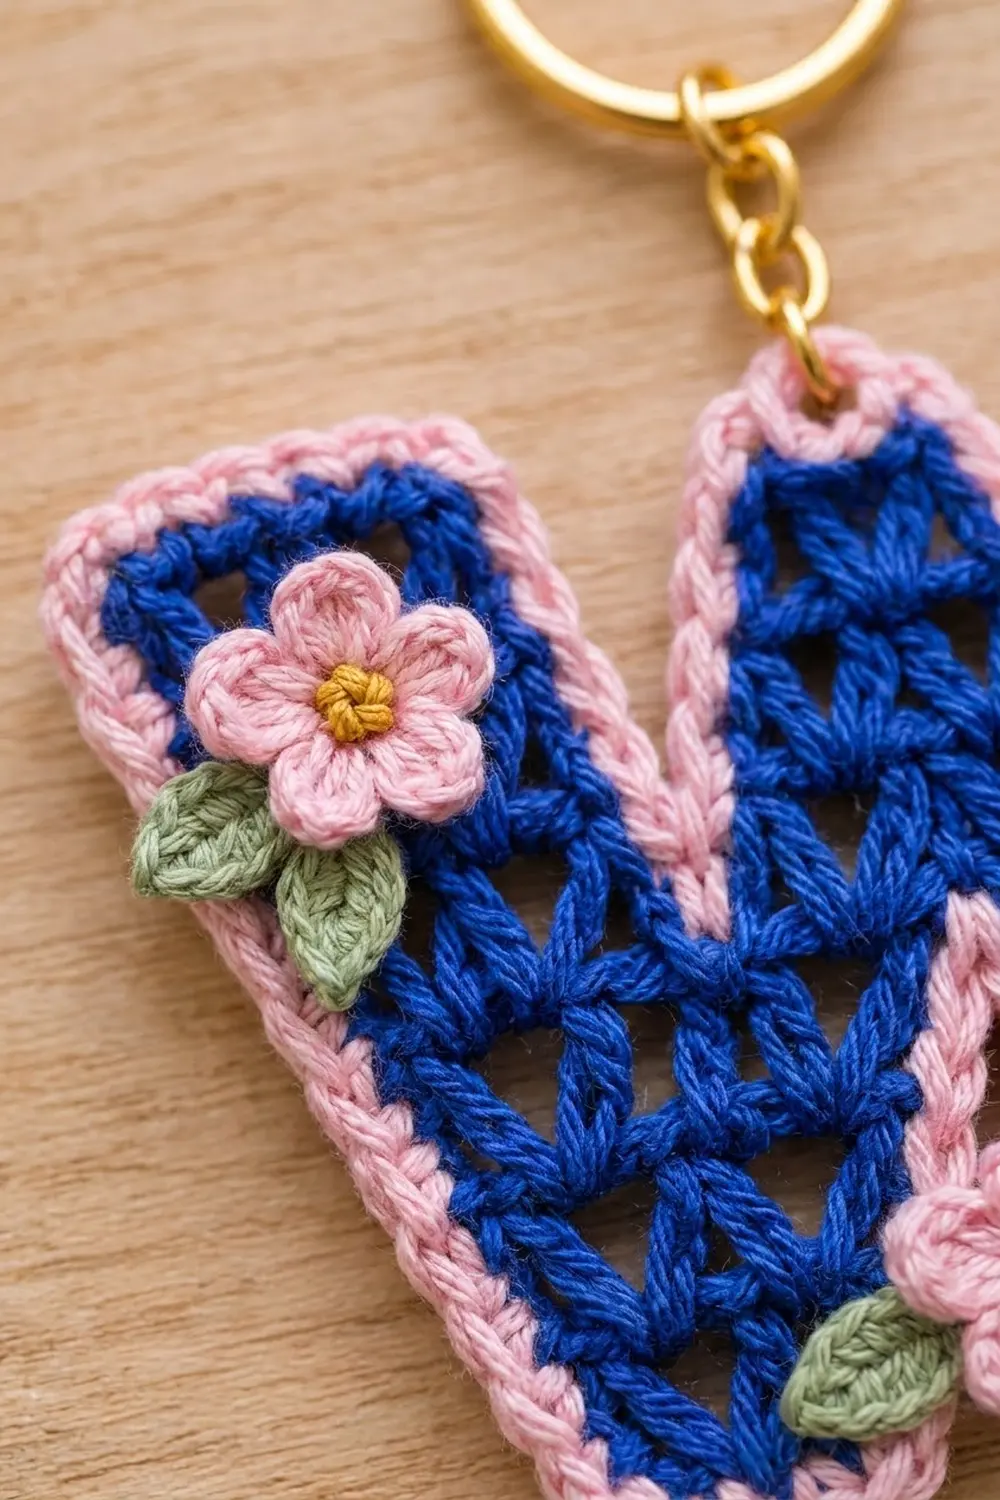
Letter Body
The body follows a grid of 9 V-st columns and 6 rows. Columns 1 to 4 are the left foot, column 5 is the center gap, and columns 6 to 9 are the right foot. All body rows use Color A.
Left Foot
Put a marker in the slip-knot end of the foundation chain. That end is the outer edge of the left foot.
Row 1 (RS): Ch 10. V-st in 5th ch from hook, skip 2 ch, V-st in next ch, skip 1 ch, dc in last ch. Turn. (2 V-sts + 2 edge dc = 8 sts)
The first 3 skipped ch count as the first dc. The 7 chains from the 4th to the 10th are the base chains, and you will work into them again for the border.
Row 2 (WS): Ch 3 (counts as dc here and throughout), V-st in each ch-1 sp across, dc in top of tch. Turn. (2 V-sts + 2 dc = 8 sts)
Row 3: Start-inc (this is the inner edge), V-st in each ch-1 sp across, dc in top of tch. Turn. (3 V-sts + 2 dc = 11 sts)
Row 4: Start-inc (this is the outer edge), V-st in each ch-1 sp across, dc in top of tch. (4 V-sts + 2 dc = 14 sts)
Checkpoint: 1.75 in (4.4 cm) wide, 1.6 in (4.1 cm) tall. Fasten off, leaving a 6 in (15.2 cm) tail.
Counting from the outer edge, the 4 V-sts of Row 4 are in columns 1, 2, 3 and 4.
Right Foot
Work Rows 1 and 2 as for the Left Foot, but mark the turning-chain end of Row 1 as the outer edge. This mirrors the shaping.
Row 3: Ch 3, V-st in each ch-1 sp across, end-inc (inner edge). Turn. (3 V-sts + 2 dc = 11 sts)
Row 4: Ch 3, V-st in each ch-1 sp across, end-inc (outer edge). (4 V-sts + 2 dc = 14 sts)
Do not fasten off. Put a marker in the live loop.
Counting from its own outer edge, the right foot’s V-sts are in columns 9, 8, 7 and 6.
Lay both feet RS up with their inner edges facing each other, about 0.4 in (1.0 cm) apart. Pin them so neither one twists.
Row 5: Arms and Middle Bridge
Row 5 is worked in three sections, all with RS facing. Count V-sts from each foot’s outer edge.
Left arm: Join Color A in the outer edge dc of the left foot. Ch 3, V-st in ch-1 sp of V-sts 1 and 2, dc in the sp between V-sts 2 and 3. Turn. (2 V-sts + 2 dc = 8 sts)
Middle: Join Color A in the sp between V-sts 3 and 4 of the left foot. Ch 3, V-st in ch-1 sp of V-st 4, ch 3, V-st in ch-1 sp of V-st 4 of the right foot (column 6), dc in the sp between that V-st and the next one. Fasten off. (2 V-sts + 2 dc = 8 sts, plus 1 ch-3 bridge)
V-st 3 on each foot is left uncovered. These two V-sts become the floors of the two top notches.
Right arm: Pick up the live loop on the right foot. Turn, ch 3, V-st in ch-1 sp of V-sts 1 and 2, dc in the sp between V-sts 2 and 3. Turn. (8 sts)
Checkpoint: 3.9 in (9.9 cm) across the widest row.
Row 6: Arm Tops and Center Peak
Left arm: Ch 3, V-st in each of the 2 ch-1 sps, dc in top of tch. (8 sts) Fasten off.
Right arm: Work as for the left arm. (8 sts) Fasten off.
Center peak: Join Color A with a sl st in the ch-3 bridge sp. Ch 3, (dc, ch 2, 2 dc) in the same sp. (Peak shell: 4 dc + 1 ch-2 sp) Fasten off.
The single shell is narrower than the arms, which gives the W its small, pointed middle.
Checkpoint: 2.4 in (6.1 cm) tall from the foundation to the arm tops. Weave in all Color A ends now.
Border
Border gauge:
– 2 sc per dc row-end.
– 1 sc per st or ch along tops and bottoms.
– 3 sc in each outer corner st. The corner st counts as 1, so this adds 2.
– 1 extra sc at each step where an increase changed the edge.
– No extra stitches at inside corners.
Round 1 (Color B, sc)
With RS facing, join Color B in the top-left corner st of the left arm. Work clockwise:
- Left arm top: 3 sc in corner dc, 1 sc in each of next 6 sts, 3 sc in corner dc. (12 sc)
- Left arm inner side, rows 6 and 5. (4 sc)
- Left notch floor, exposed V-st 3. (3 sc)
- Middle left side, row 5. (2 sc)
- Middle left shoulder: 3 sc in edge dc, 1 sc in each of next 3 sts. (6 sc)
- Peak left side. (2 sc)
- Peak top: 1 sc in each of 2 dc, (sc, ch 6, sc) in ch-2 sp, 1 sc in each of 2 dc. (6 sc + ch-6 loop)
- Peak right side. (2 sc)
- Middle right shoulder: 1 sc in each of 3 sts, 3 sc in edge dc. (6 sc)
- Middle right side. (2 sc)
- Right notch floor. (3 sc)
- Right arm inner side. (4 sc)
- Right arm top: as for the left arm top. (12 sc)
- Right outer side: rows 6 to 4, 1 step sc, rows 3 to 1. (13 sc)
- Right foot bottom: 3 sc in first base ch, 1 sc in each of next 5 base ch, 3 sc in last base ch. (11 sc)
- Right foot inner side: rows 1 and 2, 1 step sc, rows 3 and 4. (9 sc)
- Bridge underside: 1 sc in each ch. (3 sc)
- Left foot inner side: rows 4 and 3, 1 step sc, rows 2 and 1. (9 sc)
- Left foot bottom: as for the right foot bottom. (11 sc)
- Left outer side: rows 1 to 3, 1 step sc, rows 4 to 6. (13 sc)
Join with sl st to first sc. (133 sc + 1 ch-6 loop)
Round 2 (Color B, rev sc)
Ch 1, rev sc in each sc around, skipping the ch-6 loop so it stays free. Join and fasten off. (133 rev sc)
The rev sc round makes the twisted, corded look of the pink outline.
Why the math works: Every count comes straight from the body:
– Each arm top is 8 sts plus 4 for the two corners.
– Each foot bottom is 7 base chains plus 4 for the two corners.
– Every side uses 2 sc per 0.4 in (1.0 cm) row, which equals the height of two sc.
– The two halves mirror each other. Segments 1 to 6 (29 sc) match segments 8 to 13 (29 sc), and segments 14 to 16 (33 sc) match segments 18 to 20 (33 sc).
– The peak top and the bridge add 9 sc.
So the total is 29 + 29 + 33 + 33 + 9 = 133. Because no stitches are added at inside corners, the notches stay sharp instead of puckering.
Checkpoint: 4.3 in x 2.8 in (10.9 cm x 7.1 cm).
Flowers and Leaves
Flower (make 3, Color B)
Rnd 1: Magic ring, ch 1, 5 sc in ring. Pull the ring closed and join with sl st. (5 sc)
Rnd 2: In each sc around: (sl st, ch 2, 2 dc, ch 2, sl st). (5 petals) Fasten off, leaving a 10 in (25.4 cm) tail.
Each flower measures 0.9 in (2.3 cm) across.
Center: With Color C, work 3 small French knots close together in the middle of the ring.
Leaf (make 6, Color D)
Ch 5. Sl st in 2nd ch from hook, sc in next ch, hdc in next ch, sc in last ch. Fasten off, leaving an 8 in (20.3 cm) tail. (4 sts) Each leaf is 0.5 in (1.3 cm) long with a pointed tip.
Placement
- Top left: One flower on top of the left arm, with the petals slightly overlapping the outer border. Tuck 2 leaves under its lower-left edge.
- Top right: One flower on top of the right arm, overlapping the outer border. Tuck 2 leaves under its lower edge, angled outward.
- Bottom center: One flower centered over the bottom of the center notch, with the petals overlapping the inner borders of both feet. Tuck 1 leaf on each side so it lies across a foot.
Sew the leaves first, then the flowers on top. Use small stitches through the backs of the petals only so the stitching doesn’t show from the front.
Final Blocking
- Lightly spray the letter with water until it is damp, not soaked.
- Pin it flat on the blocking mat, RS up.
- Pin each outer corner and each notch floor so the diagonals run straight.
- Check with a ruler that it measures 4.3 in x 2.8 in (10.9 cm x 7.1 cm).
- Gently open each mesh triangle with a fingertip.
- Let it dry completely, about 4 to 6 hours.
- Open a jump ring with pliers, thread it through the ch-6 loop and one end of the chain, and close it. Use the second jump ring to attach the split ring to the other end of the chain.
Final Quality-Control Checklist
- Each foot has 14 sts in Row 4.
- Each arm has 8 sts in Rows 5 and 6.
- The middle bridge is exactly ch 3 and lies flat, not twisted.
- The peak shell sits centered over the bridge.
- Border Round 1 has 133 sc plus the ch-6 loop.
- Both top notches show one open V-st floor.
- The two top flowers mirror each other.
- All ends are woven in at least 1 in (2.5 cm) and trimmed.
- The keyring hardware is fully closed.
Troubleshooting
The feet twist when you work the bridge. Pin both feet flat, RS up, before you join the yarn.
The border ruffles. You are adding too many sc along the row-ends. Work 2 sc per row, not 3.
The border pulls the notches closed. Make sure you did not add stitches at the inside corners.
The letter is too wide. Your gauge is loose. Go down a hook size and make a new test foot.
The flower petals cup. Shorten the ch 2 on each side of the petal to ch 1.
The peak looks flat. Work the shell’s ch 2 loosely and pin the point while blocking.
Care
Hand wash in cool water with mild soap and lay flat to dry. Take off the metal keyring before washing to protect the gold finish.
Final Notes
Each measurement in this letter follows from the one before it. A gauge of 8 sts per 1 in (2.5 cm) and 0.4 in (1.0 cm) per row gives a 14-stitch foot that is 1.75 in (4.4 cm) wide. Two feet plus the ch-3 bridge make a 3.9 in x 2.4 in (9.9 cm x 6.1 cm) body. The 133-stitch, two-round border adds 0.2 in (0.5 cm) per side, for a finished charm of 4.3 in x 2.8 in (10.9 cm x 7.1 cm), ready for its three flowers and gold ring.
Happy crocheting!