

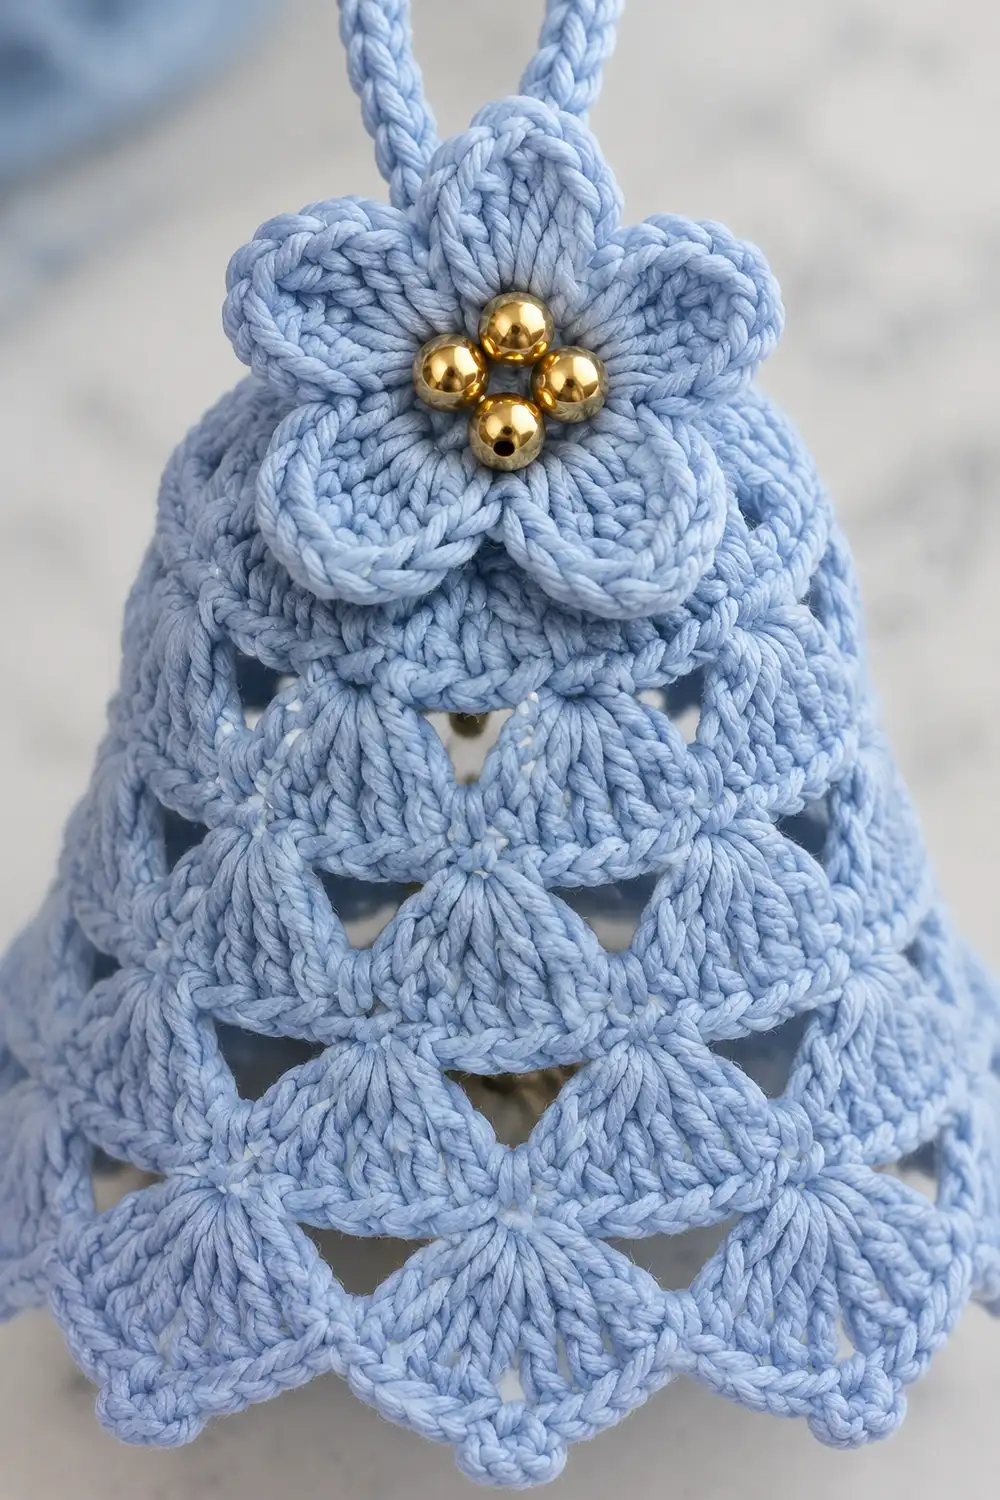
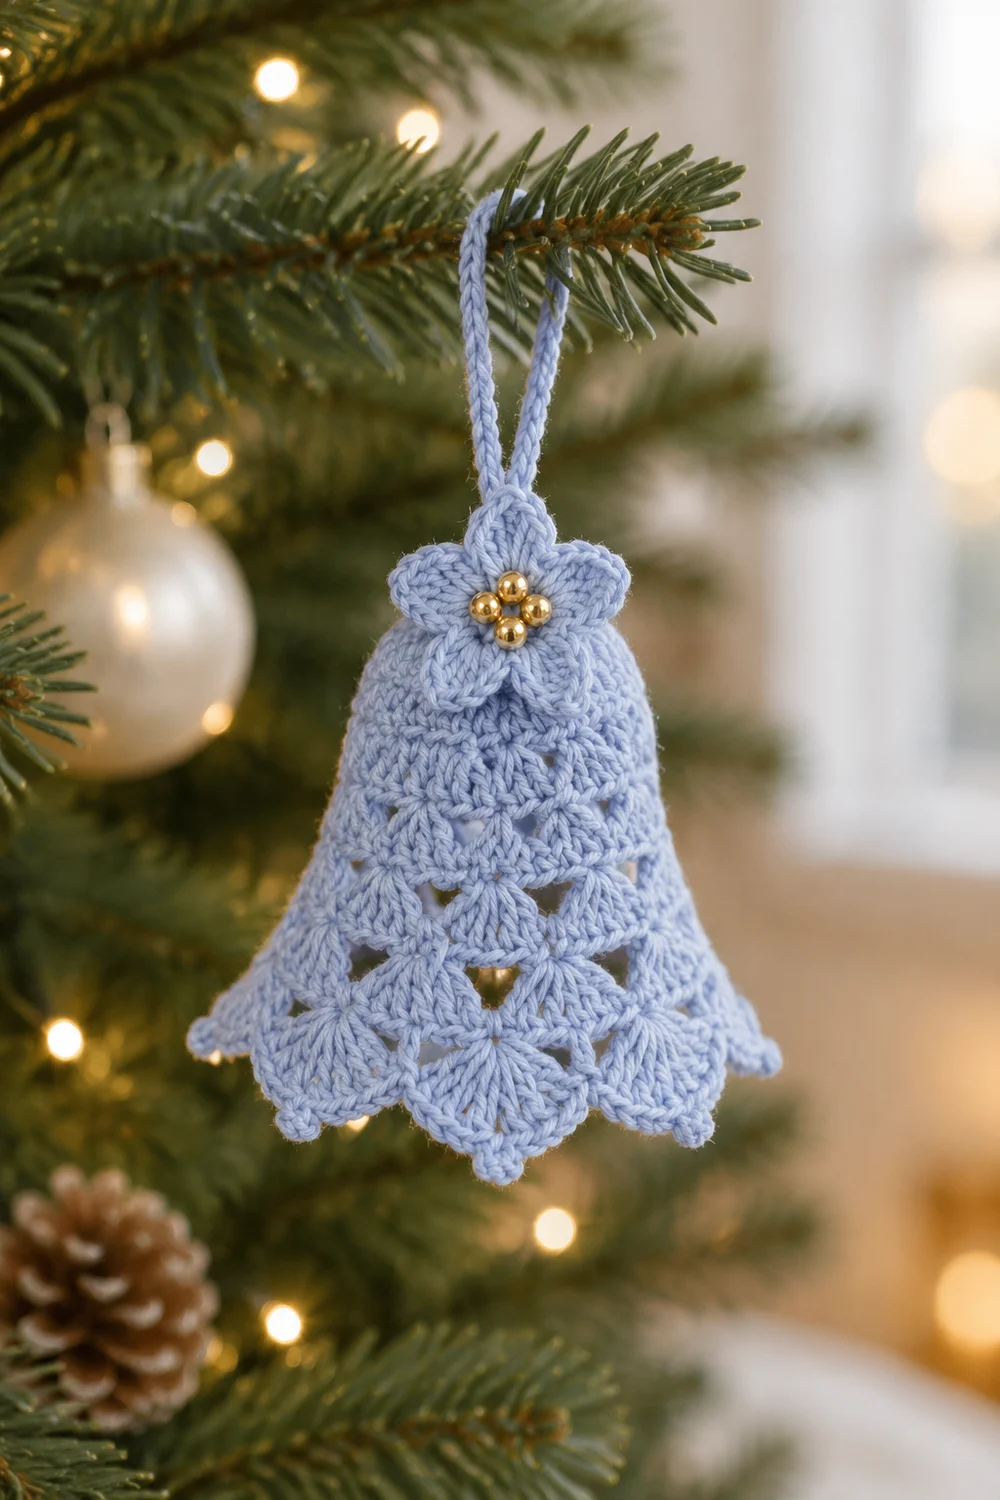
This little bell is light, lacy, and easy to finish in one sitting. It is worked in a soft light blue (periwinkle) cotton. An openwork stitch pattern opens triangular cutouts all the way around the body, so the bell looks airy and delicate when it hangs on a tree or catches window light.
The bell has a rounded dome crown, a lacy body that tapers slightly just above the hem, and a scalloped trim of shell-like points along the bottom edge. A twisted rope loop in matching yarn forms the hanger. Three small gold metallic beads are sewn at the top center, where the loop attaches.
This pattern uses US crochet terms. The finished bell measures about 2.75 in (7.0 cm) tall, not counting the hanging loop. The hem is about 2.5 in (6.4 cm) across, and the scallop points reach about 2.75 in (7.0 cm) tip to tip.
Construction is simple. You work one piece top-down in joined rounds: a solid single crochet dome, then alternating shell and chain-loop lace rounds, one narrowing round, and a two-round scalloped border. A twisted cord and three beads finish it.
Finished Size and Construction
- Finished size: 2.75 in (7.0 cm) tall; hem 2.5 in (6.4 cm) diameter; points 2.75 in (7.0 cm) tip to tip
- Hanging loop: stands about 1.25 in (3.2 cm) above the crown
- Skill level: Easy-intermediate
- Terminology: US crochet terms
- Yarn weight: #2 fine (sport weight) cotton
- Hook: 2.75 mm (US C-2)
- Number of pieces: 1 crocheted bell, plus 1 twisted cord and 3 beads
- Layout: worked top-down in joined rounds, right side always facing
- Piece size: 2.75 in (7.0 cm) tall × 2.5 in (6.4 cm) hem diameter
- Size before border: about 2.25 in (5.7 cm) tall, 2.5 in (6.4 cm) diameter at Round 13
- Border depth: about 0.5 in (1.3 cm)
Materials
Yarn advice: Choose a smooth, mercerized cotton in sport weight. Cotton holds the lace shape and the scallop points much better than acrylic, and it takes starch well. Avoid fuzzy or brushed yarns, because they blur the triangular holes.
- Light blue / periwinkle: 8 g, about 25 m (27 yd)
Tools and notions:
- 2.75 mm (US C-2) crochet hook
- 3 gold metallic round beads, 4 mm
- Tapestry needle
- Beading needle or thin sewing needle, plus light blue sewing thread
- Scissors
- Stitch marker
- Spray starch or fabric stiffener (optional but recommended)
- A ball of plastic wrap or a small foam ball, about 2.5 in (6.4 cm) across, for blocking
- Rust-proof pins
The yarn quantity includes a margin for the gauge swatch, the twisted cord, and weaving in ends. The bell itself uses about 5 g.
Abbreviations (US Terms)
- ch – chain
- sl st – slip stitch
- sc – single crochet
- dc – double crochet
- st(s) – stitch(es)
- sp – space
- MR – magic ring
- rep – repeat
Special stitches:
- Shell (lace body): (2 dc, ch 1, 2 dc) or (3 dc, ch 2, 3 dc) in the same space, as stated in each round.
- Picot: ch 3, sl st in the 3rd ch from hook.
- Point shell (border): (3 dc, picot, 3 dc) in the same stitch.
Beginning ch 3 counts as 1 dc throughout. Beginning ch 1 never counts as a stitch.
Gauge and Checkpoints
Gauge: 6 sc and 7 rows = 1 in (2.5 cm), worked in the round with the 2.75 mm hook.
This is a small project, so the bell itself acts as your gauge test. Work the crown first and check it against the checkpoints below before you start the lace.
Measurement checkpoints:
- After Round 3 (lying flat): disc about 1.25 in (3.2 cm) across
- After Round 6: crown is cupped; the opening measures about 1.75 in (4.4 cm) across
- After Round 8: about 2 in (5.1 cm) across
- After Round 10: about 2.5 in (6.4 cm) across
- After Round 12: about 2.75 in (7.0 cm) across, the widest part of the body
- After Round 13: narrows back to about 2.5 in (6.4 cm)
- After the border: 2.75 in (7.0 cm) tall, points 2.75 in (7.0 cm) tip to tip
If your crown is too big (more than about 0.25 in / 0.6 cm over at Round 6), go down to a 2.5 mm hook.
If your crown is too small or tight and bumpy, go up to a 3.0 mm hook.
Do not change the stitch counts to fix size. The lace and border math depends on exact multiples of 8.
Crown (Rounded Dome)
The crown is solid sc. Increase rounds alternate with even rounds so the top curves into a smooth dome instead of a flat disc or a sharp cone. Join every round with a sl st to the first sc.
Round 1: Make a MR. Ch 1, 8 sc in ring. Pull the ring closed tightly and join. (8 sc)
Round 2: Ch 1, 2 sc in each st around. Join. (16 sc)
Round 3: Ch 1, sc in next st, 2 sc in next st; rep from * around. Join. (24 sc)
Round 4: Ch 1, sc in each st around. Join. (24 sc)
The edge starts to curl downward here. That is the dome forming.
Round 5: Ch 1, sc in next 2 sts, 2 sc in next st; rep from * around. Join. (32 sc)
Round 6: Ch 1, sc in each st around. Join. (32 sc)
Check the 1.75 in (4.4 cm) opening now.
Lace Body (Triangular Cutouts)
The body has 8 lace columns. Each shell sits in a chain loop. The next round bridges each gap between shells with a chain, and that chain plus the slanted sides of the two shells frames a triangular hole. Join every round with a sl st as stated.
Round 7 (lace setup): Ch 1, sc in next st, ch 3, skip next 3 sts; rep from * around. Join to first sc. (8 sc, 8 ch-3 sps)
Check: 8 repeats × 4 sts used = 32 sts, which matches Round 6.
Round 8: Sl st into first ch-3 sp. Ch 3 (counts as dc), (dc, ch 1, 2 dc) in same sp. (2 dc, ch 1, 2 dc) in next ch-3 sp; rep from * 6 more times. Join to top of beginning ch 3. (8 shells: 32 dc, 8 ch-1 sps)
Round 9: Sl st in next dc and into ch-1 sp. Ch 1, sc in same sp. Ch 4, sc in next ch-1 sp; rep from * 6 more times. Ch 4, join to first sc. (8 sc, 8 ch-4 sps)
The first row of triangular holes is now visible between the shells.
Round 10: Sl st into first ch-4 sp. Ch 3, (2 dc, ch 2, 3 dc) in same sp. (3 dc, ch 2, 3 dc) in next ch-4 sp; rep from * 6 more times. Join. (8 shells: 48 dc, 8 ch-2 sps)
This is a growth round. Each shell now has 6 dc instead of 4, so the round total is 8 × 6 = 48 dc.
Round 11: Sl st in next 2 dc and into ch-2 sp. Ch 1, sc in same sp. Ch 5, sc in next ch-2 sp; rep from * 6 more times. Ch 5, join to first sc. (8 sc, 8 ch-5 sps)
Round 12: Sl st into first ch-5 sp. Ch 3, (2 dc, ch 2, 3 dc) in same sp. (3 dc, ch 2, 3 dc) in next ch-5 sp; rep from * 6 more times. Join. (8 shells: 48 dc, 8 ch-2 sps)
The stitch count is the same as Round 10. The longer ch-5 loops underneath spread the shells wider, so this is the widest round, about 2.75 in (7.0 cm) across.
Round 13 (taper): Sl st in next 2 dc and into ch-2 sp. Ch 1, sc in same sp. Ch 4, sc in next ch-2 sp; rep from * 6 more times. Ch 4, join to first sc. (8 sc, 8 ch-4 sps)
The shorter ch-4 loops (instead of ch-5) draw the body in slightly to about 2.5 in (6.4 cm). This creates the gentle taper toward the bottom edge. Each sc sits above a shell center, and each ch-4 loop spans the triangular hole between shells.
Border (Scalloped Hem)
Border gauge: The border is worked at the same 6 sc per inch (2.5 cm) as the crown. 48 sc ÷ 6 sc per in = 8 in (20.3 cm) of circumference. That gives a diameter of about 2.5 in (6.4 cm), which matches the Round 13 checkpoint. The hem lies flat with no ruffling and no pulling.
Border Round 1 (conversion round): Ch 1, sc in first sc, 5 sc in next ch-4 sp. Sc in next sc, 5 sc in next ch-4 sp; rep from * 6 more times. Join to first sc.
Count: (8 sc worked 1-per-existing-sc) + (8 loops × 5 sc) = 8 + 40 = 48 sc.
This round converts the loops into a solid base. It does not continue the shell growth. Each of the 8 segments has 6 sc: 1 above a shell center, plus 5 across a chain loop.
Border Round 2 (point shells): Ch 1, sc in first st. Skip next 2 sts, point shell (3 dc, picot, 3 dc) in next st, skip next 2 sts, sc in next st; rep from * around. On the last repeat, omit the final sc and join to the first sc instead. (8 sc, 8 point shells: 48 dc, 8 picots)
Why the math works: Each repeat uses exactly 6 sts: 1 sc + 2 skipped + 1 shell st + 2 skipped. 48 ÷ 6 = 8 repeats, one per lace column.
Each segment’s sts are numbered 1 to 6, where st 1 is the sc above the shell center and sts 2 to 6 are the 5 sc over the loop. The point shell lands in st 4, the exact center of those 5 sc. Every scallop therefore sits directly below a triangular hole, and the sc between scallops lines up under each lace column.
Fasten off, leaving a 6 in (15.2 cm) tail. Weave in all ends on the wrong side.
Twisted Rope Loop and Beads
Twisted cord: Cut one 16 in (40.6 cm) strand of yarn. Anchor one end, then twist the other end clockwise until the strand kinks back on itself when relaxed. Fold it in half and let the two halves twist around each other. Knot the cut ends together. You get a firm twisted rope about 7 in (17.8 cm) long.
Attach: Thread both knotted ends onto a tapestry needle. Pass them down through the center of the magic ring from the outside. Adjust until the loop stands 1.25 in (3.2 cm) above the crown, about 2.5 in (6.4 cm) of cord. Knot securely inside the bell, then trim to 0.5 in (1.3 cm).
Beads: Using the beading needle and sewing thread, sew the three 4 mm gold beads in a small triangle right at the base of the loop, at the top center of the crown. Pass the thread through each bead twice. Stitch through the knotted cord inside the bell as you go to lock the loop in place. Knot the thread inside.
Final Blocking
- Soak the bell in cool water for 5 minutes, then press out excess water in a towel. Do not wring it.
- Stuff the bell with a ball of plastic wrap or a foam ball about 2.5 in (6.4 cm) across, so the dome is fully rounded.
- Ease the hem in slightly above the border so the taper at Round 13 shows.
- Pull each picot point outward and pin it. Space the points evenly; they should reach about 2.75 in (7.0 cm) tip to tip.
- Open each triangular hole gently with a fingertip.
- Spray with starch or brush on diluted fabric stiffener. Avoid the beads.
- Let it dry completely for 24 hours, then remove the form.
- Measure: 2.75 in (7.0 cm) tall, hem 2.5 in (6.4 cm).
Final Quality-Control Checklist
- Crown is a smooth rounded dome with no flat top and no pointed tip
- Magic ring is fully closed
- 8 lace columns, with 8 evenly spaced triangular holes in each hole round
- Round 13 is visibly slightly narrower than Round 12
- Border Round 1 has 48 sc
- 8 point shells, each with a crisp picot tip
- Each scallop sits centered below a triangular hole
- Twisted loop is tight, even, and stands 1.25 in (3.2 cm) tall
- 3 gold beads are secure and sit snugly at the base of the loop
- All ends are woven in invisibly
- Bell holds its shape when hung
Troubleshooting
Crown is flat instead of domed: You may have added extra increases. Recount: Rounds 4 and 6 must have no increases.
Crown is pointed or cone-like: Your tension is too tight. Go up a hook size and keep Round 1 snug but not strangled.
Holes look like slits, not triangles: The chains are too tight. Loosen your chains slightly, or make each chain a little taller on the hook.
Hem ruffles: Your Round 13 loops are too short for 5 sc. Work them looser, or check that you used ch 4, not ch 3.
Hem pulls in or cups: Your loops are too loose. Tighten your chains or drop to a 2.5 mm hook.
Scallops are off-center: Recount Border Round 1. Every segment must have exactly 6 sc.
Picots are droopy: Starch the border more heavily and pin the tips while drying.
Loop flops sideways: Twist the cord more before folding, and stitch the bead thread through the cord base.
Care
Spot clean with cool water and mild soap, then reshape over a form and re-starch if needed. Store flat or loosely stuffed so the dome keeps its shape.
Final Notes
The measurement chain is short and easy to follow:
- Crown opening: 1.75 in (4.4 cm) at Round 6
- Body widens: 2.75 in (7.0 cm) at Round 12
- Taper: 2.5 in (6.4 cm) at Round 13
- Border base: 48 sc at 6 sc per in = 8 in (20.3 cm) around, 2.5 in (6.4 cm) across
- Finished bell: 2.75 in (7.0 cm) tall, with points 2.75 in (7.0 cm) tip to tip
Every count is a multiple of 8: one lace column for each scallop. If the crown matches the checkpoints, everything below it will too.
Optional: make several bells in different pastels for a tree set. The pattern itself stays a single ornament.
Happy crocheting!