

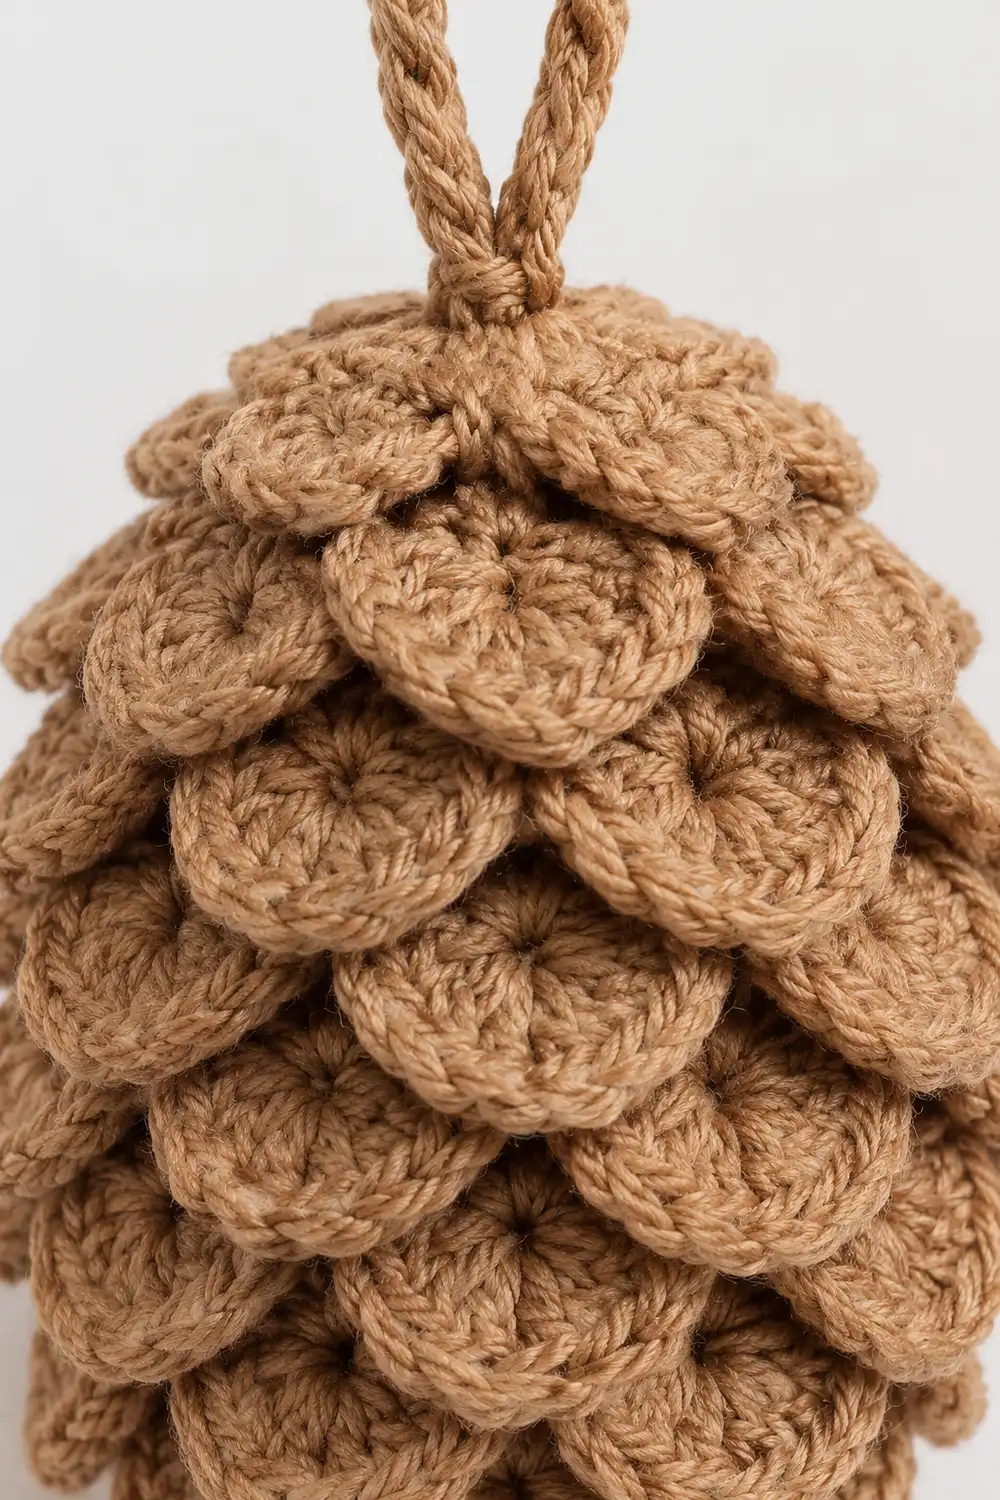
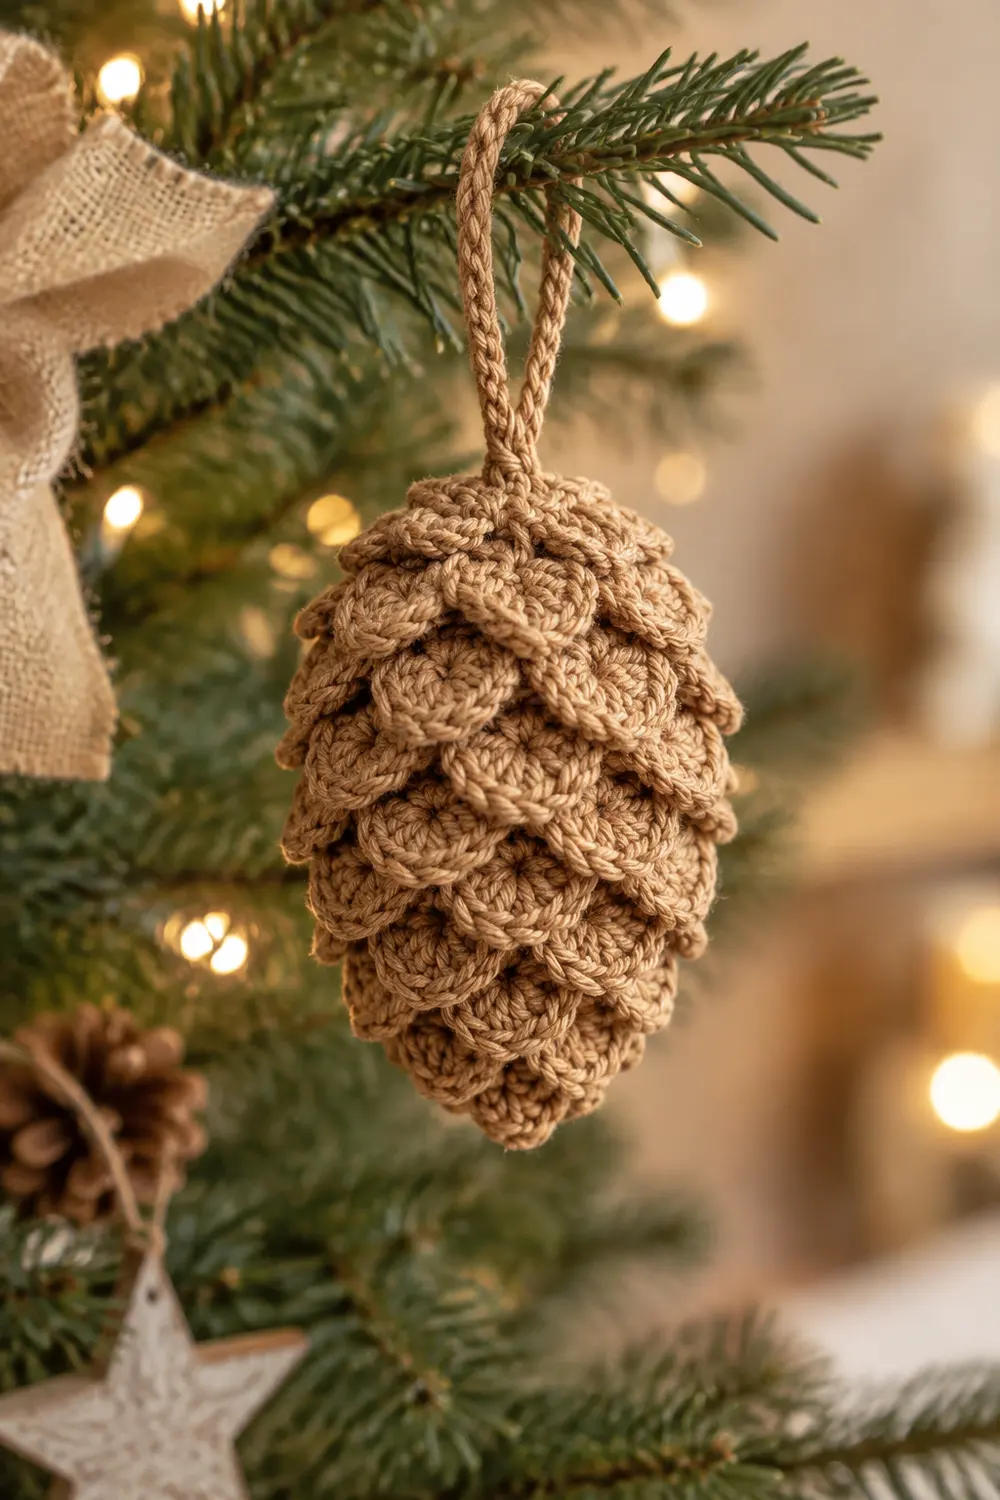
This little pinecone ornament is all texture. Small fan-shaped scales overlap in tight, staggered rounds, like shingles on a roof, to make a realistic pinecone shape. A twisted yarn loop at the top lets it hang from a tree, a gift tag, or a window hook.
The sample is worked in a warm tan cotton, close to the color of a real dried cone. Choose a smooth yarn so each scale shows clearly. A solid color works best, because the shadows between the scales do the design work.
The pattern uses US crochet terms. The finished ornament measures about 2.75 in (7.0 cm) tall from the top of the body to the lowest scale tip, not counting the loop. It is about 2.25 in (5.7 cm) wide at its widest point, including the scales.
Construction is one continuous piece worked top-down. You alternate two kinds of rounds. A body round of single crochet shapes the cone. A scale round of 5-dc shells is worked into the front loops of that same body round. The next body round goes into the back loops, so the scales hang down over the rounds below. You stuff the cone, close the bottom tip, and twist the starting tail into the hanging loop.
Finished Size and Construction
- Finished size: 2.75 in (7.0 cm) tall × 2.25 in (5.7 cm) wide, excluding loop
- Hanging loop: 2 in (5.1 cm) tall
- Skill level: Intermediate (front/back loop work, shells, small-scale amigurumi shaping)
- Terminology: US crochet terms
- Yarn weight: #2 fine / sport weight cotton
- Hook: 2.5 mm
- Number of pieces: 1 (the loop is made from the starting tail)
- Layout: Single 3D piece; 18 body rounds and 14 scale rounds
- Piece size: Body core 1.8 in (4.6 cm) in diameter at its widest
- Size before border: No traditional border. The body measures 2.5 in (6.4 cm) tall before the bottom scales overhang it.
- Border depth: None. The scale edges are the finished edge. The “border” stage here is the bottom closure and hanging loop.
Materials
Yarn advice: Use a smooth, mercerized or combed cotton in sport weight, about 150 m per 50 g. Cotton holds the scale shape crisply. Avoid fuzzy or brushed yarns, because they blur the shells.
- Tan (main color): 15 g, about 45 m
Quantities include a generous margin. The ornament itself uses roughly 25 m, and the rest covers tails, the twisted loop, and one restart if needed.
Tools:
– 2.5 mm crochet hook (plus 2.25 mm and 2.75 mm for gauge adjustment)
– Polyester fiberfill, about 3–4 g
– 1 stitch marker
– Tapestry needle
– Scissors
– Chopstick or pencil eraser for stuffing
Abbreviations (US Terms)
- ch – chain
- sl st – slip stitch
- sc – single crochet
- dc – double crochet
- inc – 2 sc in the same stitch
- dec – sc2tog (single crochet 2 stitches together)
- MR – magic ring
- FLO – front loop only
- BLO – back loop only
- sk – skip
- st(s) – stitch(es)
- rep – repeat
- rnd(s) – round(s)
Special stitch – Scale: 5 dc in the same stitch. Each scale sits on a 4-stitch repeat: one sl st, one skipped st, the scale st, and one skipped st.
Gauge and Checkpoints
Gauge: 7 sc and 7 rnds = 1 in (2.5 cm) in sc worked in the round.
Test one piece first. Work Rnds 1–4 as written, including the Type A scale round after Rnd 2. Then stop and measure.
- Checkpoint 1 (after Rnd 4): The disk measures 1.1 in (2.8 cm) across, laid flat.
- Checkpoint 2 (one scale): Each scale is about 0.4 in (1.0 cm) wide and 0.3 in (0.8 cm) long from base to tip.
- Checkpoint 3 (after Rnd 8): The circumference measures 5.7 in (14.5 cm). That is 40 sts at 7 sts per inch.
- Checkpoint 4 (after Rnd 9): The body measures 1.25 in (3.2 cm) from the magic ring down.
- Checkpoint 5 (finished): 2.75 in (7.0 cm) tall × 2.25 in (5.7 cm) wide.
If your disk is too big, switch to a 2.25 mm hook. If it is too small, switch to a 2.75 mm hook. If you are off by less than 0.1 in (0.3 cm), you can keep going. A small size difference does not matter for an ornament, but the scale proportions do. Scales that are too loose will flare instead of lying flat.
How the Rounds Work
Every body rnd is joined with a sl st and begins with ch 1. The ch 1 does not count as a stitch.
A scale rnd is always worked into the FLO of the body rnd you just finished. The next body rnd is then worked into the BLO of that same rnd. This means each body stitch uses both of its loops: the front loop holds a scale and the back loop holds the next rnd.
There are two scale-round types. They are offset by half a repeat, which gives the scales their staggered look.
Type A scale rnd: Working in FLO only, *sl st in next st, sk 1 st, scale in next st, sk 1 st; rep from * around. Sl st in first sl st.
Type B scale rnd: Working in FLO only, ch 2 (does not count), *scale in next st, sk 1 st, sl st in next st, sk 1 st; rep from * around. Sl st in top of first dc.
Both types use 4 sts per repeat. Every scale rnd is therefore placed on a body rnd whose count divides by 4.
To start the next body rnd, tilt the new scales toward you. This shows the free back loops.
Pattern: Top Cap (Increase Section)
Leave a 12 in (30.5 cm) starting tail. This becomes the hanging loop, so do not weave it in.
Rnd 1: 6 sc in MR, sl st to first sc. Pull the ring closed. (6 sts)
Rnd 2: Ch 1, inc in each st around, sl st to first sc. (12 sts)
Scale Rnd S1 (Type A) on Rnd 2: 3 scales. (15 dc + 3 sl st; uses all 12 front loops)
Rnd 3: Ch 1, working in BLO of Rnd 2: (sc, inc) 6 times, sl st to first sc. (18 sts)
There is no scale rnd on Rnd 3, because 18 does not divide by 4.
Rnd 4: Ch 1, working in both loops: (2 sc, inc) 6 times, sl st to first sc. (24 sts)
Scale Rnd S2 (Type B) on Rnd 4: 6 scales. (30 dc + 6 sl st)
Checkpoint 1 here. Measure the disk, then continue.
Rnd 5: Ch 1, working in BLO of Rnd 4: (5 sc, inc) 4 times, sl st. (28 sts)
Scale Rnd S3 (Type A): 7 scales. (35 dc + 7 sl st)
Rnd 6: Ch 1, BLO of Rnd 5: (6 sc, inc) 4 times, sl st. (32 sts)
Scale Rnd S4 (Type B): 8 scales. (40 dc + 8 sl st)
Rnd 7: Ch 1, BLO of Rnd 6: (7 sc, inc) 4 times, sl st. (36 sts)
Scale Rnd S5 (Type A): 9 scales. (45 dc + 9 sl st)
Rnd 8: Ch 1, BLO of Rnd 7: (8 sc, inc) 4 times, sl st. (40 sts)
Scale Rnd S6 (Type B): 10 scales. (50 dc + 10 sl st)
Checkpoint 3 here: circumference 5.7 in (14.5 cm).
Pattern: Widest Point
Rnd 9: Ch 1, BLO of Rnd 8: sc in each st around, sl st. (40 sts)
Scale Rnd S7 (Type A): 10 scales. (50 dc + 10 sl st)
Checkpoint 4 here: height 1.25 in (3.2 cm).
Pattern: Taper (Decrease Section)
From here on, decreases are worked as sc2tog through the BLO of the 2 stitches.
Rnd 10: Ch 1, BLO of Rnd 9: (8 sc, dec) 4 times, sl st. (36 sts)
Scale Rnd S8 (Type B): 9 scales. (45 dc + 9 sl st)
Rnd 11: Ch 1, BLO of Rnd 10: (7 sc, dec) 4 times, sl st. (32 sts)
Scale Rnd S9 (Type A): 8 scales. (40 dc + 8 sl st)
Rnd 12: Ch 1, BLO of Rnd 11: (6 sc, dec) 4 times, sl st. (28 sts)
Scale Rnd S10 (Type B): 7 scales. (35 dc + 7 sl st)
Rnd 13: Ch 1, BLO of Rnd 12: (5 sc, dec) 4 times, sl st. (24 sts)
Scale Rnd S11 (Type A): 6 scales. (30 dc + 6 sl st)
Rnd 14: Ch 1, BLO of Rnd 13: (4 sc, dec) 4 times, sl st. (20 sts)
Scale Rnd S12 (Type B): 5 scales. (25 dc + 5 sl st)
Stuff now. Fill the cone firmly through the bottom opening, pushing fiberfill up into the top cap. Fold the scales up and out of the way while you stuff.
Rnd 15: Ch 1, BLO of Rnd 14: (3 sc, dec) 4 times, sl st. (16 sts)
Scale Rnd S13 (Type A): 4 scales. (20 dc + 4 sl st)
Rnd 16: Ch 1, BLO of Rnd 15: (2 sc, dec) 4 times, sl st. (12 sts)
Scale Rnd S14 (Type B): 3 scales. (15 dc + 3 sl st)
Scale total: 3 + 6 + 7 + 8 + 9 + 10 + 10 + 9 + 8 + 7 + 6 + 5 + 4 + 3 = 95 scales.
Border: Bottom Closure and Hanging Loop
This ornament has no added edging. The scale edges are the finished surface. This stage closes the bottom tip and builds the loop.
Border gauge: The closure rnds are worked at the same gauge as the body, 7 sc per inch. Nothing is tightened or loosened.
Rnd 17: Ch 1, BLO of Rnd 16: (sc, dec) 4 times, sl st. (8 sts)
Top up the stuffing so the tip feels firm.
Rnd 18: Ch 1, working in both loops of Rnd 17: dec 4 times, sl st. (4 sts)
Fasten off and leave a 6 in (15.2 cm) tail. Thread it through the front loops of the 4 remaining sts and pull to close. Weave the end up into the stuffing and trim.
Why the math works: Each decrease rnd removes exactly 4 sts. From 40 sts, the counts run 36, 32, 28, 24, 20, 16, 12, and 8. Every count through Rnd 16 is divisible by 4, so each scale rnd ends on a complete repeat. Rnd 17 (8 sts) has no scales because the opening is too small. Rnd 18 halves 8 sts to 4, which closes the tip without a visible hole. The Rnd 16 scales hang down past the tip, so the closure is hidden.
Hanging loop (twisted cord):
- Find the 12 in (30.5 cm) starting tail at the top center.
- Twist the tail clockwise between your fingers until it is tightly wound and starts to kink.
- Hold the midpoint and fold the tail in half, bringing the free end back down to the magic ring. Let go of the midpoint. The two halves twist around each other into a cord.
- Adjust the fold so the loop stands 2 in (5.1 cm) tall.
- Thread the free end onto a tapestry needle. Pass it down through the magic ring into the stuffing and bring it back up next to the loop base.
- Knot it once around the loop base, bury the end in the stuffing, and trim.
Final Blocking
Cotton scales respond best to light, cool blocking.
- Mist the whole ornament lightly with water until it is just damp, not soaked.
- Work from the top down. Press each scale flat with your fingertip and coax it downward so it overlaps the round below.
- Roll the cone gently between your palms to even out the silhouette.
- Stand it upright on a towel, tip down, propped in a small cup. Hang it by the loop if it tips over.
- Pinch the loop straight and let everything air-dry fully, about 4–6 hours.
- Measure again: 2.75 in (7.0 cm) tall × 2.25 in (5.7 cm) wide.
Final Quality-Control Checklist
- [ ] 95 scales total, 14 scale rnds
- [ ] Scale rnds alternate Type A and Type B, so the scales are staggered
- [ ] Every scale has exactly 5 dc
- [ ] No gaps where the body sc shows between scales at the widest point
- [ ] Bottom tip closed with no visible hole
- [ ] Stuffing is firm and evenly distributed, with no lumps
- [ ] Hanging loop is 2 in (5.1 cm) tall, tightly twisted, and anchored at the top center
- [ ] Finished size is 2.75 in (7.0 cm) × 2.25 in (5.7 cm)
- [ ] All tails buried in the stuffing
Troubleshooting
Scales flip upward. Your dc are too loose. Go down a hook size for the scale rnds only, then block the scales downward while damp.
Body shows between scales. Check that every body rnd after a scale rnd was worked in BLO. If you worked through both loops, the scales sit too far apart.
Can’t find the back loops. Fold the new scales toward you before starting the body rnd. The free back loops sit just behind the base of the scales.
Pinecone looks round instead of tapered. Check your counts after Rnds 10–16. Each one should be exactly 4 sts fewer than the previous rnd.
Scales line up in columns. You worked two scale rnds of the same type in a row. The types must alternate A, B, A, B.
Holes at the decreases. Work each sc2tog snugly through the BLO, and pull the yarn firm after every decrease.
Loop untwists. Twist the tail more before folding it, and knot the end securely at the loop base.
Ornament feels squishy. Add stuffing before Rnd 17, while the opening is still 12 sts.
Care
Hand wash in cool water with mild soap, press out excess water in a towel, and reshape the scales downward. Dry upright or hang by the loop. Do not tumble dry.
Final Notes
Here is the measurement chain from start to finish. At a gauge of 7 sc and 7 rnds per 1 in (2.5 cm), the Rnd 4 disk measures 1.1 in (2.8 cm). The Rnd 8 circumference reaches 5.7 in (14.5 cm), and the body is 1.25 in (3.2 cm) deep at Rnd 9. The core finishes at 2.5 in (6.4 cm) tall and 1.8 in (4.6 cm) across.
With the 95 scales overhanging, the ornament measures 2.75 in (7.0 cm) tall and 2.25 in (5.7 cm) wide, topped by a 2 in (5.1 cm) twisted loop. If you match the gauge and keep the A/B alternation, the shingled texture follows naturally.
Optional: if you’d like a set, make several ornaments in tan, darker brown, and natural cream to hang together.
Happy crocheting!