
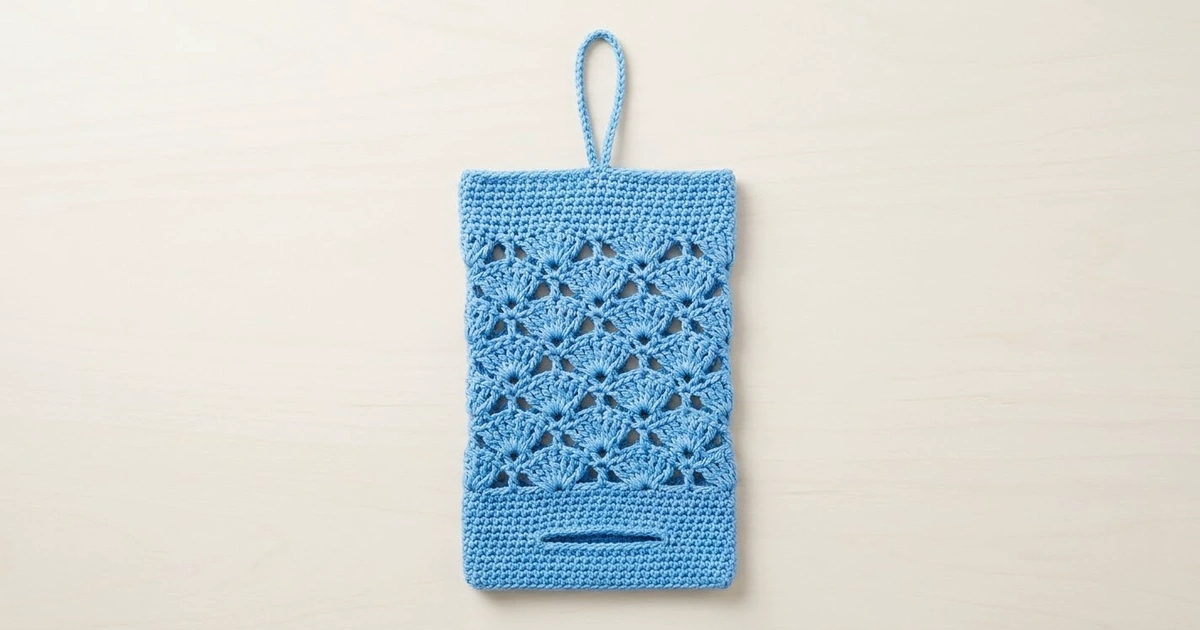
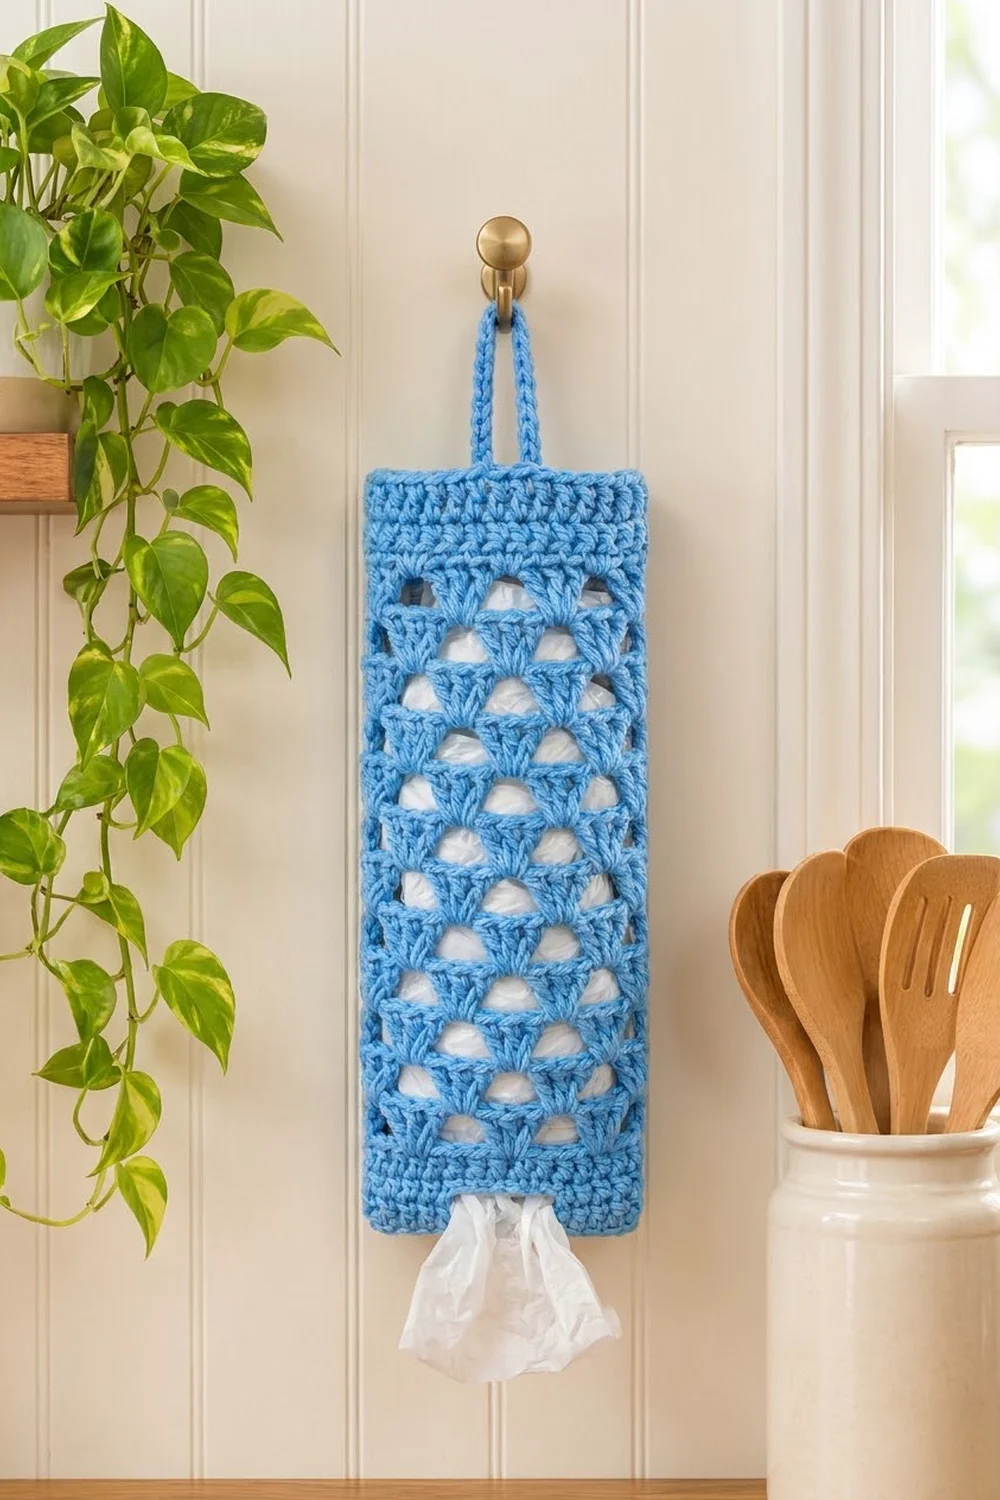
The Bluebell Shell Plastic Bag Holder gives you a tidy place to keep grocery bags. You stuff bags in at the top and pull them out one at a time through a slot near the bottom. The body has rows of fan-shaped shells, and the triangular gaps between them let you see how many bags are left.
The sample uses one sky-blue cotton. Solid single-crochet bands at the top and bottom keep the openings firm, and the lace section in between looks light and simple. It suits a kitchen, pantry door, or laundry room.
This pattern uses US crochet terms. Laid flat, the holder measures 6 in (15.2 cm) wide by 12 in (30.5 cm) tall. The hanging loop adds about 2.5 in (6.4 cm) above the top.
You work the body from the bottom up as one seamless tube. The first round goes around both sides of a foundation chain, which closes the bottom with no sewing. You build a solid band that includes the dispensing slot, work 12 rounds of offset shells, then finish with a solid top band and a slip-stitch rim. Last, you make a short cord loop and sew it inside the top band.
Finished Size and Construction
- Finished size (flat): 6 in (15.2 cm) wide x 12 in (30.5 cm) tall
- Circumference: 12 in (30.5 cm)
- Skill level: Easy / Advanced Beginner
- Terminology: US crochet terms
- Yarn weight: Worsted (Category 4), cotton
- Hook: 5.0 mm (H-8)
- Number of pieces: 2 (1 body tube, 1 hanging loop)
- Layout: loop sewn to the top center of the body
- Body before top band: 6 in (15.2 cm) wide x 10 in (25.4 cm) tall
- Top band (“border”) depth: 2 in (5.1 cm)
- Bottom band depth: 2.5 in (6.4 cm)
- Slot width: 2 in (5.1 cm)
Materials
Yarn: Use a smooth worsted-weight cotton or cotton blend. Cotton holds its shape when the holder is full and doesn’t sag as much as acrylic. A tightly plied yarn gives the clearest shells.
- Sky Blue: 100 g, about 180 m (197 yd)
This amount includes a margin of roughly 20%, enough for a gauge swatch and a little frogging. The holder itself uses about 80 g.
Tools:
– 5.0 mm (H-8) crochet hook
– 2 locking stitch markers (plus 1 for the start of the round)
– Tapestry needle
– Scissors
– Measuring tape
– Rust-proof pins and a blocking mat or towel
Abbreviations (US Terms)
- ch – chain
- sl st – slip stitch
- sc – single crochet
- hdc – half double crochet
- dc – double crochet
- sk – skip
- st(s) – stitch(es)
- rnd(s) – round(s)
- * * – repeat the instructions between asterisks as directed
Special stitch – Shell: Work 5 dc into the same stitch. The center dc of the shell is the 3rd dc.
Gauge and Checkpoints
Solid gauge: 16 sc x 16 rnds = 4 in (10.2 cm) in the round, so 4 sts and 4 rnds per inch.
Shell gauge: 2 shell repeats (12 sts) = 3 in (7.6 cm) wide, and 4 shell rnds = 2.5 in (6.4 cm) tall.
The bottom band works as your gauge swatch. Work Rnds 1–10, flatten the tube, and measure before you go on.
Checkpoints:
– After Rnd 1: the flat width is 6 in (15.2 cm).
– After Rnd 10: the height from the bottom fold is 2.5 in (6.4 cm).
– After Rnd 22: the total height is 10 in (25.4 cm).
– After Rnd 31: the total height is 12 in (30.5 cm).
If your piece is too big (for example, wider than 6 in / 15.2 cm), go down a hook size and start again. If it’s too small, go up a hook size. Don’t add or remove stitches. The shell pattern needs exactly 48 sts (8 repeats of 6), so change the hook, not the count.

Body (make 1)
You work the body in joined rounds with the right side always facing you. Don’t turn. Unless stated otherwise, the beginning ch 1 does not count as a stitch.
Bottom Band
Foundation: Ch 25.
Rnd 1: Sc in 2nd ch from hook and in each of the next 23 ch (24 sc). Rotate the work so you can see the bottom loops of the chain. Sc in each of the same 24 ch along the opposite side (24 sc). Join with sl st to first sc. [48 sc]
This round closes the bottom. The first 24 sts are the front face and the last 24 are the back face. Place a locking marker at each fold, between st 24 and st 25 and between st 48 and st 1. Move the markers up as you go so you always know where the faces are.
Checkpoint: Flattened, Rnd 1 measures 6 in (15.2 cm) across.
Rnds 2–4: Ch 1, sc in each st around, join. [48 sc]
Rnd 5 (slot round): Ch 1, sc in first 8 sts, ch 8, sk next 8 sts, sc in next 32 sts, join. [40 sc + 8 ch = 48 sts]
The front face is now 8 sc, an 8-ch slot, and 8 sc, which centers the slot. The 32 sc are the last 8 front sts plus all 24 back sts.
Rnd 6: Ch 1, sc in each of first 8 sc, sc in each of the 8 ch (work into the chain itself, not around it), sc in each of next 32 sc, join. [40 + 8 = 48 sc]
Rnds 7–10: Ch 1, sc in each st around, join. [48 sc]
Checkpoint: The band measures 2.5 in (6.4 cm) tall, with a 2 in (5.1 cm) slot centered on the front.
Shell Section
The shell section has 8 repeats around: 4 on the front face and 4 on the back. Each repeat is 1 sc and 1 shell, which counts as 6 sts.
Rnd 11 (set-up shell round): Ch 1, sc in first st, *sk 2 sts, 5 dc in next st, sk 2 sts, sc in next st* 7 times, sk 2 sts, 5 dc in next st, sk 2 sts, join with sl st to first sc. [8 shells + 8 sc = 48 sts]
Rnd 12 (offset shell round): Sl st in each of next 3 dc to reach the center dc of the first shell. Ch 1, sc in same st, *5 dc in next sc, sc in center dc of next shell* 7 times, 5 dc in next sc, join with sl st to first sc. [8 shells + 8 sc = 48 sts]
Each round puts its shells into the previous round’s sc and its sc into the previous round’s center dc. This stacks the fans in a brick pattern and opens a triangle under each sc.
Rnds 13–22: Repeat Rnd 12 ten more times. [each rnd: 8 shells + 8 sc = 48 sts]
That makes 12 shell rounds in total (Rnds 11–22). The starting slip stitches move the start of the round half a repeat each time, which is normal. Keep using your fold markers to track the faces, not the start of the round.
Checkpoint: The shell section measures 7.5 in (19.1 cm). Total height from the bottom fold is 10 in (25.4 cm), with 4 shells across each face and the width still 6 in (15.2 cm).
Make All Pieces
This holder has only two pieces, each in Sky Blue:
- Body tube: 1 (about 77 g)
- Hanging loop: 1 (about 3 g)
Layout (front view):
        [ Loop ]
   +----------------+
   |   Top band     |
   |  Shell section |
   |  Bottom band   |
   |    [ slot ]    |
   +----------------+
Hanging Loop (make 1)
Foundation: Ch 29, leaving a 10 in (25.4 cm) starting tail.
Row 1: Sc in 2nd ch from hook and in each ch across. Fasten off, leaving a 10 in (25.4 cm) tail. [28 sc]
Checkpoint: The strip measures 7 in (17.8 cm) long.
Top Band and Rim (Border)
The top band acts as the border for the open edge. Border gauge: the same as the solid gauge, 16 sc x 16 rnds = 4 in (10.2 cm).
Rnd 23 (conversion round): The last shell round ends with a sl st into the first sc. Ch 2 (does not count), hdc in that same first sc, sc in each of next 5 dc, *hdc in next sc, sc in each of next 5 dc* 7 times, join. [48 sts worked 1-per-existing-st + 0 added = 48 sts: 8 hdc + 40 sc]
The hdc over each sc fills the dip between shells, so the band starts level.
Rnds 24–30: Ch 1, sc in each st around, join. [48 sc: 24 front + 24 back]
Rnd 31 (rim): Sl st loosely in each st around. Join to the first sl st and fasten off. [48 sl st]
Why the math works: At the start of the band, each face has 4 shell repeats of 6 sts, so 4 x 6 = 24 sts per face and 24 x 2 = 48 sts in total. That matches the 48-st foundation, so the top and bottom are the same width. At 4 sts per inch, 24 sts gives 6 in (15.2 cm) per face. The folds are folds of a tube, not corners, so no corner stitches are added. The band is 8 rounds (Rnds 23–30) at 4 rnds per inch, which makes it 2 in (5.1 cm) deep. The slip-stitch rim adds almost no height.
Checkpoint: The total body height is 12 in (30.5 cm) and the top opening lies flat at 6 in (15.2 cm).
Joining
Method: Whipstitch the loop’s ends inside the back face of the top band.
- Flatten the body so the slot faces you. Find the center of the back face, which is 12 sts in from either fold marker.
- Bring both ends of the loop together without twisting the strip, and stack them so the ends overlap.
- Push the stacked ends 1 in (2.5 cm) down inside the back top band, centered. This uses 2 in (5.1 cm) of the strip and leaves a loop about 2.5 in (6.4 cm) tall above the rim.
- Use one tail to whipstitch along the overlapped ends and through the band, covering about 4 band rounds (1 in / 2.5 cm). Pass each stitch through the back loops of the band only, so nothing shows on the outside.
- Whipstitch across the bottom edge of the overlap as well, so it can’t roll.
Stitch-to-stitch logic: Each whipstitch goes through 1 sc of the loop and 1 sc of the band, working down a column. Keep 2 sc of the loop’s width (both stacked ends) lined up over the same 2 center columns of the back face, sts 12 and 13 of that face.
Tension: Pull each stitch snug but don’t cinch it. If you pull too hard, the top band puckers into a dimple behind the loop.
Checkpoint: When you hang it, the rim stays level and the loop sits straight up from the center.
Weave in all tails, working them through solid sc rows only.
Final Blocking
- Lightly spray the holder with cool water, or wet it fully and roll it in a towel to press out the excess.
- Lay it flat with the slot centered on the front and the fold markers on the side edges.
- Pin the width to 6 in (15.2 cm) at the bottom band, the middle of the shell section, and the top band.
- Pin the height to 12 in (30.5 cm), keeping both side folds straight.
- Gently open each triangular gap with your fingers so the shells fan out evenly.
- Straighten the slot to a crisp 2 in (5.1 cm) line.
- Lay the loop flat, at 2.5 in (6.4 cm) above the rim.
- Let it dry completely before you unpin it.
Final Quality-Control Checklist
- 48 sts in every round, with 8 shells per shell round
- Rnd 1 forms a closed bottom with no holes at the folds
- The slot is centered on the front: 8 sc, 8-ch slot, 8 sc
- 12 shell rounds with 4 shells showing on each face
- The top band starts level, with no dips between shells
- The flat size is 6 in x 12 in (15.2 cm x 30.5 cm)
- The loop is centered on the back, not twisted, and stitches don’t show on the front
- All tails are woven into solid areas
Troubleshooting
The bottom corners have small holes. Work the first and last sc of each side of Rnd 1 firmly. Close any gap with the starting tail.
The slot is too tight for bags. Work the ch 8 loosely, or use a hook one size larger for those chains only.
The shells lean or spiral. Check that each sc goes into the exact center (3rd) dc of the shell below it.
The tube gets wider in the shell section. Your dc tension is looser than your sc. Use a hook 0.5 mm smaller for Rnds 11–22.
The top band flares. The rim is too loose. Redo Rnd 31 with tighter slip stitches.
The loop sags or tilts. Sew it farther down, 1.5 in (3.8 cm) instead of 1 in (2.5 cm), so you can catch more rounds.
Care
Machine wash cold on a gentle cycle in a mesh bag, then reshape and dry flat. Don’t tumble dry, so the shells keep their crisp shape.
Final Notes
Everything in this pattern depends on 48 sts at 4 sts per inch: 24 sts per face makes the holder 6 in (15.2 cm) wide. The 10 solid rounds give a 2.5 in (6.4 cm) bottom band, and the 12 shell rounds add 7.5 in (19.1 cm), bringing the body to 10 in (25.4 cm). The 8-round top band adds 2 in (5.1 cm), for a finished height of 12 in (30.5 cm). The 7 in (17.8 cm) loop strip, with 1 in (2.5 cm) of each end tucked inside, stands 2.5 in (6.4 cm) tall. Check your measurements at each checkpoint and the holder should come out at the stated size. Fill it up, hang it, and pull out bags as you need them.
Happy crocheting!