

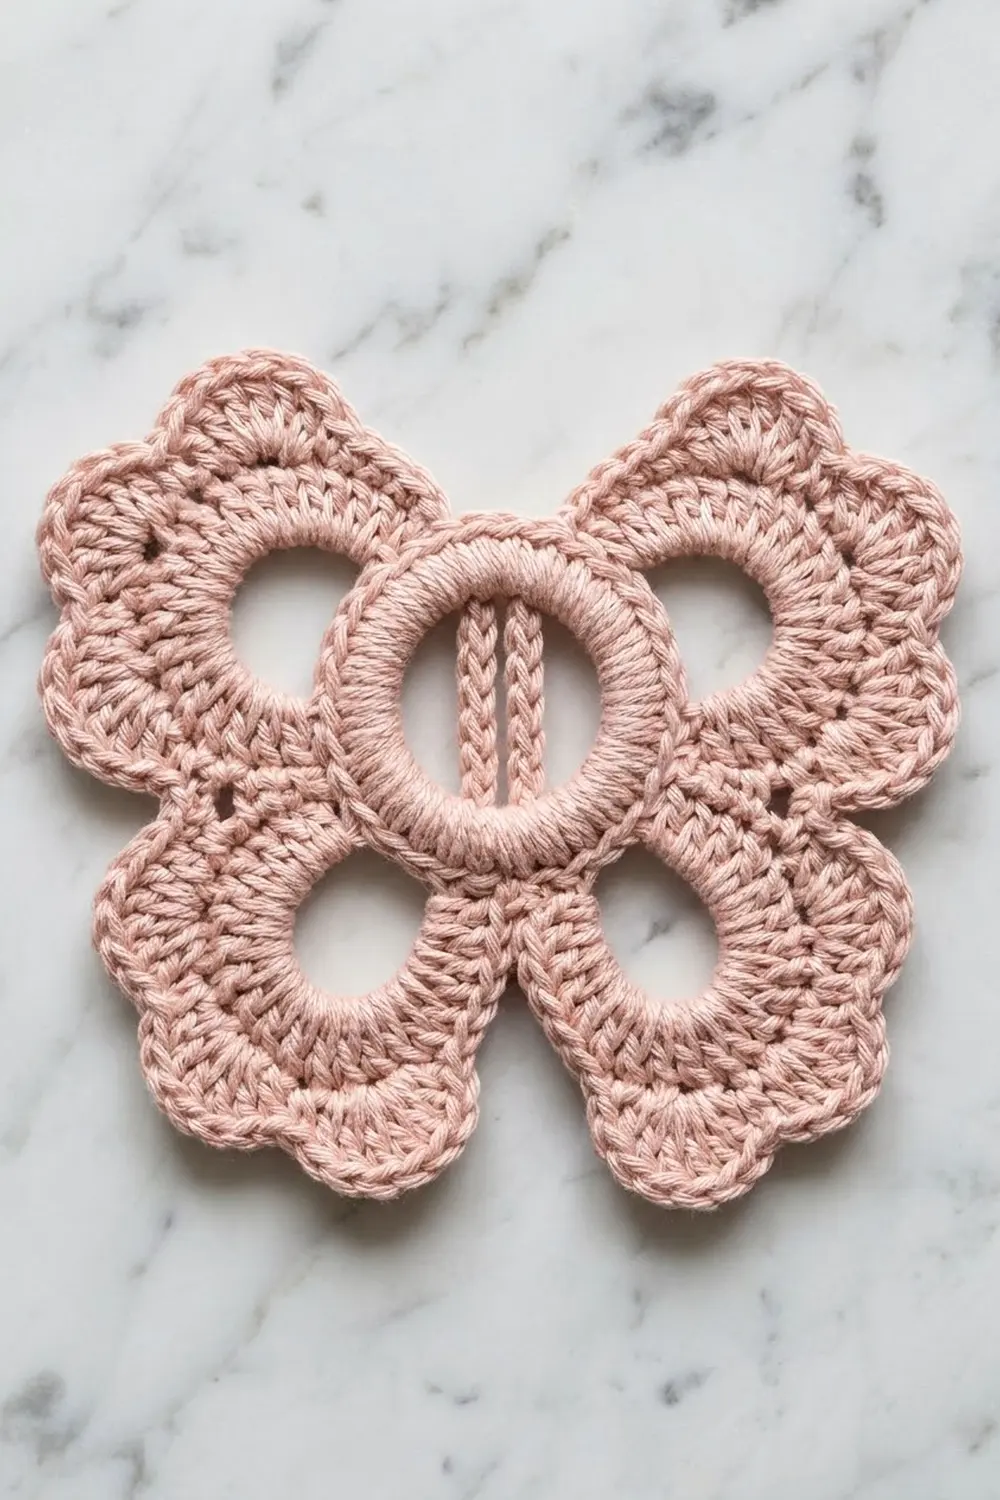
The Blush Scallop Bow is a light, lacy bow motif made from one solid pink yarn. Each wing has three rounded lobes. Each lobe is a fan of stitches around an open eye, so the bow looks airy rather than solid.
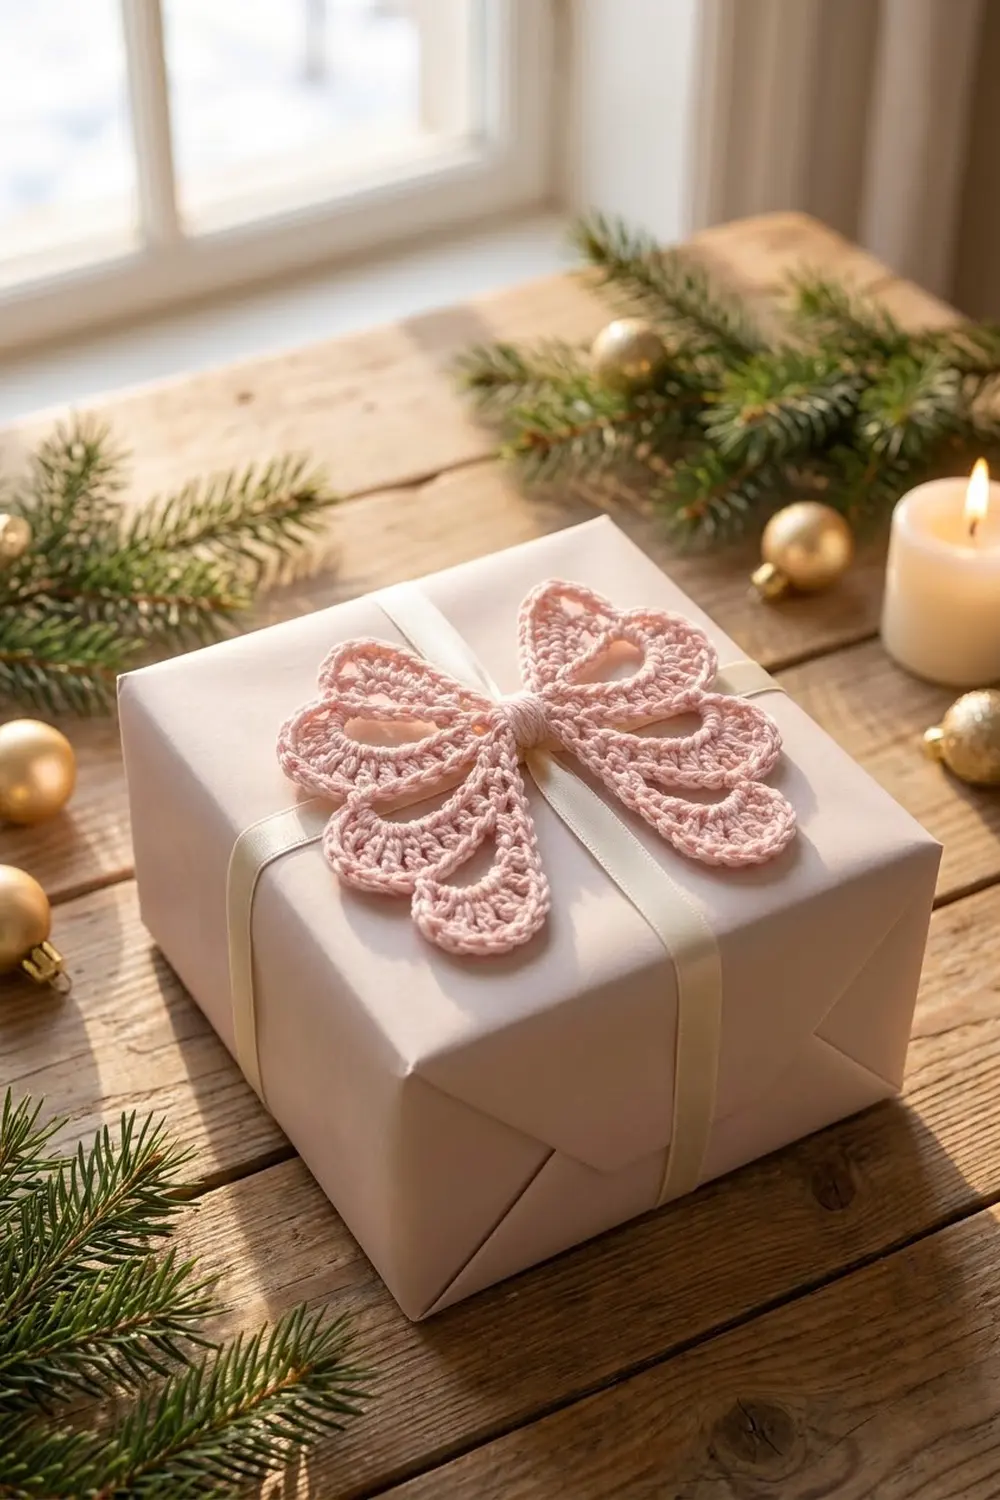
It’s worked in a single blush pink, which shows off the texture: the chain arches, the fanned double crochets and the neat single crochet rim. The look is soft, romantic and vintage-lace. It works well as an appliqué, a gift-wrap topper, an ornament or a hair accessory.
This pattern uses US crochet terms. The finished bow measures 6.5 in (16.5 cm) wide × 4.5 in (11.4 cm) tall after blocking.
The bow is one piece. You start with a small center ring. A chain bar runs out to each wing, and three chain loops are made at a shared anchor point. Each loop is then filled with a stitch fan, and a second chain bar runs back to the ring. Last, a single crochet border goes around the outer curve of each wing.
Finished Size and Construction
- Finished size: 6.5 in × 4.5 in (16.5 cm × 11.4 cm)
- Skill level: Advanced beginner
- Terminology: US crochet terms
- Yarn weight: DK (light worsted, weight 3)
- Hook: 4.0 mm (US G-6)
- Number of pieces: 1 (worked in one continuous piece)
- Layout: Center ring + two mirrored wings, 3 lobes per wing
- Piece size (each wing, bordered): about 2.25 in (5.7 cm) wide × 4.5 in (11.4 cm) tall
- Size before border: 6 in × 4 in (15.2 cm × 10.2 cm)
- Border depth: 0.25 in (0.6 cm) on each outer edge
Materials
Yarn advice: Use a smooth DK cotton or cotton blend with good stitch definition. Mercerized cotton gives the crispest scallops. A soft acrylic blend also works but blocks less sharply. Avoid fuzzy or brushed yarns, because they fill in the open eyes.
- Blush pink (main color): 10 g, about 23 m (25 yd), based on DK at about 230 m per 100 g
Tools:
- 4.0 mm (US G-6) crochet hook
- Tapestry needle
- Scissors
- Stitch markers (2–3)
- Blocking mat and rust-proof pins
- Spray bottle with water
- Ruler or measuring tape
Quantities include about a 20% margin for your swatch, tension differences and weaving in ends.
Abbreviations (US Terms)
- ch – chain
- sl st – slip stitch
- sc – single crochet
- hdc – half double crochet
- dc – double crochet
- st(s) – stitch(es)
- RS – right side
- sk – skip
Special term – Anchor ch: The last chain of each outgoing bar. All three lobe loops of a wing begin and end here. Put a stitch marker in it as soon as you make it.
Working over a loop: When a pattern says “into the loop,” insert your hook into the open space under the whole chain loop, not into individual chains. This encloses the chain and keeps the eye open.
Gauge and Checkpoints
Gauge: 18 sc and 20 rows = 4 in (10.2 cm) in a sc swatch with a 4.0 mm hook. Chains: 6 ch = 1 in (2.5 cm), measured relaxed.
Test one wing first. Make the center ring and the first wing, then check:
- After the center ring: about 0.5 in (1.3 cm) across.
- After the first chain bar: the 6-ch bar is about 1 in (2.5 cm) long.
- After filling the top lobe: the lobe reaches about 2 in (5.1 cm) from the anchor ch to the tip of the middle dc.
- After filling the middle lobe: about 1.75 in (4.4 cm) from anchor to tip.
- After both wings (before the border): 6 in × 4 in (15.2 cm × 10.2 cm).
- After the border and blocking: 6.5 in × 4.5 in (16.5 cm × 11.4 cm).
If the bow is too big: go down to a 3.5 mm hook, or make your chains tighter. Loose chain loops are the most common cause.
If the bow is too small or the lobes cup: go up to a 4.5 mm hook, or loosen the chain loops. Tight loops can’t hold the full fan, so the lobe curls up.
Pattern
Center Ring
Rnd 1: Ch 5, sl st in the first ch to form a ring. Ch 1 (does not count as a st), work 10 sc into the ring, sl st to the first sc. (10 sc)
Number the sc 1 to 10 in your head, starting with the first sc. Sc #1 and sc #6 are opposite each other, and the wings start from these points. The ring should measure about 0.5 in (1.3 cm).
Left Wing
Outgoing bar: Ch 6. The 6th ch is the anchor ch; mark it. (6 ch)
Lobe loops (chain only):
- Top lobe loop: Ch 18, sl st in the anchor ch. (18-ch loop)
- Middle lobe loop: Ch 16, sl st in the anchor ch. (16-ch loop)
- Bottom lobe loop: Ch 18, sl st in the anchor ch. (18-ch loop)
You now have three chain loops fanned out from one point, like flower petals. Arrange them so the top loop points up and out, the middle points straight out, and the bottom points down and out.
Fill the bottom lobe (the most recent loop, worked first). Working into the loop: 4 sc, 2 hdc, 15 dc, 2 hdc, 4 sc, then sl st in the anchor ch. (27 sts)
Fill the middle lobe. Working into the loop: 3 sc, 2 hdc, 13 dc, 2 hdc, 3 sc, then sl st in the anchor ch. (23 sts)
Fill the top lobe. Working into the loop: 4 sc, 2 hdc, 15 dc, 2 hdc, 4 sc, then sl st in the anchor ch. (27 sts)
Wing total before border: 27 + 23 + 27 = 77 sts over 52 lobe chains.
The 15 dc of each large lobe should spread into a semicircle at the outer end of the loop. The sc and hdc should run along the loop’s sides. A crescent-shaped opening, the eye, stays open inside each lobe. If the eye closes up, your loop is too short or too tight.
Return bar: Ch 6, sk sc #2 of the ring, sl st in sc #3. This makes the second parallel chain bar. Between the two bars is a small open gap, which gives the doubled center bar of the bow. (6 ch)
Move Across the Ring
Sl st in sc #4, sc #5 and sc #6. (3 sl sts) You are now directly opposite your starting point.
Right Wing
Work the right wing exactly like the left wing:
- Outgoing bar: Ch 6 from sc #6; mark the anchor ch.
- Loops: Ch 18, sl st in anchor; ch 16, sl st in anchor; ch 18, sl st in anchor.
- Fills: Bottom lobe 27 sts, middle lobe 23 sts, top lobe 27 sts, with a sl st in the anchor after each. (77 sts)
- Return bar: Ch 6, sk sc #7, sl st in sc #8.
Make the right wing’s loops a mirror image of the left: top loop up, bottom loop down. Because you are now working in the opposite direction across the ring, the order of the loops mirrors on its own. Lay the bow flat and check that the top and bottom lobes line up across the center.
Finish the center: Sl st in sc #9 and sc #10, then sl st in sc #1 to close. Fasten off.
Checkpoint: The bow measures 6 in × 4 in (15.2 cm × 10.2 cm), not counting the border.
Border
The border is a sc edging around the outer curve of each wing’s lobes. It is worked as two short sections, one per wing. The inner sides of the lobes and the center bars are left unbordered, so they stay light and open.
Border gauge: About 4.5 sc per inch (18 sc = 4 in / 10.2 cm), worked with the same 4.0 mm hook. The border adds 0.25 in (0.6 cm) on each outer edge.
Left Wing Border
With RS facing, join the yarn with a standard sc in the first hdc of the top lobe, on the side closest to the center bar.
- Top lobe: Sc in next hdc (2 sc so far). [Sc in next 2 dc, 2 sc in next dc] 5 times (20 sc). Sc in next 2 hdc (2 sc). (24 sc)
- Valley: Ch 1. Sk the 4 side sc of the top lobe and the 3 side sc of the middle lobe; these lie against each other in the valley. (1 ch)
- Middle lobe: Sc in first 2 hdc (2 sc). [Sc in next 2 dc, 2 sc in next dc] 4 times (16 sc). Sc in next dc (1 sc). Sc in next 2 hdc (2 sc). (21 sc)
- Valley: Ch 1. Sk the 3 side sc of the middle lobe and the 4 side sc of the bottom lobe. (1 ch)
- Bottom lobe: Work as for the top lobe. (24 sc)
Fasten off. Left wing border total: 24 + 1 + 21 + 1 + 24 = 71 sts (69 sc + 2 ch).
Right Wing Border
Join in the first hdc of the right wing’s top lobe on the side closest to the center, and work as for the left wing. (71 sts: 69 sc + 2 ch)
Whole bow border total: 71 × 2 = 142 sts.
Why the Math Works
The outer edge of a fan is longer than the dc tops it sits on, so the border needs more stitches than the fan has. A ratio of 4 sc for every 3 dc keeps it flat: 15 dc × 4 ÷ 3 = 20 sc across each large fan, which is exactly what [2 sc, 2 sc in next] × 5 gives. The middle lobe’s 13 dc give 4 repeats (12 dc → 16 sc) plus 1 plain sc, for 17 sc, which is close to 13 × 4 ÷ 3 = 17.3. The 2 hdc at each end get 1 sc each because they sit on the gentle shoulder of the curve.
With 24 sc at 4.5 sc per inch, the top lobe’s rim is about 5.3 in (13.5 cm) long. That is a little longer than the rim of the dc fan, so the edge lies flat with a slightly raised look. The ch-1 at each valley gives just enough slack at the inside corner so the lobes don’t pull together.
Final Blocking
- Weave in all ends before blocking. Run each tail through the backs of the sc along the lobe sides, where they are least visible.
- Dampen the bow with a spray bottle until it’s evenly moist but not dripping. For cotton, you can soak it for 5 minutes and roll it in a towel.
- Lay it RS up on the blocking mat.
- Pin the center ring first, then pin each wing’s anchor point 1.5 in (3.8 cm) out from the center of the ring.
- Pin each lobe tip. Pin the top and bottom lobes so the total height is 4.5 in (11.4 cm), and the middle lobes so the total width is 6.5 in (16.5 cm).
- Open each eye. Place one pin inside each eye and nudge it into a clean crescent.
- Ease the scallops. Pin 2–3 points along each border rim so the curves stay round.
- Straighten the bars so the two center chains run parallel with an even gap.
- Let it dry completely, usually 12–24 hours, then unpin.
Final Quality-Control Checklist
- [ ] The center ring has 10 sc and is closed neatly.
- [ ] Each wing has 3 lobes: 27, 23 and 27 fill sts.
- [ ] All 6 eyes are open and evenly crescent-shaped.
- [ ] Both wings mirror each other, with top lobes up and bottom lobes down.
- [ ] The two center bars on each side are parallel and the same length (6 ch).
- [ ] Each wing border has 71 sts (24 + 1 + 21 + 1 + 24).
- [ ] The border lies flat with no ruffling or cupping.
- [ ] The blocked size is 6.5 in × 4.5 in (16.5 cm × 11.4 cm).
- [ ] All ends are woven in securely and trimmed.
Troubleshooting
Lobes cup or curl up: The chain loops are too tight for the fill. Remake them with looser chains, or use a hook one size up just for the chains.
Eyes close up completely: The loops are too short or the fill is packed too tightly. Check that you used 18 and 16 chains, and keep your stitches relaxed.
Border ruffles: You may be adding extra increases. Recount to 24 / 21 / 24 sc, or go down half a hook size for the border only.
Border pulls the scallops flat or straight: Your border tension is tight. Loosen up, or swap a few plain sc for 2 sc in the dc at the top of the fan, but keep the count noted.
Wings don’t mirror: The loops were laid out in the wrong direction before filling. Rotate the loops before you fill them; the fill locks the position.
Gaps at the valleys: If the valleys look loose, replace each ch-1 with a sl st through the last side sc of both lobes. That changes each wing border to 69 sc + 2 sl sts.
Crowded anchor ch: Five sl sts go into one anchor. If it gets hard to work, insert the hook around the whole anchor (the ch plus the earlier sl sts) instead of into a single loop.
Care
Hand wash in cool water with a mild soap, press out the water in a towel, and dry flat. Re-pin the lobes while damp if the scallops need refreshing.
Final Notes
The measurement chain keeps this bow consistent. Begin by checking that the 10-sc center ring is 0.5 in (1.3 cm) across. Each 6-ch bar adds 1 in (2.5 cm), and each three-lobe wing reaches 2 in (5.1 cm) from its anchor. Together that gives 6 in × 4 in (15.2 cm × 10.2 cm) before the border. The 0.25 in (0.6 cm) sc border, at 71 sts per wing, brings the bow to its finished 6.5 in × 4.5 in (16.5 cm × 11.4 cm).
If you check at each stage, your bow will come out symmetrical and crisp, with open eyes and smooth, rounded scallops.
Happy crocheting!