

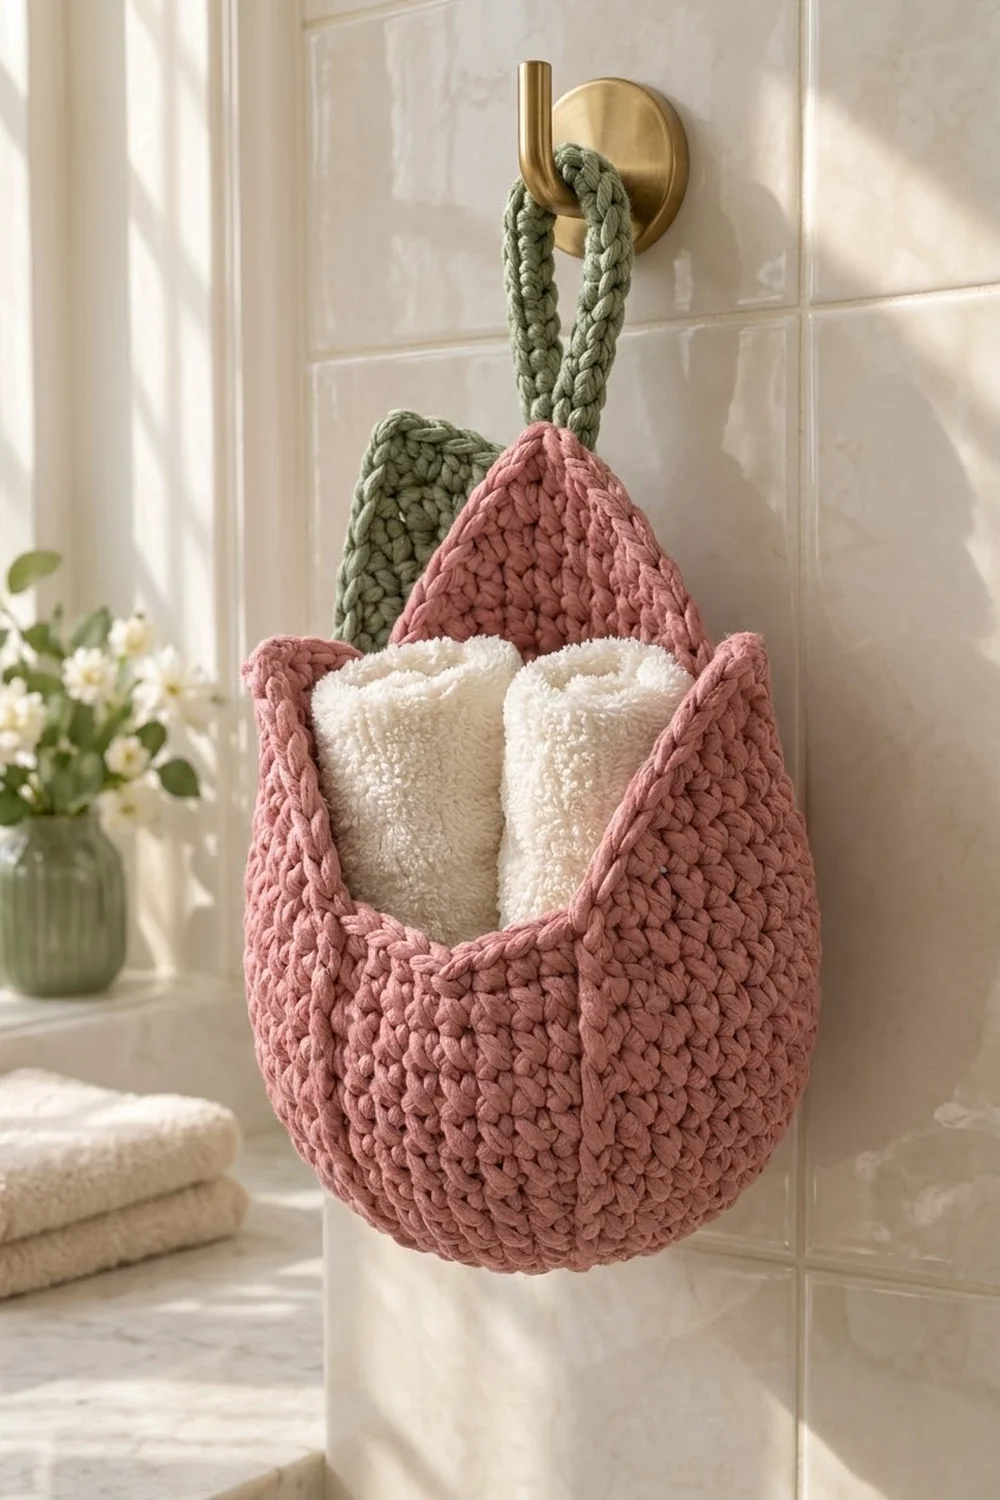
This little tulip basket hangs from a hook and keeps small things tidy. Use it for rolled washcloths, hair ties, cotton pads, or a small plant in a liner. The body is a rounded rose-colored bulb, and three pointed petals open at the top like a tulip just starting to bloom.
The palette is soft: dusty rose for the flower and sage green for the single leaf and the braided hanging loop. Everything is worked in tight single crochet, so the basket keeps its shape without stiffener.
The pattern uses US crochet terms. The finished basket is about 5.75 in (14.6 cm) across at its widest and 7 in (17.8 cm) tall to the tip of the back petal. With the loop, it measures about 10 in (25.4 cm) tall.
You’ll work the base in the round, turn up the sides with a back-loop round, and shape a gentle bulge. Next, you’ll work three petals in rows straight off the last round. Two rounds of edging tidy the top. Finally, you’ll add surface slip stitch lines and sew on the leaf and loop.
Finished Size and Construction
- Finished size: 5.75 in (14.6 cm) wide, 7 in (17.8 cm) tall to the back petal tip, 6.4 in (16.3 cm) tall to the side petal tips
- Height including loop: about 10 in (25.4 cm)
- Skill level: Easy+ (confident beginner)
- Terminology: US crochet terms
- Yarn weight: Bulky (#5) cotton or cotton blend
- Hook: 5.5 mm (US I-9)
- Number of pieces: 1 basket body + 1 leaf + 1 hanging loop
- Layout: Three petals at equal spacing: one at the back and two at the front sides
- Base size: 4.5 in (11.4 cm) diameter
- Size before border: 6.8 in (17.3 cm) to the back tip, 6.2 in (15.7 cm) to the side tips
- Border depth: about 0.2 in (0.5 cm)
Materials
Choose a firm bulky cotton or cotton blend at about 100 m per 100 g. Cotton holds its shape, survives damp bathrooms, and shows the stitch texture clearly. Avoid very soft acrylic, which can let the petals droop.
- Dusty rose: 80 g (about 80 m)
- Sage green: 15 g (about 15 m)
- 5.5 mm (US I-9) crochet hook
- Tapestry needle
- 4 stitch markers
- Scissors
- Measuring tape
These quantities include a margin of about 25% for your gauge swatch, sewing tails, and small tension differences.
Abbreviations (US Terms)
- ch: chain
- sl st: slip stitch
- sc: single crochet
- hdc: half double crochet
- dc: double crochet
- inc: 2 sc in the same stitch
- sc2tog: single crochet 2 together
- BLO: back loop only
- st(s): stitch(es)
- rnd: round
- MR: magic ring
Special stitch: surface slip stitch. Hold the yarn inside the basket. Insert the hook from the outside, between two stitches, and pull up a loop. Move up one round, insert the hook again, pull up a loop, and draw it through the loop on your hook. Repeat to make a chain-like line on the surface.
Gauge and Checkpoints
Gauge: 12 sc and 13 rnds = 4 in (10.2 cm) in sc worked in the round. That works out to 3 stitches and 3.25 rounds per inch.
Work the base first and use it as your gauge test. If it measures correctly, carry on.
- After Rnd 7 (base): 4.5 in (11.4 cm) across, 14 in (35.6 cm) around
- After Rnd 12 (widest point): 18 in (45.7 cm) around
- After Rnd 18 (body): body walls about 3.4 in (8.6 cm) tall, measured from the BLO ridge
- Side petals: about 2.8 in (7.1 cm) tall
- Back petal: about 3.4 in (8.6 cm) tall
If your base is too big, go down to a 5.0 mm (US H-8) hook. If it is too small, go up to a 6.0 mm (US J-10) hook. Fabric that is a little too tight is better than fabric that is too loose, because the basket needs to stand firm.
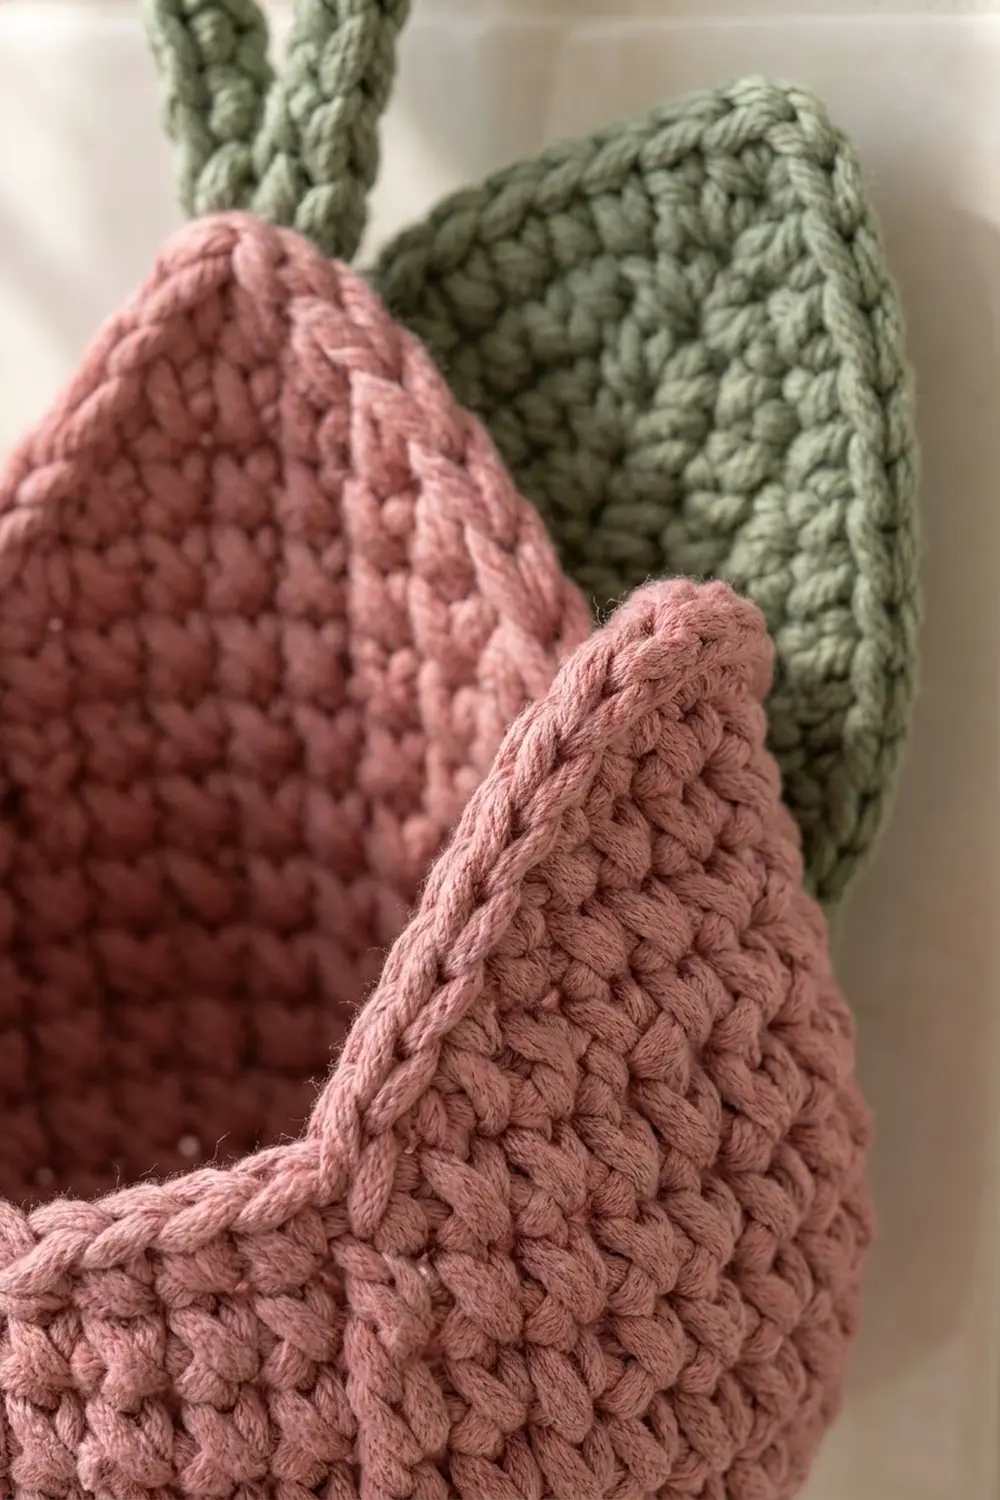
Part 1: Base
Use dusty rose. Work in continuous spiral rounds and move a marker to the first stitch of each round.
Rnd 1: In a MR, work 6 sc. (6)
Rnd 2: Inc in each st around. (12)
Rnd 3: (Sc 1, inc) 6 times. (18)
Rnd 4: (Sc 2, inc) 6 times. (24)
Rnd 5: (Sc 3, inc) 6 times. (30)
Rnd 6: (Sc 4, inc) 6 times. (36)
Rnd 7: (Sc 5, inc) 6 times. (42)
Checkpoint: The base lies flat and measures 4.5 in (11.4 cm) across.
Part 2: Body
Rnd 8: Working in BLO, sc in each st around. (42)
This round leaves a ridge that turns the walls upward.
Rnd 9: Sc in each st around. (42)
Rnd 10: (Sc 6, inc) 6 times. (48)
Rnd 11: Sc in each st around. (48)
Rnd 12: (Sc 7, inc) 6 times. (54)
Rnds 13–16: Sc in each st around. (54 per round, 4 rounds)
Rnd 17: (Sc 7, sc2tog) 6 times. (48)
Rnd 18: Sc in each st around. (48) Sl st in the next st to smooth the step at the end of the spiral. Don’t fasten off.
The increases in Rnds 10 and 12 make the bulb shape, and the decrease in Rnd 17 pulls the top in a little, like a tulip just before it opens.
Checkpoint: The body is 18 in (45.7 cm) around at its widest and about 3.4 in (8.6 cm) tall.
Mark the petals: Counting from the slip stitch, put a marker in st 1, st 17, and st 33. Each petal uses 16 sts (3 × 16 = 48). Plan for the end-of-round area to sit at the back of the basket. The back petal will cover it.
Part 3: Petals
Each petal is worked flat in rows over its own 16 stitches. Ch 1 at the start of every row. The ch 1 doesn’t count as a stitch.
Back Petal (Petal 1)
Work over sts 1–16.
Rows 1–3: Ch 1, turn as needed, sc in each of the 16 sts. (16 per row)
Row 4: Ch 1, turn, sc2tog, sc 10, sc2tog. (12)
Hold on. Check that row: 16 sts need 2 removed, not 4. The correct row is:
Row 4: Ch 1, turn, sc2tog, sc 12, sc2tog. (14)
Row 5: Ch 1, turn, sc2tog, sc 10, sc2tog. (12)
Row 6: Ch 1, turn, sc2tog, sc 8, sc2tog. (10)
Row 7: Ch 1, turn, sc2tog, sc 6, sc2tog. (8)
Row 8: Ch 1, turn, sc2tog, sc 4, sc2tog. (6)
Row 9: Ch 1, turn, sc2tog, sc 2, sc2tog. (4)
Row 10: Ch 1, turn, sc2tog twice. (2)
Row 11: Ch 1, turn, sc2tog. (1)
Fasten off. The back petal has 11 rows and is about 3.4 in (8.6 cm) tall.
Side Petals (Petals 2 and 3)
Join dusty rose in st 17 for Petal 2, or in st 33 for Petal 3.
Row 1: Ch 1, sc in the same st and in the next 15 sts. (16)
Row 2: Ch 1, turn, sc2tog, sc 12, sc2tog. (14)
Row 3: Ch 1, turn, sc2tog, sc 10, sc2tog. (12)
Row 4: Ch 1, turn, sc2tog, sc 8, sc2tog. (10)
Row 5: Ch 1, turn, sc2tog, sc 6, sc2tog. (8)
Row 6: Ch 1, turn, sc2tog, sc 4, sc2tog. (6)
Row 7: Ch 1, turn, sc2tog, sc 2, sc2tog. (4)
Row 8: Ch 1, turn, sc2tog twice. (2)
Row 9: Ch 1, turn, sc2tog. (1)
Fasten off. Each side petal has 9 rows and is about 2.8 in (7.1 cm) tall.
Neighboring petals start in side-by-side stitches, so each valley comes to a clean V.
Part 4: Leaf
Use sage green.
Foundation: Ch 13.
Rnd 1: Working into the chains, start in the 2nd ch from the hook: sc 1, hdc 1, dc 7, hdc 1, sc 1. That’s 11 sts. Work 3 sc in the last ch. Rotate the piece and work along the other side of the chain: sc 1, hdc 1, dc 7, hdc 1, sc 1. Sl st to the first sc. (25)
Rnd 2: Ch 1, then sc in the same st and the next 10 sts (11). Sc in the next st, work (sc, ch 2, sc) in the next st (the center of the 3-sc group), and sc in the next st. Sc in the remaining 11 sts. Sl st to the first sc. (26 sc + 1 ch-2 tip)
The ch-2 makes the pointed tip. The joining end is the base of the leaf. Fasten off and leave a 10 in (25.4 cm) tail. The leaf measures about 4 in (10.2 cm) long and 2 in (5.1 cm) wide.
Part 5: Hanging Loop
Use sage green.
Row 1: Ch 25. Sc in the 2nd ch from the hook and in each ch across. (24)
Row 2: Ch 1, turn, sl st in each sc across. (24)
The slip stitch row thickens the strip and gives it a braided look. Fasten off and leave a 12 in (30.5 cm) tail. The strip is about 8 in (20.3 cm) long.
Border
The border is a two-round edging around all three petals. It makes the raised rim you can see in the photo.
Border gauge: Work 1 sc in each row-end and 3 sc in each petal tip. At each valley, work 1 sc2tog across the two Row 1 row-ends that meet there.
Rnd 1: Join dusty rose with a standing sc in the Row 2 row-end on the right edge of the back petal. Then work:
- Back petal: 1 sc in each row-end for Rows 2–10 (9 sc, including the standing sc). Work 3 sc in the Row 11 tip st. Then work 1 sc in each row-end down the other side, Rows 10–2 (9 sc). Total for the back petal: 21.
- Valley: Sc2tog across the Row 1 row-end of this petal and the Row 1 row-end of the next petal. (1)
- Each side petal: 1 sc in each row-end for Rows 2–8 (7 sc), 3 sc in the Row 9 tip st, then 7 sc down the other side. Total per side petal: 17.
- Remaining valleys: Work a sc2tog after Petal 2 and another after Petal 3, as above.
Sl st to the first sc.
Total: 21 + 17 + 17 + 3 = 58 sts.
Rnd 2: Loosely sl st in each st around. (58)
Fasten off and weave in the end.
Why the math works: Each petal loses exactly 1 stitch at each edge per row. That gives each side edge one row-end per row, so the count is fixed: 9 per side on the back petal and 7 per side on the side petals, once the Row 1 row-ends are used for the valleys. The sc2tog at each valley sharpens the V instead of rounding it. The 3 sc at each tip turn the point without bunching. Working 1 stitch per row-end keeps the edge a little firm, which helps the petals stand up instead of flopping. The slip stitch round adds the defined rim without making the petals any wider.
Surface Lines
With dusty rose and the yarn held inside the basket, start just below one valley at Rnd 18. Work surface slip stitch straight down the stitch column below the valley, from Rnd 18 to Rnd 9. That’s 10 sl sts, one per round, stopping at the BLO ridge. Fasten off on the inside. Repeat below the other two valleys.
Assembly
- Leaf: Place the leaf behind the valley between the back petal and the left petal, with the tip pointing up and out. Sew the bottom 1.25 in (3.2 cm) of the leaf to the inside of the back wall so that about 2.75 in (7.0 cm) of the leaf shows above the rim.
- Loop: Fold the strip in half. Overlap 1 in (2.5 cm) of each end against the back of the back petal tip, side by side. Whipstitch both ends securely through both layers. The loop stands about 3 in (7.6 cm) above the tip.
- Weave in all ends on the inside.
Final Blocking
- Mist the basket lightly with water, or steam it from a distance if your yarn label allows.
- Fill the body firmly with a rolled towel or plastic bags to round out the bulb.
- Shape each petal with your fingers: lift it upright, then curve it gently outward at the tip.
- Pinch each petal tip into a crisp point.
- Press the base flat on the table.
- Let it dry completely, at least 12 hours, before taking out the stuffing.
Final Quality-Control Checklist
- Base is 4.5 in (11.4 cm) across and sits flat
- Body is 18 in (45.7 cm) around at the widest point
- Each petal started with exactly 16 sts
- Border Rnd 1 has 58 sts (21 + 17 + 17 + 3)
- All three valleys are sharp V shapes
- Surface lines run straight, 10 sl sts each
- Leaf is secure and shows about 2.75 in (7.0 cm) above the rim
- Loop is sewn through both layers and holds weight without stretching
- No ends are visible on the outside
Troubleshooting
Base curls up like a bowl: Your tension is tight in the early rounds. Go up a hook size for Rnds 1–7 only.
Base ripples: You may have extra increases. Count each round again; Rnd 7 must have 42 sts.
Body leans or twists: That’s normal spiral drift in sc. Line the petal markers up over the joining seam, and block the basket stuffed.
Petals flop outward: The yarn is too soft or the stitches are too loose. Work the border’s slip stitch round a little tighter, or go down a hook size.
Valleys look rounded: Make sure you used the Row 1 row-ends for the sc2tog. Don’t skip it.
Loop stretches: Add a second line of whipstitching, or work the strip with a smaller hook.
Care
Hand wash in cool water, press out the water in a towel, and reshape. Dry flat over a stuffed form so the bulb keeps its shape.
Final Notes
The measurements build on each other. A base of 4.5 in (11.4 cm) and 42 sts grows to an 18 in (45.7 cm) circumference at 54 sts. The top narrows to 48 sts, which divide into three 16-stitch petals. The back petal rises 3.4 in (8.6 cm) and the side petals 2.8 in (7.1 cm). The 58-stitch border adds about 0.2 in (0.5 cm), for a finished height of 7 in (17.8 cm). If the base checkpoint is right, everything after it will fall into place.
Happy crocheting!