

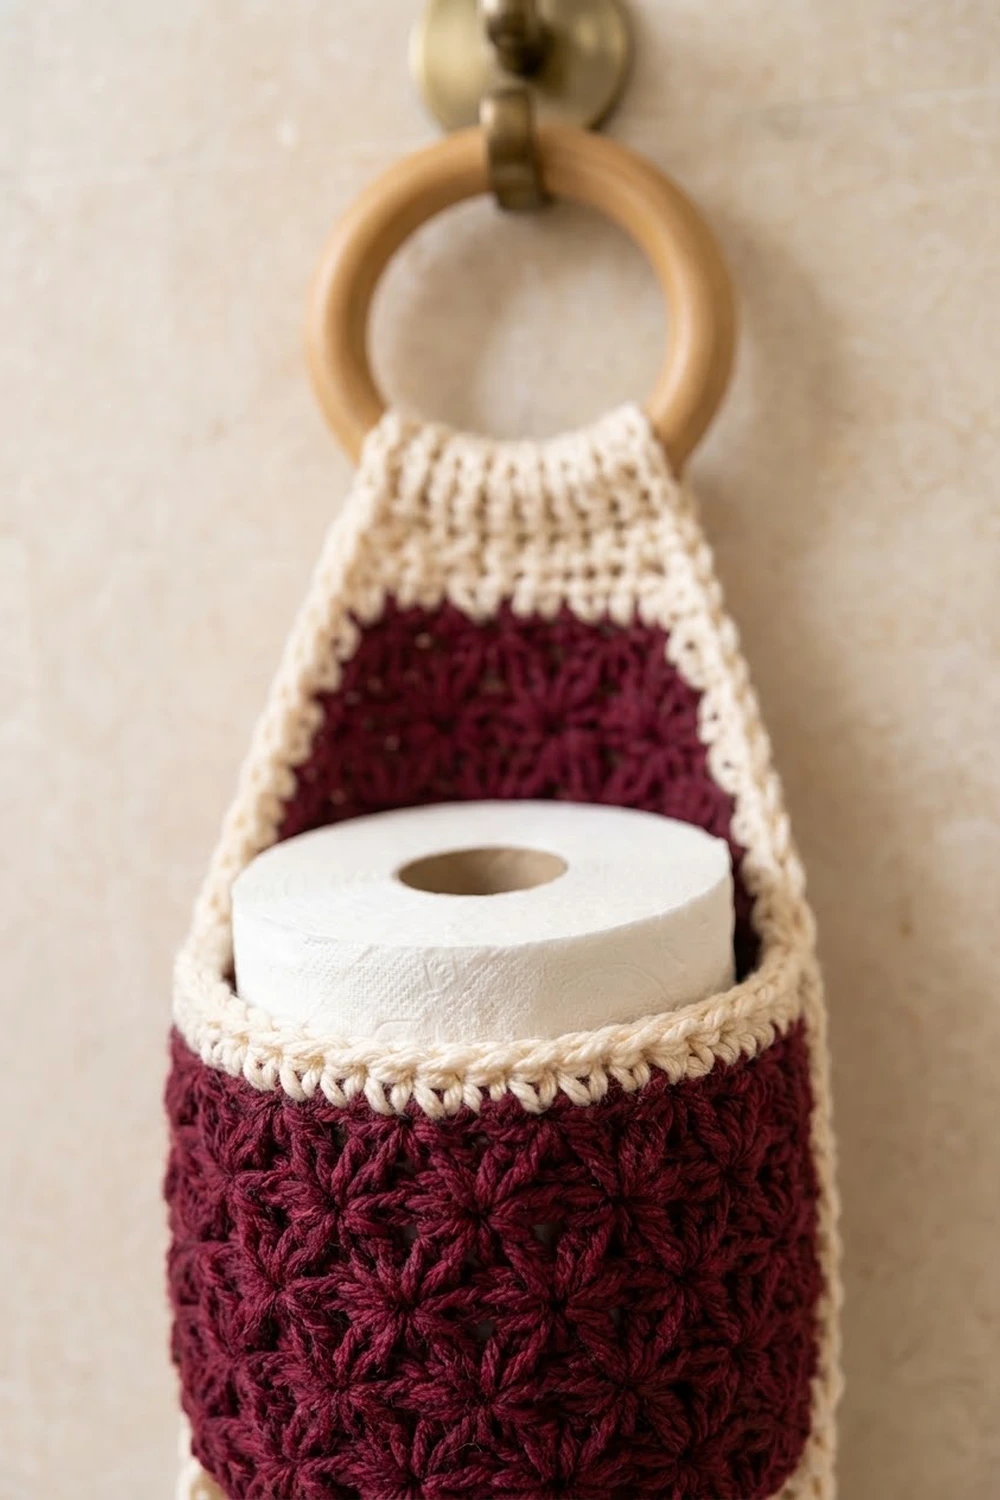
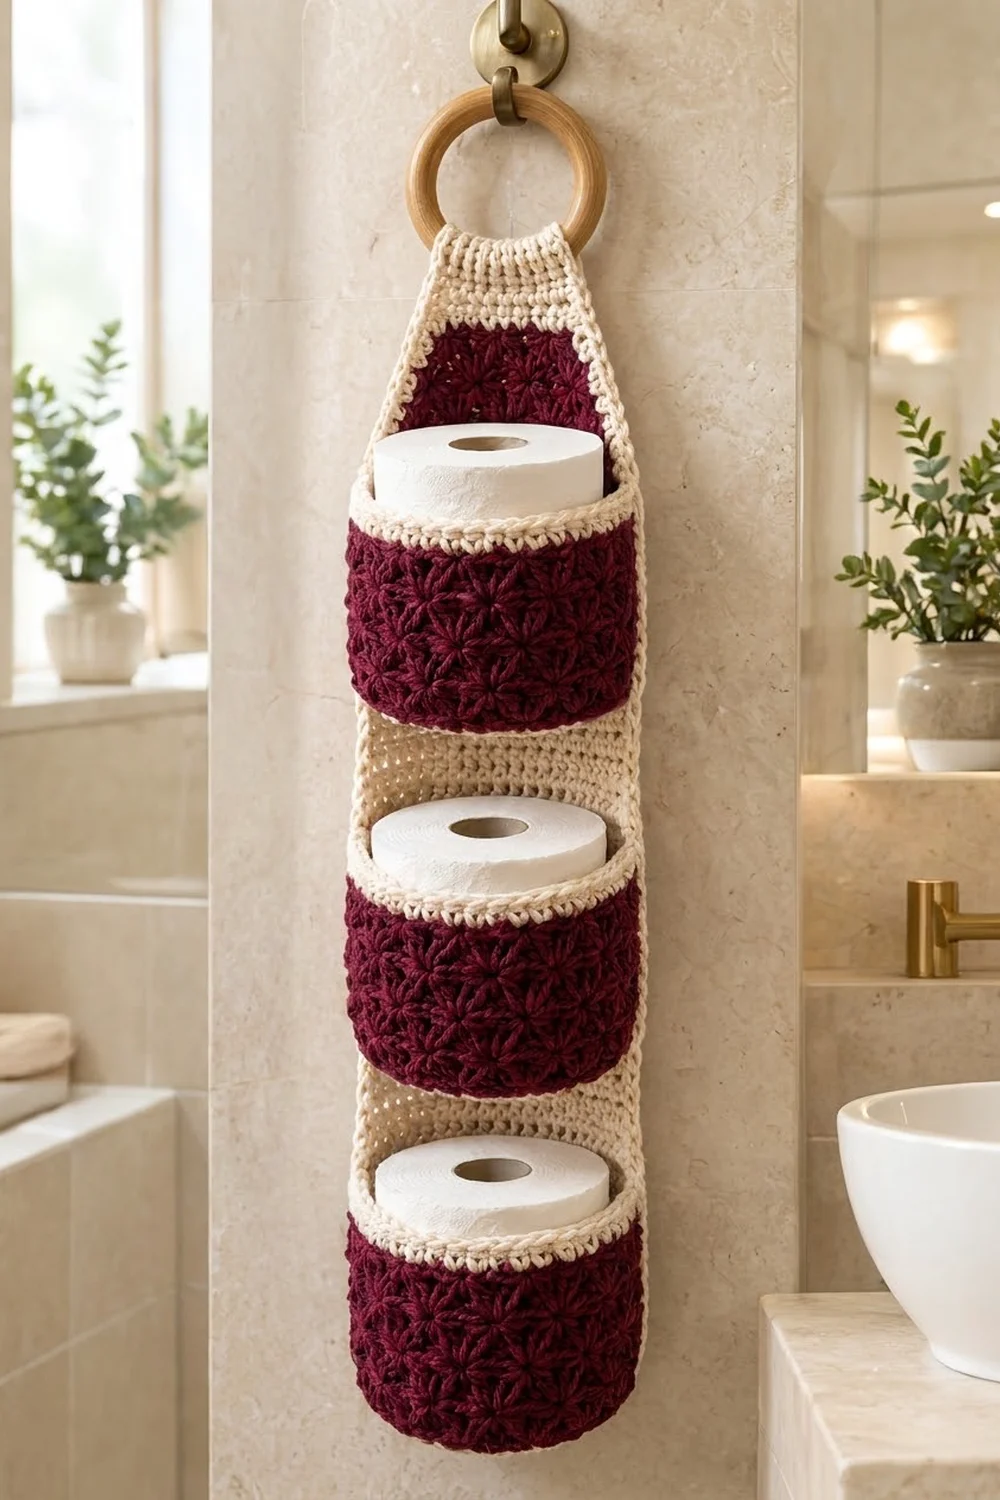
This hanging holder stores three spare rolls on one long cream panel. Three deep burgundy star-stitch cups hold the rolls, and each has a crisp cream rim. A burgundy accent patch near the top repeats the texture, and the narrow top strap wraps around a wooden ring.
The style is calm and simple: two colors, one strong texture, and plenty of plain single crochet between them. The star stitch makes the cups look plush, and the cream panel keeps the piece light against a pale wall.
All terms are US crochet terms. Laid flat, the finished panel measures 6.5 in (16.5 cm) wide by 34.5 in (87.6 cm) long. Once folded over the ring, it hangs 31.5 in (80.0 cm) from the fold to the bottom edge.
You will crochet five pieces: one back panel worked in rows, three cups worked in rounds from the base up, and one flat accent patch. You sew the patch and cups to the panel, work one border round around the panel, then fold the strap over the ring.
Finished Size and Construction
- Finished size: 6.5 in x 34.5 in (16.5 cm x 87.6 cm) flat; 31.5 in (80.0 cm) hanging length
- Skill level: Intermediate
- Terminology: US
- Yarn weight: Worsted (#4) cotton
- Hook: 5.0 mm (H-8)
- Number of pieces: 5 crocheted pieces (1 panel, 3 cups, 1 patch) plus 1 wooden ring
- Layout: One vertical column: patch at the top, three cups below it
- Cup size: about 4.75 in (12.1 cm) across, 3.75 in (9.5 cm) tall
- Panel size before border: 6 in x 34 in (15.2 cm x 86.4 cm)
- Border depth: 0.25 in (0.6 cm), one round of sc
Materials
Use a firm, smooth worsted-weight cotton or cotton blend. Cotton holds its shape when filled and copes well with bathroom humidity. Avoid fuzzy acrylic, because it hides the star texture.
- Cream (Color A): 320 g / about 545 m — panel, cup bases, cup rims, border
- Burgundy (Color B): 210 g / about 357 m — cup sides, accent patch
Tools:
– 5.0 mm (H-8) hook
– Wooden ring, 3 in (7.6 cm) inner diameter
– Tapestry needle
– Stitch markers (at least 6)
– Locking pins or clips
– Measuring tape
– Scissors
These amounts include a margin of about 10% for gauge swatches and differences between dye lots.
Abbreviations (US Terms)
- ch – chain
- sl st – slip stitch
- sc – single crochet
- hdc – half double crochet
- sc2tog – single crochet 2 together
- BLO – back loop only
- MR – magic ring
- st(s) – stitch(es)
- RS – right side
Star (special stitch): Pull up a loop in the eye of the previous star. Pull up a loop in the back of the last loop of the previous star. Pull up a loop in the same st where the previous star’s last loop was made. Pull up a loop in each of the next 2 sts. You now have 6 loops on the hook. Yarn over and pull through all 6 loops, then ch 1 to close the star. That ch-1 is the eye. Each star uses 2 new stitches.
Gauge and Checkpoints
- Single crochet: 16 sts and 18 rows = 4 in (10.2 cm)
- Star pattern: 16 sts (8 stars) and 8 rows = 4 in (10.2 cm), counting star rows and hdc rows together
Before you start the long panel, make one cup completely. It shows whether both gauges are correct.
Checkpoints:
– Cup base after Rnd 10: about 4.75 in (12.1 cm) across
– Finished cup: 3.75 in (9.5 cm) tall, and a standard roll slides in easily
– Panel after Row 18: 6 in (15.2 cm) wide, 4 in (10.2 cm) tall
– Panel after Row 117: 26 in (66.0 cm) tall
– Strap: 2 in (5.1 cm) wide
Too big? Go down 0.5 mm. Too small, or the roll won’t fit? Go up 0.5 mm. Check the panel’s width more strictly than its length, because the stitch counts set the panel’s shape.
Back Panel (Color A)
Ch 25.
Row 1 (RS): Sc in 2nd ch from hook and in each ch across, turn. (24 sts)
Rows 2–117: Ch 1, sc in each st across, turn. (24 sts)
Checkpoint: 6 in x 26 in (15.2 cm x 66.0 cm).
Taper
Row 118: Ch 1, sc2tog, sc to last 2 sts, sc2tog, turn. (22 sts)
Row 119: Ch 1, sc in each st, turn. (22 sts)
Rows 120–133: Repeat Rows 118–119 seven more times. The stitch count drops by 2 on each decrease row: 20, 18, 16, 14, 12, 10, 8. Row 133 has 8 sts.
Rows 134–135: Ch 1, sc in each st, turn. (8 sts)
The taper is 18 rows, which is 4 in (10.2 cm) tall. Each side moves in by 8 sts, which is 2 in (5.1 cm).
Strap
Rows 136–153: Ch 1, sc in each st, turn. (8 sts)
The strap is 18 rows, which is 4 in (10.2 cm). Do not fasten off. Your yarn is now ready for the border, which you work after joining.
Checkpoint: 6 in x 34 in (15.2 cm x 86.4 cm) total.
Cup (make 3)
Base (Color A)
Rnd 1: 6 sc in MR. (6 sts)
Rnd 2: 2 sc in each st. (12 sts)
Rnd 3: Sc 1, 2 sc in next around. (18 sts)
Rnd 4: Sc 2, 2 sc in next around. (24 sts)
Rnd 5: Sc 3, 2 sc in next around. (30 sts)
Rnd 6: Sc 4, 2 sc in next around. (36 sts)
Rnd 7: Sc 5, 2 sc in next around. (42 sts)
Rnd 8: Sc 6, 2 sc in next around. (48 sts)
Rnd 9: Sc 7, 2 sc in next around. (54 sts)
Rnd 10: Sc 8, 2 sc in next around. (60 sts)
Join each round with a sl st to the first sc. Checkpoint: the base is about 4.75 in (12.1 cm) across.
Sides
Rnd 11 (Color A): Ch 1, sc in BLO of each st, join. (60 sts) Working in the back loop makes the side turn upward and leaves the cream bottom band. Change to Color B on the final join.
Rnd 12 (star round): Ch 3. Pull up a loop in the 2nd ch from hook and in the 3rd ch from hook, then in each of the first 3 sts (6 loops). Yarn over, pull through all loops, ch 1. That is the first star, using sts 1–3. Work stars around, each using 2 new sts. For the 30th star, pull up its last loop in st 1 to close the round. Join to the top of the beginning ch-3. (30 stars)
Rnd 13 (hdc round): Sl st into the first eye, ch 2 (does not count as a st), 2 hdc in each eye around, join to the first hdc. (60 sts)
Rnds 14–17: Repeat Rnds 12–13 twice. That gives 30 stars on each star round and 60 sts on each hdc round. Change to Color A on the last join.
Rnds 18–19 (Color A): Ch 1, sc in each st, join. (60 sts)
Fasten off and leave a 24 in (61.0 cm) tail for sewing. Checkpoint: the cup is 3.75 in (9.5 cm) tall and 15 in (38.1 cm) around the rim (60 sts ÷ 4 sts per inch).
Accent Patch (Color B)
Ch 18.
Row 1 (RS): Pull up a loop in each of the 2nd through 6th ch from hook (6 loops). Yarn over, pull through all loops, ch 1. That is the first star. Work 6 more stars across, using 2 new ch each, turn. (7 stars) The first star uses 5 ch, and the remaining 12 ch make 6 stars.
Row 2: Ch 2 (does not count), 2 hdc in each eye, hdc in the last st, turn. (15 sts)
Row 3: Ch 3. Pull up a loop in the 2nd and 3rd ch from hook and in each of the first 3 hdc. Finish the first star, then work 6 more stars, turn. (7 stars) The first star uses 3 sts, and the other 12 sts make 6 stars.
Rows 4–8: Repeat Rows 2–3 twice, then Row 2 once more. (15 sts)
Fasten off and leave a long tail. The patch measures 3.75 in x 4 in (9.5 cm x 10.2 cm).
Make All Pieces
- Color A: 1 back panel; 3 cup bases plus their side bands and rims
- Color B: 3 cup sides; 1 accent patch
Layout (front view). Heights are measured from the bottom edge of the panel before the border:
        [ ring ]
         |strap|        26–34 in
        /taper \        26–30 in
      |  PATCH  |       19–23 in
      | [CUP 3] |       18–21.75 in
      |         |
      | [CUP 2] |       9.5–13.25 in
      |         |
      | [CUP 1] |       1–4.75 in
      |_________|       0 in
The cups start 8.5 in (21.6 cm) apart. Cup 1 sits 1 in (2.5 cm) from the bottom, Cup 2 at 9.5 in (24.1 cm), and Cup 3 at 18 in (45.7 cm). The top of Cup 3’s rim is at 21.75 in (55.2 cm). The patch runs from 19 in (48.3 cm) to 23 in (58.4 cm), so Cup 3 overlaps its lower part.
Joining
Patch first. Center the patch across the panel so that about 1.1 in (2.8 cm) of cream shows on each side. That is 4.5 of the panel’s 24 sts on each side, around the patch’s 15 sts. Whipstitch all four edges with Color B.
Cups. Each cup is sewn on along its back. Place 6 markers on each cup’s rim, 18 sts apart in total, to mark the back 18 rim sts. On the panel row level with the top of the rim, mark sts 4 and 21.
- Stitch-to-stitch: Sew the 18 back rim sts to panel sts 4–21 of that row, one rim st to one panel st.
- Vertical seams: From each end marker, sew straight down the side of the cup to the base. Follow the panel’s column of st 4 or st 21. Each seam crosses about 17 panel rows, because 3.75 in x 4.5 rows per inch is about 17 rows.
- Base: Tack the back 18 sts of Rnd 11 to the panel row level with the bottom of the cup.
Tension: Keep the stitches snug but not tight. The panel must stay flat and the cup should not dent. Use Color A on the rims and base and Color B on the sides, so the seams don’t show.
Size checkpoint: After joining, the panel should still measure 6 in (15.2 cm) wide at every cup. If it narrows, the side seams are too tight.
Border (Color A)
Border gauge: 16 sc = 4 in (10.2 cm) along every edge, the same as the panel’s stitch gauge.
Pick up the working loop at the top of the strap. Work one round:
- Strap top (one end of the panel): Turn to work across the 8 sts of Row 153: 3 sc in the first st, sc in the next 6, 3 sc in the last st. (12 sc = 8 worked 1-per-stitch + 4 added)
- First long side: Strap: 16 sc over 18 row-ends (8 sc in every 9 rows). Taper: 18 sc, 1 in each row-end. Body: 104 sc over 117 row-ends (8 sc in every 9 rows). (138 sc)
- Bottom edge: Work along the foundation chain: 3 sc in the first st, sc in the next 22, 3 sc in the last st. (28 sc = 24 worked 1-per-stitch + 4 added)
- Second long side: Repeat the first long side in reverse order: body, then taper, then strap. (138 sc)
Join to the first sc. Total: 316 sc.
Why the math works:
– The body has 117 rows. That is 13 groups of 9 rows, so 13 × 8 gives 104 sc over 26 in (66.0 cm), or 4 sc per inch.
– The strap’s 18 rows give 16 sc over 4 in (10.2 cm), also 4 sc per inch.
– The tapered edges run diagonally. Each one is about 4.47 in (11.4 cm) long, because the edge rises 4 in and moves in 2 in. Working 18 sc there keeps the same rate of about 4 sc per inch, so the edge neither ripples nor pulls.
– Each corner group adds 2 sc, so the four corners add 8 sc in total.
– The border adds 0.25 in (0.6 cm) on every side. That brings the panel to 6.5 in x 34.5 in (16.5 cm x 87.6 cm).
Attach the ring: Slide the strap through the ring from front to back. Fold the top 3 in (7.6 cm) behind the panel and whipstitch the strap end in place across all its edge stitches. The hanging length is now 31.5 in (80.0 cm).
Final Blocking
- Lightly spray the panel with water, or steam it from above without touching it.
- Pin it flat to 6.5 in x 34.5 in (16.5 cm x 87.6 cm), keeping the cups standing up.
- Put a roll in each cup, or a rolled towel of the same size, so the cups dry round.
- Smooth the tapered edges into straight diagonal lines.
- Let it dry completely, at least 12 hours, before hanging it.
Final Quality-Control Checklist
- [ ] Panel is 24 sts wide and 153 rows long; strap is 8 sts wide
- [ ] Each cup has 60 sts, 30 stars on every star round, and 60 sts on every hdc round
- [ ] Every cup has a cream band at the bottom and a two-round cream rim
- [ ] Cups are 8.5 in (21.6 cm) apart, centered, and level
- [ ] Border round has 316 sc: 12 + 138 + 28 + 138
- [ ] Ring fold is 3 in (7.6 cm) deep and sewn securely
- [ ] All yarn tails are woven in along seam lines
Troubleshooting
- Rolls won’t fit: The base is too small. Go up one hook size for the base only.
- Cups sag forward: Add a second line of stitching along the rim, or tack the base more firmly.
- Stars look slanted or crowded: Check that each star uses exactly 2 new sts. Recount to 30 stars.
- Tapered edge ripples: Work 16 sc instead of 18 along that edge.
- Border edges wave: Your row gauge may be looser than stated. Skip one extra row-end every 18 rows.
- Panel narrows at the cups: Unpick the side seams and sew them again more loosely.
Care
Hand wash in cool water and lay flat to dry, with rolls or towels in the cups to keep them round. Do not tumble dry.
Final Notes
The measurement chain is simple:
– Stitch gauge of 16 sc = 4 in (10.2 cm) gives a 6 in (15.2 cm) panel and a 15 in (38.1 cm) cup rim.
– Row gauge of 18 rows = 4 in (10.2 cm) gives a 34 in (86.4 cm) panel.
– The 8-in-9 border rule keeps 4 sc per inch on every edge.
– One border round brings the panel to 6.5 in x 34.5 in (16.5 cm x 87.6 cm).
– Folding 3 in (7.6 cm) over the ring leaves a 31.5 in (80.0 cm) hanging length.
If you check the gauge on the first cup, everything else follows. Happy crocheting!