

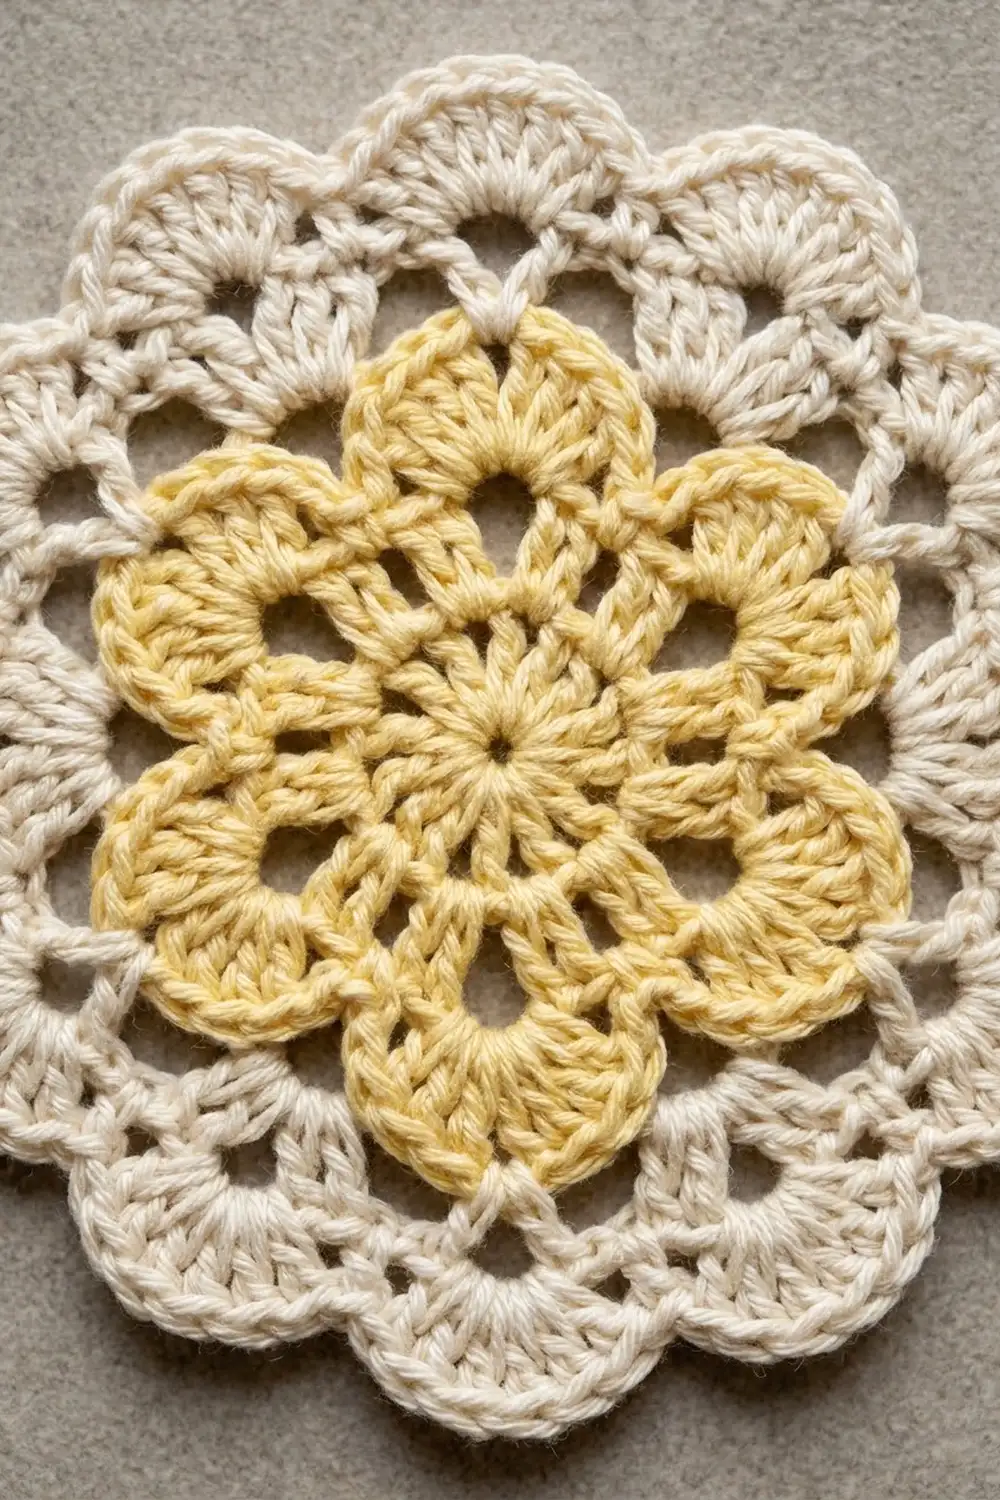
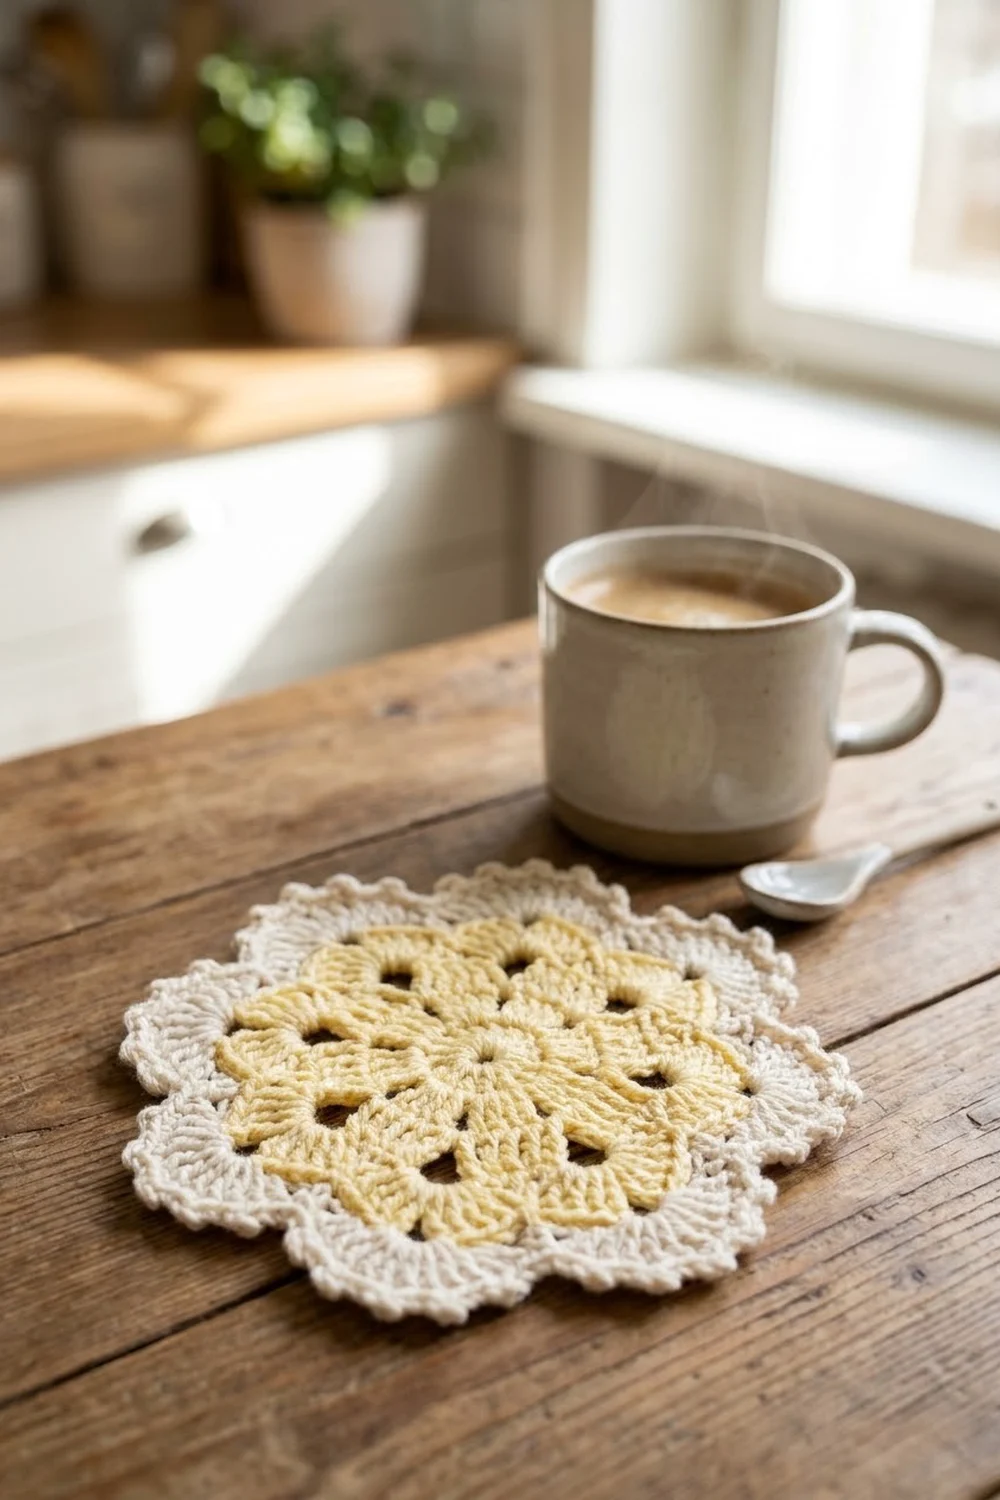
The Buttercream Blossom is a round, six-petaled flower motif. A pale yellow flower sits at the center, with six rounded petals radiating from a solid center circle. Each petal is worked as an open fan of tall stitches and small chain spaces, so the flower looks light and lacy.
A cream frame surrounds the flower. It is built from chain loops and finishes with a scalloped edge of small picots, framing the yellow petals like a doily border. The soft yellow and cream pairing looks warm and gentle. It suits holiday tables, spring décor, or a simple coaster-style accent.
This pattern uses US crochet terms. The finished motif measures 3.5 in (8.9 cm) across, measured point to point after blocking.
The motif is one piece made in two joined color sections. You work the yellow flower in three rounds, then join cream directly onto the petal tips and work three frame rounds. There is no sewing and no separate assembly.
Finished Size and Construction
- Finished size: 3.5 in (8.9 cm) diameter, blocked
- Skill level: Easy-intermediate (rounds, chain spaces, treble crochet, picots)
- Terminology: US crochet terms
- Yarn weight: Sport weight (#2) cotton or cotton blend
- Hook: 3.0 mm
- Number of pieces: 1 motif, made of 2 color sections joined as you go
- Layout: Single round motif, 6 petals, 6-fold symmetry
- Piece size: 3.5 in (8.9 cm)
- Size before border: 2.75 in (7.0 cm), yellow flower only
- Border depth: 0.375 in (1.0 cm) per side, cream frame
Materials
Yarn. Choose a smooth, mercerized or combed sport-weight cotton. Cotton holds the petal shape and the picots crisply after blocking. Avoid fuzzy or very splitty yarns, because they blur the small chain spaces.
- Pale yellow (Color A): 5 g, about 15 m (16 yd)
- Cream (Color B): 4 g, about 12 m (13 yd)
Both quantities include a margin of roughly 30% for a gauge swatch, tails, and frogging.
Tools:
– 3.0 mm crochet hook
– Tapestry needle
– Scissors
– Stitch marker
– Rust-proof pins and a blocking mat or folded towel
– Spray bottle with water
– Ruler or tape measure
Abbreviations (US Terms)
- ch – chain
- sl st – slip stitch
- sc – single crochet
- hdc – half double crochet
- dc – double crochet
- tr – treble crochet (yarn over twice)
- sk – skip
- sp(s) – space(s)
- st(s) – stitch(es)
- rnd – round
Special stitch – Picot: Ch 3, then sl st into the 3rd ch from the hook. This makes a small loop that sits upright on the edge.
Standing sc: With a slip knot already on the hook, insert the hook into the indicated space, yarn over, pull up a loop, yarn over, and pull through both loops.
Gauge and Checkpoints
Gauge for this motif is measured by checkpoints rather than a flat swatch. Make one complete motif as your test piece, and measure at each stage below. Lay the work flat without stretching it.
| Stage | Diameter |
|---|---|
| After Rnd 1 | 1 in (2.5 cm) |
| After Rnd 2 | 1.75 in (4.4 cm) |
| After Rnd 3 (flower complete) | 2.75 in (7.0 cm) |
| After Rnd 5 | 3.25 in (8.3 cm) |
| After Rnd 6, blocked | 3.5 in (8.9 cm) |
A tolerance of about 0.125 in (0.3 cm) at each checkpoint is fine.
If your motif is too big: Go down to a 2.75 mm hook. Also check that your treble crochets are not loose at the top.
If your motif is too small: Go up to a 3.25 mm hook. Also make sure your chain loops are not pulled tight.
If only the frame is off: Change hooks for the cream rounds only. Chain tension has the biggest effect on frame size.
Pattern: Yellow Flower (Color A)
Rnd 1 – Solid Center
Make a magic ring. Ch 3 (counts as first dc), then work 17 dc into the ring. Pull the ring fully closed. Sl st to the top of the beginning ch-3.
Count: 18 dc.
Pulling the ring tight gives the solid center circle. Check that the circle lies flat and measures 1 in (2.5 cm).
Rnd 2 – Petal Foundation Loops
- Ch 1. Sc in the same st as the join.
- Ch 7, sk 2 dc, sc in next dc. Repeat from * 4 more times.
- Ch 7, sk the last 2 dc, and sl st to the first sc.
Count: 6 sc and 6 ch-7 loops.
The sc land on dc numbers 1, 4, 7, 10, 13, and 16. This spaces them evenly, 3 sts apart. Each ch-7 loop becomes the base of one petal. The diameter should now be about 1.75 in (4.4 cm).
Rnd 3 – Lacy Petals
Sl st into the first ch-7 loop. Ch 1. In each ch-7 loop, work one petal:
Petal: (sc, hdc, dc, ch 1, tr, ch 1, tr, ch 2, tr, ch 1, tr, ch 1, dc, hdc, sc)
Work one petal into each of the 6 loops. Sl st to the first sc.
Count per petal: 10 sts (2 sc, 2 hdc, 2 dc, 4 tr) and 5 chain spaces. In order, these are ch-1, ch-1, ch-2, ch-1, ch-1. The center ch-2 is the petal tip.
Round count: 60 sts and 30 chain spaces (24 ch-1 sps + 6 ch-2 tips).
Each petal now has a rounded shape with small openings between its tall stitches. These openings form the openwork lace. The low sc from Rnd 2 sits between petals, leaving a small window near the center at each valley.
Fasten off Color A and weave in the tail.
Checkpoint: The flower measures 2.75 in (7.0 cm) from petal tip to opposite petal tip. Six petals should be evenly spaced, with the tips sitting at clock positions like a hexagon.
Naming the chain spaces in each petal (used in the frame instructions), going counterclockwise as you work:
- A – first ch-1 (between dc and tr)
- B – second ch-1 (between tr and tr)
- C – ch-2 tip
- D – third ch-1 (between tr and tr)
- E – fourth ch-1 (between tr and dc)
Border: Cream Frame (Color B)
The cream frame is the motif’s border. It joins directly to the yellow flower as you work, so the two color sections become one piece.
Because the motif is round, “per side” here means per petal sector. There are 6 identical sectors, one per petal.
Border gauge: The outer edge (Rnd 6) works out to about 7 sc per inch (2.5 cm) around the circumference. This count does not include picots. It is slightly looser than the flower, so the frame lies flat rather than cupping.
Rnd 4 – Anchor Loops
- Make a standing sc in the C (tip) space of any petal.
- Ch 4, then sc in E of the same petal.
- Ch 4, then sc in A of the next petal.
- Ch 4, then sc in C of that petal.
Repeat steps 2–4 around. On the final repeat, replace the last “sc in C” with a sl st to the first sc.
Per sector: 3 sc + 3 ch-4 loops.
Round count: 18 sc + 18 ch-4 loops (6 sectors × 3).
The middle loop of each sector (E to A) bridges the valley between two petals. This lifts the frame over the valley so the outer edge becomes round.
Rnd 5 – Frame Loops
- Sl st into the next 2 ch to reach the center of the first ch-4 loop.
- Ch 1, then sc in the same loop.
- Ch 5, sc in next ch-4 loop. Repeat from * around.
- End with ch 5 and a sl st to the first sc.
Per sector: 3 sc + 3 ch-5 loops.
Round count: 18 sc + 18 ch-5 loops.
This is a conversion round: 1 sc goes into each existing ch-4 loop, and no stitches are added. The sc sit on the centers of the Rnd 4 loops.
Because of that placement, one ch-5 loop in each sector arches directly over a petal tip. The other two flank the valley.
Checkpoint: 3.25 in (8.3 cm) across.
Rnd 6 – Picot Scallops
- Sl st into the first ch-5 loop. Ch 1.
- In each ch-5 loop, work (2 sc, picot, 2 sc).
- Sl st to the first sc. Fasten off.
Per sector: 12 sc + 3 picots (3 loops × 4 sc, 3 loops × 1 picot).
Round count: 72 sc + 18 picots (18 loops × 4 sc, 18 loops × 1 picot).
This is also a conversion round. Each existing ch-5 loop receives exactly 4 sc and 1 picot, with no extra corner stitches. The packed sc make each loop curve outward into a small scallop, and the picot sits at the top of each scallop.
Why the math works:
- Rnd 4 creates exactly 3 loops per petal. That gives 3 × 6 = 18 loops.
- Rnds 5 and 6 keep that same 18-loop count. Each round works exactly once into each loop of the round before.
- 18 divides evenly by 6. Every petal therefore gets the same 3 scallops, with one centered on its tip.
- The edge count of 72 sc divides evenly by 6, giving 12 sc per sector. The frame stays perfectly symmetrical.
Frame depth beyond the petal tips is 0.375 in (1.0 cm). Combined with the 2.75 in (7.0 cm) flower, that gives 2.75 + 0.375 + 0.375 = 3.5 in (8.9 cm).
Optional: To build a larger project like the runner seen in the reel, make additional motifs and join them at the picots on Rnd 6. This pattern covers the single motif only.
Final Blocking
- Weave in all remaining tails along stitches of their own color. Do not trim yet.
- Lightly mist the motif until it is evenly damp. Do not soak it.
- Draw or mark a 3.5 in (8.9 cm) circle on your blocking surface.
- Place the flower center on the middle of the circle.
- Pin each petal tip so the tips sit 2.75 in (7.0 cm) apart across the flower, evenly spaced at 60° intervals.
- Pin each of the 18 picots on the 3.5 in (8.9 cm) circle line. Start with the 6 picots over the petal tips, then fill in the rest.
- Gently open the chain spaces inside each petal with a fingertip.
- Let the motif dry completely, usually 2–4 hours.
- Unpin the motif and trim the tails close.
Final Quality-Control Checklist
- [ ] Center circle is closed, flat, and solid (18 dc)
- [ ] 6 petals, each with 10 sts and 5 visible chain spaces
- [ ] All 6 petal tips are the same height
- [ ] Rnd 4 has 18 ch-4 loops, with 3 per petal sector
- [ ] Rnds 5 and 6 each have 18 loops or scallops
- [ ] 18 picots, with one centered over each petal tip
- [ ] Flower measures 2.75 in (7.0 cm), and the full motif measures 3.5 in (8.9 cm)
- [ ] Motif lies flat with no cupping or ruffling
- [ ] All tails are woven in securely and none are visible from the front
Troubleshooting
The center has a hole. The magic ring was not pulled tight before joining. Weave the starting tail around the base of Rnd 1 and cinch it closed.
The petals cup or curl. The treble crochets are too tight, or the ch-7 loops are short. Loosen your yarn-overs on the tr and keep the ch-7 relaxed.
The petals flare or ruffle. The chain spaces inside the petals are too loose. Tighten your ch-1 and ch-2 slightly, or drop half a hook size for Rnd 3.
The frame pulls the petals inward. The Rnd 4 chains are too tight. Redo the round with looser ch-4 loops, or use a 3.25 mm hook for the cream rounds only.
The frame ruffles. The Rnd 5 chains are too loose. Use a 2.75 mm hook for Rnd 5.
The loop count is off. Count 3 ch-4 loops per petal on Rnd 4 before moving on. Any error there carries into Rnds 5 and 6.
The picots lean over. Make sure you sl st into the 3rd ch from the hook, not the 2nd. Pin each picot upright when blocking.
Care
Hand wash in cool water with a mild detergent. Press out the water in a towel, then reshape and dry flat, re-pinning the picots if needed.
Final Notes
The Buttercream Blossom builds in a clear measurement chain:
- Rnd 1: an 18-dc solid center at 1 in (2.5 cm)
- Rnd 2: 6 foundation loops reaching 1.75 in (4.4 cm)
- Rnd 3: 6 lacy petals totaling 60 sts and 30 chain spaces, completing the flower at 2.75 in (7.0 cm)
- Rnds 4–5: the cream frame adds 18 loops, reaching 3.25 in (8.3 cm)
- Rnd 6: 72 sc and 18 picots bring the blocked motif to 3.5 in (8.9 cm)
Check each stage against these numbers, and your motif will come out round, flat, and symmetrical.
Happy crocheting!