

This is a light, airy lace panel covered in soft yellow flowers. Each flower has a small cream center and eight plump petals. Chain loops hold the petals inside a square frame, and the open spaces between them make the lace look delicate. It’s still sturdy enough for everyday use.
The palette is just two colors: butter yellow for the petals, frames, and border, and cream for the flower centers. With only two shades and so much open space, the panel looks fresh and vintage at the same time. It works well as a table mat, a dresser runner, or a decorative panel.
The pattern uses US crochet terms. The finished panel measures 15 x 11.5 in (38.1 x 29.2 cm) after blocking.
You’ll make 12 square flower motifs, each 3.5 in (8.9 cm) across. Then you’ll join them in a 4 x 3 grid with a slip-stitch seam and add a two-round picot border. Each motif side has 21 stitches, and that number carries through every stage so the border math comes out exactly.
Finished Size and Construction
- Finished size: 15 x 11.5 in (38.1 x 29.2 cm)
- Skill level: Intermediate
- Terminology: US crochet terms
- Yarn weight: Sport weight (#2) cotton
- Hook: 3.25 mm (US D/3)
- Number of pieces: 12 flower motifs
- Layout: 4 motifs across x 3 motifs down
- Motif size: 3.5 x 3.5 in (8.9 x 8.9 cm)
- Size before border: 14 x 10.5 in (35.6 x 26.7 cm)
- Border depth: 0.5 in (1.3 cm) on each side
Materials
Yarn: Use a smooth mercerized or combed cotton in sport weight. Cotton shows off the petal texture and holds its shape well after blocking. Avoid fuzzy or very loosely plied yarns, because they blur the open lace.
- Butter yellow: 75 g (about 225 m)
- Cream: 10 g (about 30 m)
These amounts include a margin of about 20% for your gauge swatch and any small differences in tension.
Tools:
- 3.25 mm (US D/3) crochet hook
- Yarn needle
- 4 stitch markers
- Scissors
- Measuring tape
- Blocking mats and rustproof pins
- Spray bottle
Abbreviations (US Terms)
- ch – chain
- sl st – slip stitch
- sc – single crochet
- hdc – half double crochet
- dc – double crochet
- tr – treble crochet
- sp – space
- st(s) – stitch(es)
- rnd – round
- RS / WS – right side / wrong side
Special stitch:
- Picot: Ch 3, then sl st into the front loop and the left vertical bar of the sc you just made. This makes one small rounded bump.
Gauge and Checkpoints
Gauge: 24 sc = 4 in (10.2 cm), or 6 sc per 1 in (2.5 cm).
Make one complete motif before starting the rest, and measure it at each stage:
- After Rnd 1: The cream center is about 0.75 in (1.9 cm) across.
- After Rnd 3: The flower is about 2.75 in (7.0 cm) from tip to tip.
- After Rnd 4: The framed motif is about 3.25 in (8.3 cm) square.
- After Rnd 5: The motif is 3.5 in (8.9 cm) square, with 21 sts per side.
If your motif is too big by more than 0.25 in (0.6 cm), go down half a hook size. If it’s too small by more than 0.25 in (0.6 cm), go up half a hook size. Don’t change the stitch counts. The whole design depends on 21 sts per side.
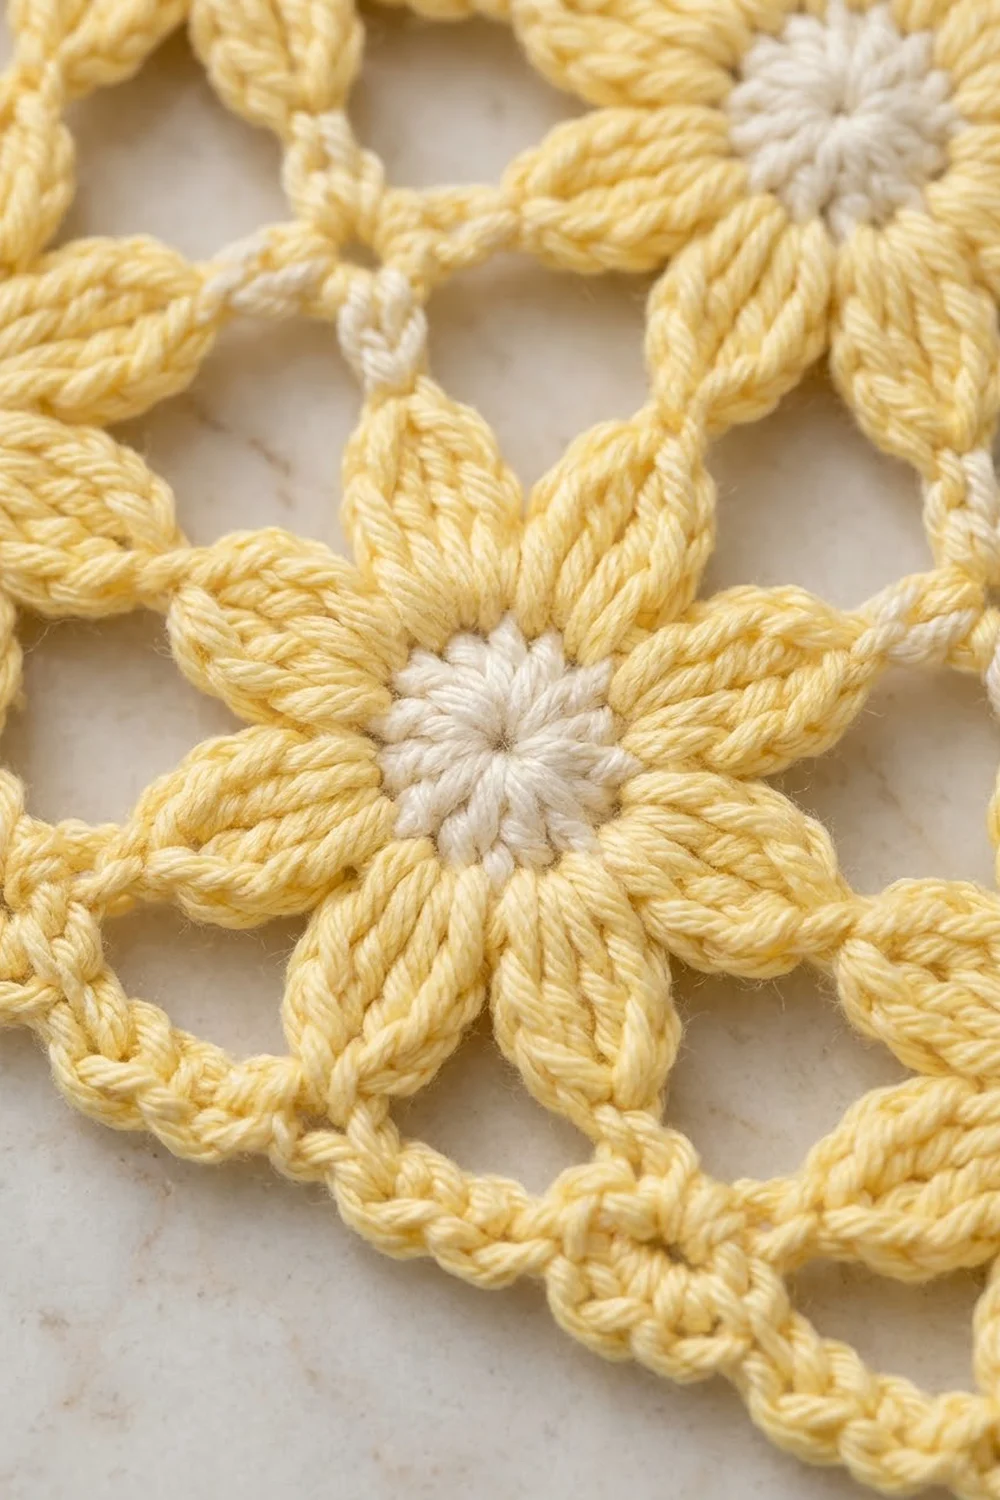
Flower Motif (Make 12)
Rnd 1 (cream): Make a magic ring. Ch 1 and work 16 sc into the ring. Pull the ring closed and sl st to the first sc. Fasten off. (16 sc)
Rnd 2 (yellow): Join yellow with a sc in any sc. Ch 4, skip 1 sc, sc in the next sc. Repeat from * to * 6 more times. Ch 4, skip the last sc, and sl st to the first sc. (8 sc, 8 ch-4 loops)
Rnd 3 (petals): In each ch-4 loop, work (sc, hdc, 2 dc, tr, ch 2, tr, 2 dc, hdc, sc). Sl st to the first sc. (8 petals; 10 sts and 1 ch-2 tip in each petal; 80 sts in total)
Each petal is worked into its own loop, so it puffs outward and stays separate from its neighbors. The ch-2 at the top of each petal makes the pointed tip.
Rnd 4 (frame loops): Sl st in each of the next 5 sts (sc, hdc, dc, dc, tr), then sl st into the ch-2 tip.
Ch 4 (counts as tr), ch 3, and work 1 tr in the same tip. This makes the first corner.
Ch 7, sc in the tip of the next petal, ch 7, then work (tr, ch 3, tr) in the tip of the next petal. Repeat from * to * 2 more times.
Ch 7, sc in the tip of the last petal, ch 7, and sl st to the 4th ch of the beginning ch-4.
(8 tr, 4 sc, 8 ch-7 loops, 4 ch-3 corner sps)
The petals now alternate between corner petals and side petals. The ch-7 loops cross the gaps between petal tips, and those gaps are the open lace triangles you see in the finished panel.
Rnd 5 (square frame): Sl st into the first ch-3 corner sp. Ch 1 and work 3 sc in the same sp.
Sc in the next tr, 7 sc in the next ch-7 loop, sc in the next sc, 7 sc in the next ch-7 loop, sc in the next tr, then 3 sc in the next corner sp. Repeat from * to * 2 more times.
Sc in the next tr, 7 sc in the next ch-7 loop, sc in the next sc, 7 sc in the next ch-7 loop, and sc in the next tr. Sl st to the first sc and fasten off.
Count check:
- Each side has 17 sts between the corner groups (1 + 7 + 1 + 7 + 1).
- Each corner group adds 3 sts.
- Total: (4 x 17) + (4 x 3) = 80 sc.
- The middle sc of each 3-sc corner group is the corner st. Put a marker in each one.
- Stitches per side, counting both corner sts: corner st + 1 + 17 + 1 + corner st = 21.
- Check: 4 sides x 21 = 84, minus the 4 shared corner sts = 80. ✓
Weave in all ends. The motif should measure 3.5 in (8.9 cm) square.
Make All Pieces
Make 12 motifs, all the same:
- Cream: 12 centers (Rnd 1)
- Yellow: 12 flowers with frames (Rnds 2–5)
Block the motifs lightly to 3.5 in (8.9 cm) square before joining. Matching sizes make the seams much easier.
Layout grid:
ROW 1: FLOWER FLOWER FLOWER FLOWER
ROW 2: FLOWER FLOWER FLOWER FLOWER
ROW 3: FLOWER FLOWER FLOWER FLOWER
Turn every motif the same way, so that its corner petals point toward the corners of the grid.
Joining
Method: Slip-stitch seam worked from the RS, through both loops of both layers. This makes the raised, chain-like seam lines that frame each flower.
Horizontal seams (2 seams):
- Hold Row 1 and Row 2 with the WS together, with Row 1 on top.
- Join yellow in the first matching pair of corner sts.
- Sl st through both stitches of each matching pair: 21 sl sts for each motif pair.
- At the meeting point between motif pairs, go straight on into the next pair’s corner sts. Don’t add any chains.
- Each seam has 4 x 21 = 84 sl sts.
- Join Row 2 to Row 3 the same way.
Vertical seams (3 seams):
- Work each column seam the same way: 3 motif pairs x 21 = 63 sl sts.
- Where a vertical seam crosses a horizontal seam, slip stitch over the existing ridge without adding a stitch.
Stitch logic: Each pair of sts is joined one-to-one, so the seams add no width and take none away.
Tension: Keep your slip stitches as loose as the sc underneath them. If your slip stitches tend to be tight, use a hook 0.5 mm larger just for the seams.
Size checkpoint: The joined panel should measure 14 x 10.5 in (35.6 x 26.7 cm). If one side is shorter, the seam is too tight. Pull back and redo it.
Border
Border gauge: 6 sc per 1 in (2.5 cm). This is the same as the motif gauge, so the border lies flat.
Starting counts:
- Long sides: 4 motifs x 21 sts = 84 sts, counting both panel corner sts.
- Short sides: 3 motifs x 21 sts = 63 sts, counting both panel corner sts.
- At each seam, the corner sts of both motifs stay as separate sts, and you work into each one.
- Total around the panel: (2 x 84) + (2 x 63) − 4 shared corners = 290 sts.
Border Rnd 1: With the RS facing, join yellow in the corner st at the top right. Ch 1.
Work 3 sc in that corner st. Then work 1 sc in each st along each side, and 3 sc in each of the other panel corner sts. Sl st to the first sc.
Count: 290 sts worked one-per-stitch + 8 extra sts (2 at each corner) = 298 sc.
- Each long side has 86 sts, counting both corner middles.
- Each short side has 65 sts, counting both corner middles.
- Between the corner middles, there are 84 sts on each long side and 63 sts on each short side.
Border Rnd 2 (picot edge): Sl st into the middle sc of the corner. Ch 1 and work (sc, ch 3, sc) in that st.
- Long sides: [Sc in each of the next 3 sts, picot] 28 times. That’s 84 sts.
- Each corner: (Sc, ch 3, sc) in the corner middle st.
- Short sides: [Sc in each of the next 3 sts, picot] 21 times. That’s 63 sts.
Work all the way around and sl st to the first sc. Fasten off.
Count: 302 sc, 98 picots, and 4 ch-3 corner loops.
Why the math works: Every motif side has 21 sts, and 21 = 3 x 7. Any number of motifs along a side gives a multiple of 3: 84 = 3 x 28 and 63 = 3 x 21. That means the 3-stitch picot repeat fits each side exactly, with no leftover stitches before a corner. Border Rnd 1 adds stitches only at the corners, so the stitches between the corners stay exactly at 84 and 63.
Final Blocking
- Weave in all remaining ends along the seam ridges, where they won’t show.
- Soak the panel in cool water for 10 minutes, then gently press the water out. Don’t wring it.
- Roll it in a towel to remove the extra moisture.
- Lay it flat on blocking mats, RS up.
- Pin the four corners first so the panel measures 15 x 11.5 in (38.1 x 29.2 cm).
- Pin along each side about every 1 in (2.5 cm), and keep the edges straight.
- Open each picot with a pin tip, and shape each petal so it’s rounded.
- Let it dry completely, which usually takes 12–24 hours.
Final Quality-Control Checklist
- All 12 motifs have 8 separate petals and a cream center that sits flat.
- Every motif has 80 sts in Rnd 5 and 21 sts on each side.
- The open lace triangles look even across all motifs.
- The horizontal seams have 84 sl sts each, and the vertical seams have 63 sl sts each.
- The joined panel measures 14 x 10.5 in (35.6 x 26.7 cm).
- Border Rnd 1 has 298 sc.
- The long sides have 28 picots each and the short sides have 21 picots each.
- The blocked panel measures 15 x 11.5 in (38.1 x 29.2 cm), and its corners are square.
- No ends or knots show on the RS.
Troubleshooting
The petals ruffle or overlap. Your Rnd 2 loops are too long. Make the ch-4 loops snugger, or use a smaller hook for Rnd 3 only.
The cream center puckers. The magic ring is closed too tightly around too few stitches. Check that you have exactly 16 sc, and close the ring firmly but without strain.
The motif isn’t square. Count the 7 sc in each ch-7 loop. Missing even one stitch pulls that side in.
A corner looks rounded. Make sure every corner sp has exactly 3 sc, and pin the corner firmly when you block.
The seams pucker. Your slip stitches are too tight. Redo the seam with a larger hook.
The border ripples. You may have worked extra stitches at the seam points. There should be exactly 84 sts along a long side and 63 along a short side.
The border cups. You may have skipped stitches at the seams. Make sure you worked into both motifs’ corner sts.
Care
Hand wash in cool water with a mild detergent. Then reshape the panel and dry it flat. Don’t tumble dry it, and don’t hang it while it’s wet.
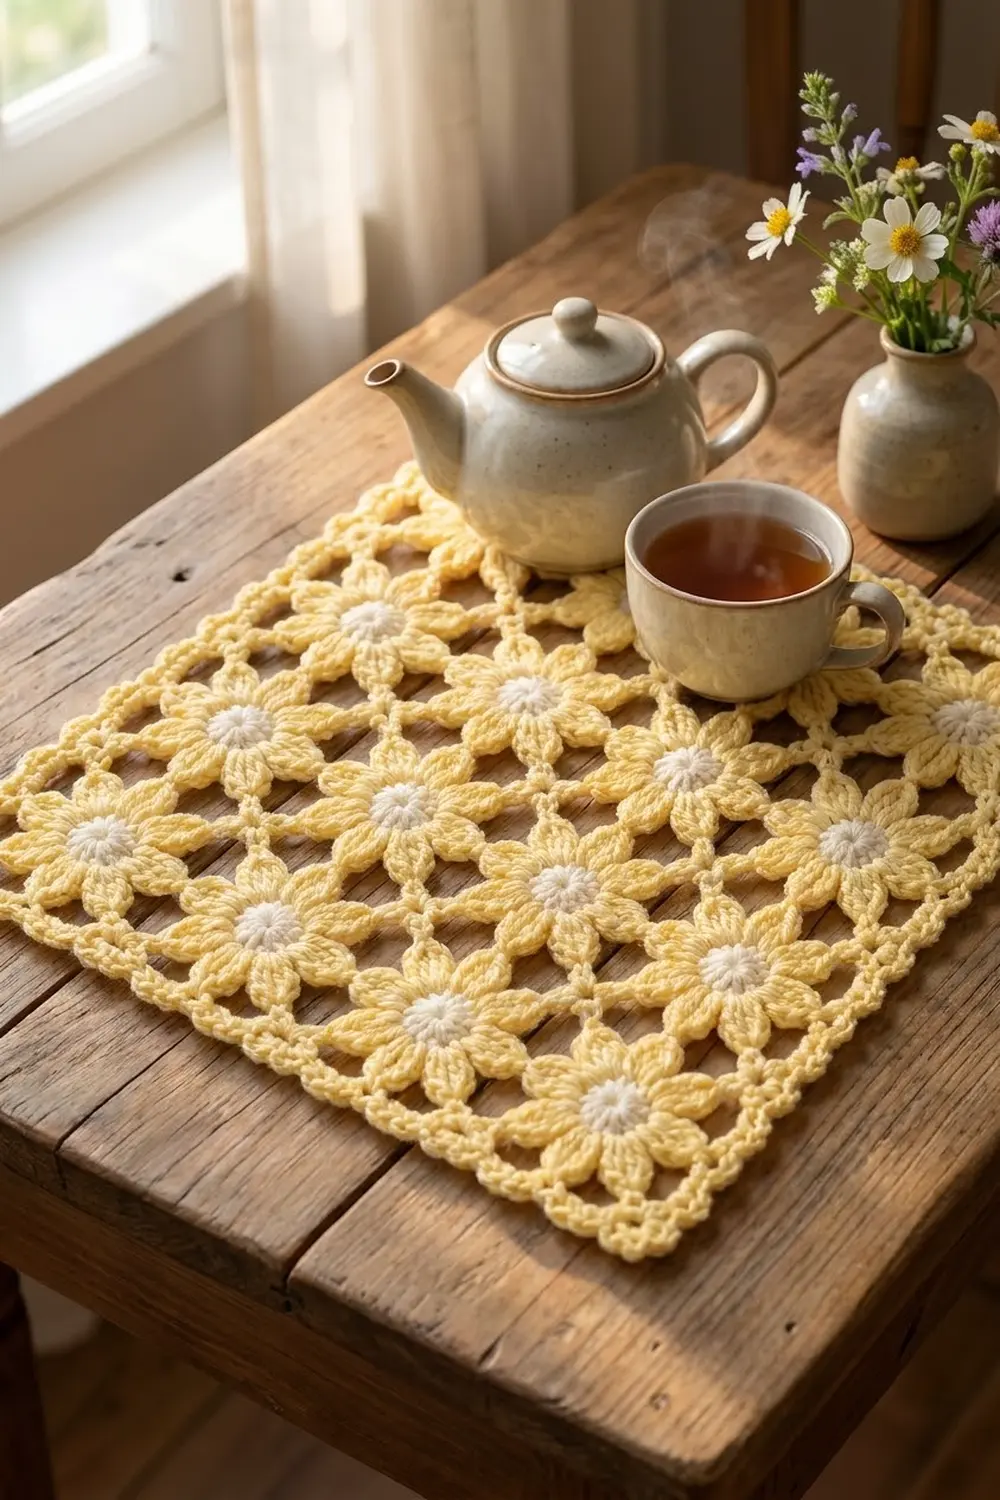
Final Notes
Every measurement in this panel follows from one number. Each motif has 21 sts per side and measures 3.5 in (8.9 cm). Four motifs give 84 sts and 14 in (35.6 cm). Three motifs give 63 sts and 10.5 in (26.7 cm). Border Rnd 1 adds stitches only at the corners, and the 3-stitch picot repeat fits both sides exactly. The border adds 0.5 in (1.3 cm) on each side, which brings the finished panel to 15 x 11.5 in (38.1 x 29.2 cm).
Check your first motif carefully, keep your seams relaxed, and the rest of the panel will fall into place.
Happy crocheting!