

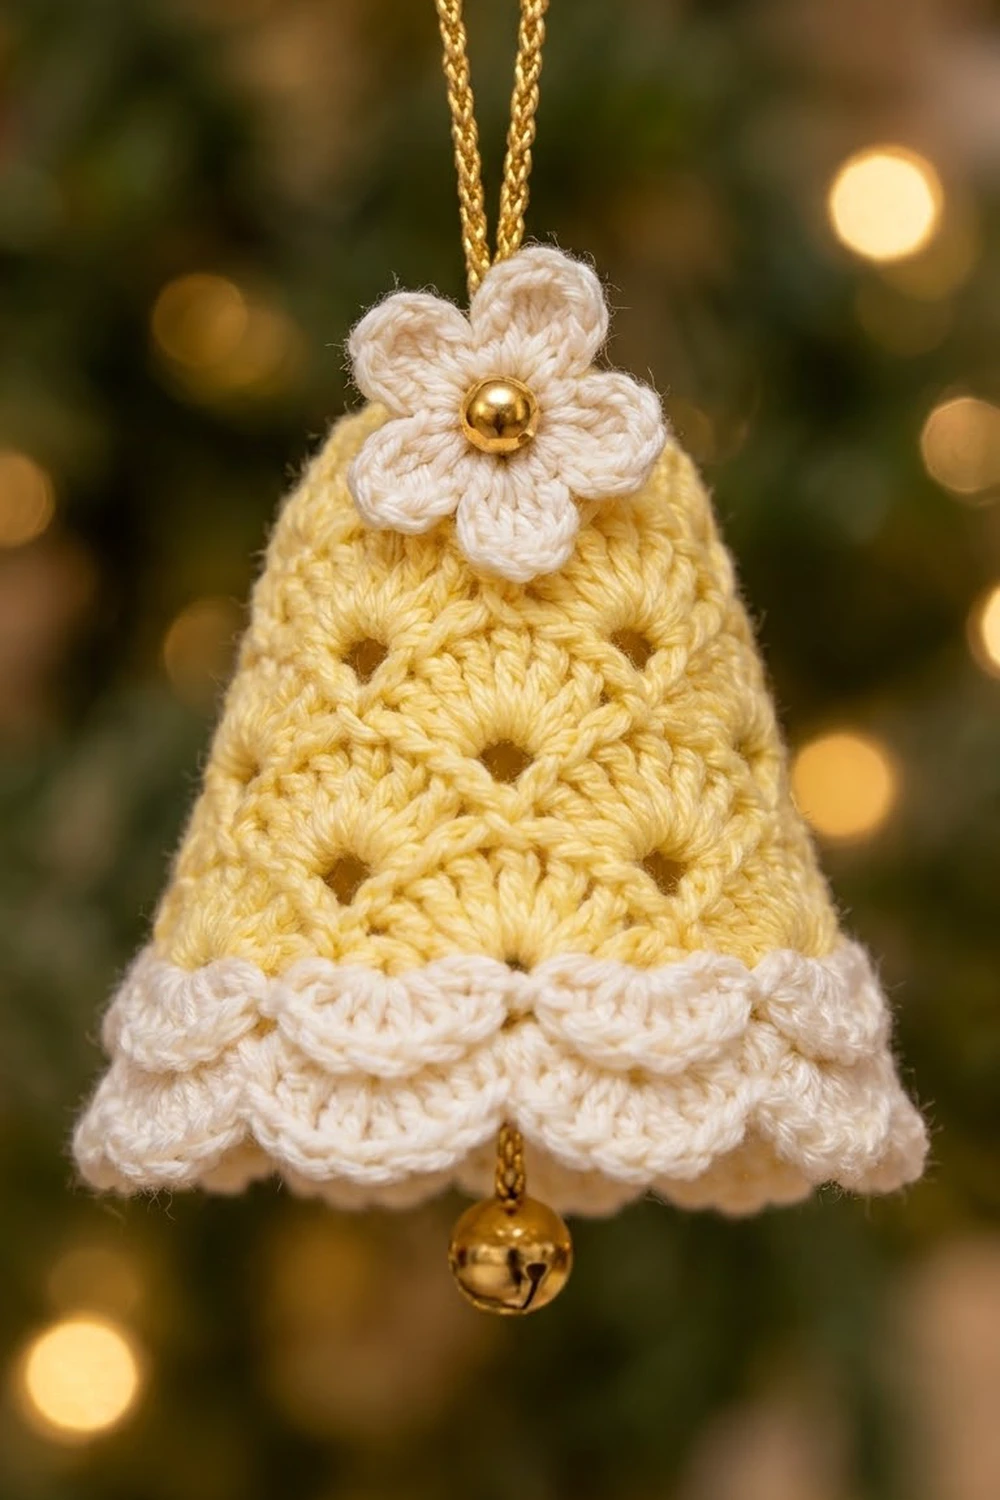
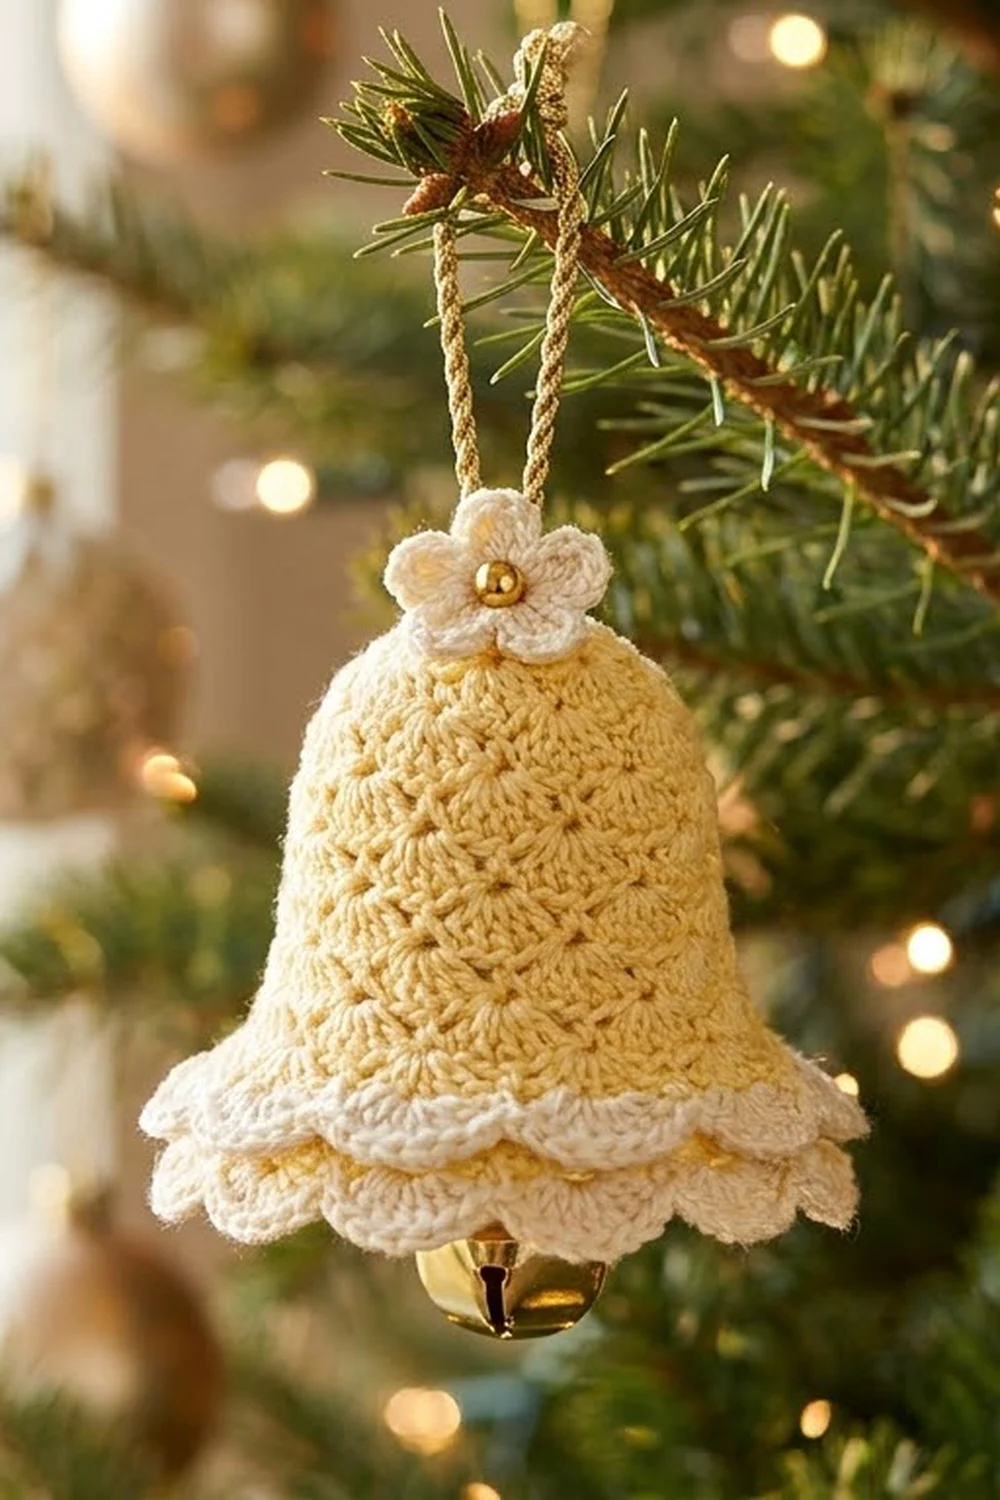
The Buttercup Chime Bell is a small, lacy Christmas ornament in soft yellow and cream. Its body is covered in fan-shaped shells that alternate in position from round to round, with a small eyelet under each fan. Each round of shells is a little wider than the one above, which gives the bell its classic flared shape.
At the hem, two cream ruffles of scallops overlap: a short upper tier over a longer lower tier. A cream five-petal flower with a gold bead center sits at the crown, and a gold cord loop and a hidden jingle bell finish the ornament.
The pattern uses US crochet terms. The finished bell measures about 2.75″ (7.0 cm) tall and 2.25″ (5.7 cm) across at the hem. With the ruffle, it is about 2.75″ (7.0 cm) wide.
You work the bell in joined rounds from the crown down. You change to cream for two ruffle tiers, worked into the front and back loops of the last yellow round. You make the flower separately and sew it on, then add the cord loop and the jingle bell.
Finished Size and Construction
- Finished size: 2.75″ (7.0 cm) tall; 2.25″ (5.7 cm) hem diameter; 2.75″ (7.0 cm) across the ruffle
- Skill level: Intermediate (shells, chain spaces, front/back loop work)
- Terminology: US
- Yarn weight: Fingering (#1 super fine) cotton
- Hook: 2.25 mm (B-1)
- Number of pieces: 1 bell body plus 1 flower appliqué
- Layout: Single ornament, worked in joined rounds from the top down
- Piece size before ruffle: 2.25″ (5.7 cm) tall, 7″ (17.8 cm) hem circumference
- Ruffle depth: 0.5″ (1.3 cm) for the lower tier, 0.25″ (0.6 cm) for the upper tier
Materials
Use a smooth mercerized cotton or cotton blend in fingering weight. Mercerized cotton shows the shells clearly and takes starch well, which helps the bell keep its shape.
- Yellow (body): 6 g, about 24 m
- Cream (ruffles and flower): 3 g, about 12 m
- Gold metallic twisted cord: 8.5″ (21.6 cm) in total: 5″ (12.7 cm) for the loop and 3.5″ (8.9 cm) for the clapper
- 1 gold jingle bell, 12 mm
- 1 round gold bead, 6 mm
- 2.25 mm (B-1) crochet hook
- Tapestry needle
- Sewing needle and cream thread
- Stitch marker
- Fabric stiffener or spray starch (optional)
- A cone form for blocking, such as rolled card stock or a small funnel
These quantities include a margin of about 20%.
Abbreviations (US Terms)
- ch: chain
- sl st: slip stitch
- sc: single crochet
- dc: double crochet
- sp: space
- st(s): stitch(es)
- MR: magic ring
- BLO / FLO: back loop only / front loop only
- FL: front loop
Special stitch: Shell. Work the stated number of dc (3, 5, or 7) into the same chain space or stitch.
Note: The beginning ch-3 counts as 1 dc. The beginning ch-1 does not count as a stitch. Chain stitches inside chain spaces count toward the stitch totals.
Gauge and Checkpoints
Gauge: 8 sc and 9 sc rounds = 1″ (2.5 cm).
Gauge is less important for an ornament than for a garment, but it controls the bell’s proportions. Make one bell before you plan a whole set, and check these measurements as you go:
- After Rnd 3: the flat crown measures 1″ (2.5 cm) across.
- After Rnd 7: the bell measures 1.25″ (3.2 cm) from the crown down, and about 1.5″ (3.8 cm) across.
- After Rnd 12: the bell is 2.25″ (5.7 cm) long, and the hem is 7″ (17.8 cm) around, or 2.25″ (5.7 cm) across.
- After the ruffles: the bell is 2.75″ (7.0 cm) tall.
If your bell is too big, go down a hook size to 2.0 mm. If it is too small or stiff, go up to 2.5 mm. Don’t change the stitch counts; the shell repeats depend on them.
Bell Body (Yellow)
Join every round with a sl st to the first stitch.
Rnd 1: In a MR, ch 1, work 8 sc. Join. (8 sts)
Rnd 2: Ch 1, work 2 sc in each st around. Join. (16 sts)
Rnd 3 (eyelet setup): Ch 1, sc in next 2 sts, ch 1; repeat from * 8 times total. Join to the first sc. (24 sts: 16 sc + 8 ch)
The 8 ch-1 spaces become the first row of eyelets.
Rnd 4 (3-dc shells): Ch 1, skip the first sc, sc in the next sc. Work 3 dc in the next ch-1 sp, skip the next sc, sc in the next sc; repeat from * 7 more times. Work 3 dc in the last ch-1 sp. Join to the first sc. (32 sts: 8 sc + 24 dc; 8 shells)
Rnd 5 (lace round): Sl st in the next 2 dc to reach the center dc of the first shell. Ch 1, sc in the same st. Ch 3, skip 3 sts (dc, sc, dc), sc in the center dc of the next shell; repeat from * 6 more times. Ch 3 and join to the first sc. (32 sts: 8 sc + 24 ch)
Rnd 6 (5-dc shells): Sl st into the first ch-3 sp. Ch 3, work 4 dc in the same sp, sc in the next sc. Work 5 dc in the next ch-3 sp, sc in the next sc; repeat from * 6 more times. Join to the top of the ch-3. (48 sts: 40 dc + 8 sc; 8 shells)
These shells sit halfway between the Rnd 4 shells, and each chain space leaves an eyelet at the base of its shell.
Rnd 7 (lace round): Sl st in the next 2 dc to reach the 3rd dc. Ch 1, sc in the same st. Ch 4, skip 5 sts (2 dc, sc, 2 dc), sc in the 3rd dc of the next shell; repeat from * 6 more times. Ch 4 and join. (40 sts: 8 sc + 32 ch)
The ch-4 is slightly shorter than the 5 skipped stitches. This gently holds in the bell’s “waist.”
Rnd 8 (5-dc shells): Sl st into the first ch-4 sp. Ch 3, work 4 dc in the same sp, sc in the next sc. Work 5 dc in the next ch-4 sp, sc in the next sc; repeat from * 6 more times. Join. (48 sts: 40 dc + 8 sc)
Rnd 9: Repeat Rnd 7. (40 sts: 8 sc + 32 ch)
Rnd 10 (7-dc shells): Sl st into the first ch-4 sp. Ch 3, work 6 dc in the same sp, sc in the next sc. Work 7 dc in the next ch-4 sp, sc in the next sc; repeat from * 6 more times. Join. (64 sts: 56 dc + 8 sc)
The larger shells create the flare.
Rnd 11 (lace round): Sl st in the next 3 dc to reach the 4th dc. Ch 1, sc in the same st. Ch 6, skip 7 sts (3 dc, sc, 3 dc), sc in the 4th dc of the next shell; repeat from * 6 more times. Ch 6 and join. (56 sts: 8 sc + 48 ch)
Rnd 12 (hem conversion round): Ch 1, sc in the same sc, then work 6 sc in the next ch-6 sp. Sc in the next sc, 6 sc in the next ch-6 sp; repeat from * 6 more times. Join. (56 sc = 56 sts worked 1 per existing stitch + 0 extra)
Fasten off and weave in the ends.
Checkpoint: The bell should be 2.25″ (5.7 cm) long, with a hem 7″ (17.8 cm) around.
Ruffle Border (Cream)
Border gauge: one scallop (sc, skip 1, 5-dc shell, skip 1) covers 4 base stitches, about 0.5″ (1.3 cm).
Lower Tier
Rnd 13: Join cream with a sl st in the back loop of any Rnd 12 st. Ch 1, sc in the BLO of each st around. Join. (56 sts = 56 worked 1 per existing stitch + 0 extra)
The front loops of Rnd 12 stay free for the upper tier.
Rnd 14: Ch 1, sc in the next 6 sts, 2 sc in the next st; repeat from * 8 times total. Join. (64 sts)
Rnd 15 (scallops): Ch 1, sc in the first st. Skip 1 st, 5 dc in the next st, skip 1 st, sc in the next st; repeat from * 14 more times. Skip 1 st, 5 dc in the next st, skip 1 st, and join to the first sc. (16 scallops; 96 sts: 16 sc + 80 dc)
Fasten off.
Upper Tier
Rnd 16: Turn the bell upside down and fold the lower tier away from you. Join cream in any free front loop of Rnd 12. Ch 1, sc in the same FL. Skip 1 FL, 5 dc in the next FL, skip 1 FL, sc in the next FL; repeat from * 12 more times. Skip 1 FL, 5 dc in the next FL, skip 1 FL, and join to the first sc. (14 scallops; 84 sts: 14 sc + 70 dc)
Fasten off.
Why the Math Works
Each scallop uses exactly 4 base stitches. The lower tier starts from 64 sts (64 ÷ 4 = 16 scallops), and the upper tier from the 56 free loops (56 ÷ 4 = 14 scallops), so both close evenly with no leftover stitches. The lower tier has two extra rounds and more scallops, so it flares wider and hangs 0.25″ (0.6 cm) below the upper tier. That gives the layered double-ruffle look. Because the two tiers have different scallop counts (16 and 14), their scallops stagger naturally.
Flower Appliqué (Cream)
Rnd 1: In a MR, ch 1, work 5 sc. Join. (5 sts)
Rnd 2: In each sc, work (sl st, ch 2, 3 dc, ch 2, sl st). (5 petals)
Fasten off, leaving an 8″ (20.3 cm) tail. The flower measures about 0.75″ (1.9 cm) across. Sew the 6 mm gold bead to the center with cream thread.
Assembly
- Clapper: Thread the jingle bell onto the 3.5″ (8.9 cm) cord and knot the cord ends together.
- Hanging loop: Fold the 5″ (12.7 cm) cord in half.
- From inside the bell, push the clapper knot and both ends of the loop cord up through the center of the Rnd 1 ring.
- Adjust the clapper so the jingle bell hangs about 0.25″ (0.6 cm) below the lower ruffle. Knot all the cords together securely just above the crown.
- Sew the flower over the crown so it hides the knots, stitching through Rnds 1–2 of the bell.
Final Blocking
- Lightly mist the bell with water, or brush it with diluted fabric stiffener.
- Slide the bell onto a cone form that is 2.25″ (5.7 cm) across at the base.
- Push each shell outward with your fingertip so the eyelets open into round holes.
- Shape the ruffle scallops by hand, laying the upper tier over the lower tier.
- Leave the bell to dry completely, for at least 6 hours.
- Remove the form and fluff the flower petals.
Block the bell before you add the clapper. If you have already attached it, tuck it to one side of the form.
Final Quality-Control Checklist
- The bell is 2.75″ (7.0 cm) tall and 2.25″ (5.7 cm) across at the hem.
- There are 8 shells in each shell round, offset from the round above.
- One eyelet sits at the base of every shell.
- The lower ruffle has 16 scallops and the upper ruffle has 14.
- The lower ruffle extends below the upper one all the way around.
- The flower has 5 even petals and the bead is firmly centered.
- The loop and clapper knots are hidden and secure.
- The jingle bell hangs freely and peeks out below the hem.
- All ends are woven in.
Troubleshooting
The bell is too straight: Your lace rounds may be too tight. Loosen your chains on Rnds 7, 9, and 11.
The bell flares too much at the top: Tighten your tension on Rnds 4–6, or go down half a hook size.
The shells don’t line up offset: Make sure every lace round starts at the shell’s center dc.
The ruffle ripples or cups: Recount Rnd 14; you should have exactly 64 sts.
The scallop counts don’t close evenly: Check that the round you are working into has a multiple of 4 sts.
The jingle bell doesn’t show: Lengthen the clapper cord by about 0.25″ (0.6 cm).
Care
Spot clean only with cool water and mild soap, then reshape on the cone form to dry. Store flat in a box so the ruffles don’t crush.
Final Notes
The measurement chain is short: a 1″ (2.5 cm) crown after Rnd 3, 1.25″ (3.2 cm) of length by Rnd 7, and a 2.25″ (5.7 cm) body with a 7″ (17.8 cm) hem after Rnd 12. The 0.5″ (1.3 cm) double ruffle brings the bell to 2.75″ (7.0 cm) tall.
Check each stage against these numbers, and every bell you make will match. Happy crocheting!