

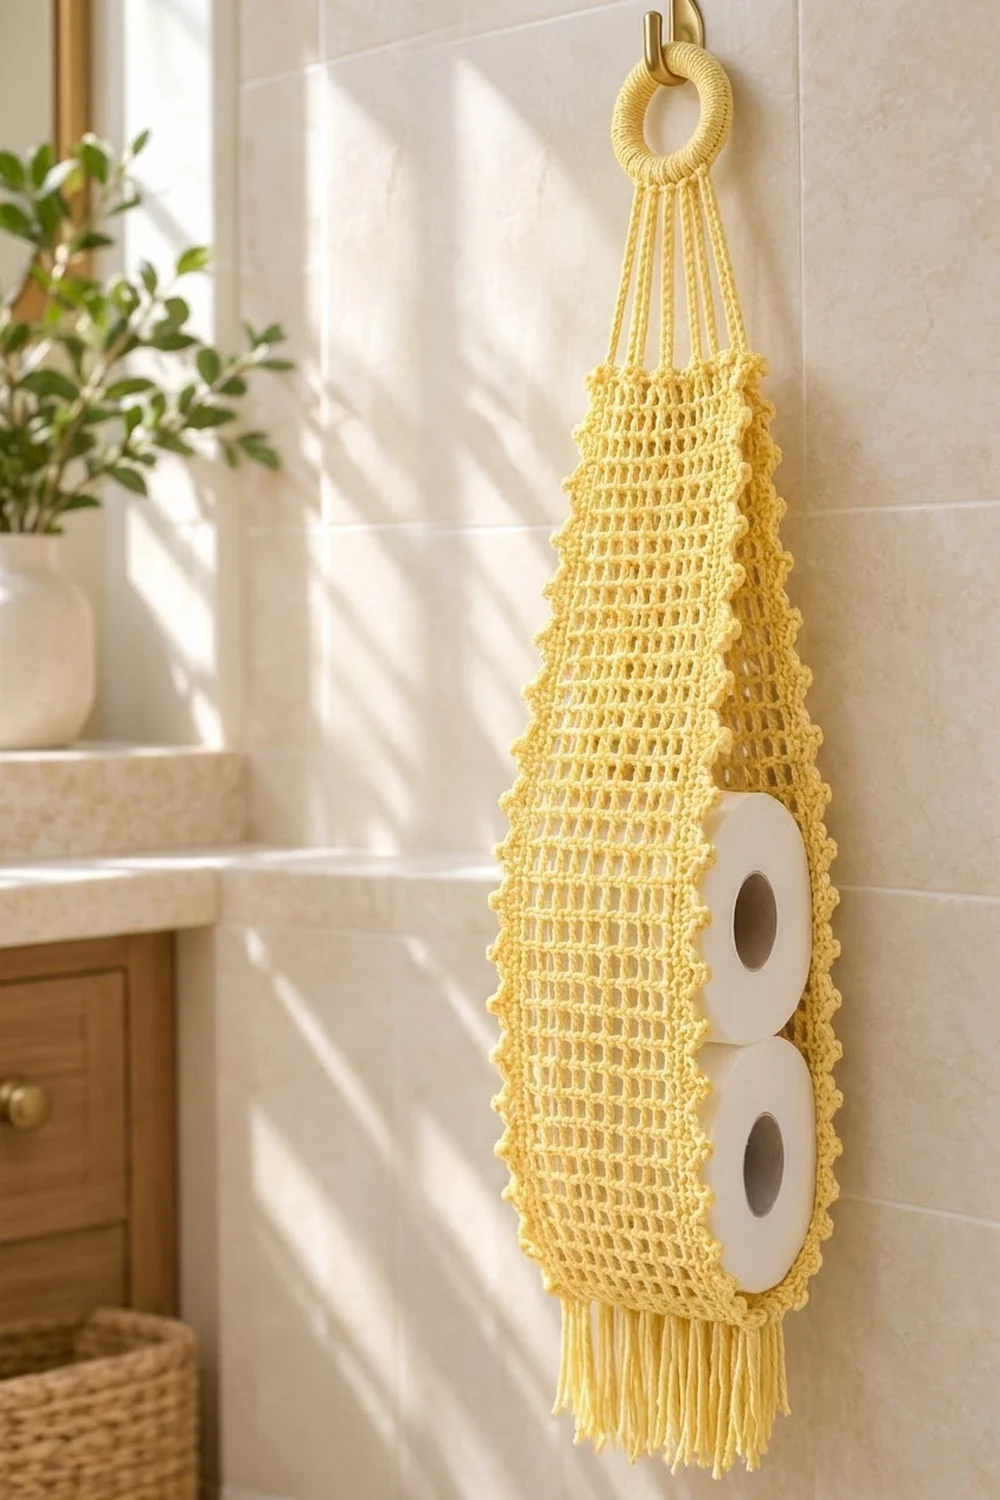
This Buttercup Mesh holder is a simple, airy way to keep spare rolls close at hand. A long filet-mesh body curves around two stacked rolls, leaving the front open so you can grab one easily. Soft picot edges trim the front, a short fringe finishes the bottom, and five slim cords rise to a yarn-covered hanging ring.
The sample uses one color, a pale butter yellow cotton. The look is clean and a little boho: an open grid, crisp edges, and a warm color that suits cream or white bathroom tiles. Because the mesh is open, the white rolls show through and become part of the design.
The pattern uses US crochet terms. The flat body measures 12 in x 18 in (30.5 cm x 45.7 cm) after the border. Hanging from its ring, the holder measures about 31.5 in (80.0 cm) from the top of the ring to the fringe tips.
You will crochet one mesh rectangle in rows, add a two-round border with picots on the long sides, fold the body and seam the bottom, then add fringe, cords, and the covered ring. There is only one main piece, so no motif joining is needed.
Finished Size and Construction
- Finished body (flat): 12 in x 18 in (30.5 cm x 45.7 cm)
- Body folded and hanging: about 6 in (15.2 cm) wide
- Total hanging length: about 31.5 in (80.0 cm)
- Skill level: Easy / Advanced beginner
- Terminology: US crochet terms
- Yarn weight: Worsted weight (#4) cotton
- Hook: 5.0 mm (H-8)
- Number of pieces: 1 mesh body, plus 5 cords and 1 covered ring
- Layout: single rectangle, folded into a U-shaped channel
- Body size before border: 11 in x 17 in (27.9 cm x 43.2 cm)
- Border depth: 0.5 in (1.3 cm) on each edge
Materials
Choose a smooth, mercerized or combed cotton in worsted weight. Cotton holds the mesh shape and the picots well and doesn’t sag much under the weight of two rolls. Acrylic works, but the channel will stretch more over time. A light color shows the grid best.
- Pale butter yellow cotton, worsted weight: 150 g, about 285 m (312 yd)
Tools:
- 5.0 mm (H-8) crochet hook
- One 2 in (5.1 cm) metal or plastic ring
- Tapestry needle
- Scissors
- Measuring tape
- Rust-proof pins and a blocking mat
- Spray bottle with water
The quantity includes about a 15% margin for your swatch, the fringe, and differences in tension.
Abbreviations (US Terms)
- ch – chain
- sl st – slip stitch
- sc – single crochet
- dc – double crochet
- sk – skip
- sp – space
- st(s) – stitch(es)
- rnd – round
- RS – right side
Special stitch – picot: ch 3, sl st into the first of those 3 ch. A picot doesn’t count as a stitch.
Mesh square: one dc plus one ch-1 sp. In this pattern, each dc and each ch counts as 1 st.
Gauge and Checkpoints
Gauge: 8 mesh squares (16 sts) and 8 rows of mesh = 4 in (10.2 cm) square, worked in the mesh pattern below.
Single crochet gauge: 16 sc = 4 in (10.2 cm). This sets the border math.
Make a swatch first. Ch 21 and work Row 1 (19 sts), then repeat Row 3 seven times. Block it lightly and measure the center. Each mesh square should be 0.5 in (1.3 cm) wide and tall.
Checkpoints while working the body:
- After Row 1: the width should be 11 in (27.9 cm).
- After Row 10: length 5 in (12.7 cm).
- After Row 20: length 10 in (25.4 cm).
- After Row 34: length 17 in (43.2 cm).
If your piece is too big, switch to a 4.5 mm (US 7) hook. If it’s too small, switch to a 5.5 mm (I-9) hook. Change the hook, not the stitch counts, since the border and cord placement depend on the 45-stitch row.
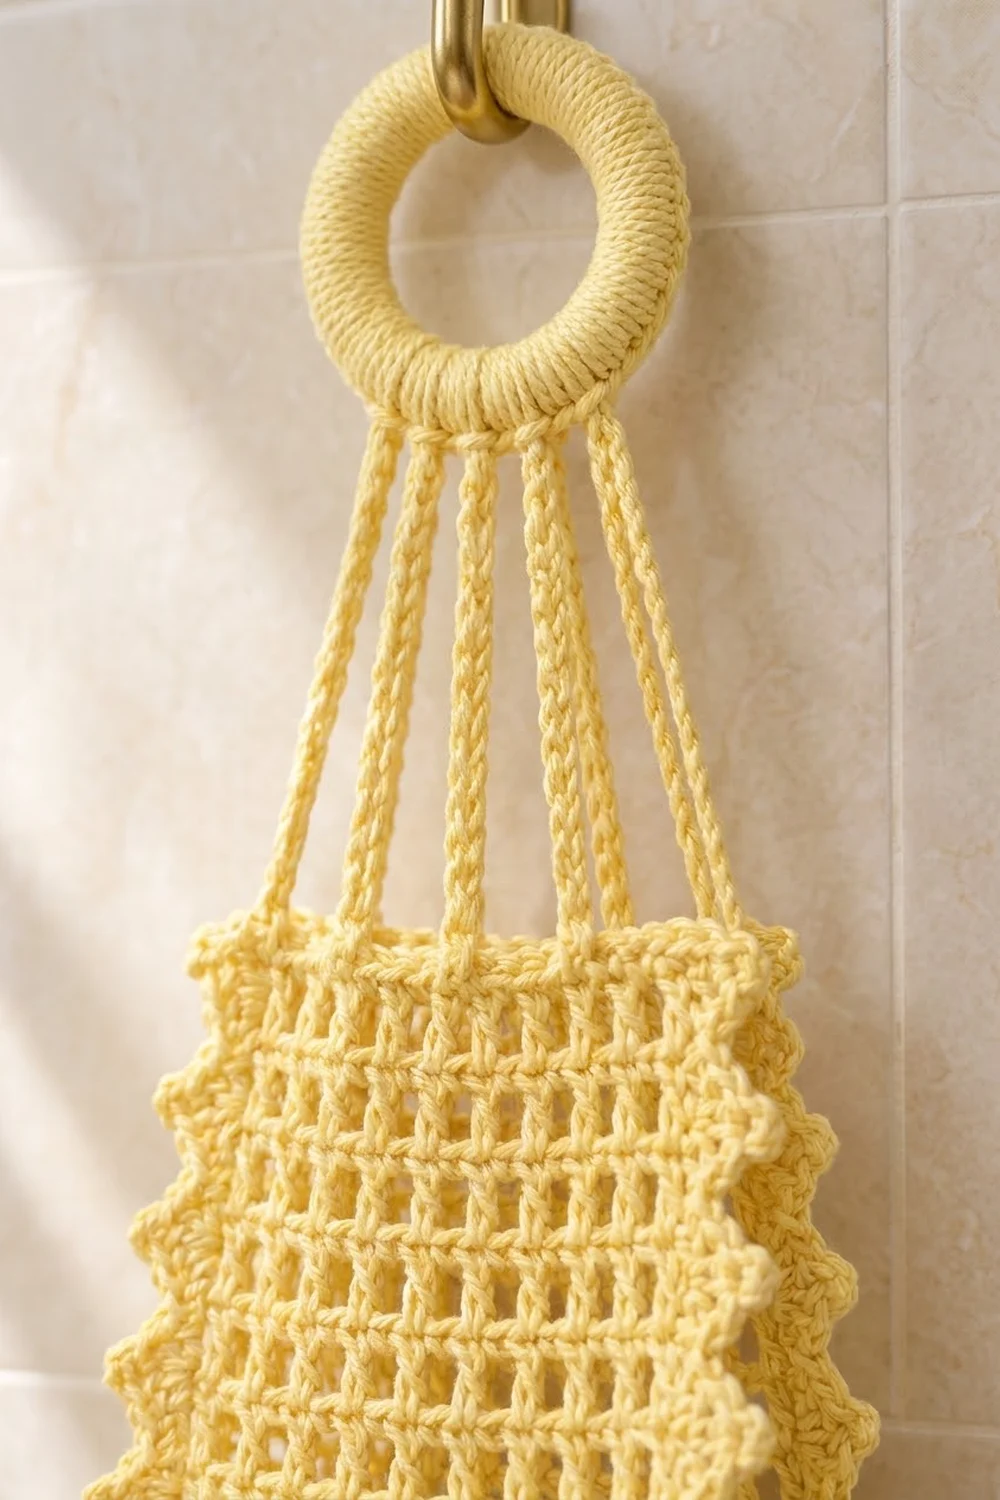
Mesh Body
The body is worked flat in rows. The rows run across the width, so the dc posts stand vertically when the holder hangs.
Foundation: Ch 47.
Row 1 (solid band): Dc in 4th ch from hook and in each ch across, turn. (44 dc + turning ch-3 = 45 sts)
The 3 skipped chains count as the first dc.
Row 2 (set-up mesh): Ch 4 (counts as dc + ch 1), sk next st, dc in next st, ch 1, sk next st, dc in next st; repeat from * across, working the last dc in the top of the turning ch, turn. (23 dc + 22 ch-1 sps = 45 sts)
Row 3 (mesh): Ch 4 (counts as dc + ch 1), sk ch-1 sp, dc in next dc, ch 1, sk ch-1 sp, dc in next dc; repeat from * across, working the last dc in the 3rd ch of the turning ch-4, turn. (23 dc + 22 ch-1 sps = 45 sts)
Rows 4–33: Repeat Row 3. (45 sts in each row)
Check that the posts line up in straight vertical columns. Each new dc sits directly on top of the dc below it. Keep the ch-1 spaces relaxed but not loose, so the squares stay square.
Row 34 (solid band): Ch 3 (counts as dc), dc in next ch-1 sp, dc in next dc; repeat across, working the last dc in the 3rd ch of the turning ch-4. (45 dc) Don’t fasten off.
The body now has 34 rows: 2 solid bands and 32 rows of mesh. At 0.5 in (1.3 cm) per row, it measures 11 in x 17 in (27.9 cm x 43.2 cm).
Border
The border is 2 rounds of sc. It frames the whole rectangle, and the picots go only on the two long sides, which become the front edges of the holder.
Border gauge: 16 sc = 4 in (10.2 cm), so 4 sc per 1 in (2.5 cm). Each dc row is 0.5 in (1.3 cm) tall, so it takes exactly 2 sc per row end.
Rnd 1: Continuing from Row 34, ch 1 and work along the top edge: sc in each st across. (45 sc) Ch 1 for the corner. Rotate and work down the long side: 2 sc in each row end. (34 rows x 2 = 68 sc) Ch 1 for the corner. Work along the foundation chain: sc in each ch. (45 sc) Ch 1 for the corner. Work up the second long side: 2 sc in each row end. (68 sc) Ch 1 for the corner, sl st to the first sc.
Rnd 1 total: 45 + 68 + 45 + 68 = 226 sc, plus 4 corner ch-1 sps.
The corner ch-1 sps aren’t counted as sts and aren’t part of any side count. This keeps the corners flat without adding stitches to the sides.
Rnd 2: Ch 1. Top edge: sc in each sc. (45 sc) Ch 1 over the corner ch-1 sp. Long side: sc in each of next 4 sc, picot; repeat from * 17 times in total. (68 sc + 17 picots) Ch 1 over the corner. Bottom edge: sc in each sc. (45 sc) Ch 1 over the corner. Second long side: sc in each of next 4 sc, picot; repeat from * 17 times in total. (68 sc + 17 picots) Ch 1 over the corner, sl st to the first sc. Fasten off and weave in the ends.
Rnd 2 total: 226 sc and 34 picots, plus 4 corner ch-1 sps.
Why the math works: each long side has 34 rows x 2 sc = 68 sc, and 68 ÷ 4 = 17 exact repeats. The last picot lands at the corner, and the picots fall about every 1 in (2.5 cm), or every 2 mesh rows. The top and bottom stay at 45 sts, matching Row 1 and Row 34, so the short edges don’t ruffle or pull in.
Checkpoint: two sc rounds add 0.5 in (1.3 cm) on each edge. The flat body should now measure 12 in x 18 in (30.5 cm x 45.7 cm).
Shaping the Channel and Bottom Seam
- Lay the body RS down with a short edge at the bottom.
- Fold it in half lengthwise so the two picot edges meet at the front. The center back is the 23rd sc of the bottom edge.
- Thread a needle with a 24 in (61.0 cm) tail of yarn. Working through both layers of the bottom edge, whipstitch sc 22 to sc 24, sc 21 to sc 25, and so on, out to sc 1 and sc 45. That makes 22 joined pairs, with sc 23 sitting at the fold.
- Secure the seam and weave in the end.
The bottom is now closed and about 6 in (15.2 cm) wide. Above the seam, the picot edges open into the front gap where the rolls show.
Fringe
- Cut 33 strands, each 7 in (17.8 cm) long.
- Hold 3 strands together and fold them in half.
- Pull the fold through a seamed pair from back to front, then pull the ends through the loop and tighten.
- Attach one bundle to every other seamed pair, starting at the outer edge: pairs 1, 3, 5, and so on to pair 21. (11 bundles)
- Trim the fringe evenly to 3.5 in (8.9 cm).
Hanging Cords (Make 5)
Cord: Ch 41. Sl st in 2nd ch from hook and in each ch across. (40 sl st) Fasten off, leaving an 8 in (20.3 cm) tail at each end.
The finished cords are about 8 in (20.3 cm) long. The sl st row makes each cord firm and stops it from stretching.
Attaching the cords: unfold the top edge and count its 45 sc. Sew one cord securely to each of these sts: 1, 12, 23, 34, and 45. That gives 4 even gaps of 11 sts. Cords 1 and 5 sit on the front edges, and cord 3 sits at the center back.
Covered Ring
Rnd 1: Attach the yarn to the ring with a sl st. Ch 1, work 48 sc around the ring, pushing the stitches together so the ring is completely hidden. Sl st to the first sc. (48 sc) Fasten off.
Attaching the ring: sew the 5 cord tops to 5 neighboring sc at the bottom of the ring. Even the lengths first so the body hangs level, then sew each cord with several firm passes.
Final Blocking
- Soak the body and cords in cool water for 10 minutes, then press out the water. Don’t wring.
- Roll the piece in a towel to remove more moisture.
- Lay it flat and unfold the channel. Pin the body to 12 in x 18 in (30.5 cm x 45.7 cm).
- Pin out each picot along both long edges.
- Line up the mesh columns using a ruler or a blocking-board grid.
- Straighten the cords and comb out the fringe.
- Let everything dry completely, then unpin and trim the fringe again if needed.
Final Quality-Control Checklist
- Body rows: 34, with 45 sts in every row.
- Mesh: 23 straight dc columns with no slanting.
- Border Rnd 2: 45 / 68 + 17 picots / 45 / 68 + 17 picots.
- Flat size: 12 in x 18 in (30.5 cm x 45.7 cm).
- Bottom seam: 22 pairs, firm, with no gaps.
- Fringe: 11 even bundles, 3.5 in (8.9 cm) long.
- Cords: 5, all 8 in (20.3 cm), at sts 1, 12, 23, 34, and 45.
- Ring: fully covered with 48 sc, and the holder hangs level.
- Fit test: two standard rolls slide in from the top and sit snugly.
Troubleshooting
The mesh slants to one side. You’re probably working the dc into a ch-1 sp instead of the dc below. Each dc goes into the dc of the row below.
The edges are uneven. Make sure the last dc of each row goes into the 3rd ch of the turning ch-4.
The long sides ripple after the border. Your sc tension is loose. Redo Rnd 1 with a 4.5 mm (US 7) hook, keeping 2 sc per row end.
The long sides pull in. Your sc is tight. Go up to a 5.5 mm (I-9) hook for the border only.
The rolls slip out of the front. Your body is wider than 12 in (30.5 cm). Remake it with a smaller hook, or add a 1 in (2.5 cm) stitched join between the picot edges just above the bottom seam.
The holder tilts. One cord is longer or attached off-count. Re-measure and re-sew the cords at sts 1, 12, 23, 34, and 45.
Care
Hand wash in cool water with mild soap and lay flat to dry, reshaping the mesh while it’s damp. Don’t tumble dry, since heat can shrink cotton and distort the grid.
Final Notes
The measurement chain is short and reliable. A 0.5 in (1.3 cm) mesh square gives an 11 in x 17 in (27.9 cm x 43.2 cm) body from 45 sts and 34 rows. Two border rounds bring it to 12 in x 18 in (30.5 cm x 45.7 cm), with 17 picots on each front edge. Folding and seaming makes a 6 in (15.2 cm) channel, and the 8 in (20.3 cm) cords and 2 in (5.1 cm) ring finish the hanging length at about 31.5 in (80.0 cm).
If your swatch matches, every count falls into place. Fill it with two rolls, hang it on a hook, and enjoy a soft, sunny touch in your bathroom.
Happy crocheting!