

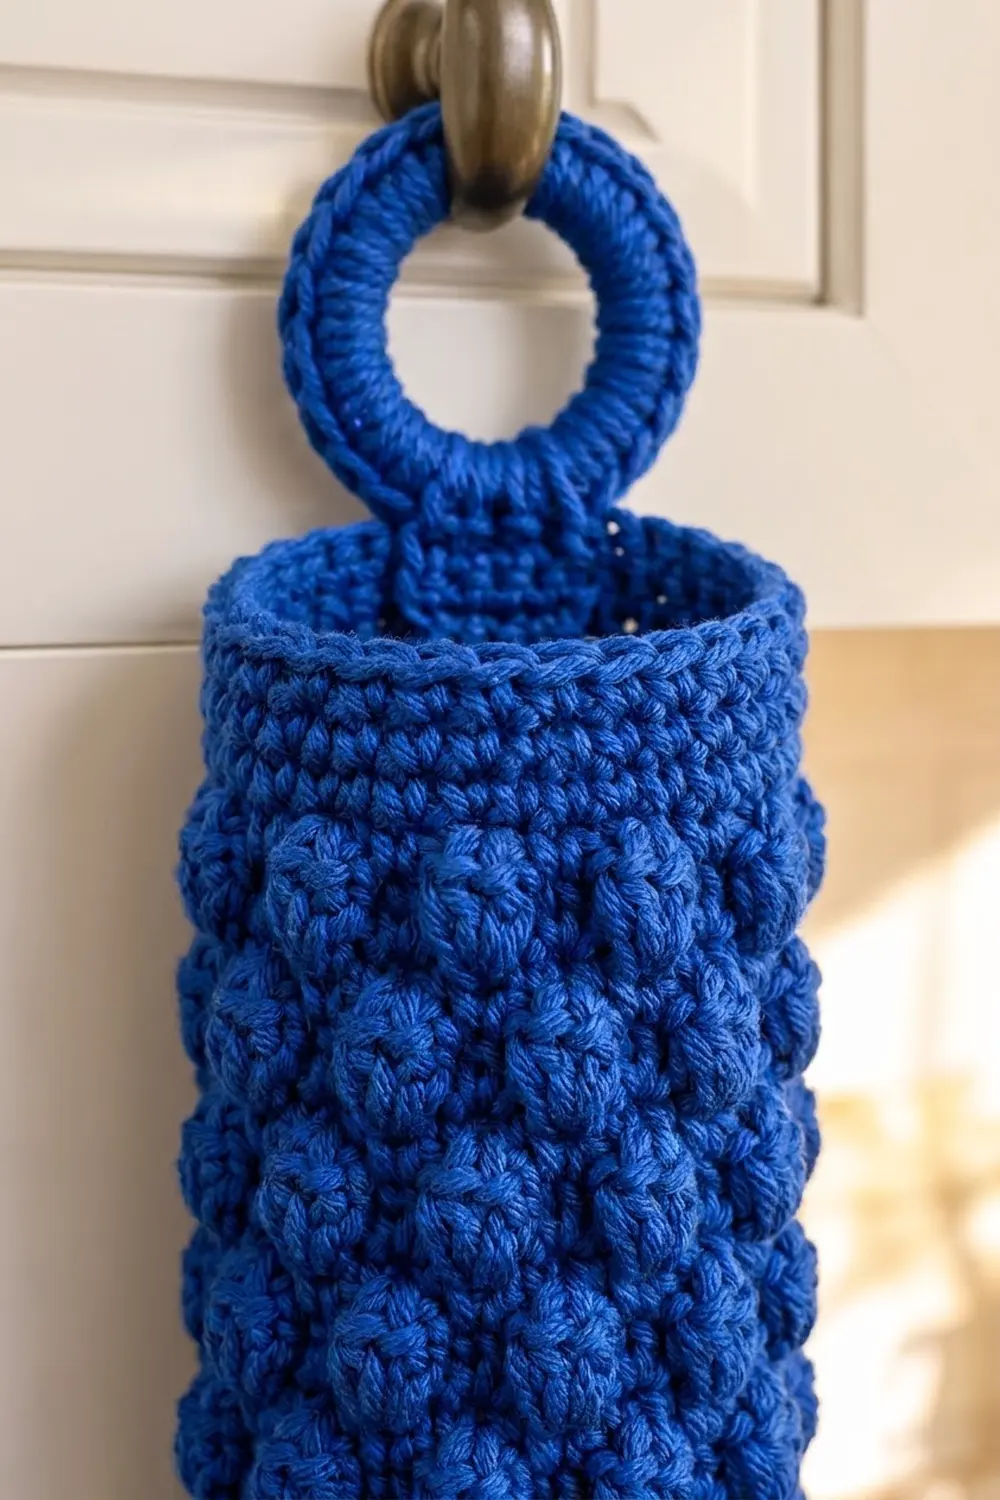
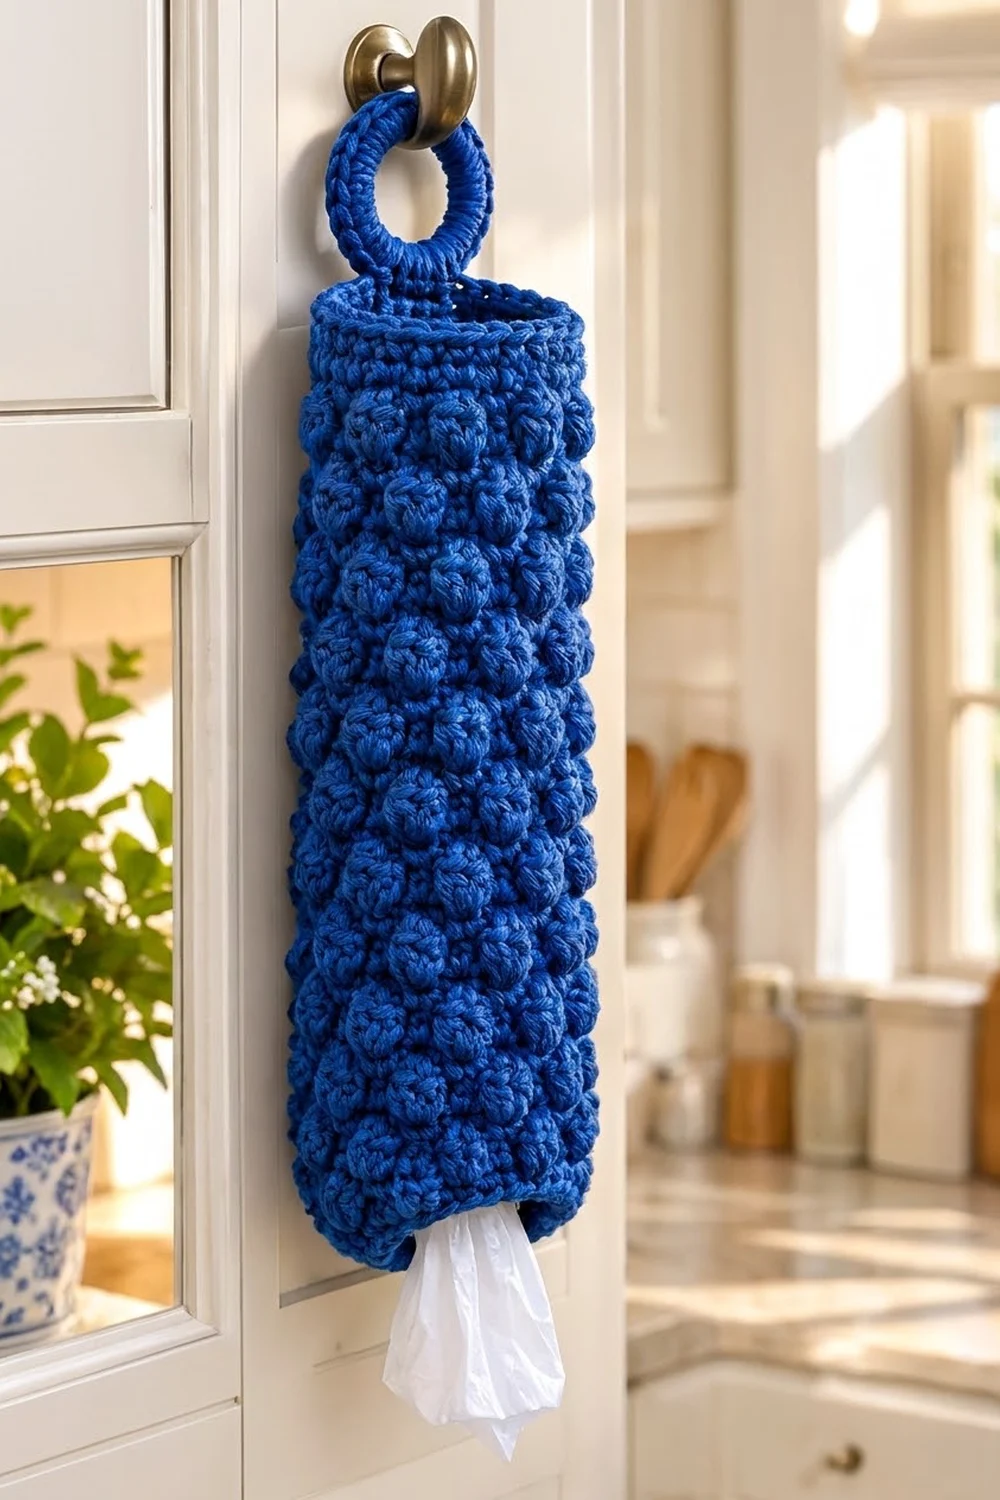
This plastic bag holder is a tall, textured tube that hangs from a cabinet knob and lets bags pull out one at a time through a small opening at the bottom. The whole surface is covered in rows of plump, offset bobbles. That gives it a berry-like texture and makes it look more like kitchen decor than storage.
The sample is worked in one solid cobalt blue cotton. A single strong color shows the bobble texture best. Navy, sage, cream, or terracotta work well too, as long as the yarn is smooth and mercerized or tightly plied. You stuff bags in through the top and pull them out at the bottom, so the oldest bag always comes out first.
The pattern uses US crochet terms throughout. The body measures about 4.6 in (11.7 cm) across and 16 in (40.6 cm) tall. From the bottom edge to the top of the hanging ring it is about 19.5 in (49.5 cm).
Construction is simple. You start at the bottom with a flat ring of single crochet around a small center hole. Then you turn the work upward into a tube, work the bobble pattern in joined, turned rounds, and finish with a plain single crochet rim. A wooden ring is covered in single crochet, a short strap is worked off it, and the strap is sewn to the back of the rim.
Finished Size and Construction
- Finished body size: 4.6 in (11.7 cm) diameter, 14.4 in (36.6 cm) circumference, 16 in (40.6 cm) tall
- Flattened width: 7.2 in (18.3 cm)
- Total hanging length: about 19.5 in (49.5 cm), including the ring
- Skill level: Intermediate (bobbles, turned rounds, simple sewing)
- Terminology: US crochet terms
- Yarn weight: Worsted (#4) cotton
- Hook: 5.0 mm (US H-8)
- Number of pieces: 1 holder, made of 1 tubular body plus 1 covered-ring hanger sewn on
- Layout: Single vertical tube, with the hanger centered at the back of the rim
- Body circumference: 54 stitches in every round from the base edge to the top
- Size before top rim: 14.75 in (37.5 cm) tall after the last pattern round
- Top rim depth: 5 rounds, 1.25 in (3.2 cm)
- Bottom opening: about 1.5 in (3.8 cm) across, and it stretches to let bags through
Materials
Choose a worsted-weight cotton or cotton blend. Cotton holds the bobbles crisply, doesn’t stretch out under the weight of the bags, and can be washed. Acrylic works, but it makes a softer, slightly floppier tube.
- Cobalt blue worsted cotton: 200 g, about 340 m (372 yd)
The holder itself uses about 160 g. The amount listed includes a margin of roughly 25 percent for the gauge swatch, dye-lot differences, and tension variation. Bobbles use a lot of yarn, so don’t cut it close.
Tools:
- 5.0 mm (US H-8) crochet hook
- 1 wooden or metal ring, 2 in (5.1 cm) outer diameter
- 2 locking stitch markers
- Tapestry needle
- Scissors
- Tape measure
- Rust-proof pins
- A cardboard tube, rolled towel, or bottle about 4.5 in (11.4 cm) across, for blocking
Abbreviations (US Terms)
- ch: chain
- sl st: slip stitch
- sc: single crochet
- inc: 2 sc in the same stitch
- BLO: back loop only
- bob: bobble (see below)
- st(s): stitch(es)
- rnd(s): round(s)
- RS / WS: right side / wrong side
Special stitch: Bobble (bob). (Yarn over, insert hook in the stitch, yarn over and pull up a loop, yarn over and draw through 2 loops) 4 times in the same stitch. Then yarn over and draw through all 5 loops on the hook. One bobble counts as 1 stitch.
Bobbles push toward the side of the fabric that faces away from you. That’s why every bobble round in this pattern is worked with the WS facing. The bobbles pop out on the RS, which becomes the outside of the holder.
Gauge and Checkpoints
Gauge: 15 sts and 16 rows = 4 in (10.2 cm) in the bobble pattern, after light blocking. That works out to 3.75 sts and 4 rows per 1 in (2.5 cm).
Test before you commit to the full tube by making a flat swatch:
- Ch 21.
- Row 1 (RS): Sc in 2nd ch from hook and in each ch across. (20 sts)
- Row 2 (WS): Ch 1, turn, (sc in next st, bob in next st) 10 times. (20 sts)
- Row 3 (RS): Ch 1, turn, sc in each st across. (20 sts)
- Row 4 (WS): Ch 1, turn, (bob in next st, sc in next st) 10 times. (20 sts)
- Rows 5–16: Repeat Rows 1–4 pattern by working Rows 3–4 six more times. (16 rows total)
Measure 15 sts across the center and 16 rows top to bottom. Both should be 4 in (10.2 cm).
If your swatch is too big (fewer than 15 sts in 4 in), switch to a 4.5 mm hook. If it’s too small (more than 15 sts), switch to a 5.5 mm hook. Being off by one stitch per 4 in changes the circumference by almost 1 in (2.5 cm).
Checkpoints during the holder:
- After Rnd 7, the base lies flat and measures 4.6 in (11.7 cm) across.
- After Rnd 10, the tube measures 14.4 in (36.6 cm) around, or 7.2 in (18.3 cm) wide when flattened.
- After Rnd 27, you have 20 rounds of side, 5 in (12.7 cm) tall from the base fold.
- After Rnd 66, the tube is 14.75 in (37.5 cm) tall from the base fold.
- After Rnd 71, the tube is 16 in (40.6 cm) tall.
Body Pattern
Base (Bottom Opening)
The base is a flat ring, and the foundation chain forms the opening the bags pull through.
Rnd 1 (RS): Ch 18 and sl st in the first ch to form a ring, taking care not to twist. Ch 1, sc in each ch around, then sl st in the first sc to join. (18 sts)
Place a marker in the first stitch of each round and move it up as you go. Don’t turn on Rnds 1–10.
Rnd 2: Ch 1, (sc in next 2 sts, inc in next st) 6 times, sl st to join. (24 sts)
Rnd 3: Ch 1, (sc in next 3 sts, inc) 6 times, join. (30 sts)
Rnd 4: Ch 1, (sc in next 4 sts, inc) 6 times, join. (36 sts)
Rnd 5: Ch 1, (sc in next 5 sts, inc) 6 times, join. (42 sts)
Rnd 6: Ch 1, (sc in next 6 sts, inc) 6 times, join. (48 sts)
Rnd 7: Ch 1, (sc in next 7 sts, inc) 6 times, join. (54 sts)
Checkpoint: the base should lie flat at 4.6 in (11.7 cm) across, with a center opening about 1.5 in (3.8 cm) wide. If it ruffles, your increases are too loose. If it cups, recount your rounds. For a rounder edge, you can stagger the increases by working the inc at the start of the repeat on Rnds 3 and 5. The count per round stays the same.
Turning the Corner
Rnd 8: Ch 1, sc in BLO of each st around, join. (54 sts)
The unworked front loops make a neat ridge around the bottom edge, and the work starts to rise into a tube.
Rnds 9–10: Ch 1, sc in each st around, join. (54 sts)
Checkpoint: 14.4 in (36.6 cm) around. At the end of Rnd 10, turn the work so the WS faces you.
Bobble Section
From here through Rnd 66, turn at the end of every round. Start each round with ch 1 (it doesn’t count as a stitch), work the first stitch into the same stitch as the join, and finish with a sl st in the first stitch.
Rnd 11 (WS, Bobble A): Ch 1, (sc in next st, bob in next st) 27 times, join, turn. (27 bobbles + 27 sc = 54 sts)
Rnd 12 (RS): Ch 1, sc in each st around, join, turn. (54 sts)
Rnd 13 (WS, Bobble B): Ch 1, (bob in next st, sc in next st) 27 times, join, turn. (27 bobbles + 27 sc = 54 sts)
Rnd 14 (RS): Ch 1, sc in each st around, join, turn. (54 sts)
Because 54 is even and every bobble round is worked in the same direction, Bobble A puts bobbles on the even-numbered stitches and Bobble B puts them on the odd-numbered stitches. Each bobble sits between the two bobbles below it, which gives the staggered berry texture.
Rnds 15–66: Repeat Rnds 11–14 thirteen more times. (54 sts in every round)
That gives 56 pattern rounds in total: 28 bobble rounds (14 A and 14 B) and 28 plain rounds. Don’t turn at the end of Rnd 66.
Checkpoint after Rnd 66: the tube is 14.75 in (37.5 cm) tall from the base fold and still 14.4 in (36.6 cm) around. If it’s shorter, add one more A/B repeat (4 rounds, 1 in or 2.5 cm) before the rim.
Tips for Even Bobbles
Pull the first loop of each bobble up to the same height every time, about as tall as a double crochet. Short loops make flat bobbles. Long loops make loose ones that sag.
Keep the sc after each bobble snug. It locks the bobble in place and stops it from leaning.
On the plain RS rounds, the top of each bobble can hide its own stitch. Look for the two loops sitting just behind the bobble and work into them. Skipping one adds a missing-stitch gap and pulls the tube in.
Hanger
Covered Ring
Make a slipknot on the hook. Holding the 2 in (5.1 cm) ring, insert the hook through the center, yarn over and pull up a loop, then yarn over and draw through both loops. Keep working sc over the ring, pushing the stitches together so no wood shows. About 40 sc will cover the ring, but work as many as you need (36–44) for full coverage. Sl st in the first sc to join, and don’t fasten off.
The covered ring measures about 2.5 in (6.4 cm) across.
Strap
Row 1: Ch 1, sc in the same st as the join and in the next 5 sts. (6 sts)
Rows 2–8: Ch 1, turn, sc in each st across. (6 sts)
The strap measures 1.6 in (4.1 cm) wide and 2 in (5.1 cm) long. Fasten off, leaving a 16 in (40.6 cm) tail for sewing.
Border: Top Rim and Bottom Edge
Top Rim
The rim is plain single crochet, so the opening stays firm and the hanger has a smooth surface to sew onto.
Border gauge: 15 sc = 4 in (10.2 cm), the same as the body. When flattened, the tube has 27 sts across the front and 27 sts across the back. A round tube has no corner stitches, so the count is simply 27 + 27 = 54.
Rnd 67 (RS): Ch 1, sc in each st around, join. (54 sts: 27 front, 27 back)
Rnds 68–71: Ch 1, sc in each st around, join. (54 sts: 27 front, 27 back)
Fasten off and weave in the end.
Why the math works: The rim has exactly as many stitches as the body, and plain sc has the same stitch gauge as the bobble pattern. 54 sts ÷ 3.75 sts per inch = 14.4 in (36.6 cm), so the rim doesn’t flare or pull in. At 4 rounds per inch, 5 rounds add 1.25 in (3.2 cm), taking the height from 14.75 in to 16 in (40.6 cm).
Bottom Edge (Optional but Recommended)
Join yarn in any remaining loop of the foundation chain at the center opening. Sl st in each of the 18 foundation loops and join. (18 sl sts) Fasten off.
This firms up the opening so it springs back after each bag is pulled out.
Attaching the Hanger
Flatten the tube with the round seam at one side. The center back is the 14th of the 27 back stitches. Lay the strap on the outside of the rim, centered over that stitch, with Rows 5–8 overlapping Rnds 68–71. That leaves 1 in (2.5 cm) of strap above the rim.
Use the tail to whipstitch around all four edges of the overlapped section, going through both layers. This line carries all the weight, so make a second pass along the top edge of the rim. Weave in the end.
Final Blocking
- Weave in all remaining ends on the inside of the tube.
- Soak the holder in cool water and squeeze it gently. Don’t wring it.
- Roll it in a towel to remove excess water.
- Slide it over a cardboard tube, rolled towel, or bottle about 4.5 in (11.4 cm) across.
- Ease it to 16 in (40.6 cm) tall and 14.4 in (36.6 cm) around, and pat the bobbles so they sit evenly.
- Pin or shape the base so it’s flat and round.
- Let it dry completely, then hang it and check that it sits straight.
Final Quality-Control Checklist
- Every round from Rnd 7 to Rnd 71 has 54 sts.
- Every bobble round has 27 bobbles.
- The bobbles sit on the outside and alternate neatly from round to round.
- The base lies flat at 4.6 in (11.7 cm) across.
- The tube is 16 in (40.6 cm) tall and 7.2 in (18.3 cm) wide when flattened.
- The bottom opening is about 1.5 in (3.8 cm) and springs back.
- The ring is fully covered, with no wood showing.
- The strap is centered on the back and sewn through both layers.
- All ends are woven in on the inside.
Troubleshooting
The bobbles are on the inside. You worked the bobble rounds with the RS facing. Make sure you turn after Rnd 10 and after every round from then on, so you always make bobbles with the WS facing.
The bobbles stack instead of alternating. You started two bobble rounds the same way. Alternate Bobble A (sc first) and Bobble B (bob first).
The seam drifts diagonally. Always work the first stitch into the same stitch as the join, and always join into the first stitch, not the ch 1.
The tube flares or narrows. Count to 54 every few rounds. The usual cause is a missed or doubled stitch at the join.
Bags fall out on their own. The opening is too loose. Add the sl st bottom edge, or work it a second time.
Bags are hard to pull out. Start with ch 24 instead of 18 and skip Rnd 2, since Rnd 1 then has 24 sts. Continue from Rnd 3. The opening becomes about 2 in (5.1 cm), and Rnd 7 still ends at 54 sts.
The holder twists on the knob. The strap is off center. Re-sew it over the 14th back stitch.
Care
Hand wash, or machine wash on a gentle cool cycle, then reshape it and dry it flat or over a tube. Avoid high heat, which can shrink cotton and flatten the bobbles.
Final Notes
The measurement chain is short and easy to check. A gauge of 15 sts per 4 in (10.2 cm) turns 54 sts into a 14.4 in (36.6 cm) circumference and a 4.6 in (11.7 cm) diameter. The base grows from 18 sts to 54 sts over 6 increase rounds and lies flat. At 16 rounds per 4 in, the side adds up to 64 rounds and 16 in (40.6 cm) of height: 3 plain rounds, 56 bobble-pattern rounds, and a 5-round rim. The hanger adds 1 in (2.5 cm) of visible strap and the 2.5 in (6.4 cm) covered ring, for a full length of about 19.5 in (49.5 cm).
Check your swatch, count to 54, and turn every round in the bobble section, and the holder will come out straight and evenly textured.
Happy crocheting!