
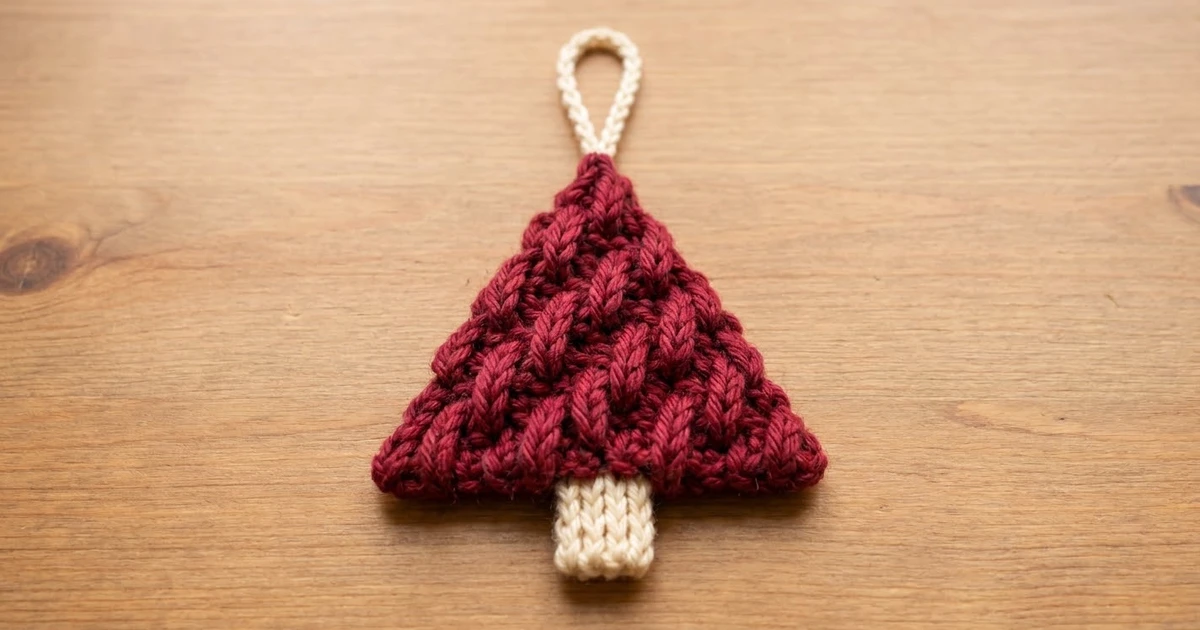
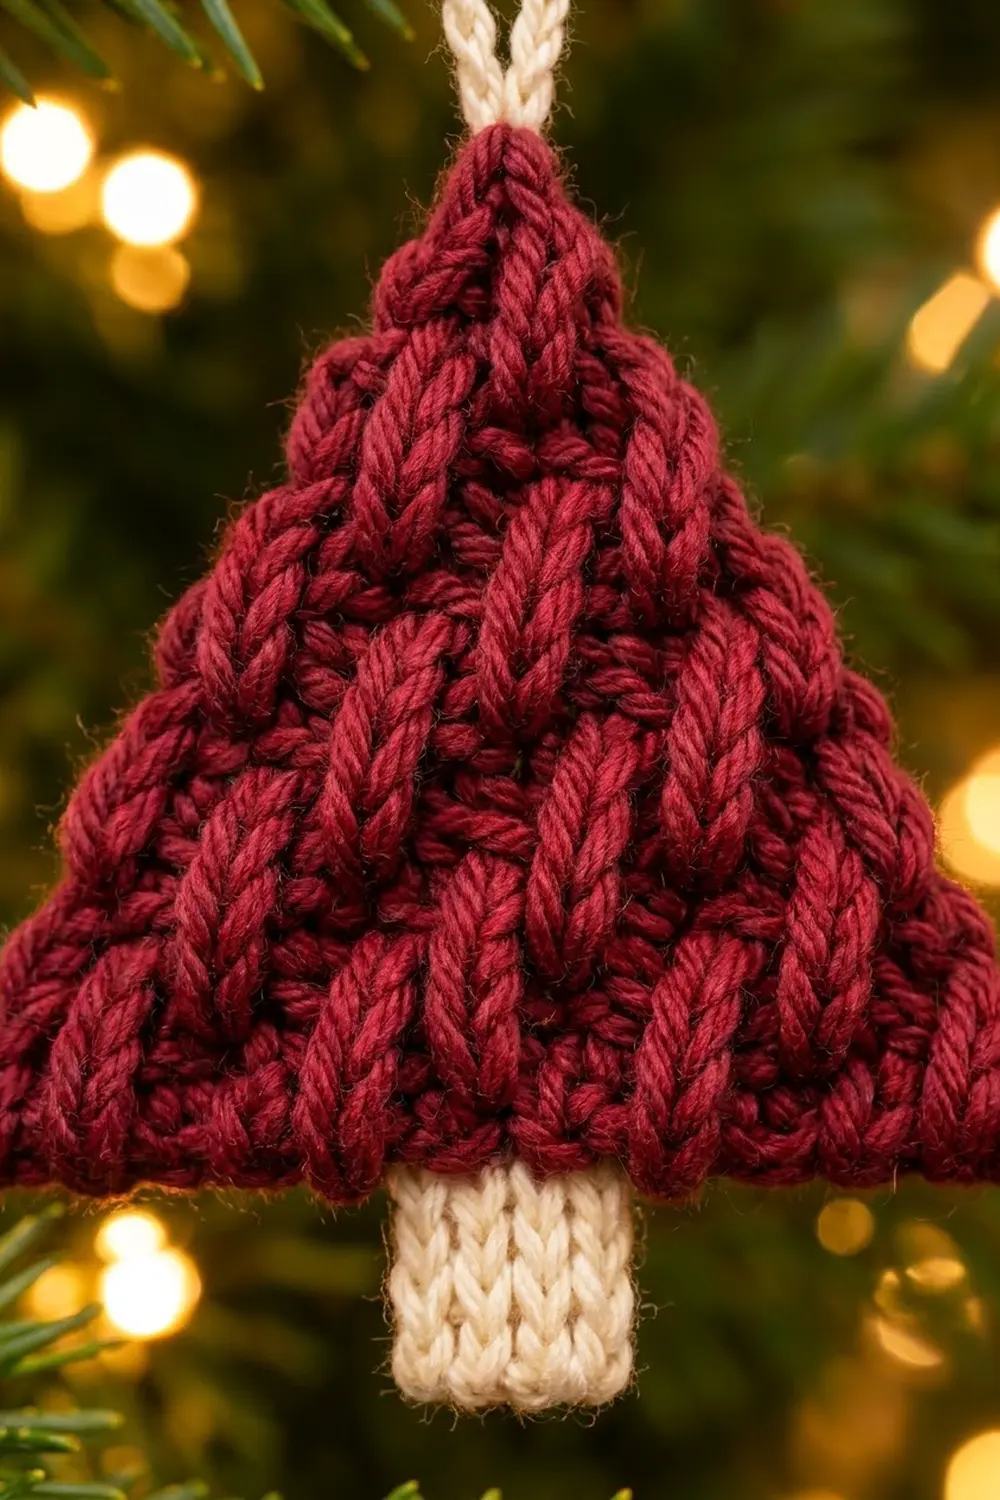
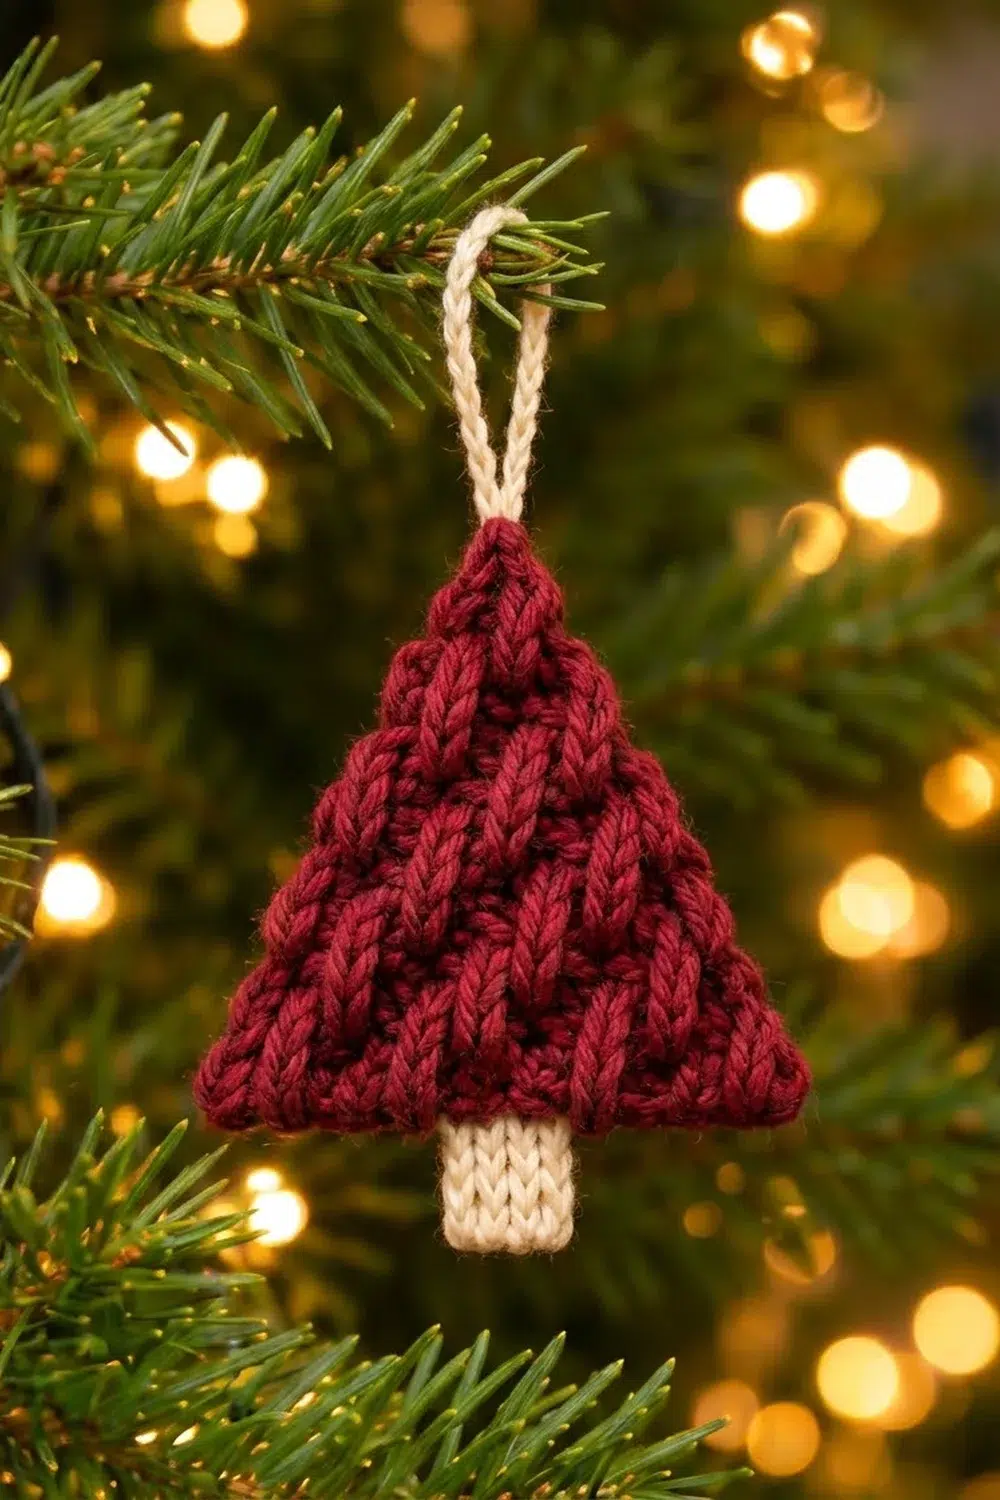
This little tree ornament is a single flat triangle in deep cranberry red. It sits on a short cream trunk and has a cream chain loop for hanging. Raised front post stitches run in staggered columns across the tree, so the surface looks like rows of tiny braids climbing diagonally toward the tip.
The style is cozy and classic, with two colors, a chunky knit-look texture and a clean outline. It looks good laid flat on a gift as a topper and just as good hanging from a branch.
The pattern uses US crochet terms. The finished tree is about 4.25 in (10.8 cm) wide at the base and 3.8 in (9.7 cm) tall, not counting the trunk. With the trunk it is about 4.8 in (12.2 cm) tall, and the loop adds about 1.75 in (4.4 cm).
You work the tree body flat in rows from the base up, decreasing at both edges on every right-side row. The trunk is worked downward from the free loops of the foundation chain. One row of sc around the outline tidies the edges, and a chain loop finishes the top.
Finished Size and Construction
- Finished size: 4.25 in (10.8 cm) wide x 3.8 in (9.7 cm) tall for the tree body; 4.8 in (12.2 cm) tall with the trunk
- Skill level: Easy-intermediate (front post stitches, decreases)
- Terminology: US crochet terms
- Yarn weight: Worsted (#4)
- Hook: 4.5 mm (US 7)
- Number of pieces: 1 (a single flat ornament, no joining)
- Layout: One triangle with the trunk centered below the base
- Tree body before border: 3.75 in (9.5 cm) wide x 3.3 in (8.4 cm) tall
- Trunk: 1.25 in (3.2 cm) wide x 1.25 in (3.2 cm) long
- Border depth: 0.25 in (0.6 cm), one row of sc
Materials
Choose a smooth, plied worsted-weight yarn in wool, acrylic or a wool blend. Smooth yarn makes the post stitches stand out crisply. Fuzzy or loosely plied yarn blurs the braid effect.
- Cranberry red: 8 g (about 16 m)
- Cream: 3 g (about 6 m)
These amounts include a margin for checking gauge and weaving in ends.
Tools:
- 4.5 mm (US 7) crochet hook
- Tapestry needle
- Scissors
- Stitch marker (optional, to mark the RS)
- Ruler or tape measure
- Pins and a blocking surface
- Spray bottle with water
Abbreviations (US Terms)
- ch: chain
- sc: single crochet
- hdc: half double crochet
- sl st: slip stitch
- st(s): stitch(es)
- sc2tog: single crochet 2 together
- sc3tog: single crochet 3 together
- RS / WS: right side / wrong side
- FPdc: front post double crochet
Special stitches:
FPdc 2 rows below: Yarn over and insert your hook from front to back to front around the post of the stitch two rows below. Yarn over and pull up a loop, then (yarn over, pull through 2 loops) twice. Skip the stitch in the current row that sits behind the FPdc. The stitch count stays the same, and you get a raised, braid-like column.
Camel stitch (hdc in third loop): Work an hdc into the horizontal bar just below the top two loops on the back of the stitch. This pushes the top loops forward and gives the trunk its knit-look V columns.
Gauge and Checkpoints
Gauge: 16 sts and 18 rows of sc = 4 in (10.2 cm), so each sc is 0.25 in (0.6 cm) wide.
Make one ornament first. It’s small enough to work up quickly, so it can serve as your gauge swatch.
Checkpoints:
- After Row 3: 3.75 in (9.5 cm) wide and about 0.67 in (1.7 cm) tall
- After Row 9: top edge of 9 sts, about 2.25 in (5.7 cm) wide; body about 2 in (5.1 cm) tall
- After Row 15: body 3.3 in (8.4 cm) tall from base to tip
- After the trunk: 1.25 in (3.2 cm) wide x 1.25 in (3.2 cm) long
- After the border: 4.25 in (10.8 cm) x 3.8 in (9.7 cm)
If the tree is too big, switch to a 4 mm (US G-6) hook. If it’s too small, switch to a 5 mm (US H-8) hook. Check the width after Row 3 before you go any further, because every later measurement builds on it.
Tree Body
Work in rows with cranberry red. The ch 1 at the start of each row does not count as a stitch. WS rows are plain sc. RS rows carry the decreases and the raised columns.
Foundation: Ch 16.
Row 1 (WS): Sc in 2nd ch from hook and in each ch across. (15 sc)
Row 2 (RS): Ch 1, turn, sc in each st across. (15 sc)
Mark this side as the RS.
Row 3 (WS): Ch 1, turn, sc in each st across. (15 sc)
Rows 1–3 form a solid band at the base of the tree. Check the width here: it should be 3.75 in (9.5 cm).
Row 4 (RS): Ch 1, turn, sc2tog, *FPdc around next st 2 rows below (in Row 2), sc in next st; repeat from * 4 more times, FPdc around next st 2 rows below, sc2tog. (13 sts: 2 sc2tog, 6 FPdc, 5 sc)
For each FPdc, use the Row 2 stitch directly below the stitch you would normally work into, and skip that stitch in Row 3.
Row 5 (WS): Ch 1, turn, sc in each st across. (13 sc)
Row 6 (RS): Ch 1, turn, sc2tog, *FPdc around next st 2 rows below (in Row 4), sc in next st; repeat from * 3 more times, FPdc around next st 2 rows below, sc2tog. (11 sts: 2 sc2tog, 5 FPdc, 4 sc)
The edge decrease shifts the row by one stitch, so these FPdc land around the sc of Row 4, between the earlier columns. That half-step offset is what makes the braids stagger diagonally.
Row 7 (WS): Ch 1, turn, sc in each st across. (11 sc)
Row 8 (RS): Ch 1, turn, sc2tog, *FPdc around next st 2 rows below, sc in next st; repeat from * 2 more times, FPdc around next st 2 rows below, sc2tog. (9 sts: 2 sc2tog, 4 FPdc, 3 sc)
Row 9 (WS): Ch 1, turn, sc in each st across. (9 sc)
Checkpoint: the body should be about 2 in (5.1 cm) tall, with a top edge about 2.25 in (5.7 cm) wide.
Row 10 (RS): Ch 1, turn, sc2tog, (FPdc around next st 2 rows below, sc in next st) twice, FPdc around next st 2 rows below, sc2tog. (7 sts: 2 sc2tog, 3 FPdc, 2 sc)
Row 11 (WS): Ch 1, turn, sc in each st across. (7 sc)
Row 12 (RS): Ch 1, turn, sc2tog, FPdc around next st 2 rows below, sc in next st, FPdc around next st 2 rows below, sc2tog. (5 sts: 2 sc2tog, 2 FPdc, 1 sc)
Row 13 (WS): Ch 1, turn, sc in each st across. (5 sc)
Row 14 (RS): Ch 1, turn, sc2tog, FPdc around next st 2 rows below, sc2tog. (3 sts: 2 sc2tog, 1 FPdc)
Row 15 (WS): Ch 1, turn, sc3tog. (1 st)
Fasten off. The body should measure 3.75 in (9.5 cm) wide x 3.3 in (8.4 cm) tall and have 21 raised FPdc in total (6 + 5 + 4 + 3 + 2 + 1).
Why the counts work: Each RS row loses 2 sts, because each edge sc2tog turns 2 sts into 1. The middle section always has an odd number of sts and starts and ends with an FPdc, so the tree stays symmetrical. The counts run 15, 13, 11, 9, 7, 5 and 3, then the sc3tog brings it to 1.
Trunk
Work the trunk in cream, downward from the free loops on the underside of the foundation chain. Number the 15 free loops 1–15 from one corner to the other. The trunk uses loops 6–10, which leaves 5 free loops on each side so the trunk sits exactly in the center.
Row T1: With RS facing, join cream in loop 6. Ch 2 (does not count), hdc in the same loop and in each of loops 7–10. (5 hdc)
Rows T2–T4: Ch 1 (does not count), turn, camel stitch (hdc in third loop) in each st across. (5 hdc)
Fasten off and weave in ends. The trunk should measure 1.25 in (3.2 cm) wide x 1.25 in (3.2 cm) long and show neat vertical V columns on the RS.
Border
Border gauge: Same as the body, 4 sc per 1 in (2.5 cm). Along the slanted edges, work 1 sc in the end of each row.
The border is one long row worked around the tree outline. It starts and ends at the trunk, so the trunk stays free.
Border (RS): With RS facing, join cranberry red with a sc in loop 5, right next to the trunk. Then work:
- Base, first section: sc in loops 4, 3 and 2. (4 sc including the joining sc)
- Base corner: 3 sc in loop 1. (3 sc)
- First slanted side: 1 sc in the end of each of Rows 2–14. (13 sc)
- Tip: 3 sc in the single st of Row 15. (3 sc)
- Second slanted side: 1 sc in the end of each of Rows 14–2. (13 sc)
- Base corner: 3 sc in loop 15. (3 sc)
- Base, second section: sc in loops 14, 13, 12 and 11, ending next to the trunk. (4 sc)
Total: 4 + 3 + 13 + 3 + 13 + 3 + 4 = 43 sc. In this pattern, the corner and tip groups are counted separately from the side counts, so no stitch is counted twice.
Fasten off and weave in ends.
Why the math works: Before the border, each slanted side is about 3.8 in (9.7 cm) long. At 4 sc per 1 in (2.5 cm), that edge needs about 15 sts. The 13 side sc plus their share of the corner and tip groups gives that coverage. Each base section is 5 loops, or 1.25 in (3.2 cm), and 4 sc plus the outer corner group covers it without ruffling. The 3-sc groups let the sharp points turn without pulling.
The border adds 0.25 in (0.6 cm) on every edge, so the tree grows to 4.25 in (10.8 cm) wide x 3.8 in (9.7 cm) tall. After the border, 1 in (2.5 cm) of trunk shows below the base.
Hanging Loop
With RS facing, join cream in the center sc of the 3-sc group at the tip. Ch 18, then sl st in the same st. Fasten off and weave the ends into the back of the tree.
The loop hangs about 1.75 in (4.4 cm) above the tip.
Final Blocking
- Lay the ornament RS up on a blocking mat or a folded towel.
- Pin the two base corners 4.25 in (10.8 cm) apart.
- Pin the tip centered above them, 3.8 in (9.7 cm) from the base.
- Pin the trunk straight down so 1 in (2.5 cm) shows below the base, keeping it 1.25 in (3.2 cm) wide.
- Mist lightly with water. Don’t soak it, so the post stitches keep their height.
- Gently press the raised columns with your fingertips so they all lean the same way.
- Let it dry completely, then unpin.
For acrylic yarn, you can steam-block instead. Hold the iron above the piece and never press it directly onto the stitches.
Final Quality-Control Checklist
- The tree is 4.25 in (10.8 cm) wide x 3.8 in (9.7 cm) tall.
- Both slanted sides are straight and the same length.
- There are 21 FPdc in six staggered rows of 6, 5, 4, 3, 2 and 1.
- All the raised columns are on the RS.
- The trunk is centered, with 5 free loops on each side.
- The trunk is 1.25 in (3.2 cm) wide, and 1 in (2.5 cm) of it shows below the base.
- The border has 43 sc and lies flat.
- The tip forms a clean point and the loop is secure.
- All ends are woven in and can’t be seen from the front.
Troubleshooting
Edges curve inward: Your sc2tog stitches are too tight. Work more loosely at the ends of RS rows.
Tree leans to one side: You probably missed a decrease or an FPdc. Count each RS row against the totals above.
FPdc columns line up instead of staggering: You worked around the FPdc two rows below instead of the sc. Each new FPdc should land between the earlier ones.
Body puckers behind the posts: Your FPdc are too short. Pull up the first loop to the full height of the two rows it spans.
Border ruffles: Skip 1 row end on each slanted side (12 sc instead of 13).
Border pulls tight: Add 1 sc on each slanted side, or use a hook one size larger for the border.
Trunk V’s are on the back: Camel stitch shows its V’s on only one face. Either redo the trunk starting from the other face of the foundation chain, or leave the smooth side showing.
Care
Hand wash in cool water with mild soap, press out the water in a towel and dry flat. Reshape the point and the trunk while the ornament is still damp.
Final Notes
The whole ornament rests on one chain of measurements. A gauge of 16 sc to 4 in (10.2 cm) gives a 15-st base 3.75 in (9.5 cm) wide. Fifteen rows bring the body to 3.3 in (8.4 cm) tall, and the 5-st trunk is 1.25 in (3.2 cm) long. The 43-st border brings the tree to 4.25 in (10.8 cm) x 3.8 in (9.7 cm).
Check the base width after Row 3 and count every RS row, and the rest will follow. Make one for your own tree, then a few more for gift toppers and ornament swaps.
Happy crocheting!