

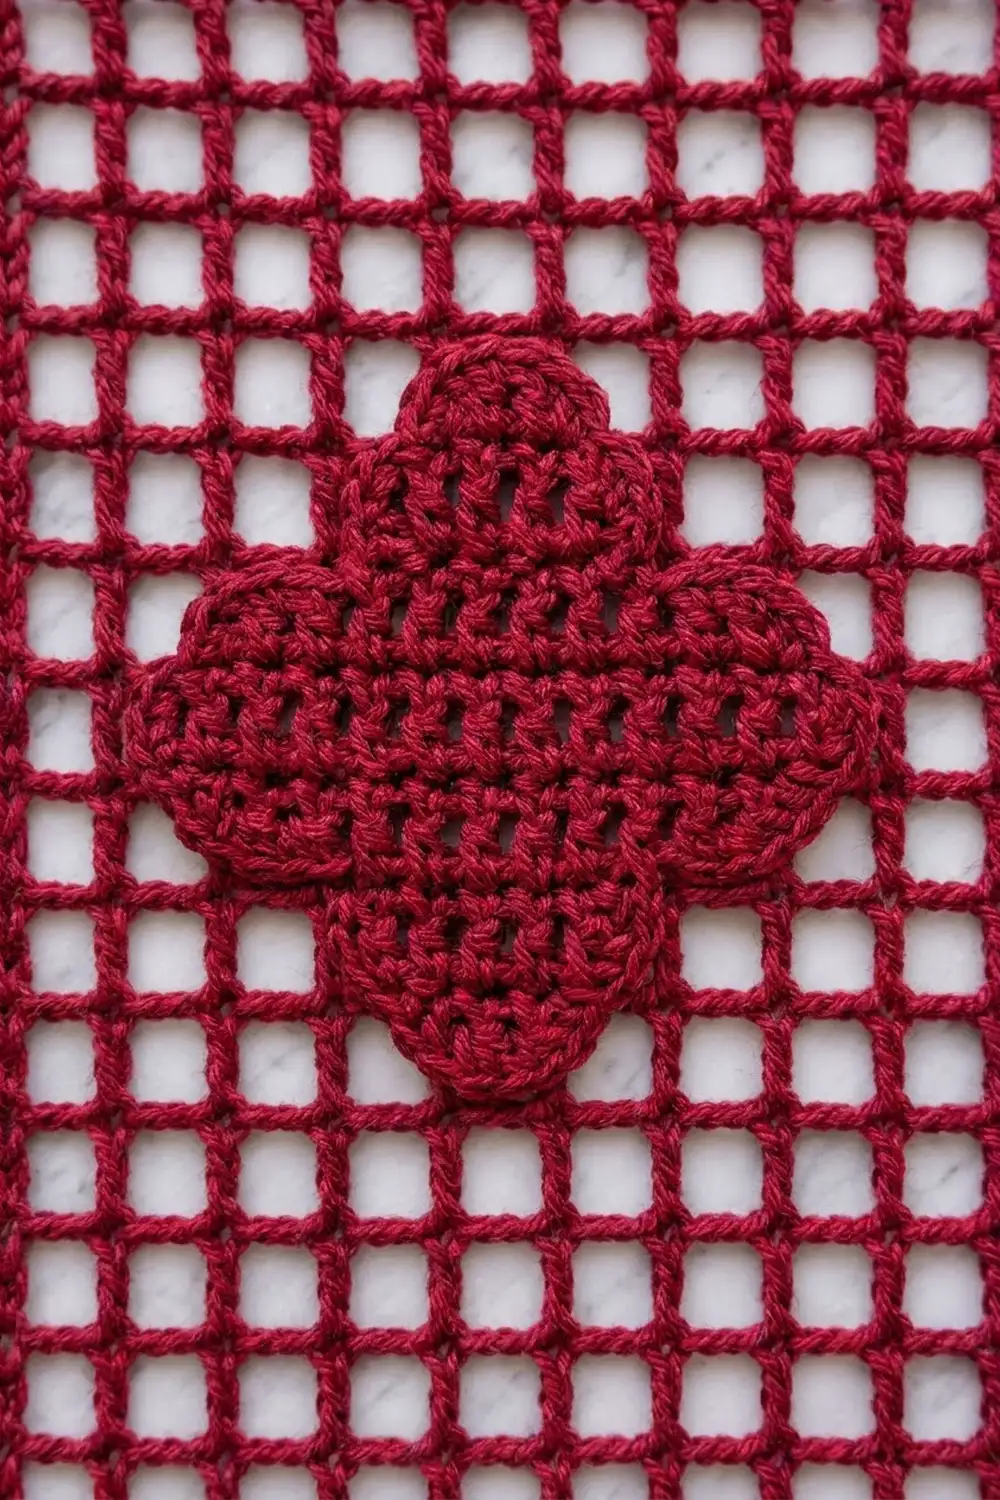
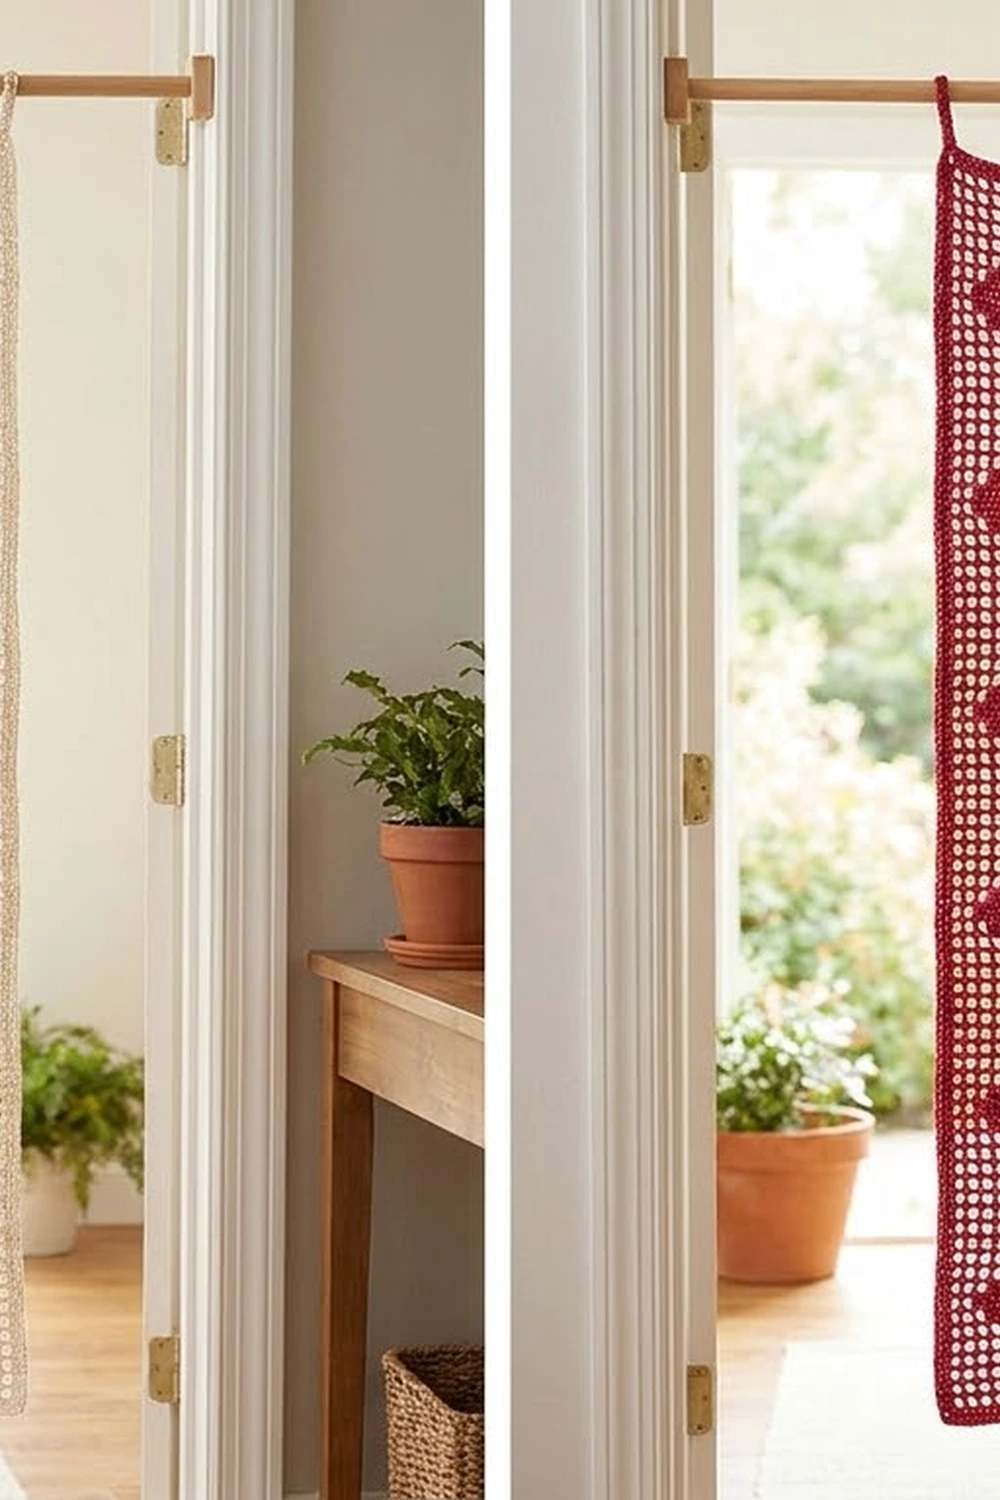
This filet crochet strip is long and narrow. An airy square grid is broken by a column of solid stepped quatrefoil motifs. The open mesh lets light through, and the solid motifs give it a bold, graphic rhythm. Hang one strip by its two top loops, or make several and hang them side by side on a rod as a doorway curtain.
The sample is shown in deep cranberry red and in warm cream. Each strip uses one color only, and the motifs are worked into the mesh with the same yarn. Smooth worsted-weight cotton keeps the grid crisp and the blocks clean.
The pattern uses US crochet terms. The finished strip measures 5 in (12.7 cm) wide by 42 in (106.7 cm) long, not counting the hanging loops. With the loops, it is 43.5 in (110.5 cm) long.
The strip is worked flat in rows from the bottom edge up. You’ll make 83 filet rows that are 9 meshes wide and hold 8 quatrefoil motifs. Then you’ll add a single crochet border around the outside and two hanging loops at the top corners.
Finished Size and Construction
- Finished size: 5 in x 42 in (12.7 cm x 106.7 cm), plus 1.5 in (3.8 cm) loops
- Skill level: Easy+ (basic filet crochet)
- Terminology: US crochet terms
- Yarn weight: Worsted (#4) cotton
- Hook: 4.5 mm (US 7)
- Number of pieces: 1 strip
- Layout: Single vertical strip, 9 meshes wide x 83 rows tall
- Piece size before border: 4.5 in x 41.5 in (11.4 cm x 105.4 cm)
- Border depth: 0.25 in (0.6 cm) on every side
- Motifs: 8 stepped quatrefoils, each 2.5 in wide x 3.5 in tall (6.4 cm x 8.9 cm)
Materials
Yarn: Choose a smooth, mercerized or combed worsted-weight cotton. Cotton holds its shape when it hangs and shows the filet grid clearly. Avoid fuzzy or very stretchy yarns, because they blur the mesh and make long strips grow.
Each strip uses one color. Pick one:
- Option A, Cranberry Red: 140 g / 266 m (291 yd)
- Option B, Cream: 140 g / 266 m (291 yd)
These quantities include a margin of about 15% for swatching and for working the border and loops.
Tools:
- 4.5 mm (US 7) crochet hook
- Tapestry needle
- Scissors
- Stitch markers (2 to 3)
- Measuring tape
- Blocking mats and rust-proof pins
- Spray bottle
Abbreviations (US Terms)
- ch: chain
- sl st: slip stitch
- sc: single crochet
- dc: double crochet
- sk: skip
- sp: space
- st(s): stitch(es)
Special stitches (filet units):
- Mesh (open square): ch 2, sk the next 2 sts or the ch-2 sp, dc in the next dc.
- Block (filled square): Over a ch-2 sp, work 2 dc in the sp, then dc in the next dc. Over a block, work dc in each of the next 3 dc.
- Turning chain: At the start of each row, ch 3. It counts as the first dc. The last dc of every row goes into the 3rd ch of the turning ch-3.
Constant row count: Every row is 28 stitches wide: 10 dc “posts” plus 9 two-stitch units (either ch-2 sps or 2 filling dc). A row with B blocks has 10 + 2B dc and 9 − B ch-2 spaces.
Gauge and Checkpoints
Gauge: 2 meshes = 1 in (2.5 cm) wide and 2 rows = 1 in (2.5 cm) tall, after blocking. One mesh is 0.5 in (1.3 cm) square.
Test first: Work Rows 1 to 13 (the bottom open rows plus the first motif and the gap after it) before going further. This section acts as your swatch and is part of the strip.
Checkpoints (lightly stretched flat):
- After Row 1: width 4.5 in (11.4 cm)
- After Row 3: height 1.5 in (3.8 cm)
- After Row 13: height 6.5 in (16.5 cm)
- After Row 43: height 21.5 in (54.6 cm)
- After Row 83: height 41.5 in (105.4 cm)
- After the border: 5 in x 42 in (12.7 cm x 106.7 cm)
If your strip is too big: Go down a hook size (4.0 mm). Also check that your ch-2 sps aren’t loose, since long chains make the meshes rectangular.
If your strip is too small: Go up a hook size (5.0 mm). Pull up each dc a little taller so the rows stay square.
If the meshes are not square: Width is set by the ch-2 sps and height by the dc. Change one, not the hook. Use a looser chain if the meshes are tall and narrow, or shorter dc if they are short and wide.
Strip Pattern
Foundation
Ch 32.
Row 1 (open): Dc in the 8th ch from the hook. The skipped 7 chs count as dc, ch 2, and 2 skipped chs, so this makes the first mesh. Ch 2, sk 2 ch, dc in next ch, repeat 7 more times. Turn.
(9 meshes: 10 dc, 9 ch-2 sps = 28 sts.)
Rows 2 to 3 (open): Ch 3, ch 2, sk ch-2 sp, dc in next dc, repeat 8 more times, working the last dc into the 3rd ch of the turning chain. Turn.
(9 meshes each: 10 dc, 9 ch-2 sps.)
Note on Row 2: Because of the foundation, the first ch-2 of Row 2 is the ch 3 + ch 2 at the start of the row. To be exact, every open row begins: ch 5 (counts as dc + ch 2), sk ch-2 sp, dc in next dc. Then ch 2, sk sp, dc in next dc 8 times.
Motif Rows
Each motif takes 7 rows and is centered over meshes 3 to 7. Mesh 5 is the center column. Read each row from the turning chain across.
Motif Row A (1 block): Ch 5 (counts as dc + ch 2), sk sp, dc in next dc. [Ch 2, sk sp, dc in next dc] 3 times. Work 1 block. [Ch 2, sk sp, dc in next dc] 4 times. Turn.
(4 meshes, 1 block, 4 meshes: 12 dc, 8 ch-2 sps.)
Motif Row B (3 blocks): Ch 5, sk sp, dc in next dc. [Ch 2, sk sp, dc in next dc] 2 times. Work 3 blocks. [Ch 2, sk sp, dc in next dc] 3 times. Turn.
(3 meshes, 3 blocks, 3 meshes: 16 dc, 6 ch-2 sps.)
Motif Row C (5 blocks): Ch 5, sk sp, dc in next dc. Ch 2, sk sp, dc in next dc. Work 5 blocks. [Ch 2, sk sp, dc in next dc] 2 times. Turn.
(2 meshes, 5 blocks, 2 meshes: 20 dc, 4 ch-2 sps.)
When a mesh sits over a block from the row below, work ch 2, sk 2 dc, dc in next dc. When a block sits over a block, work dc in each of the next 3 dc.
One motif = 7 rows in this order: A, B, C, C, C, B, A.
This stepped outline of 1, 3, 5, 5, 5, 3, 1 blocks makes the rounded quatrefoil-diamond shape. The narrow top and bottom rounded out to the wide middle give the soft lobed look once blocked.
Gap Rows
Gap (3 rows): Work 3 open rows exactly as Row 2.
(9 meshes each: 10 dc, 9 ch-2 sps.)
Full Row Sequence
- Rows 1 to 3: open
- Rows 4 to 10: Motif 1 (A, B, C, C, C, B, A)
- Rows 11 to 13: gap
- Rows 14 to 20: Motif 2
- Rows 21 to 23: gap
- Rows 24 to 30: Motif 3
- Rows 31 to 33: gap
- Rows 34 to 40: Motif 4
- Rows 41 to 43: gap
- Rows 44 to 50: Motif 5
- Rows 51 to 53: gap
- Rows 54 to 60: Motif 6
- Rows 61 to 63: gap
- Rows 64 to 70: Motif 7
- Rows 71 to 73: gap
- Rows 74 to 80: Motif 8
- Rows 81 to 83: open
That gives 83 rows total: 3 + 8 x (7 + 3) = 83. The strip is symmetrical, with 3 open rows at both the top and the bottom. Each motif repeat is 10 rows, or 5 in (12.7 cm).
Do not fasten off after Row 83. Go straight into the border.
Border
Border gauge: Along the top and bottom edges, work 1 sc per stitch (28 sts across 4.5 in / 11.4 cm). Along the long sides, work 2 sc per dc row end, or 4 sc per inch. The long sides are kept a little firmer on purpose. A hanging strip stretches lengthwise under its own weight, and a snug side edge stops the length from growing and the edges from waving.
Corner definition: Each corner is 3 sc worked into one stitch or space. The middle sc of each group is the corner stitch. In the counts below, “per side” means every sc from one corner stitch to the next, including both corner stitches.
Border Round (sc): With the right side facing, ch 1.
- Top edge (along Row 83): Work 3 sc in the first st (corner). Sc in each of the next 26 sts (the dc and ch sts of Row 83). Work 3 sc in the last st, the 3rd ch of the turning chain (corner).
- First long side: Work 2 sc around the post of each row end, 83 rows x 2 = 166 sc.
- Bottom edge (along the foundation chain): Work 3 sc in the first ch (corner). Sc in each of the next 26 ch. Work 3 sc in the last ch (corner).
- Second long side: Work 2 sc in each row end, 166 sc.
- Sl st to the first sc. Do not fasten off.
Counts per side (including both corner sc):
- Top: 1 + 26 + 1 = 28 sc between corners, plus 2 corner sc = 30 sc
- Bottom: 30 sc
- Each long side: 1 + 166 + 1 = 168 sc between corners, plus 2 corner sc = 170 sc
- Round total: 4 corners + 28 + 28 + 168 + 168 = 396 sc
Why the math works: The top and bottom edges each have exactly 28 sts. The corner groups use the 2 end sts and the 26 middle sts take 1 sc each, so no stitches are added or lost. The long sides use a fixed ratio of 2 sc per row, so the count is always 2 x 83 = 166. Because the border is one round deep, it adds 0.25 in (0.6 cm) on each side. The 4.5 in x 41.5 in (11.4 cm x 105.4 cm) strip becomes 5 in x 42 in (12.7 cm x 106.7 cm).
Hanging Loops
You are at the first sc of the round, next to a bottom corner. Fasten off and weave in the end.
First loop: With the right side facing, join the yarn with a sl st in the top-right corner sc. Ch 14, then sl st in the same corner sc to form a loop. Work 20 sc into the loop, covering the chain completely. Sl st in the corner sc. Fasten off.
Second loop: Repeat in the top-left corner sc.
Each loop stands about 1.5 in (3.8 cm) tall and fits rods up to 0.75 in (1.9 cm) across. For a thicker rod, add 3 ch and 4 sc per loop for every extra 0.25 in (0.6 cm) of rod diameter.
Final Blocking
- Weave in all ends along solid blocks or the border, never across open meshes.
- Soak the strip in cool water for 15 minutes, then gently press out the water. Don’t wring it.
- Roll it in a towel to take out the excess moisture.
- Lay it flat on blocking mats. Pin the four corners first to 5 in x 42 in (12.7 cm x 106.7 cm).
- Pin along each long side about every 3 in (7.6 cm), keeping the edges straight.
- Use a ruler to check that the meshes are square, about 0.5 in (1.3 cm) each. Ease the rows up or down by hand as needed.
- Pin the motifs so the stepped edges line up, and smooth the lobes evenly.
- Shape the loops upright and let them dry pinned.
- Leave it to dry completely, at least 24 hours.
Final Quality-Control Checklist
- [ ] Strip measures 5 in x 42 in (12.7 cm x 106.7 cm) after blocking
- [ ] Every row has 10 dc posts lined up in straight vertical columns
- [ ] There are 8 motifs, each with the 1, 3, 5, 5, 5, 3, 1 block outline
- [ ] All motifs are centered on mesh 5
- [ ] Every gap between motifs is exactly 3 open rows
- [ ] There are 3 open rows at both ends
- [ ] The border has 30 sc on the top and bottom and 170 sc on each long side
- [ ] Both loops are the same size and sit at the top corners
- [ ] All ends are hidden in solid areas
Troubleshooting
Meshes slant to one side: You may be working into the turning chain wrong. Check that the last dc of each row goes into the 3rd ch of the ch-3 or ch-5.
The motif is off-center: Count the meshes before you start the blocks. Rows A, B, and C start with 4, 3, and 2 meshes.
Long edges wave: You worked too many sc per row end. Take the border back and use exactly 2 per row.
Long edges pucker: Your border tension is too tight. Go up a hook size for the border only.
The strip grows when it hangs: This is normal for cotton. Block it a bit shorter than 42 in (106.7 cm), or keep your dc a little shorter.
Row count drifts: Put a stitch marker at the start of each motif so you can check your 10-row repeats.
Care
Hand wash in cool water with a mild detergent, then lay flat or pin to dry. If needed, re-block to 5 in x 42 in (12.7 cm x 106.7 cm) after washing.
Final Notes
Here is how the measurements build: one 0.5 in (1.3 cm) mesh, 9 meshes for a 4.5 in (11.4 cm) width, 10-row motif repeats of 5 in (12.7 cm), and 83 rows for 41.5 in (105.4 cm). The sc border adds 0.25 in (0.6 cm) on each side for a finished 5 in x 42 in (12.7 cm x 106.7 cm) strip, and two 1.5 in (3.8 cm) loops sit on top. Check your gauge early, keep the meshes square, and every motif will line up cleanly down the strip.
Happy crocheting!