

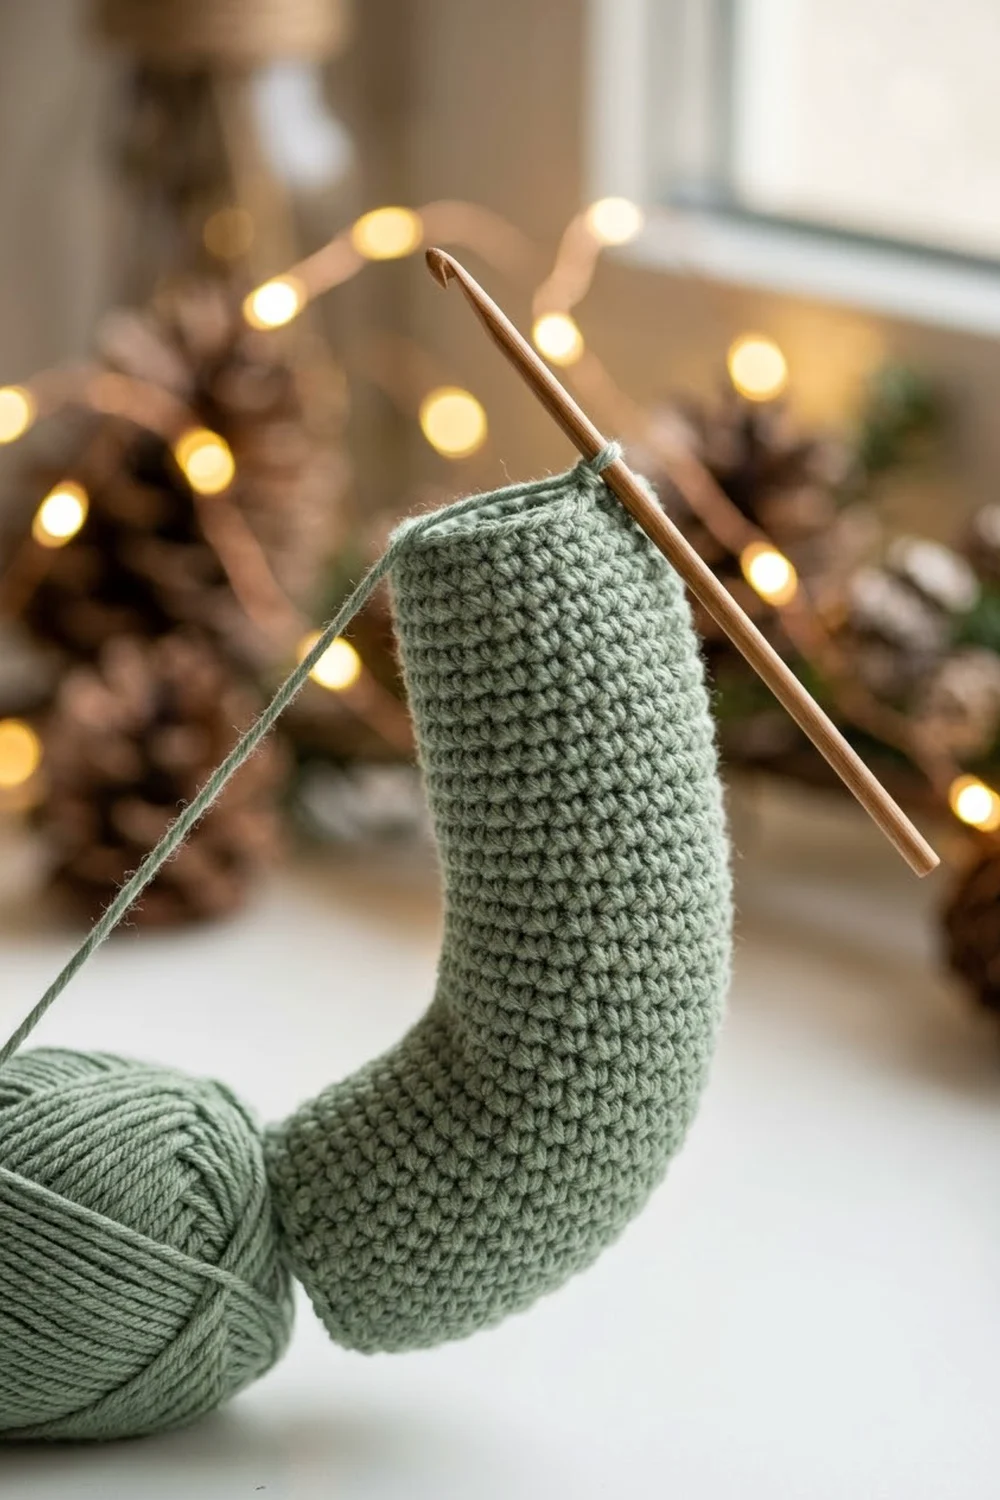
The Sage Curve Tube is a small, single crocheted piece: a smooth, curved tube worked in soft sage green yarn. It has a dense, even single crochet texture, a rounded closed tip at one end, and a neatly finished open rim at the other. The curve is built into the stitches, not just pinned in during blocking.
The look is calm and minimal: one muted green, tight stitches with no gaps, and a gentle C-shaped bend. It’s the same quiet, cozy style you see in slow, close-up crochet videos.
This pattern uses US crochet terms. The finished tube measures about 3.6 in (9.1 cm) long along its center line and about 1 in (2.5 cm) wide when flattened.
Construction is simple. You start with a magic ring, increase once to set the tube’s size, and work in continuous spiral rounds. A short section of “bend rounds” pairs one increase with one decrease, so the stitch count stays the same while one side grows longer than the other. That difference creates the curve. Two finishing rounds close out the open end.
Finished Size and Construction
- Finished size: 3.6 in (9.1 cm) long along the center line, 1 in (2.5 cm) wide flattened
- Skill level: Easy (advanced beginner)
- Terminology: US crochet terms
- Yarn weight: DK / light worsted (weight 3), cotton or cotton blend
- Hook: 3.0 mm (between US C-2 and D-3)
- Number of pieces: 1
- Layout: One curved tube with a closed rounded tip and an open finished rim
- Piece size: 12 stitches around, 26 rounds total
- Size before border: 3.4 in (8.6 cm) long after Round 24
- Border depth: about 0.2 in (0.5 cm), 2 rounds
Materials
Yarn advice: Choose a smooth, tightly plied DK cotton or cotton blend. Cotton keeps the stitches crisp and helps the tube hold its curve. Avoid fuzzy or very stretchy yarns, because they blur the stitch texture and let the bend relax.
Color:
– Sage green: 10 g (about 25 m)
The tube itself uses about 5 g (about 12 m). These quantities include a generous margin for a gauge swatch, practice tips, and weaving in ends.
Tools:
– 3.0 mm crochet hook (a smooth wooden or ergonomic handle helps with tight stitches)
– 2 stitch markers in different colors
– Yarn needle
– Scissors
– Ruler or tape measure
– Rust-proof pins and a blocking surface
– Optional: a small pinch of polyester fiberfill for a rounder profile
Abbreviations (US Terms)
- ch – chain
- sl st – slip stitch
- sc – single crochet
- inc – increase: 2 sc in the same stitch
- sc2tog – single crochet 2 together (see below)
- Rnd – round
- st(s) – stitch(es)
- MR – magic ring
Special stitch – invisible sc2tog: Insert the hook into the front loop only of the next stitch, then into the front loop only of the following stitch (3 loops on hook). Yarn over and pull through 2 loops, then yarn over and pull through the remaining 2 loops. This decrease sits flat and keeps the tube surface smooth.
Working in spiral: Do not join rounds with a slip stitch or chain at the start of rounds. Move your round marker up to the first stitch of each new round.
Gauge and Checkpoints
Gauge: 6 sc and 7 rounds = 1 in (2.5 cm), worked in the round with a 3.0 mm hook.
Because this is a single small piece, the tube is its own test piece. Work Rounds 1–6 and measure before continuing. If those first 6 rounds are on target, the rest of the tube will be too.
Checkpoints:
– After Rnd 2: flat disc, about 0.6 in (1.5 cm) across
– After Rnd 6: tube about 0.9 in (2.3 cm) long, 1 in (2.5 cm) wide when flattened
– After Rnd 18: about 2.6 in (6.6 cm) long along the center line, with a visible bend
– After Rnd 24: about 3.4 in (8.6 cm) long along the center line
– After border: about 3.6 in (9.1 cm) long along the center line
If the tube is too big (fewer than 6 sc per inch, or wider than 1 in / 2.5 cm flattened), go down 0.25 mm in hook size and restart.
If the tube is too small (more than 6 sc per inch, or narrower than 1 in / 2.5 cm flattened), go up 0.25 mm in hook size and restart.
Small differences in length can be fixed by adding or removing straight rounds in Rounds 19–24. Width cannot be fixed later, so match it before you move on.
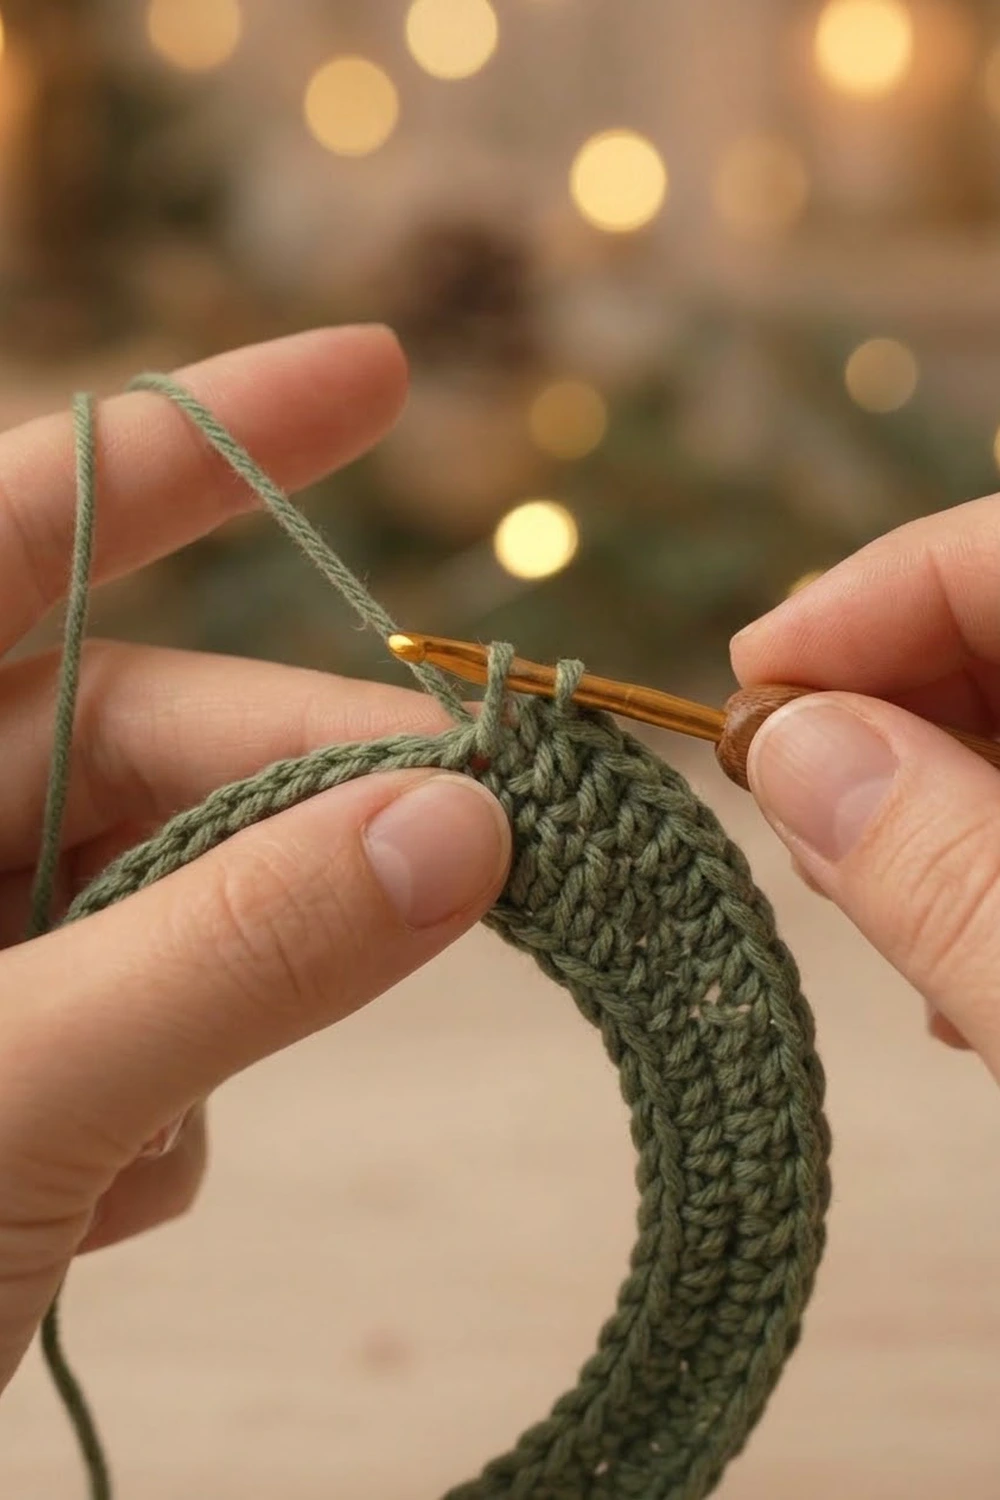
Pattern: The Curved Tube
Leave a 6 in (15.2 cm) starting tail.
Section 1: Closed Rounded Tip
Rnd 1: Make a MR. Work 6 sc into the ring. Pull the tail to close the ring tightly. (6 sts)
Place a marker in the first stitch. This is your round marker.
Rnd 2: Inc in each st around. (12 sts)
This round is a growth round. Every stitch doubles, so the round contains 12 stitches total. This sets the tube’s full circumference: 12 sts at 6 sc per inch = 2 in (5.1 cm) around, which flattens to 1 in (2.5 cm) wide.
Section 2: Straight Section
Rnds 3–6: Sc in each st around. (12 sts each round)
The disc will cup upward and become a short tube. Keep your tension firm and even. Dense stitches are what give this piece its smooth, cylindrical look.
Checkpoint: The tube should be about 0.9 in (2.3 cm) long and 1 in (2.5 cm) wide flattened.
Section 3: Bend Rounds
These rounds create the curve. Each round has one increase on the outer side and one decrease on the inner side. One stitch is added and one is taken away, so the count stays at 12.
Rnd 7: Sc 2, inc, sc 4, sc2tog, sc 3. (12 sts)
Place your second marker (a different color) in the second stitch of the increase. This marks the outer side of the curve.
Count check: You work into 2 + 1 + 4 + 2 + 3 = 12 stitches. You make 2 + 2 + 4 + 1 + 3 = 12 stitches.
Rnds 8–18: Repeat Rnd 7. (12 sts each round)
Move the outer marker up every 2–3 rounds. The increases should stack roughly above each other on the outer side, and the decreases should stack on the inner side.
The increases and decreases will shift slightly because of the spiral. That is expected and helps the curve look smooth instead of angular.
Why it curves: Each bend round adds fabric to the outer side and removes the same amount from the inner side. Over 12 bend rounds, the outer side becomes noticeably longer than the inner side, and the tube bends toward the shorter side.
Checkpoint: After Rnd 18, the tube is about 2.6 in (6.6 cm) long along the center line, with a clear C-shaped bend. The outer edge measures about 3 in (7.6 cm), and the inner edge is shorter.
Section 4: Straight Finish
Rnds 19–24: Sc in each st around. (12 sts each round)
These rounds extend the tube without adding more curve. The tube follows the angle set by the bend section.
Checkpoint: After Rnd 24, the tube is about 3.4 in (8.6 cm) long along the center line. The outer edge is about 4 in (10.2 cm), and the inner edge is about 2.75 in (7.0 cm).
Optional stuffing: For a rounder, more cylindrical profile, add a small pinch of fiberfill now. Push it into the tip with the back of your hook. Keep it light. Overstuffing stretches the stitches and opens gaps. If you skip the stuffing, the tube will rest slightly flattened, which also looks neat.
Border: Open Rim
The border finishes the open end of the tube with a firm, smooth edge.
Border gauge: The border uses the same gauge as the body, 6 sc per inch. It is worked 1 stitch into each existing stitch. No stitches are added or removed.
To keep the count clear, picture the tube flattened along the curve. The outer half (marker side) has 6 sts, and the inner half has 6 sts.
Border Rnd 1 (Rnd 25): Sc in each st around.
– Outer half: 6 sc
– Inner half: 6 sc
– Total: 12 sts (12 worked 1-per-existing-stitch + 0 extra)
This round looks like the body rounds. It provides a stable base for the edge finish.
Border Rnd 2 (Rnd 26): Sl st loosely in each st around.
– Outer half: 6 sl st
– Inner half: 6 sl st
– Total: 12 sts (12 worked 1-per-existing-stitch + 0 extra)
Work the slip stitches loosely so the rim doesn’t pinch inward. To finish, cut the yarn, leaving an 8 in (20.3 cm) tail. Use the yarn needle to make an invisible join: bring the tail under both loops of the first slip stitch, then back down through the center of the last slip stitch. Weave the tail into the inside of the tube.
Why the math works: The body is 12 stitches around, or 2 in (5.1 cm) at 6 sc per inch. The border keeps exactly 12 stitches at the same gauge, so the rim matches the body’s circumference. Adding stitches would make the rim flare. Removing stitches would make it pucker or close up. The 2 border rounds add about 0.2 in (0.5 cm), bringing the length from 3.4 in (8.6 cm) to 3.6 in (9.1 cm).
Final Blocking
- Weave in all ends. Hide the starting tail through the closed tip and the ending tail along the inside of the tube.
- Dampen the piece. Spritz it lightly with water, or hold it over steam about 1 in (2.5 cm) above an iron without touching it. Cotton responds well to either method.
- Shape the curve. Lay the tube flat, with the outer marker side facing out. Gently ease it into an even C-shaped curve.
- Check the measurements. The center line should measure about 3.6 in (9.1 cm), and the flattened width should be about 1 in (2.5 cm).
- Pin lightly. Place 3–4 pins along the outer edge and 2–3 along the inner edge. Don’t stretch the stitches.
- Roll the tube round (optional). If you didn’t stuff it, roll the tube gently between your fingers to round it before it dries.
- Let it dry completely. Leave it pinned until fully dry, usually a few hours.
- Remove the markers and pins.
Final Quality-Control Checklist
- [ ] Every round has 12 stitches from Rnd 2 through Rnd 26
- [ ] The tip is closed tightly with no hole at the magic ring
- [ ] The curve is smooth, with no sharp kink
- [ ] The increases sit on the outer side and the decreases on the inner side
- [ ] The center line measures about 3.6 in (9.1 cm)
- [ ] The flattened width is about 1 in (2.5 cm)
- [ ] There are no visible gaps between stitches
- [ ] The rim is smooth and neither flared nor puckered
- [ ] All ends are woven in securely and hidden
- [ ] Any stuffing is light, even, and doesn’t show through the stitches
Troubleshooting
Gaps between stitches: Your tension is too loose for the yarn. Go down 0.25 mm in hook size and restart.
The tube is too wide: Check your gauge. You may have more than 12 stitches. Count after Rnd 2 and after every bend round.
The tube doesn’t curve enough: Check that you are working an inc and a sc2tog in every round from 7 to 18. For a stronger curve, add 2–4 more bend rounds and remove the same number of straight rounds from Rnds 19–24, so the length stays the same.
The tube curves too much: Work only Rnds 7–14 as bend rounds, then add 4 extra straight rounds.
The curve twists into a spiral: Your inc and sc2tog are drifting apart. Use the outer marker to realign the increases every 2–3 rounds.
The decreases leave holes: Make sure you are using the invisible sc2tog through the front loops only, and pull it snug.
The rim flares: Your slip stitches are too loose, or you added stitches. Recount to 12 and redo the round with slightly firmer tension.
The rim pinches inward: Your slip stitches are too tight. Redo the round with a looser hand, or go up 0.5 mm for that round only.
The tip has a hole: Pull the magic ring tail firmly, then weave it through the Rnd 1 stitches once more before hiding it.
Care
Hand wash in cool water with mild soap, press out the water in a towel, and reshape the curve while it’s damp. Lay flat to dry.
Final Notes
The measurement chain for the Sage Curve Tube is short and easy to check. Twelve stitches at 6 sc per inch give a 2 in (5.1 cm) circumference and a 1 in (2.5 cm) flattened width. Six rounds give 0.9 in (2.3 cm). The bend rounds bring the length to 2.6 in (6.6 cm). The straight finish reaches 3.4 in (8.6 cm). The 2-round border completes the tube at 3.6 in (9.1 cm).
Keep your stitch count at 12 in every round after Rnd 2, watch the outer marker, and let the inc and sc2tog pairs build the curve for you.
Optional: if you’d like a longer curve, add more bend rounds in pairs and check the length against the gauge.
Happy crocheting!