
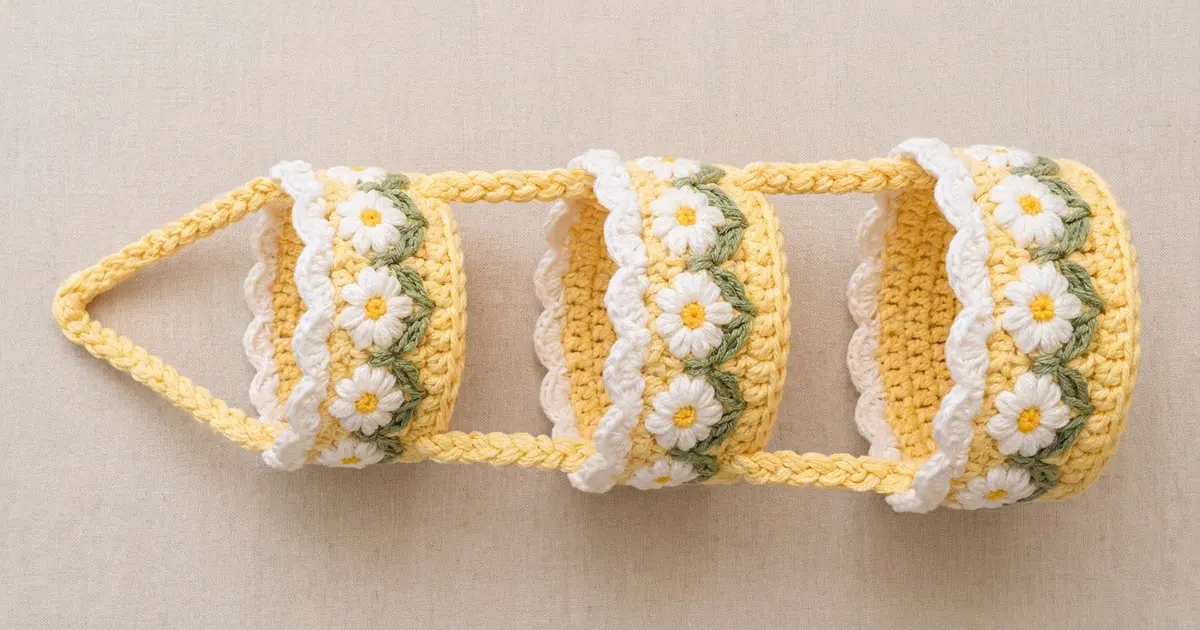
The Daisy Ladder is a three-tier hanging basket. It has three round baskets in graduated sizes, held by two braided-look cords that meet in a point for hanging. Each basket is soft butter yellow, with a ring of white daisies, a sage-green leaf vine, and a white scalloped rim.
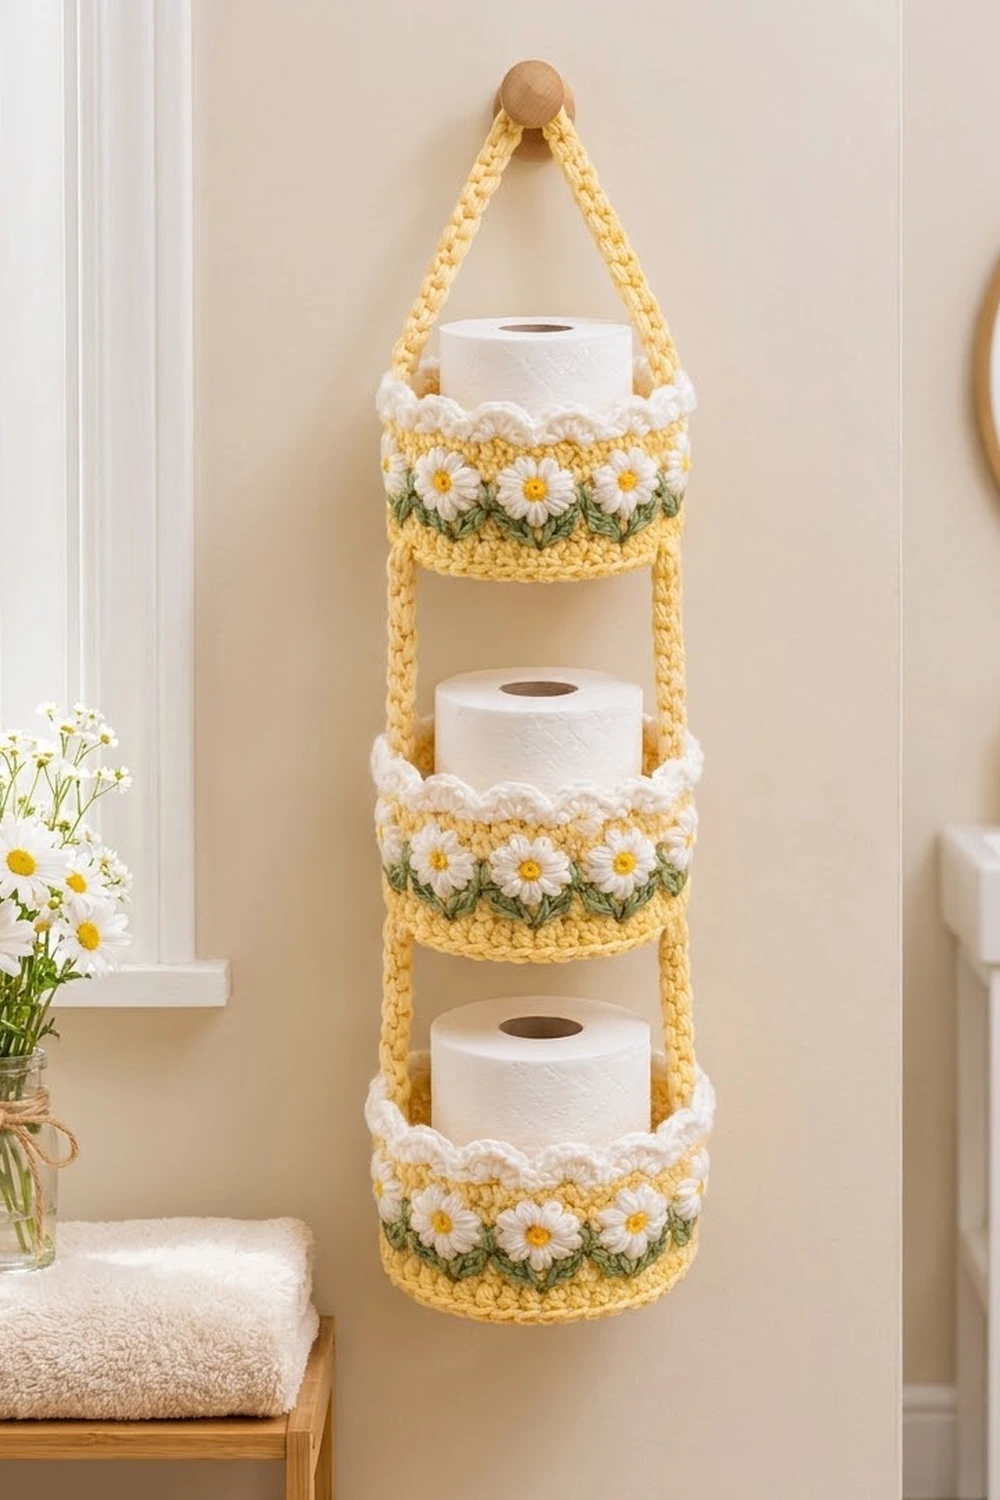
It’s made for a bathroom wall, where each tier holds one standard toilet paper roll. It also works for washcloths, yarn cakes, or nursery supplies. The colors are fresh and cottage-style, and the white rims frame each daisy band.
This pattern uses US crochet terms. The finished organizer is about 26.5 in (67.3 cm) tall and 8.4 in (21.3 cm) wide at its widest tier.
Each basket is worked the same way. You start with a flat single crochet base worked in joined rounds, then work straight walls. Daisies and leaves are sewn onto the walls, and the scalloped rim goes on last. Two Romanian cords are sewn up opposite sides of the stacked baskets and joined at the top.
Finished Size and Construction
- Finished size: about 26.5 in (67.3 cm) tall × 8.4 in (21.3 cm) wide
- Skill level: Intermediate (simple stitches, but careful counting and assembly)
- Terminology: US
- Yarn weight: Worsted (#4) cotton
- Hook: 4.0 mm (G-6)
- Number of pieces: 3 baskets, 2 cords, 42 daisies, 84 leaves
- Layout: baskets stacked vertically, small on top, large on the bottom, with 3 in (7.6 cm) gaps between them
- Basket sizes (base diameter × total height):
- Small: 5.7 in (14.5 cm) × 3.9 in (9.9 cm)
- Medium: 6.7 in (17.0 cm) × 4.4 in (11.2 cm)
- Large: 7.6 in (19.3 cm) × 4.75 in (12.1 cm)
- Wall height before rim: Small 3.1 in (7.9 cm), Medium 3.6 in (9.1 cm), Large 4 in (10.2 cm)
- Rim (border) depth: 0.75 in (1.9 cm)
Materials
Use a smooth worsted-weight cotton, at about 155 m per 100 g. Cotton holds the basket shape well and stands up to bathroom humidity. Acrylic gives softer, floppier walls.
- Butter Yellow (MC): 430 g, about 665 m. This covers the bases, walls, cords and daisy centers.
- White (A): 100 g, about 155 m. This covers the rims and petals.
- Sage Green (B): 40 g, about 62 m. This covers the leaves.
All quantities include a margin of about 15%.
Tools:
– 4.0 mm (G-6) hook
– Tapestry needle
– 4 stitch markers
– Scissors
– Measuring tape
– Rust-proof pins
– Spray bottle
– Blocking mat or folded towel
Abbreviations (US Terms)
- ch: chain
- sl st: slip stitch
- sc: single crochet
- hdc: half double crochet
- dc: double crochet
- BLO: back loop only
- MR: magic ring
- st(s): stitch(es)
- rnd(s): round(s)
- ( ) x6: repeat what’s inside the parentheses 6 times
Special stitch: shell. Work 5 dc in the same stitch.
Special technique: Romanian cord. Ch 2, then sc in the 2nd ch from the hook. Turn the work clockwise, insert the hook under the 2 loops on the left edge of the piece, yo and pull up a loop (3 loops on hook), yo and draw through all loops. Repeat from * to *. This gives a firm, braided-look cord about 3/8 in (1.0 cm) wide.
Gauge and Checkpoints
Gauge: 16 sc × 18 rnds = 4 in (10.2 cm). That’s 4 sts per inch and 4.5 rnds per inch.
Make the small basket base first and treat it as your swatch.
- After base Rnd 8 (48 sts): diameter 3.8 in (9.7 cm)
- After base Rnd 12 (72 sts): diameter 5.7 in (14.5 cm)
- Small walls, 14 rnds: 3.1 in (7.9 cm) tall
If your base is too big, go down to a 3.75 mm hook. If it’s too small, go up to a 4.5 mm hook. Small errors add up: if Rnd 12 is just 0.25 in (0.6 cm) too wide, the circumference is 0.8 in (2.0 cm) too long.
If the base cups like a bowl, your tension is tighter on increases. If it ruffles, it’s looser. Fix this before you start the walls.
Basket Base (all sizes)
Work with MC. Begin every rnd with ch 1 (it doesn’t count as a stitch) and end every rnd with a sl st to the first sc. The increases are staggered so the circle stays round rather than turning into a hexagon.
- Rnd 1: 6 sc in MR. (6)
- Rnd 2: 2 sc in each st. (12)
- Rnd 3: (sc in next st, 2 sc in next st) x6. (18)
- Rnd 4: (sc in next st, 2 sc in next st, sc in next st) x6. (24)
- Rnd 5: (sc in next 3 sts, 2 sc in next st) x6. (30)
- Rnd 6: (sc in next 2 sts, 2 sc in next st, sc in next 2 sts) x6. (36)
- Rnd 7: (sc in next 5 sts, 2 sc in next st) x6. (42)
- Rnd 8: (sc in next 3 sts, 2 sc in next st, sc in next 3 sts) x6. (48)
- Rnd 9: (sc in next 7 sts, 2 sc in next st) x6. (54)
- Rnd 10: (sc in next 4 sts, 2 sc in next st, sc in next 4 sts) x6. (60)
- Rnd 11: (sc in next 9 sts, 2 sc in next st) x6. (66)
- Rnd 12: (sc in next 5 sts, 2 sc in next st, sc in next 5 sts) x6. (72)
The small base stops here at 72 sts, 5.7 in (14.5 cm) across.
- Rnd 13: (sc in next 11 sts, 2 sc in next st) x6. (78)
- Rnd 14: (sc in next 6 sts, 2 sc in next st, sc in next 6 sts) x6. (84)
The medium base stops here at 84 sts, 6.7 in (17.0 cm) across.
- Rnd 15: (sc in next 13 sts, 2 sc in next st) x6. (90)
- Rnd 16: (sc in next 7 sts, 2 sc in next st, sc in next 7 sts) x6. (96)
The large base stops here at 96 sts, 7.6 in (19.3 cm) across.
Don’t fasten off. Go straight on to the walls.
Basket Walls
The wall rnds use the same ch 1 start and sl st join, with no increases. Place a marker in the joining seam. The seam stitch is st 1 for all placement counts later on.
- Wall Rnd 1: sc in BLO of each st around. (72 / 84 / 96) This turns a crisp edge up from the base.
- Wall Rnds 2 to end: sc in each st around. (72 / 84 / 96)
Work 14 wall rnds in total for the small basket, 16 for the medium, and 18 for the large. Fasten off MC.
Checkpoint: the walls should rise straight up, at 3.1 in (7.9 cm), 3.6 in (9.1 cm) and 4 in (10.2 cm) respectively. If they flare out, go down a hook size for the walls only.
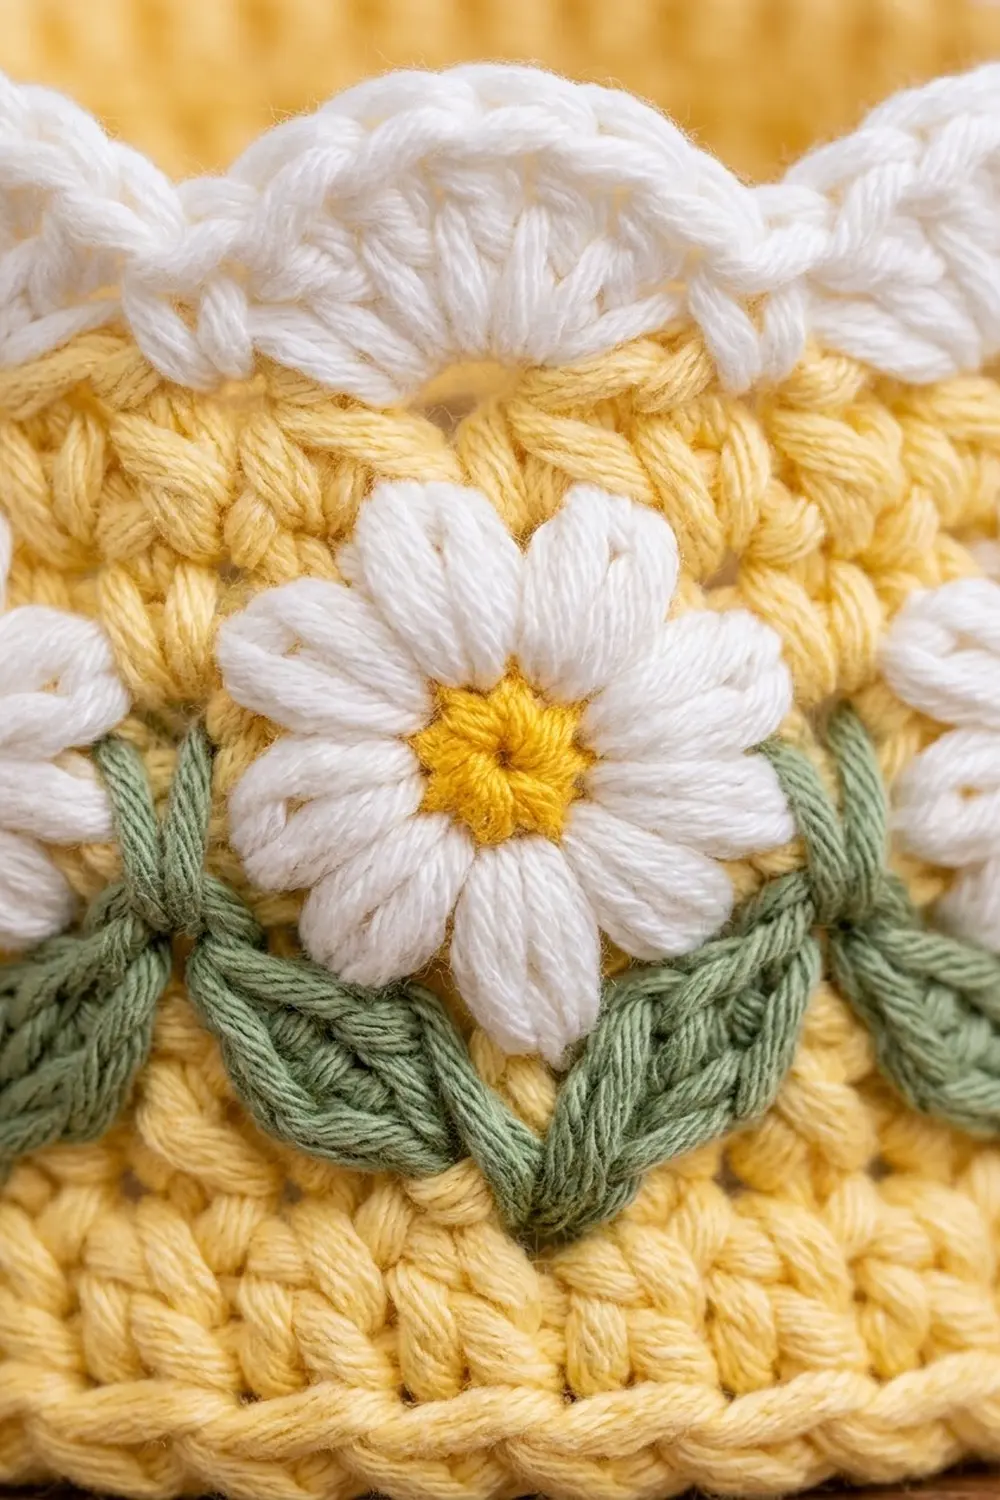
Daisies (make 42)
- Rnd 1 (MC): 8 sc in MR, then sl st to the first sc. (8) Fasten off.
- Rnd 2 (A): join with a sl st in any sc.
- Ch 4, sc in 2nd ch from hook, hdc in each of the next 2 ch, sl st in the same sc as before, sl st in the next sc.
- Repeat from * to * 8 times in total. Your last sl st lands in the joining st. (8 petals)
- Fasten off. Leave an 8 in (20.3 cm) tail of A for sewing, and weave in the MC tail.
Checkpoint: each daisy measures about 1.2 in (3.0 cm) across.
Leaves (make 84)
With B, ch 5. Sl st in the 2nd ch from hook, sc in the next ch, hdc in the next ch, sl st in the last ch. (4 sts) Fasten off and leave an 8 in (20.3 cm) tail.
Each leaf is about 1 in (2.5 cm) long.
Make All Pieces
| Basket | Daisies | Leaves | Base sts | Shells |
|---|---|---|---|---|
| Small | 12 | 24 | 72 | 12 |
| Medium | 14 | 28 | 84 | 14 |
| Large | 16 | 32 | 96 | 16 |
| Totals | 42 | 84 | — | 42 |
You also need 2 Romanian cords.
With MC, work each cord to 28 in (71.1 cm), which is about 112 stitches. Measure the length rather than counting stitches. Leave a 12 in (30.5 cm) tail at each end.
Placing the Daisies and Leaves
Daisies are centered over wall st 4, then every 6th st after it: sts 4, 10, 16, 22 and so on. That gives 72 ÷ 6 = 12 daisies, 84 ÷ 6 = 14, and 96 ÷ 6 = 16. They are spaced 1.5 in (3.8 cm) apart, center to center.
Height: center each daisy on the 5th wall rnd down from the top. That’s Rnd 10 of 14 (small), Rnd 12 of 16 (medium), or Rnd 14 of 18 (large).
Sew each daisy on through the center ring and the base of every petal. Leave the petal tips free.
Leaves: below each daisy, sew 2 leaves in a V shape. The narrow ends meet under the daisy center. Each tip points about 45° outward and touches the next daisy’s leaf, which forms the continuous vine. Tack each leaf at its base, middle and tip.
Joining
The joining step attaches the two cords to the outside of the stacked baskets. The rim (see Border) must be finished on all three baskets before you start.
Strap columns:
– Cord 1 runs up the joining seam (st 1) on every basket.
– Cord 2 runs up the stitch directly opposite:
– Small: st 37 (1 + 36)
– Medium: st 43 (1 + 42)
– Large: st 49 (1 + 48)
Each column sits exactly half the circumference from st 1. Each one also falls on a rim sc between two shells, and halfway between two daisies (3 sts from each), so no daisy is covered.
Steps:
1. Lay the large basket on its side.
2. Pin Cord 1 flat up the st 1 column. Start with the cord end level with the bottom edge of the base and finish at the rim top.
3. Leave 3 in (7.6 cm) of cord free.
4. Pin the medium basket along its st 1 column, then leave 3 in (7.6 cm) free again.
5. Pin the small basket along its st 1 column.
6. Repeat steps 1 to 5 with Cord 2 on the opposite columns.
Stitch-to-stitch sewing:
– Using the cord tails or MC, whipstitch both long edges of the cord to the wall, taking one tack into every wall rnd and every rim rnd.
– That’s 20 tacks per edge on the large basket (18 + 2), 18 on the medium (16 + 2) and 16 on the small (14 + 2).
– Keep the stitches snug but not tight. The cord should lie flat without puckering the wall.
Checkpoint: from the bottom of the large basket to the rim of the small one, the stack measures 4.75 + 3 + 4.4 + 3 + 3.9 = about 19 in (48.3 cm).
Top point:
1. Bring the two free cord ends together above the small basket.
2. Overlap them by 1 in (2.5 cm) and sew through both layers several times.
3. Check that the point sits about 7.5 in (19.1 cm) above the small rim. The finished height is about 26.5 in (67.3 cm).
Border (Scalloped Rim)
Border gauge: one shell repeat uses 6 sts, which equals 1.5 in (3.8 cm). The rim is worked separately on each basket, before joining. Use A, and join at the st 1 seam.
Rim Rnd 1 (trim round): ch 1, sc in each st, sl st to the first sc.
– Small: 72 + 0 = 72
– Medium: 84 + 0 = 84
– Large: 96 + 0 = 96
Rim Rnd 2: ch 1, sc in the first st. Skip 2 sts, shell in the next st, skip 2 sts, sc in the next st. Repeat from * to * around. On the last repeat, replace the final sc with a sl st to the first sc.
| Basket | Shells | Sc | Total sts |
|---|---|---|---|
| Small | 12 | 12 | 12 + (12 × 5) = 72 |
| Medium | 14 | 14 | 14 + (14 × 5) = 84 |
| Large | 16 | 16 | 16 + (16 × 5) = 96 |
Why the math works:
– Each repeat uses 6 stitches (1 sc, 2 skipped, 1 shell base, 2 skipped) and puts 6 new stitches back (1 sc + 5 dc). The rim stays the same circumference as the wall and doesn’t ruffle.
– 72, 84 and 96 all divide evenly by 6, so there are no partial repeats.
– Every shell sits on st 4 of its repeat, the same column as a daisy, so each scallop lines up over a flower.
– Every rim sc lands on st 1 + 6k. That gives the cords a flat landing spot at st 1 and at the opposite stitch.
Final Blocking
- Weave in all ends inside the baskets.
- Stuff each basket firmly with a folded towel or a toilet roll so the walls stand straight.
- Mist the walls and rims until they’re damp, not soaked.
- Shape each scallop with your fingers and pin the shell tips evenly.
- Press the daisy petals flat and open.
- Hang the organizer while it’s still damp so the cords straighten under the weight of the baskets.
- Let it dry completely, for 24 hours.
Final Quality-Control Checklist
- Base diameters measure 5.7 in (14.5 cm), 6.7 in (17.0 cm) and 7.6 in (19.3 cm).
- The walls stand straight with no flare.
- Each basket has 12, 14 and 16 daisies, evenly spaced 1.5 in (3.8 cm) apart.
- Each daisy has 2 leaves, and the vine is continuous.
- Shells sit directly over the daisies.
- The cords lie flat, with no daisy covered.
- The gaps between baskets are an equal 3 in (7.6 cm).
- The baskets hang level.
- The top join is secure.
Troubleshooting
- Base cups: add one extra sc to the increase round, or use a larger hook for the base.
- Base ruffles: go down a hook size and recheck your stitch counts.
- Hexagon-shaped base: make sure you are alternating the staggered increase rounds.
- Walls lean outward: go down a hook size for the walls, or use firmer cotton.
- Rim waves: your shells are too loose. Work the dc more tightly, or use a 3.75 mm hook for Rim Rnd 2.
- Basket tilts: one cord column is off-center. Recount from st 1 to the opposite column.
- Cords stretch: weight from heavy items lengthens the cords. Shorten them at the top join if needed.
Care
Hand wash in cool water with mild soap, and reshape while damp. Lay flat or hang to dry, and avoid the dryer so the baskets keep their shape.
Final Notes
The measurement chain:
- Gauge of 16 sc × 18 rnds = 4 in (10.2 cm)
- Bases of 72, 84 and 96 sts
- Diameters of 5.7, 6.7 and 7.6 in (14.5, 17.0 and 19.3 cm)
- Wall heights of 3.1, 3.6 and 4 in (7.9, 9.1 and 10.2 cm)
- A 0.75 in (1.9 cm) rim with 12, 14 and 16 shells
- A 19 in (48.3 cm) stack plus a 7.5 in (19.1 cm) top point, for a total of 26.5 in (67.3 cm)
Check each link in this chain as you go, and the finished organizer will hang level and true.
Happy crocheting!