

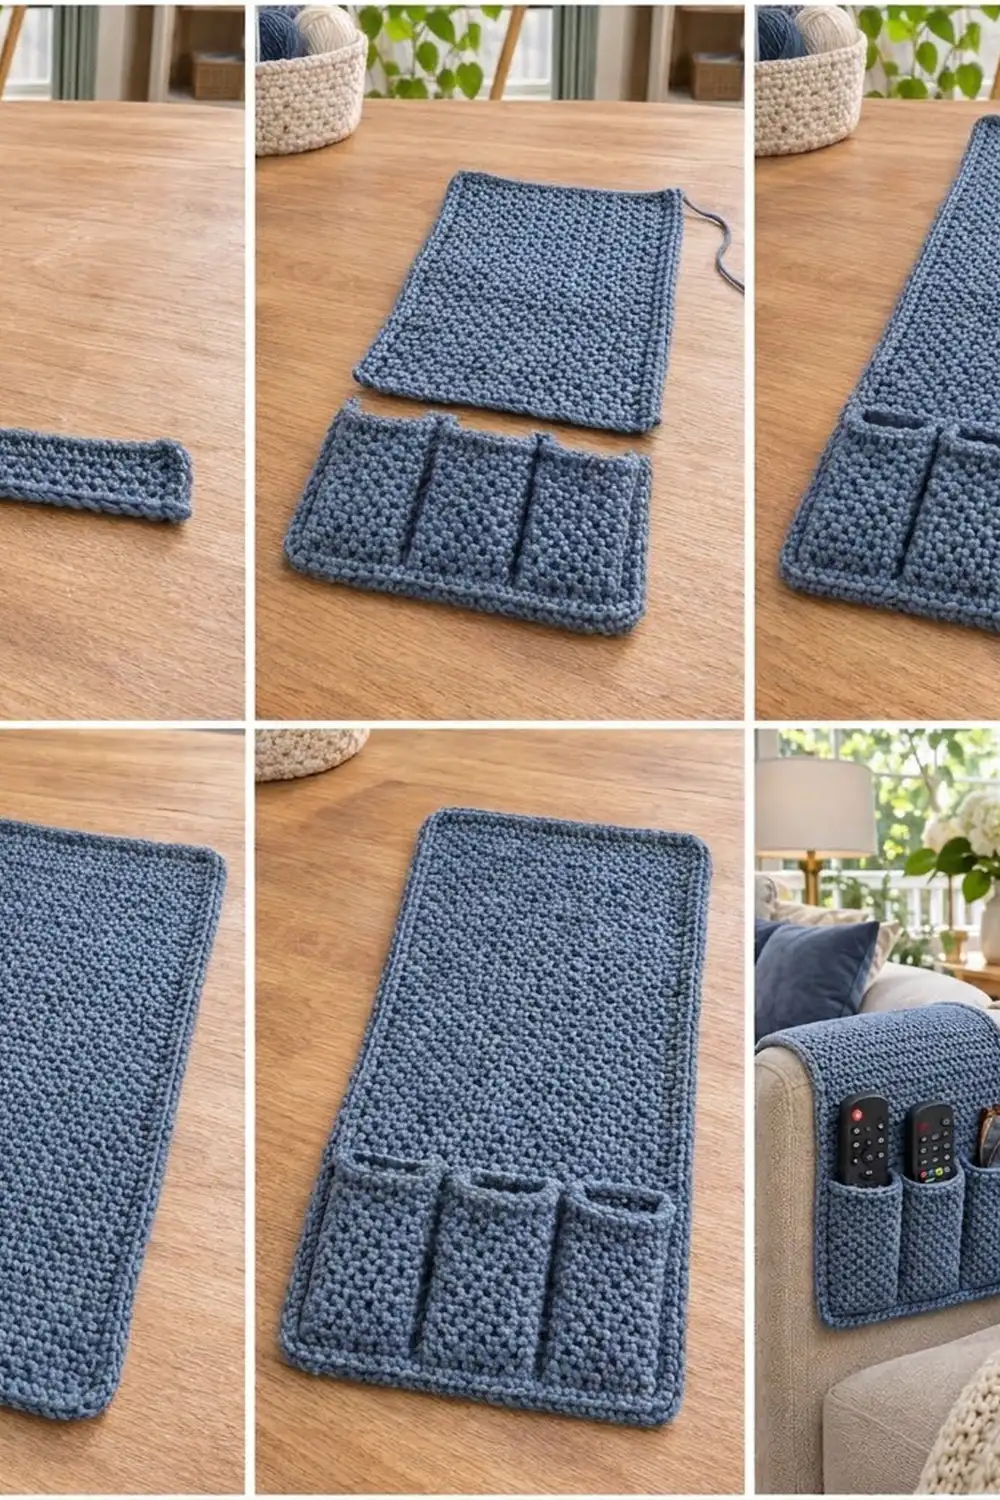
This armrest caddy keeps remotes, glasses, and a pen right where you sit. It is a long moss stitch panel that drapes over the sofa arm, with a three-pocket panel stitched onto the front end. The texture is dense and pebbly, so the fabric keeps its shape and does not stretch out when the pockets are full.
The sample is worked in one denim blue color. Moss stitch gives it a quiet, tweedy look that suits neutral sofas. A warm beige version works just as well, and so does any solid color that hides lint.
The pattern uses US crochet terms. The finished caddy measures 9 in (22.9 cm) wide by 23 in (58.4 cm) long. Each pocket is about 2.7 in (6.9 cm) wide and 6 in (15.2 cm) deep.
Construction is simple. Crochet the back panel in rows, then crochet the pocket panel in rows. Lay the pocket panel on the bottom of the back panel and sew the two pocket dividers. The first border round joins the pocket’s sides and bottom to the back panel, and the second round finishes the edge.
Finished Size and Construction
- Finished size: 9 in x 23 in (22.9 cm x 58.4 cm)
- Skill level: Easy
- Terminology: US crochet terms
- Yarn weight: Worsted (#4)
- Hook: 5.0 mm (H-8)
- Number of pieces: 2 (back panel and pocket panel)
- Layout: Pocket panel stacked on the lower 6 in (15.2 cm) of the back panel, divided into 3 pockets
- Back panel size before border: 8 in x 22 in (20.3 cm x 55.9 cm), 36 sts x 99 rows
- Pocket panel size: 8 in x 6 in (20.3 cm x 15.2 cm), 36 sts x 27 rows
- Border depth: 2 rounds of sc, 0.5 in (1.3 cm) on each side
Materials
Yarn: Use a smooth worsted weight cotton or cotton blend. Cotton keeps the stitches crisp and does not pill when remotes slide in and out. Acrylic also works, but the caddy will be a little softer.
- Denim Blue: 200 g, about 330 m (361 yd)
These quantities include a margin of about 15% for your gauge swatch and small differences in tension.
Tools:
- 5.0 mm (H-8) crochet hook
- Tapestry needle
- 4 locking stitch markers
- Measuring tape or ruler
- Rust-proof pins and a blocking mat or folded towel
- Spray bottle with water
- Scissors
Abbreviations (US Terms)
- ch – chain
- sc – single crochet
- sk – skip
- sl st – slip stitch
- st(s) – stitch(es)
- ch-1 sp – the space under a chain 1
- RS / WS – right side / wrong side
Moss stitch (linen stitch): This stitch alternates single crochets with ch-1 spaces. On each row, you work a sc into each ch-1 sp below and a ch 1 over each sc below. Each sc and each ch 1 counts as 1 st, so the stitch count stays the same on every row.
Gauge and Checkpoints
Gauge: 18 sts and 18 rows = 4 in (10.2 cm) in moss stitch.
Moss stitch is compact. With this yarn and hook, the stitch gauge and the row gauge come out the same, and the border depends on that square gauge.
Test swatch: Ch 21. Work Row 1 of the back panel on 20 sts, then Row 2, then repeat Row 3 until you have 20 rows. Steam lightly, then measure the center 4 in (10.2 cm) in both directions.
Checkpoints:
- After Row 1 of the back panel: 36 sc, about 8 in (20.3 cm) wide.
- After Row 18: about 4 in (10.2 cm) tall.
- After Row 99: about 8 in x 22 in (20.3 cm x 55.9 cm).
- Finished pocket panel: about 8 in x 6 in (20.3 cm x 15.2 cm), exactly as wide as the back panel.
- After the border: 9 in x 23 in (22.9 cm x 58.4 cm).
Too big? Use a hook 0.5 mm smaller. Too small? Use a hook 0.5 mm larger. Change hooks rather than stitch counts, because the joining and the border depend on matching counts.
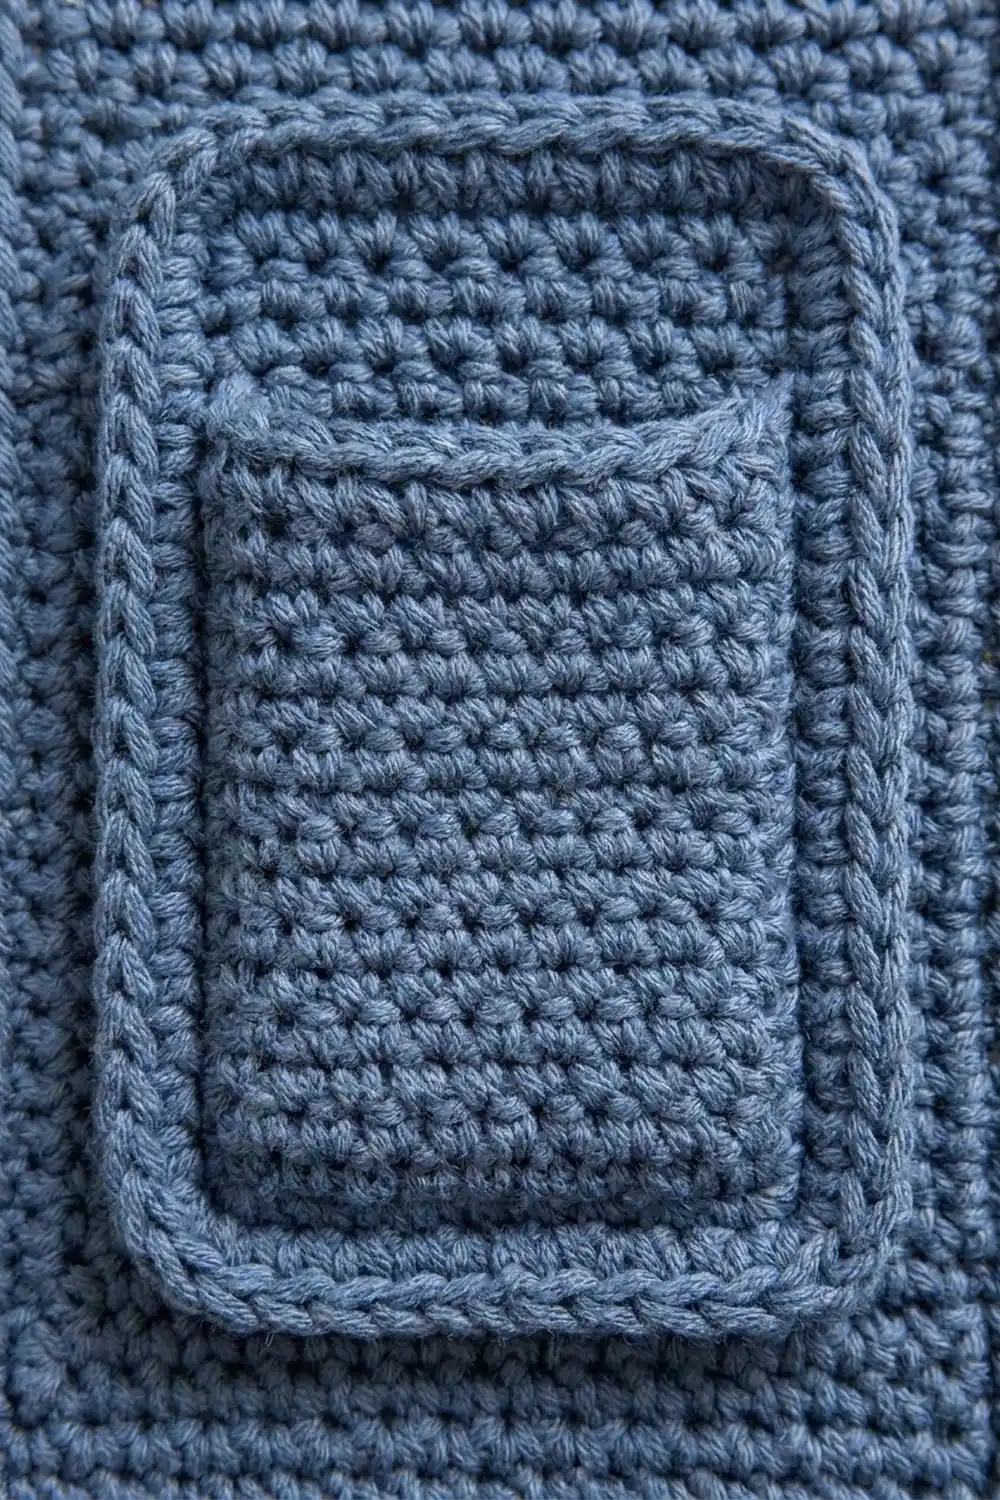
Back Panel
Ch 37.
Row 1 (RS): Sc in 2nd ch from hook and in each ch across, turn. (36 sts)
Row 2: Ch 1 (does not count as a st). Sc in first st, ch 1, sk next st, sc in next st 17 times, sc in last st, turn. (36 sts: 19 sc and 17 ch-1 sps)
Row 3: Ch 1. Sc in first sc, ch 1, sk next sc, sc in next ch-1 sp 17 times, sc in last sc, turn. (36 sts: 19 sc and 17 ch-1 sps)
Row 3 places a sc in every ch-1 sp and a ch 1 over every sc, which builds the staggered moss texture. On each turned row, the stitch pattern lines up so that Row 3 can be repeated exactly as written.
Rows 4–99: Repeat Row 3. (36 sts in every row)
The panel is 99 rows and measures about 8 in x 22 in (20.3 cm x 55.9 cm). Fasten off and weave in the ends. The edge sc at both ends of every row make straight, solid side edges for the border.
Pocket Panel
Ch 37.
Row 1 (RS): Sc in 2nd ch from hook and in each ch across, turn. (36 sts)
Row 2: Work as back panel Row 2. (36 sts)
Rows 3–26: Work as back panel Row 3. (36 sts in every row)
Row 27 (top edge): Ch 1, sc in each sc and in each ch-1 sp across, turn. (36 sc: 36 worked 1-per-existing-st + 0 added)
Firming edge: Ch 1, sl st in each sc across. Fasten off. (36 sl sts)
The slip stitches sit on top of Row 27 and add no real height. They keep the pocket opening from stretching. The pocket panel measures about 8 in x 6 in (20.3 cm x 15.2 cm). Weave in the ends.
Make All Pieces
Make 1 back panel and 1 pocket panel, both in Denim Blue.
Layout, seen from the RS with the pockets at the bottom:
+------------------------------------+
|                                    |
|        BACK PANEL (36 x 99)        |
|        rows 28–99 visible          |
|                                    |
+------------+-----------+-----------+
|  POCKET 1  | POCKET 2  | POCKET 3  |
|  sts 1–12  | sts 13–24 | sts 25–36 |
|  27 rows   | 27 rows   | 27 rows   |
+------------+-----------+-----------+
Joining
Method: Sew the two dividers with a running stitch first. Then join the outer edges with border Round 1.
Positioning: Lay the back panel RS up. Place the pocket panel on top of it, RS up, with the two foundation edges together and the side edges lined up. Pin all four corners of the pocket panel. Pocket Row 1 should sit on back panel Row 1, and pocket Row 27 should sit on back panel Row 27.
Stitch-to-stitch logic: Both pieces have 36 sts across the bottom and 27 rows up each side of the pocket area. Every pocket stitch and row end has a matching stitch or row end on the back panel, so nothing needs to be eased in.
Dividers:
- On pocket Row 27, place a marker between sts 12 and 13 and another between sts 24 and 25.
- Thread a 24 in (61.0 cm) length of yarn on a tapestry needle.
- Starting at a marker, sew straight down to Row 1, through both layers. Make 1 stitch per row, for 27 stitches per divider.
- Repeat at the second marker.
Each pocket is 12 sts, about 2.7 in (6.9 cm) wide.
Tension advice: Sew firmly enough to hold the layers in place, but don’t pull tight. If you pull too hard, the divider puckers and the pocket gets shorter. Check that each divider is straight and the same 6 in (15.2 cm) long as the side edges.
Size checkpoint: The joined piece still lies flat at 8 in x 22 in (20.3 cm x 55.9 cm). The pocket panel covers exactly the bottom 6 in (15.2 cm).
Border
Border gauge: 18 sc = 4 in (10.2 cm), the same as the moss stitch gauge. The panel’s row gauge equals its stitch gauge, so working 1 sc per row end along the long sides keeps them flat.
With the RS facing, join yarn with a sl st in the last st of Row 99. This is the top right corner.
Round 1 (joining round): Work this round in four parts, then join.
- Top edge: Ch 1. Work 3 sc in the corner st, sc in each of the next 34 sts, then 3 sc in the last st.
- First long side: Sc in each of the 99 row ends. For the lowest 27 row ends, insert the hook through the pocket edge and the back panel together.
- Bottom edge: Work through both layers. Work 3 sc in the first foundation ch, sc in each of the next 34 chs, then 3 sc in the last ch.
- Second long side: Sc in each of the 99 row ends, working through both layers for the first 27.
Sl st to the first sc to join.
(278 sts: 34 sc on each short side + 99 sc on each long side between corner groups + 4 corner groups of 3 sc)
Check: 34 + 34 + 99 + 99 + 12 = 278. If you count corner to corner and include the center corner sts, each short side has 36 sts and each long side has 101 sts.
Round 2: Ch 1. Sc in each st around, working 3 sc in the center sc of each corner group. Sl st to the first sc to join.
(286 sts: 36 sc on each short side + 101 sc on each long side between corner groups + 4 corner groups of 3 sc)
Check: 36 + 36 + 101 + 101 + 12 = 286. That is the 278 sts of Round 1, worked once each, plus 8 added at the corners.
Fasten off and weave in the ends.
Why the math works:
- Short sides: Each short side starts from the panel’s 36 sts, which is 8 in (20.3 cm) at 4.5 sts per inch.
- Long sides: Each long side has 99 sc for 99 rows, which is 22 in (55.9 cm) at the same gauge.
- Joining: The pocket’s 36 sts and 27 rows fall inside those same counts, so joining adds no stitches.
- Corners: The 3 sc in each corner add just enough stitches to keep it flat and square.
Each border round adds 0.25 in (0.6 cm) on every side, which brings the caddy to 9 in x 23 in (22.9 cm x 58.4 cm).
Final Blocking
- Lay the caddy RS up on a blocking mat or folded towel.
- Smooth it into a 9 in x 23 in (22.9 cm x 58.4 cm) rectangle, then measure both long sides.
- Pin the corners first, then pin every 2 in (5.1 cm) along the edges.
- Check that the dividers are vertical and the pocket top runs straight across.
- Spray with water until the caddy is evenly damp, or hold a steam iron 1 in (2.5 cm) above it. Never press it.
- Slide a piece of card into each pocket so the front layer dries flat.
- Let it dry completely before removing the pins and card.
Final Quality-Control Checklist
- The finished caddy is 9 in x 23 in (22.9 cm x 58.4 cm), within 0.25 in (0.6 cm).
- The back panel is 36 sts x 99 rows, and the pocket panel is 36 sts x 27 rows.
- Border Round 1 has 278 sts, and Round 2 has 286 sts.
- All three pockets are 12 sts, about 2.7 in (6.9 cm) wide.
- The pocket sides and bottom are caught in the border with no gaps.
- The dividers run straight from the pocket top down to the bottom edge.
- The corners are square and lie flat.
- All ends are woven in securely on the WS.
Troubleshooting
Long sides wave: Your rows are looser than your stitches. Redo Round 1, skipping 1 row end in every 10.
Long sides cup or pull in: Your rows are tighter than your stitches. Redo Round 1 and add 1 sc every 10 row ends.
Texture looks uneven: Make sure each sc goes into a ch-1 sp and not into the chain itself. Also check that every row starts and ends with an edge sc.
Pocket panel narrower than the back panel: Count your stitches; both pieces need 36. If the counts match, block the pocket panel to 8 in (20.3 cm) wide before joining.
Pockets sag open: Work a second row of sl sts across the pocket top.
Caddy slides off the sofa arm: Add 9 to 18 rows to the back panel, which is 2 to 4 in (5.1 to 10.2 cm) more length. Add 1 border sc per extra row on each long side.
Care
Hand wash in cool water with mild soap and roll in a towel to remove excess water. Dry flat, reshaping the pockets while damp.
Final Notes
The measurement chain is short and easy to check:
- Gauge: 18 sts and 18 rows = 4 in (10.2 cm).
- Back panel: 36 sts x 99 rows, 8 in x 22 in (20.3 cm x 55.9 cm).
- Pocket panel: 36 sts x 27 rows, 8 in x 6 in (20.3 cm x 15.2 cm), divided into three 12-st pockets.
- Border: Round 1 joins the pieces with 278 sts, and Round 2 finishes with 286 sts.
- Finished caddy: 9 in x 23 in (22.9 cm x 58.4 cm).
Measure at each checkpoint and your caddy will come out square, sturdy, and ready for the sofa.
Happy crocheting!