

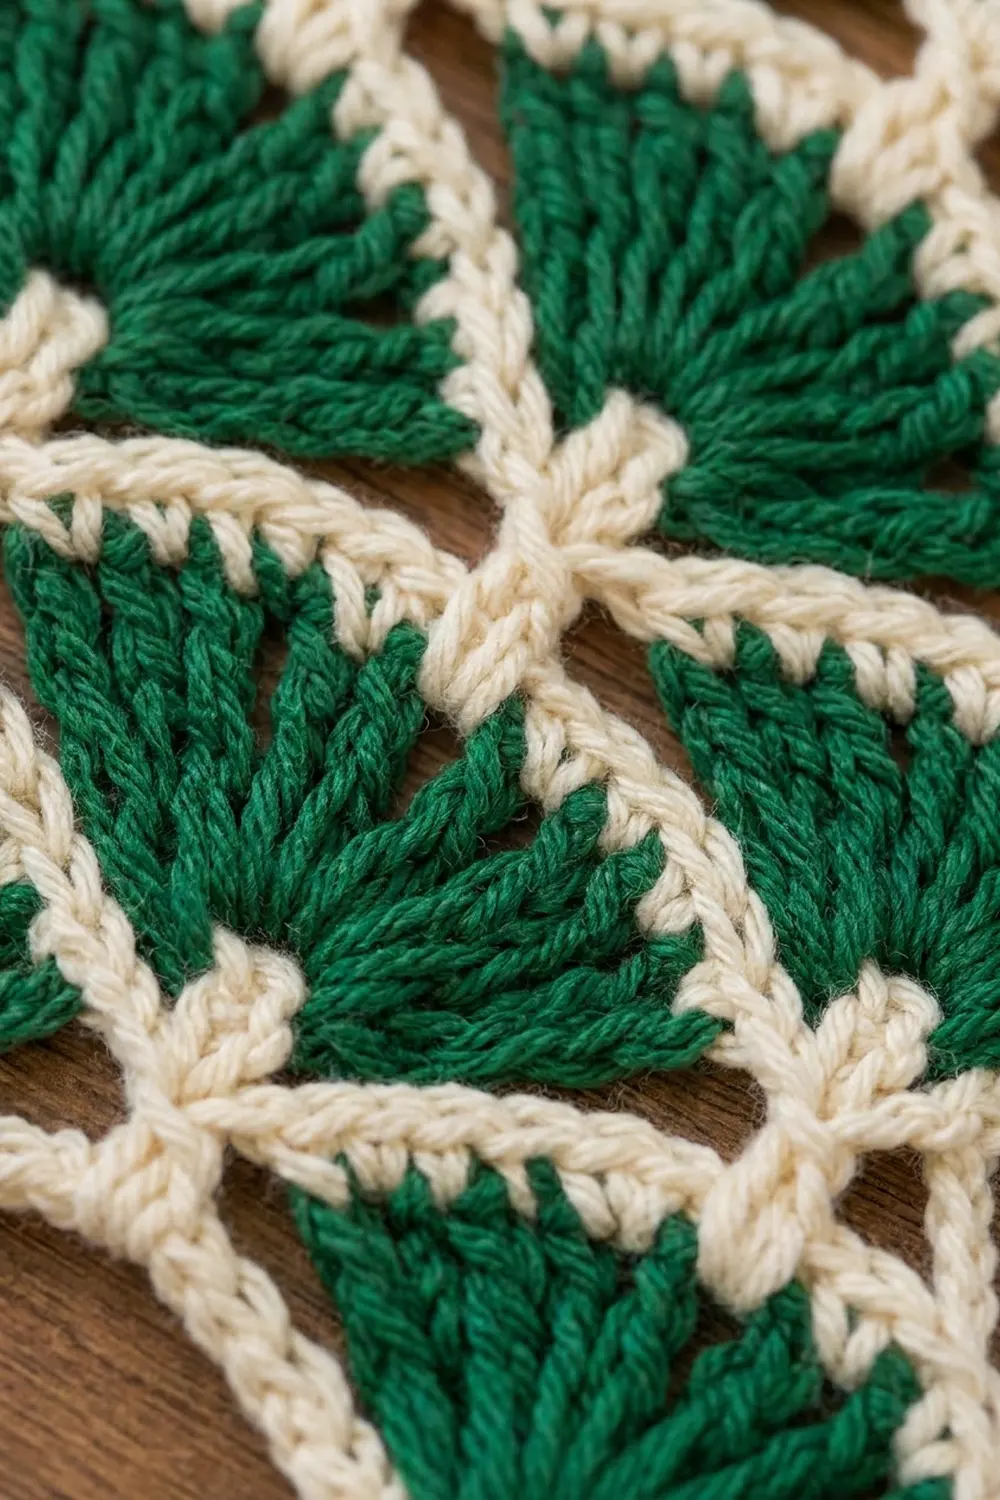
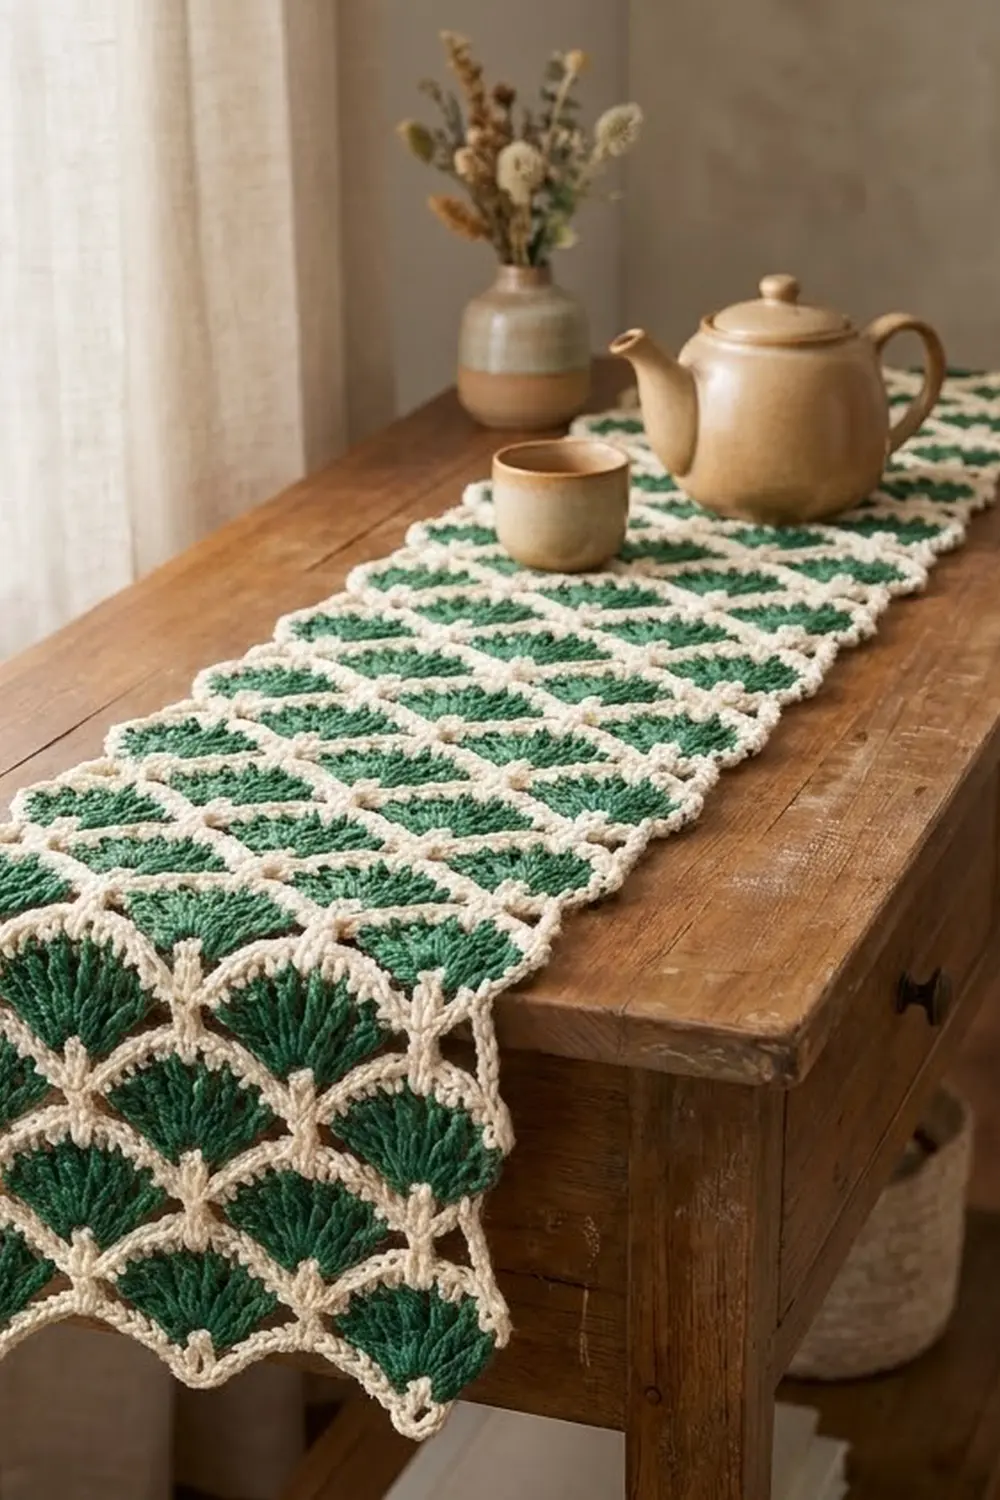
The Evergreen Fan Lattice Panel is a single rectangular strip of staggered fans. Deep forest-green fans sit on a crisp cream lattice. Every fan is outlined in cream, and short cream posts rise between the fans, so the panel looks like rows of scallop shells caught in a net.
Only two colors are used: forest green for the fans and cream for the foundation, outlines, lattice posts, and border. The style is classic and a little vintage. It suits a cabin, a holiday table, or a farmhouse shelf.
The pattern is written in US crochet terms. The finished panel measures 6 in (15.2 cm) wide by 12 in (30.5 cm) tall after one border round and blocking.
You work the panel flat in rows, always with the right side facing, and change color every row. Green rows make the fans and cream rows outline them. The fan rows alternate between two full fans and one center fan with a half fan at each edge, which gives the gently wavy sides. One cream round of single crochet finishes the edge.
Finished Size and Construction
- Finished size: 6 in x 12 in (15.2 cm x 30.5 cm)
- Skill level: Easy-intermediate
- Terminology: US crochet terms
- Yarn weight: Worsted (#4)
- Hook: US H-8 (5.0 mm)
- Number of pieces: 1
- Layout: One strip, 2 fans wide and 9 fan rows tall
- Piece size before border: 5.5 in x 11.5 in (14.0 cm x 29.2 cm)
- Border depth: 0.25 in (0.6 cm) on every side
Materials
Choose a smooth worsted-weight yarn with good stitch definition. Mercerized or matte cotton gives the sharpest fans. Soft acrylic also works, but the fans will look a little rounder. Use the same fiber and weight for both colors so the rows stay even.
- Color A, forest green: 25 g (46 m)
- Color B, cream: 20 g (37 m)
These amounts assume a yarn of about 183 m per 100 g and include a margin of roughly 20 percent.
Tools:
- US H-8 (5.0 mm) crochet hook
- Tapestry needle
- Scissors
- Measuring tape
- Rust-proof pins and a blocking mat
- Spray bottle
Abbreviations (US Terms)
- ch – chain
- sc – single crochet
- dc – double crochet
- tr – treble crochet
- sk – skip
- sl st – slip stitch
- sp – space
- st(s) – stitch(es)
- RS – right side
Special stitches
- Fan: 9 dc in the same stitch.
- Half fan: 5 dc in the same stitch.
- Standing sc / dc / tr: Start with a slip knot on the hook and work the stitch straight into the given stitch, with no turning chain. For a standing dc, yarn over once before inserting the hook. For a standing tr, yarn over twice.
Row direction: Work every row with the RS facing, from right to left (left to right if you are left-handed). Fasten off at the end of each row, then join the next color with a standing stitch. Work over the tails as you go to save weaving later.
Gauge and Checkpoints
Base gauge: 16 sc = 4 in (10.2 cm) in Row 1.
Test first: Work Rows 1–5 as your test. They are the start of the real panel, so if the numbers match, just keep going.
- After Row 1: 21 sc measures 5.25 in (13.3 cm) wide.
- After Row 5: the piece is 5.5 in (14.0 cm) wide and 2.75 in (7.0 cm) tall.
- Each green row plus its cream outline row adds 1.25 in (3.2 cm).
If your piece is too big, go down one hook size (4.5 mm). If it is too small, go up one size (5.5 mm). If the width is right but the fans look tall and loose, keep the same hook and pull each dc snug before you close it.
Pattern
Row 1 (Foundation)
With cream, ch 22.
Row 1 (RS): Sc in 2nd ch from hook and in each ch across. Fasten off. (21 sc)
Row 2 (Fan Row B, Green)
Row 2: Join green with a standing dc in the first sc, 4 dc in the same sc (half fan made), ch 2, sk 4 sc, sc in next sc, ch 2, sk 4 sc, fan in next sc, ch 2, sk 4 sc, sc in next sc, ch 2, sk 4 sc, half fan in last sc. Fasten off.
(29 sts: 19 dc, 2 sc, 8 ch – 1 center fan and 2 half fans)
Row 3 (Outline Row B, Cream)
Row 3: Join cream with a standing sc in the first dc, sc in next 4 dc, ch 1, sk ch-2 sp, tr in next sc, ch 1, sk ch-2 sp, sc in each of next 9 dc, ch 1, sk ch-2 sp, tr in next sc, ch 1, sk ch-2 sp, sc in each of last 5 dc. Fasten off.
(25 sts: 19 sc, 2 tr, 4 ch)
The sc stitches trace the curved tops of the fans. The tr stitches fill the valleys between fans and become the cream posts.
Row 4 (Fan Row A, Green)
Row 4: Join green with a standing sc in the first sc, ch 2, sk next 4 sc and ch-1 (5 sts), fan in next tr, ch 2, sk ch-1 and next 4 sc, sc in next sc (the center sc of the fan below), ch 2, sk next 4 sc and ch-1, fan in next tr, ch 2, sk ch-1 and next 4 sc, sc in last sc. Fasten off.
(29 sts: 18 dc, 3 sc, 8 ch – 2 full fans)
Each new fan sits on a cream post, so the fans stagger like bricks.
Row 5 (Outline Row A, Cream)
Row 5: Join cream with a standing tr in the first sc, ch 1, sk ch-2 sp, sc in each of next 9 dc, ch 1, sk ch-2 sp, tr in next sc, ch 1, sk ch-2 sp, sc in each of next 9 dc, ch 1, sk ch-2 sp, tr in last sc. Fasten off.
(25 sts: 18 sc, 3 tr, 4 ch)
Row 6 (Fan Row B, Green)
Row 6: Join green with a standing dc in the first tr, 4 dc in the same tr, ch 2, sk ch-1 and next 4 sc, sc in next sc, ch 2, sk next 4 sc and ch-1, fan in next tr, ch 2, sk ch-1 and next 4 sc, sc in next sc, ch 2, sk next 4 sc and ch-1, half fan in last tr. Fasten off.
(29 sts: 19 dc, 2 sc, 8 ch)
Rows 7–18
Repeat Rows 3–6 three more times. That makes four repeats of Rows 3–6 in total, ending with a Fan Row B (Row 18).
From the bottom, the fan rows go B, A, B, A, B, A, B, A, B: 9 fan rows, 5 of type B and 4 of type A.
Checkpoints:
- After Row 9: 5.25 in (13.3 cm) tall.
- After Row 13: 7.75 in (19.7 cm) tall.
- After Row 17: 10.25 in (26.0 cm) tall.
Row 19 (Top Outline, Cream)
This row is Row 3 with sc instead of tr in the valleys. The cream outline dips between the fans, so the top edge stays scalloped.
Row 19: Join cream with a standing sc in the first dc, sc in next 4 dc, ch 1, sk ch-2 sp, sc in next sc, ch 1, sk ch-2 sp, sc in each of next 9 dc, ch 1, sk ch-2 sp, sc in next sc, ch 1, sk ch-2 sp, sc in each of last 5 dc. Fasten off.
(25 sts: 21 sc, 4 ch)
Size before border: 5.5 in x 11.5 in (14.0 cm x 29.2 cm).
Border
Border gauge: The border uses the base gauge of 16 sc = 4 in (10.2 cm), so 4 sc covers 1 in (2.5 cm).
Each corner of this border is a ch-1 that belongs to neither side. The side counts below include only the sc worked along that side.
Round 1 (Cream)
Join cream with a standing sc in the first st of Row 19.
- Top: Sc in each st across Row 19, including the ch-1 sts. (25 sc)
- Corner: Ch 1.
- First long side: Working into row ends from Row 18 down to Row 2: 3 sc around each Fan Row B end, 2 sc in each Fan Row A end, 3 sc around each Outline Row A (tr) end, 2 sc in each Outline Row B end. (43 sc)
- Corner: Ch 1.
- Bottom: Working into the underside of the foundation ch, sc in each of first 10 ch, (sc, ch 2, sc) in next ch (directly below the center fan), sc in each of last 10 ch. (22 sc and a ch-2 point)
- Corner: Ch 1.
- Second long side: Work as for the first side, from Row 2 up to Row 18. (43 sc)
- Corner: Ch 1. Join with sl st to the first sc. Fasten off.
Round 1 total: 133 sc, 4 corner ch-1 sps, 1 ch-2 point.
Why the Math Works
The top side matches Row 19 stitch for stitch. Its 25 sts become 25 sc, so the top neither ruffles nor pulls.
The bottom is a trim count: 21 sc worked 1 per foundation ch + 1 extra sc at the center point = 22 sc. The small ch-2 point sits under the lowest center fan and echoes its tip.
Each long side covers 17 row ends:
- 5 Fan Row B ends x 3 sc = 15 sc
- 4 Fan Row A ends x 2 sc = 8 sc
- 4 Outline Row A ends x 3 sc = 12 sc
- 4 Outline Row B ends x 2 sc = 8 sc
- Total: 15 + 8 + 12 + 8 = 43 sc
The 43 sc span about 11 in (27.9 cm) between corners. At full gauge, 43 sc would cover 10.75 in (27.3 cm), so the edge is a touch firm. That is on purpose. The open lattice edge stretches easily, and a slightly firm border keeps the sides straight instead of wavy. Blocking evens out the last 0.25 in (0.6 cm).
The border adds 0.25 in (0.6 cm) on each side. The width becomes 5.5 in + 0.5 in = 6 in (15.2 cm), and the height becomes 11.5 in + 0.5 in = 12 in (30.5 cm).
Final Blocking
- Weave in any remaining ends through cream stitches of the same row so they stay hidden.
- Lay the panel RS up on a blocking mat.
- Pin the four corners to a 6 in x 12 in (15.2 cm x 30.5 cm) rectangle.
- Pin the top edge at the peak of each fan so the scallops stand out.
- Pin the bottom ch-2 point straight down at the center.
- Gently open each fan with your fingers so the 9 dc spread evenly.
- Spray with water until damp, not soaked.
- Let it dry completely, at least 8 hours, before unpinning.
Final Quality-Control Checklist
- 9 fan rows: 5 type B and 4 type A, alternating.
- Each full fan has 9 dc. Each half fan has 5 dc.
- Every fan row has 29 sts. Every cream outline row has 25 sts.
- Every new fan sits on a cream post, centered between two fans below.
- The top edge is scalloped, with the cream outline dipping into the valleys.
- Border Round 1: 25 + 43 + 22 + 43 = 133 sc.
- Finished size: 6 in x 12 in (15.2 cm x 30.5 cm), within 0.25 in (0.6 cm).
- No visible tails on the RS.
Troubleshooting
Fans cup or curl. Your dc are too tight to fit 9 in one stitch. Loosen your yarn-overs, or go up one hook size for the green rows only.
Fans are off-center on the posts. Recount the skips. From Row 4 onward, every skip between a fan and the next anchor is exactly 5 sts (4 sc plus a ch-1).
Cream posts look short. Check that you worked a tr, not a dc, in each valley in Rows 3 and 5 and their repeats.
Sides ripple. Check that you worked 43 sc per side. If they still ripple, work 2 sc instead of 3 around each Fan Row B end (38 sc per side).
Sides pull in. Add 1 sc to each Outline Row B end (47 sc per side).
Top edge is flat. Check that Row 19 has sc, not tr, in the valleys.
Care
Hand wash in cool water with mild soap, press out the water in a towel, and dry flat. Reblock if the fans lose their shape.
Final Notes
Here is how the measurements add up. Row 1 sets the width at 21 sc, or 5.25 in (13.3 cm), and the fan rows open the piece to 5.5 in (14.0 cm). Each green and cream pair adds 1.25 in (3.2 cm), so the foundation plus 9 pairs reaches 11.5 in (29.2 cm). One border round of 133 sc adds 0.25 in (0.6 cm) per side, for a finished panel of 6 in x 12 in (15.2 cm x 30.5 cm).
Check your gauge after Row 5 and count 29 sts on every fan row and 25 on every outline row. If those numbers hold, the fans will line up every time.
Happy crocheting!