

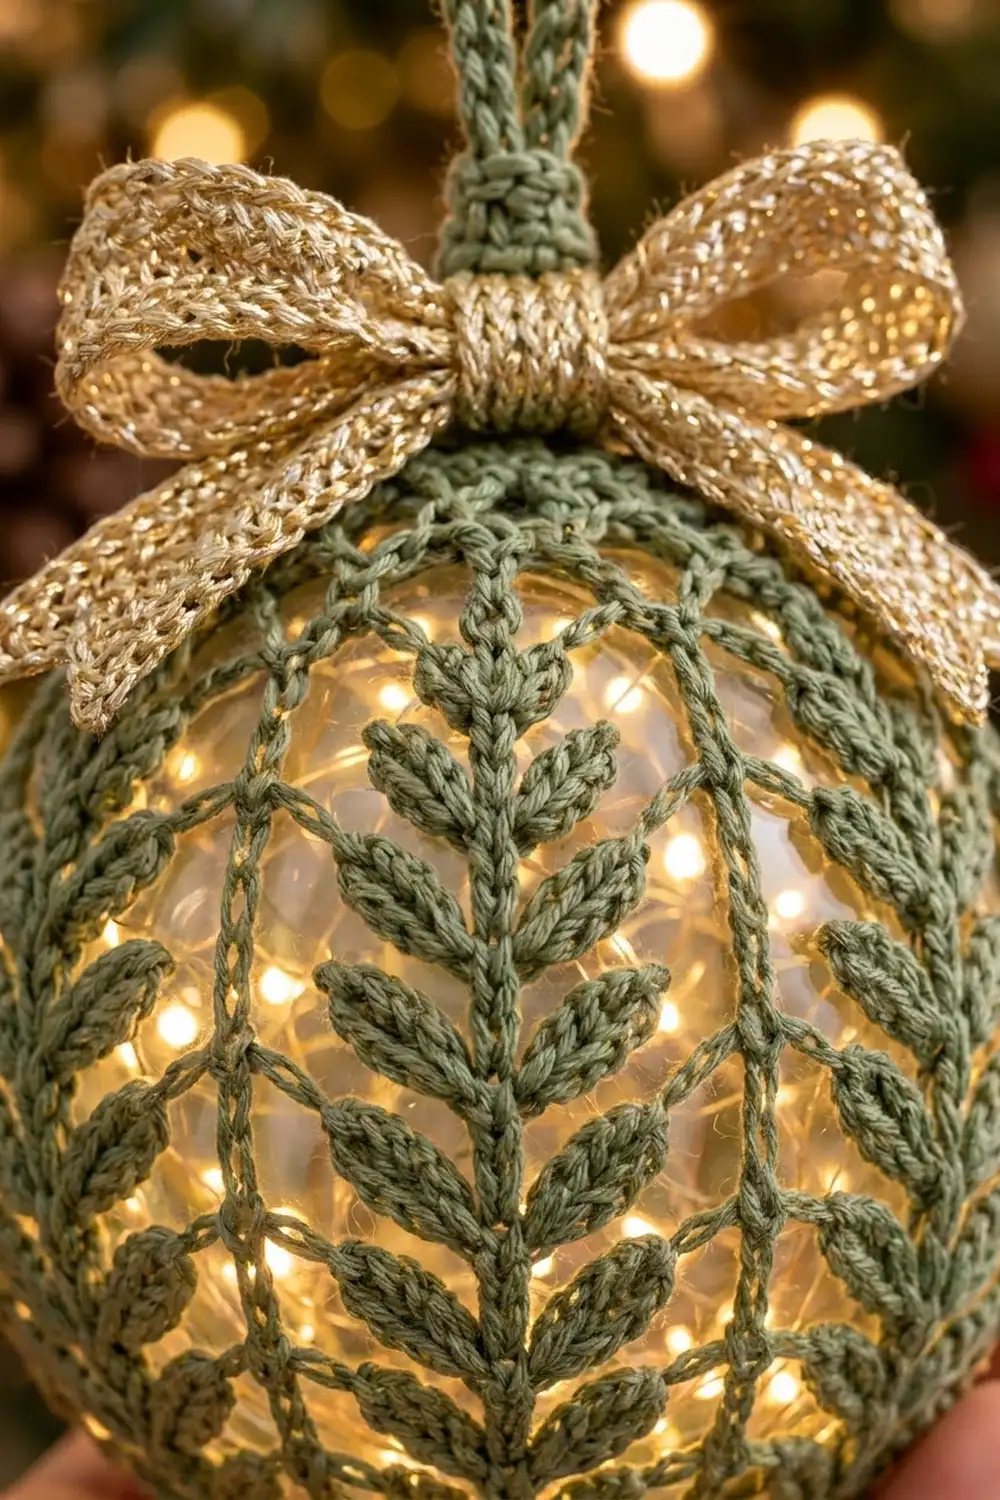
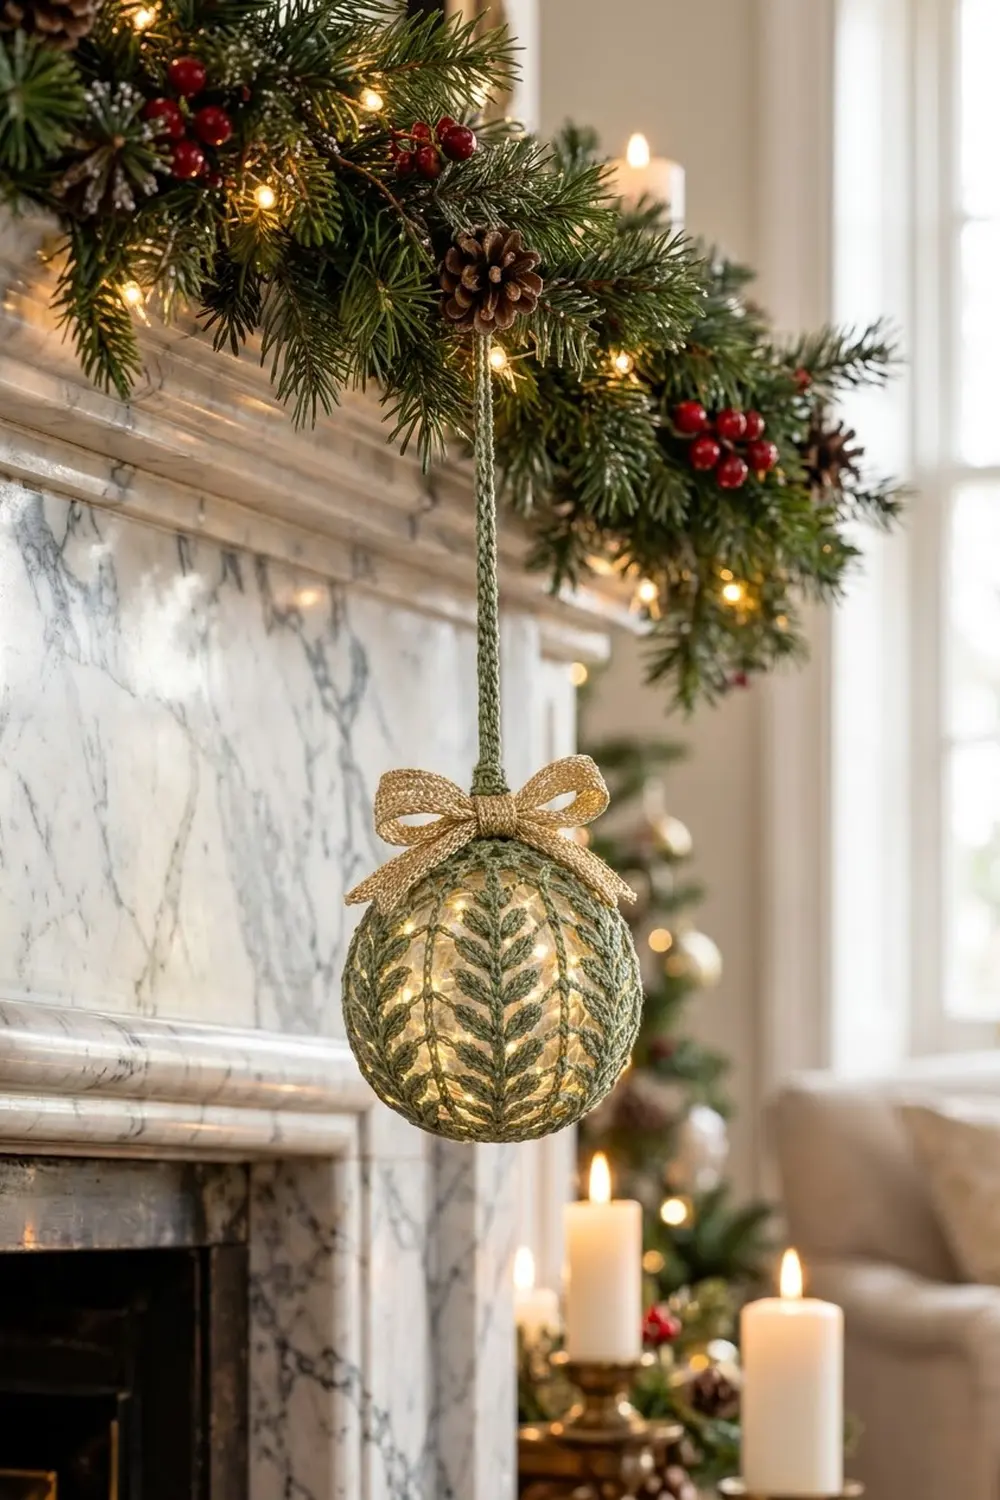
This cover turns a plain clear glass ball into a glowing ornament. Columns of sage-green leaves climb from the bottom of the ball to the cap, with slim rib lines between them. Put fairy lights inside and the open lace lights up from within. A gold metallic bow and a long green hanging loop finish it off.
The palette is soft: muted sage thread with warm gold trim. It looks good on a natural-style tree, along a mantel garland, or as a gift-wrap topper.
The pattern uses US crochet terms. The cover fits a 3 in (7.6 cm) glass ball with a circumference of about 9.4 in (23.9 cm). Before gathering, the finished tube measures 9 in (22.9 cm) around and 4.625 in (11.7 cm) tall.
You make the cover in one piece. You work a tube in joined rounds without turning, so every leaf faces the right side. Then you add an eyelet round at each edge, gather the bottom closed, and cinch the top around the cap. A slip-stitch hanging cord and a small gold bow complete the ornament.
Finished Size and Construction
- Fits: 3 in (7.6 cm) glass ball, about 9.4 in (23.9 cm) around
- Skill level: Intermediate
- Terminology: US crochet terms
- Yarn weight: Size 3 crochet thread or fingering-weight cotton (Super Fine, #1)
- Hook: 2.0 mm steel hook for the cover; 2.25 mm (B-1) for the bow
- Number of pieces: 1 cover, plus a separate bow and hanging cord
- Layout: 8 vertical leaf panels around a seamless tube
- Panel size: 1.125 in (2.9 cm) wide, 10 sts per panel
- Size before border: 9 in (22.9 cm) around × 4.25 in (10.8 cm) tall
- Border depth: top 0.125 in (0.3 cm); bottom 0.25 in (0.6 cm)
- Bow: about 3 in (7.6 cm) wide
- Hanging loop: 6 in (15.2 cm) long when folded
Materials
Choose a smooth, tightly twisted mercerized cotton. It gives crisp leaves and clean ribs. Fuzzy yarns blur the lace and hide the light.
- Sage green (MC): 10 g, about 40 m (44 yd), size 3 cotton thread or fingering cotton. This covers the cover, drawstrings, cord, and wrap.
- Gold metallic (CC): 4 g, about 16 m (17 yd), fingering-weight metallic yarn or thread
Both quantities include a margin of about 25% for swatching and drawstrings.
Tools:
– 2.0 mm steel crochet hook
– 2.25 mm (B-1) crochet hook
– 3 in (7.6 cm) clear glass or plastic ball ornament with a removable cap
– Mini battery fairy lights (optional)
– Tapestry needle with a small eye
– Stitch marker
– Scissors
– Measuring tape
– Spray bottle with water
Abbreviations (US Terms)
- ch – chain
- sl st – slip stitch
- sc – single crochet
- hdc – half double crochet
- dc – double crochet
- sp – space
- st(s) – stitch(es)
- rep – repeat
- Rnd – round
Special stitches
- 3dc-cl (3-double-crochet cluster): Yarn over, insert hook in the stitch, pull up a loop, yarn over, draw through 2 loops; rep from * twice more, all in the same st. Yarn over and draw through all 4 loops on the hook.
- LG (leaf group): (3dc-cl, ch 1, dc, ch 1, 3dc-cl) all in the same st. The center dc is the stem dc. One LG counts as 5 sts: 2 clusters, 2 ch, 1 dc.
The stem dc stacks round after round to form the center vein. The two clusters fan up and out to form each leaf pair.
Gauge and Checkpoints
Gauge matters here because the cover has to grip a fixed-size ball. Make the first few rounds, measure, and only then continue.
- Base gauge: 80 sc in a joined round = 9 in (22.9 cm) around
- Panel gauge: 1 panel (10 sts) = 1.125 in (2.9 cm) wide
- Round gauge: 1 leaf round = 0.375 in (1.0 cm) tall
Checkpoints:
– After Rnd 1: the tube measures 9 in (22.9 cm) around and is about 0.25 in (0.6 cm) tall.
– After Rnd 6: the tube is 2.125 in (5.4 cm) tall.
– After Rnd 11: the tube is 4 in (10.2 cm) tall.
– After Rnd 12: the tube is 4.25 in (10.8 cm) tall.
– After the border: the tube is 4.625 in (11.7 cm) tall.
If your tube is too big (over 9.25 in / 23.5 cm around), go down to a 1.75 mm hook. A loose cover sags and the leaves twist.
If your tube is too small (under 8.75 in / 22.2 cm around), go up to a 2.25 mm hook. Some negative ease is fine, but a tight cover pulls the ribs into zigzags.
Height is more forgiving. If your rounds are short, add one extra leaf round. If they are tall, leave one out. Do this before the top trim.
Cover Pattern
Use MC and the 2.0 mm hook. Work in joined rounds with the right side always facing you. Do not turn.
Foundation: Ch 80. Join with a sl st into the first ch to form a ring, taking care not to twist the chain.
Rnd 1: Ch 1. Sc in the same ch as the join and in each ch around. Join with a sl st to the first sc. (80 sc)
Check gauge now: 9 in (22.9 cm) around.
Rnd 2 (first leaf round): Ch 3 (counts as rib dc). Ch 2, skip next 4 sc, LG in next sc, ch 2, skip next 4 sc. Dc in next sc, ch 2, skip next 4 sc, LG in next sc, ch 2, skip next 4 sc; rep from * 6 more times. Join with a sl st to the top of the beginning ch-3. (8 rib dc, 8 LG, 16 ch-2 sps = 80 sts)
Count check: each panel is 1 rib dc + 2 ch + LG (5) + 2 ch = 10 sts. 10 × 8 panels = 80 sts. Each panel uses 1 + 4 + 1 + 4 = 10 sc from Rnd 1.
Rnd 3: Ch 3 (counts as rib dc). Ch 2, skip ch-2 sp, cluster and ch-1 sp, LG in stem dc, ch 2, skip ch-1 sp, cluster and ch-2 sp. Dc in rib dc, ch 2, skip to stem dc, LG in stem dc, ch 2, skip to next rib dc; rep from * 6 more times. Join with a sl st to the top of ch-3. (80 sts)
Rnds 4–11: Rep Rnd 3. (80 sts each round)
At the end of Rnd 11 you have 10 leaf rounds: Rnds 2 through 11. Each column has 10 leaf pairs climbing a straight stem, and the stacked rib dc form unbroken vertical lines between the columns.
Check: 4 in (10.2 cm) tall.
Rnd 12 (top trim, conversion round): Ch 1. Work each panel as follows: sc in rib dc, 2 sc in ch-2 sp, sc in cluster, sc in ch-1 sp, sc in stem dc, sc in ch-1 sp, sc in cluster, 2 sc in ch-2 sp. Rep for all 8 panels. Join to the first sc. (80 sc = 80 worked 1 per existing st or ch + 0 extra)
Check: 4.25 in (10.8 cm) tall and still 9 in (22.9 cm) around. Fasten off and weave in the ends.
Border
The border is just the two edge trims: an eyelet round at the top and two rounds at the bottom. Each holds a drawstring.
Border gauge: 10 border sts per panel = 1.125 in (2.9 cm). This is the same as the body, so the edges stay flat before gathering.
Top Eyelet Round
Join MC in the first sc of Rnd 12, directly above a rib dc.
Rnd T1: Ch 1. Sc in next sc, ch 1, skip next sc; rep from * around. Join to the first sc. (40 sc + 40 ch-1 sps = 80 sts; 5 sc + 5 ch per panel)
Fasten off.
Bottom Edge
Turn the tube upside down. Join MC in the base of the first foundation ch, directly below a rib dc.
Rnd B1: Ch 1. Sc in each foundation ch around (the base of each Rnd 1 sc). Join. (80 sc; 10 per panel)
Rnd B2: Ch 1. Sc in next sc, ch 1, skip next sc; rep from * around. Join. (40 sc + 40 ch-1 sps = 80 sts; 5 sc + 5 ch per panel)
Fasten off.
Why the math works: every round in this cover keeps exactly 80 sts, which is 8 panels × 10 sts. The leaf rounds, the conversion trim, and both eyelet rounds all hold that count. As a result, each eyelet always falls in the same place within its panel. When you gather, all 8 panels pull in evenly, so the leaf columns meet neatly at the poles instead of twisting.
Check: total height 4.625 in (11.7 cm). Half of the ball’s circumference, measured pole to pole, is about 4.7 in (11.9 cm). The slight shortfall is what keeps the cover snug once gathered.
Drawstrings
Cut two 12 in (30.5 cm) lengths of MC.
- Bottom: Weave one length in and out of the ch-1 sps of Rnd B2. Leave both tails on the outside.
- Top: Weave the second length through the ch-1 sps of Rnd T1 the same way.
Hanging Cord
Use MC and the 2.0 mm hook.
Ch 80, leaving a 6 in (15.2 cm) tail. Sl st in the back bump of the 2nd ch from the hook and of each ch across. (79 sl sts) Fasten off, leaving a second 6 in (15.2 cm) tail.
The cord measures about 12 in (30.5 cm). Fold it in half and you have a 6 in (15.2 cm) loop.
Gold Bow
Use CC and the 2.25 mm hook.
Bow gauge: 15 hdc = 2 in (5.1 cm).
Loop strip: Ch 47. Hdc in the 3rd ch from the hook and in each ch across. (45 hdc) Ch 2 and turn. Hdc in each hdc across. (45 hdc) Fasten off.
The strip measures 6 in × 0.5 in (15.2 cm × 1.3 cm).
Tail strip: Ch 32. Hdc in the 3rd ch from the hook and in each ch across. (30 hdc) Ch 2 and turn. Hdc across. (30 hdc) Fasten off.
The strip measures 4 in × 0.5 in (10.2 cm × 1.3 cm).
Center band: Ch 6. Sc in the 2nd ch from the hook and across. (5 sc) Work ch 1, turn, sc across (5 sc) for about 10 rows, until the band is 1.5 in (3.8 cm) long. Leave a 6 in (15.2 cm) tail.
The band is about 0.625 in (1.6 cm) wide.
Assemble the bow:
1. Fold both ends of the loop strip to the center, overlapping by 0.25 in (0.6 cm). Tack them in place. The two loops spread to about 3 in (7.6 cm) wide.
2. Fold the tail strip at its midpoint into an upside-down V and lay it under the loops.
3. Wrap the center band around both strips and sew the band ends together at the back.
Assembly
- If you are using lights, place them inside the ball and remove the cap.
- Slip the cover over the ball, with the bottom edge at the bottom of the ball.
- Pull the bottom drawstring tight to close the base completely. Knot it 3 times and weave the tails into the leaf stems.
- Line up the leaf columns so they run straight up and down.
- Replace the cap. Pull the top drawstring snug around the neck of the cap, knot it, and weave in the ends.
- Thread both tails of the hanging cord through the cap’s wire hanger. Knot them together just above the cap.
- Use a 10 in (25.4 cm) length of MC to wrap the cord 8–10 times just above the knot, covering 0.75 in (1.9 cm). Tie off and bury the ends inside the wrap.
- Sew or tie the bow over the cap, centered on the front, with the loops resting on the shoulder of the ball.
Final Blocking
- Before gathering the edges, mist the cover lightly. It should be damp, not wet.
- Ease the cover onto the ball and line up all 8 rib lines vertically.
- Use your fingertips to nudge each leaf cluster up and out so the pairs splay evenly from the stem.
- Gather and knot both drawstrings.
- Let the cover dry on the ball for at least 6 hours. Keep the lights off while it dries.
- Shape the bow loops with your fingers while they are slightly damp. Let them dry rounded.
Final Quality-Control Checklist
- Every round from Rnd 1 to Rnd 12 has 80 sts.
- All 8 panels have 10 leaf pairs.
- The rib lines are straight and unbroken from top to bottom.
- Every stem dc sits directly above the stem dc below it.
- Both eyelet rounds have 40 ch-1 sps.
- The base is fully closed with no gap at the bottom pole.
- The top is snug under the cap with no loose ripple.
- The bow is about 3 in (7.6 cm) wide, centered, and its tails hang evenly.
- The hanging loop is 6 in (15.2 cm), and the wrap is tidy.
- All ends are woven in along stems or ribs, not across the open windows.
Troubleshooting
The leaf columns spiral around the ball. Your LGs drifted off the stem dc. Make sure each LG goes into the stem dc itself, not into a ch-1 sp.
The cover is baggy at the equator. Your gauge is loose. Remake it with a smaller hook, or choose a slightly larger ball.
The poles bunch up and look lumpy. The tube is too tall. Remove one leaf round so the total height is 4.25 in (10.8 cm).
The base won’t close. The tube is too short. Add a second sc round before Rnd B2.
The clusters look flat and don’t read as leaves. Pull up each loop to full dc height before closing the cluster. This gives the leaves more puff.
The bow is floppy. Use a firmer metallic thread, or stiffen the bow lightly with diluted fabric glue.
Care
Spot clean only, with a damp cloth. Store the ornament in a padded box. Take out the fairy light batteries before storing it.
Final Notes
Everything in this pattern traces back to one measurement chain:
- 80 sc measure 9 in (22.9 cm) around.
- 8 panels of 10 sts each give 1.125 in (2.9 cm) per panel.
- 10 leaf rounds at 0.375 in (1.0 cm) each, plus the trims, bring the tube to 4.25 in (10.8 cm).
- The two border edges bring it to 4.625 in (11.7 cm), just under the 4.7 in (11.9 cm) half-circumference of a 3 in (7.6 cm) ball.
Get the first round right and the rest follows. Make one cover, hang it, then make a few more for a matching mantel trio.
Happy crocheting!