

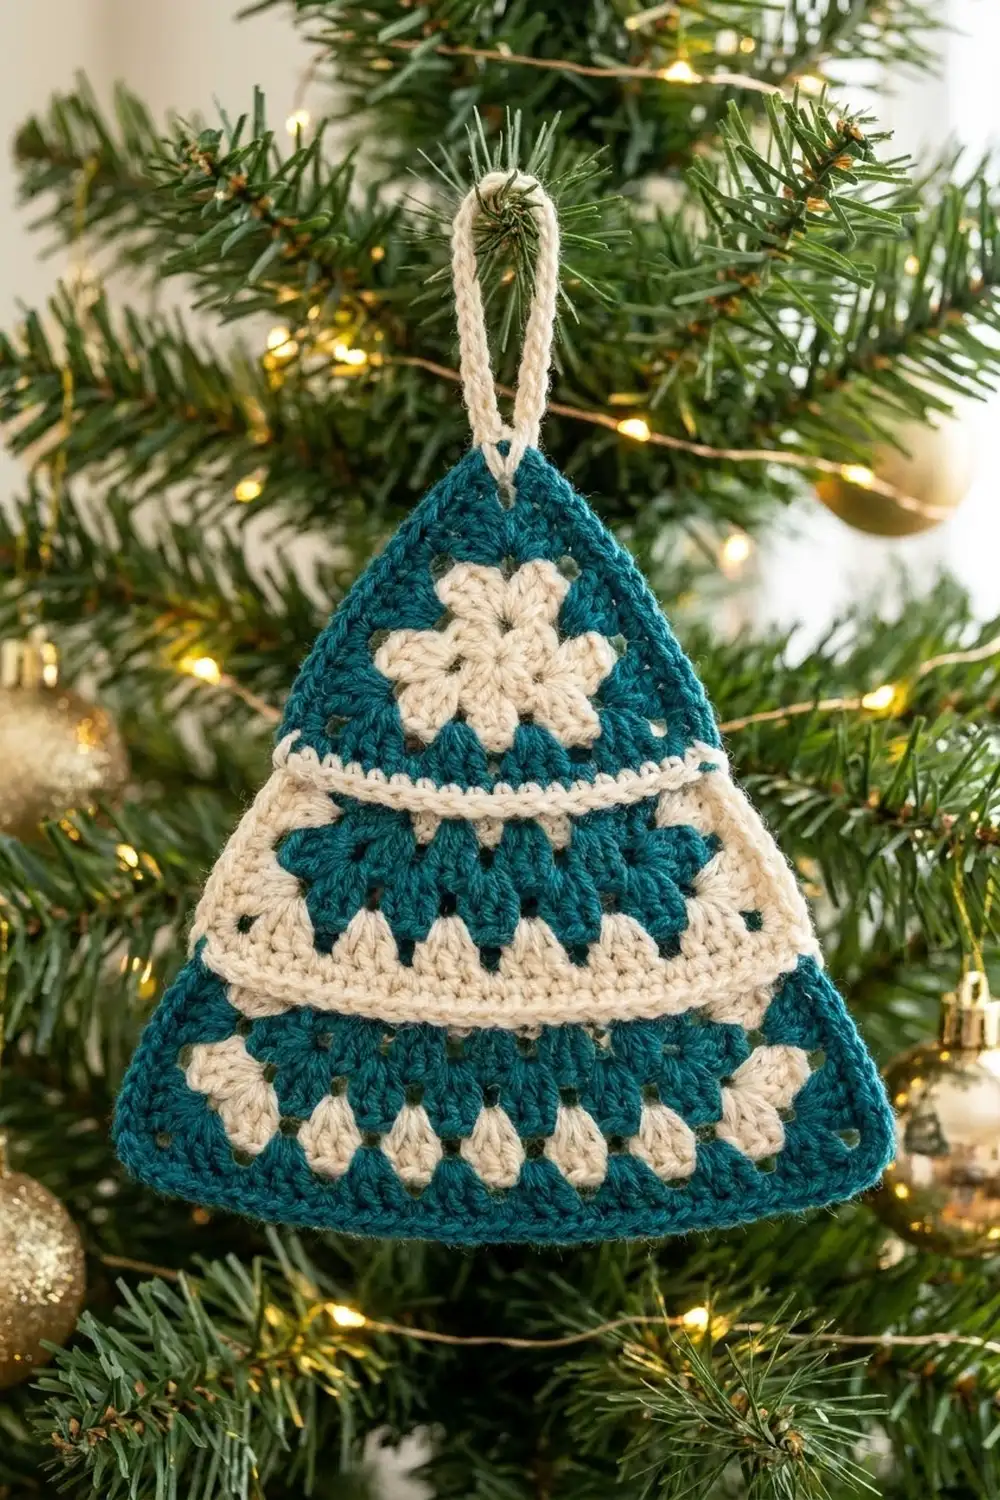
The Evergreen Tiers ornament is a small, graphic Christmas tree. It is made from three stacked granny triangles in deep teal and soft cream. Rounds of chunky 3-dc clusters give a bold, almost tile-like texture. Each tier overlaps the one below like the branches of a fir.
The palette is simple: teal for the “needles” and outlines, and cream for the cluster accents, the seam lines between tiers, and the hanging loop. The ornament looks modern but still feels like a classic handmade holiday piece.
This pattern uses US crochet terms. The finished ornament is about 4 in (10.2 cm) wide and 5 in (12.7 cm) tall, plus a 1.5 in (3.8 cm) loop. That makes it about 6.5 in (16.5 cm) from base to the top of the loop.
To make it, you work three granny triangles in rounds, each one a size larger than the last. Each tier gets a teal single crochet border. You then stack the tiers and join them with a cream single crochet line worked through both layers. Last, you add the loop at the top point.
Finished Size and Construction
- Finished size: 4 in (10.2 cm) wide × 5 in (12.7 cm) tall, excluding loop
- Skill level: Easy / advanced beginner
- Terminology: US crochet terms
- Yarn weight: DK (light #3), cotton or cotton blend
- Hook: 3.5 mm (E-4)
- Number of pieces: 3 tiers (top, middle, bottom), joined into one ornament
- Layout: Vertical stack; each upper tier overlaps the tier below
- Piece sizes (side length, after border): top 2.5 in (6.4 cm), middle 3.25 in (8.3 cm), bottom 4 in (10.2 cm)
- Size before border: top 2.25 in (5.7 cm), middle 3 in (7.6 cm), bottom 3.75 in (9.5 cm)
- Border depth: about 0.2 in (0.5 cm), one round of sc
Materials
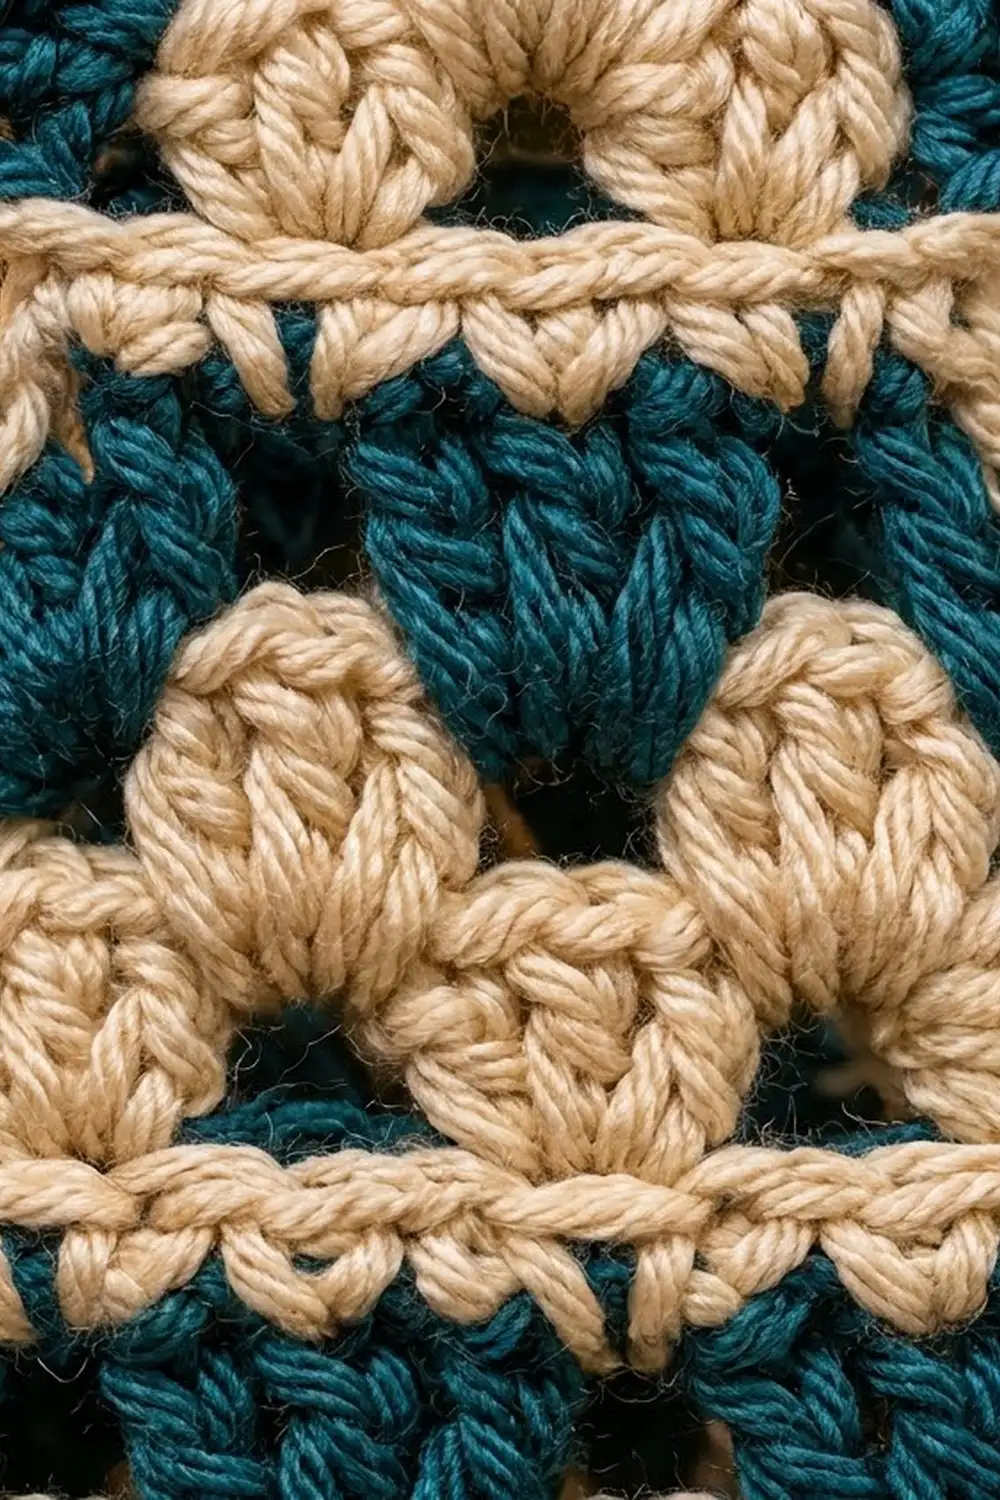
Use a smooth, mercerized cotton or cotton blend in DK weight. Cotton shows each cluster clearly and holds a crisp triangle shape after blocking. Avoid fuzzy or very stretchy yarns, because they blur the cluster definition and make the tiers curl.
- Color A – Deep Teal: 8 g / 20 m
- Color B – Cream: 5 g / 13 m
These quantities include a safety margin for gauge swatching and weaving in ends. One standard 50 g ball of each color is enough for several ornaments.
Tools:
– 3.5 mm (E-4) crochet hook
– Tapestry needle
– Scissors
– Stitch markers (2–3)
– Rigid ruler or tape measure
– Blocking mat and rust-proof pins
– Spray bottle with water
Abbreviations (US Terms)
- ch – chain
- sl st – slip stitch
- sc – single crochet
- dc – double crochet
- sp – space
- st(s) – stitch(es)
- rnd – round
- MR – magic ring
Special stitch – Cluster group (CG): 3 dc worked into the same space. In corners, work (CG, ch 2, CG) into one ch-2 space.
Beginning cluster: ch 3 (counts as the first dc), 2 dc in the same space.
Gauge and Checkpoints
Gauge matters less here than for a garment. Still, it controls whether the three tiers nest correctly, so make the top tier first and measure it before going on.
- Rnd 1 gauge: 1.5 in (3.8 cm) per side
- Each added cluster round: adds 0.75 in (1.9 cm) to the side length
- Border gauge: 4 sc = 1 in (2.5 cm)
Checkpoints:
– Top tier, after Rnd 2: 2.25 in (5.7 cm) per side
– Middle tier, after Rnd 3: 3 in (7.6 cm) per side
– Bottom tier, after Rnd 4: 3.75 in (9.5 cm) per side
– Each tier after border: 0.25 in (0.6 cm) longer per side than before the border
If your piece is too big: go down to a 3.25 mm (D-3) hook, or work the chain-2 corners a little more tightly.
If your piece is too small: go up to a 3.75 mm (F-5) hook.
Measure from the corner tip to the next corner tip along a straight edge, with the piece lying flat and unstretched.
Top Tier
Rnd 1 (Color B): Make an MR. Beginning cluster in ring, ch 2, [CG in ring, ch 2] 2 times. Pull the ring closed and sl st to the top of the beginning ch-3. Fasten off. (9 dc, 3 ch-2 corner sps)
This round makes the cream trefoil at the center of the top tier.
Rnd 2 (Color A): Join A in any ch-2 corner sp. (Beginning cluster, ch 2, CG) in the same sp, [(CG, ch 2, CG) in next corner sp] 2 times. Sl st to the top of the beginning ch-3. Do not fasten off. (18 dc in 6 CGs, 3 ch-2 corner sps)
Checkpoint: 2.25 in (5.7 cm) per side. Continue to the Border section for the top tier.
Middle Tier
Rnd 1 (Color A): Work as Top Tier Rnd 1, but in Color A. Fasten off. (9 dc, 3 ch-2 corner sps)
Rnd 2 (Color B): Join B in any corner sp. Work as Top Tier Rnd 2. Fasten off. (18 dc in 6 CGs)
Rnd 3 (Color A): Join A in any corner sp. (Beginning cluster, ch 2, CG) in the same corner sp, CG in the next sp between groups, (CG, ch 2, CG) in the next corner sp; repeat from * once more, CG in the last sp between groups. Sl st to the top of the beginning ch-3. Do not fasten off. (27 dc in 9 CGs: 6 corner CGs + 3 side CGs)*
Checkpoint: 3 in (7.6 cm) per side.
Bottom Tier
Rnds 1–3: Work as Middle Tier Rnds 1–3, but fasten off A at the end of Rnd 3. (27 dc in 9 CGs)
Rnd 4 (Color B): Join B in any corner sp. (Beginning cluster, ch 2, CG) in the same corner sp, [CG in the next sp between groups] 2 times, (CG, ch 2, CG) in the next corner sp; repeat from * once more, [CG in the next sp between groups] 2 times. Sl st to the top of the beginning ch-3. Fasten off. (36 dc in 12 CGs: 6 corner CGs + 6 side CGs)*
Checkpoint: 3.75 in (9.5 cm) per side.
Make All Pieces
You need one of each tier. All three get the teal border described below.
| Tier | Rnds of clusters | Color A rounds | Color B rounds |
|---|---|---|---|
| Top | 2 | Rnd 2 + border | Rnd 1 |
| Middle | 3 | Rnds 1, 3 + border | Rnd 2 |
| Bottom | 4 | Rnds 1, 3 + border | Rnds 2, 4 |
Layout (stacked, viewed from the front):
          [ loop ]
            /\
           /  \        TOP tier (2.5 in / 6.4 cm sides)
          /____\  <-- cream join line (10 sc)
         /      \
        /        \     MIDDLE tier (3.25 in / 8.3 cm sides)
       /__________\  <-- cream join line (13 sc)
      /            \
     /              \  BOTTOM tier (4 in / 10.2 cm sides)
    /________________\
Joining
Lay the bottom tier flat, right side up, with one straight edge as the base.
Positioning: Put the middle tier on top so its base sits 1.5 in (3.8 cm) above the bottom tier’s base, centered. The middle tier covers the bottom tier’s top point. At that height the bottom tier is only about 2.25 in (5.7 cm) wide, so the middle tier’s 3.25 in (8.3 cm) base sticks out about 0.5 in (1.3 cm) on each side. That overhang creates the step.
Place the top tier so its base sits 1.25 in (3.2 cm) above the middle tier’s base, centered. It sticks out about 0.35 in (0.9 cm) on each side. Pin all layers.
Join 1 – middle to bottom (Color B): Join B in the bottom-left corner sc of the middle tier. Ch 1. Work 1 sc in each of the middle tier’s 13 base sts, from corner sc to corner sc. Insert the hook through the middle tier’s sc and through the bottom tier fabric directly underneath wherever the layers overlap. At each overhanging end, work through the middle tier only. Fasten off. (13 sc)
Join 2 – top to middle (Color B): Work the same way across the top tier’s 10 base sts, catching the middle tier underneath. Fasten off. (10 sc)
The 1-sc-per-st logic keeps each cream line exactly as long as the tier base it sits on. That way the joins never pucker or flare.
Tension: Keep the join stitches at the same tension as the border. If you pull them tight, the base curls upward. If you work them too loosely, the cream line looks wavy.
Size checkpoint: The joined ornament should measure 4 in (10.2 cm) wide at the base and about 5 in (12.7 cm) tall.
Hanging loop (Color B): Join B in the top corner sc of the top tier. Ch 16, then sl st in the same corner st. Work 22 sc into the ch-16 loop and sl st to the first sc. Fasten off. The loop measures about 1.5 in (3.8 cm) tall.
Border
Work this border on each tier before joining. Use Color A, which is still attached from the last round (or join it in a corner sp on the bottom tier).
Border gauge: 4 sc = 1 in (2.5 cm).
To begin, sl st in each of the next 2 dc and into the corner ch-2 sp.
Border Rnd: Ch 1. 3 sc in the corner sp, *sc in each dc to the next corner sp, 3 sc in the corner sp; repeat from * once more, sc in each dc to the end. Sl st to the first sc. Fasten off and weave in the ends.
The middle sc of each 3-sc corner is the corner stitch. Mark it.
Per-tier counts:
– Top tier: 18 dc + 9 corner sc = 27 sc. Each side has 8 non-corner sts (1 corner-sp sc + 6 dc + 1 corner-sp sc) plus 2 corner sts = 10 sts per side. Check: 3 × 10 − 3 shared corners = 27.
– Middle tier: 27 dc + 9 = 36 sc. Each side: 1 + 9 + 1 = 11 non-corner sts + 2 corners = 13 sts per side. Check: 3 × 13 − 3 = 36.
– Bottom tier: 36 dc + 9 = 45 sc. Each side: 1 + 12 + 1 = 14 non-corner sts + 2 corners = 16 sts per side. Check: 3 × 16 − 3 = 45.
Why the math works: At 4 sc per inch, 10 sts = 2.5 in (6.4 cm), 13 sts = 3.25 in (8.3 cm), and 16 sts = 4 in (10.2 cm). These match the planned side lengths after the border. Each cluster round adds 3 CGs (9 dc), which is 3 dc per side. That is 0.75 in (1.9 cm) of side length at 4 sts per inch. The 3-sc corners add just enough length to turn the point sharply without cupping.
Final Blocking
- Weave in any remaining ends along same-color stitches on the wrong side.
- Pin the joined ornament face up on the blocking mat.
- Pin each of the 7 visible points: the top point, plus the two outer corners of each tier.
- Use a ruler to check that the base is 4 in (10.2 cm) and the total height is 5 in (12.7 cm).
- Straighten each cream join line so it runs horizontally.
- Spritz the ornament evenly until it is damp, not soaked.
- Let it dry fully, about 4–6 hours.
- Unpin it, then pin the loop straight up and spritz it lightly so it dries upright.
Final Quality-Control Checklist
- [ ] Top tier: 27 border sc, 10 per side
- [ ] Middle tier: 36 border sc, 13 per side
- [ ] Bottom tier: 45 border sc, 16 per side
- [ ] Cream trefoil sits centered in the top tier
- [ ] Join lines: 13 sc (middle) and 10 sc (top), horizontal and even
- [ ] Each upper tier sticks out evenly on both sides
- [ ] Base 4 in (10.2 cm), height 5 in (12.7 cm)
- [ ] Loop 1.5 in (3.8 cm), firmly attached at the top point
- [ ] No ends showing on the front
Troubleshooting
Tier curls into a cone: The corners are too tight. Loosen the ch-2 corners, or work (CG, ch 3, CG) and keep the border at 3 sc per corner.
Tier ruffles: Your dc are taller than gauge. Go down a hook size.
Border sides bow outward: You may have worked extra sc. Recount against 10 / 13 / 16 sts per side.
Clusters lean or twist: You may be joining each round in a different place. Always join new colors in a corner sp.
Upper tier doesn’t stick out: Check that its base sits at the stated height. If it is too low, the tier below is wider at that point.
Cream join line looks thin: Work the join sc through the back loop of the base sts for a more raised ridge.
Loop flops sideways: Make sure you attached it in the exact corner st, and sc densely around it.
Care
Hand wash in cool water with mild soap, press out the water in a towel, and dry flat. Reshape the points and pin them while damp if needed.
Final Notes
The whole ornament depends on one measurement chain. Rnd 1 is 1.5 in (3.8 cm) per side, and each cluster round adds 0.75 in (1.9 cm), giving 2.25 in (5.7 cm), 3 in (7.6 cm), and 3.75 in (9.5 cm). The teal border then brings the tiers to 2.5 in (6.4 cm), 3.25 in (8.3 cm), and 4 in (10.2 cm), at 10, 13, and 16 sts per side. Stacked at 1.5 in (3.8 cm) and 1.25 in (3.2 cm) offsets, the tiers make a 4 in × 5 in (10.2 cm × 12.7 cm) tree.
If your first top tier is on gauge, everything else will fit together. Make one, hang it, and you’ll probably want a whole branch of them.
Happy crocheting!