

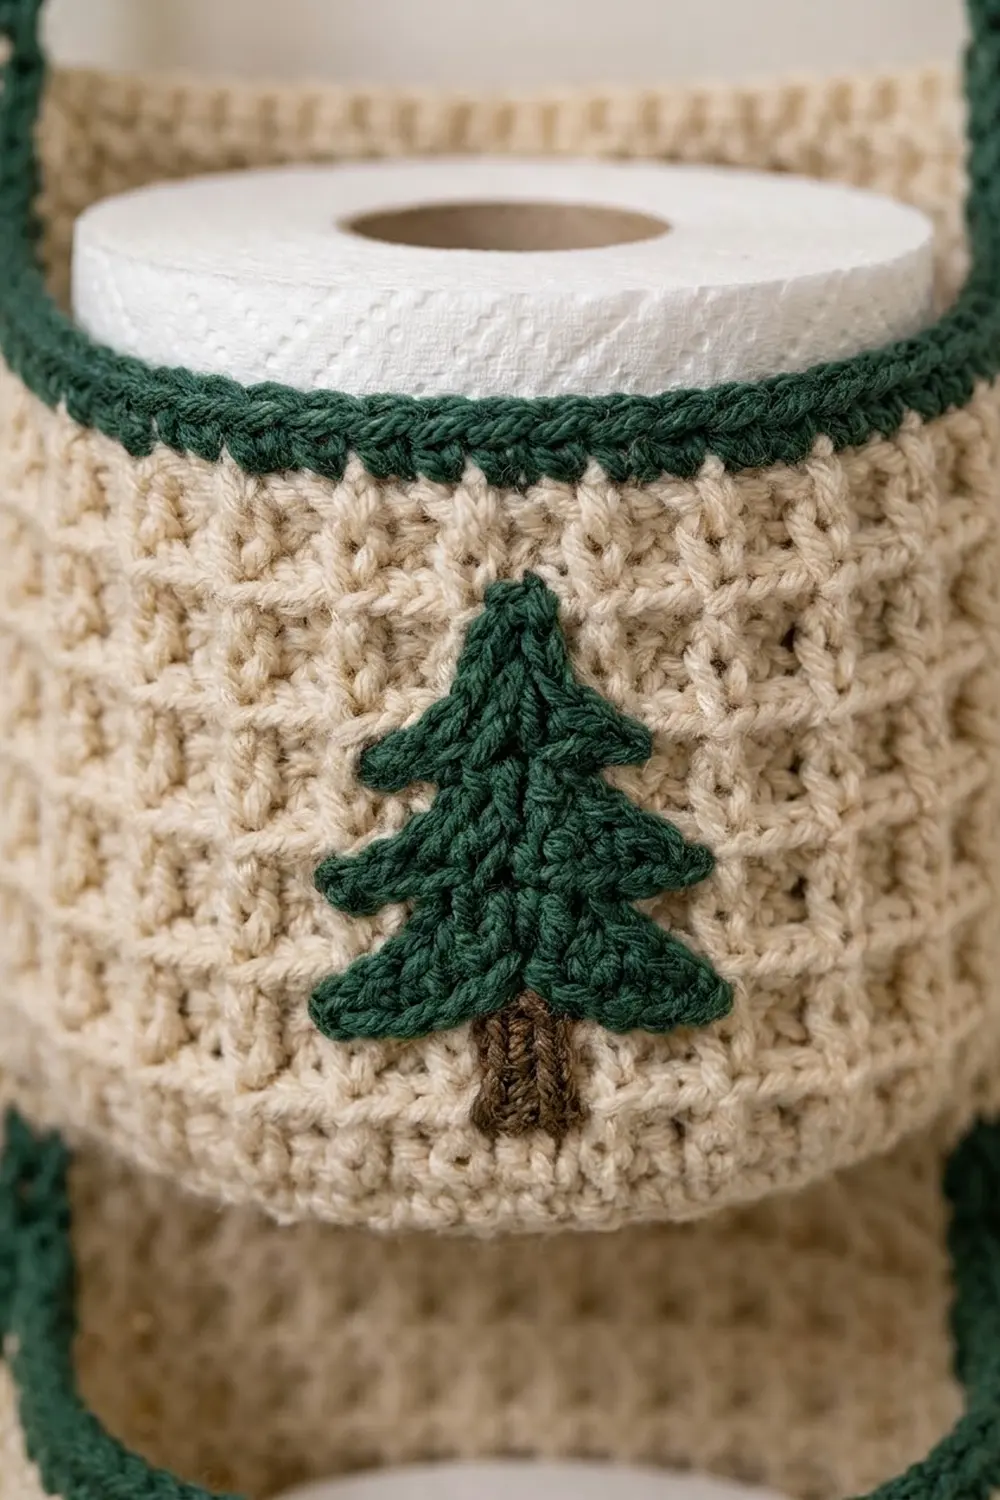
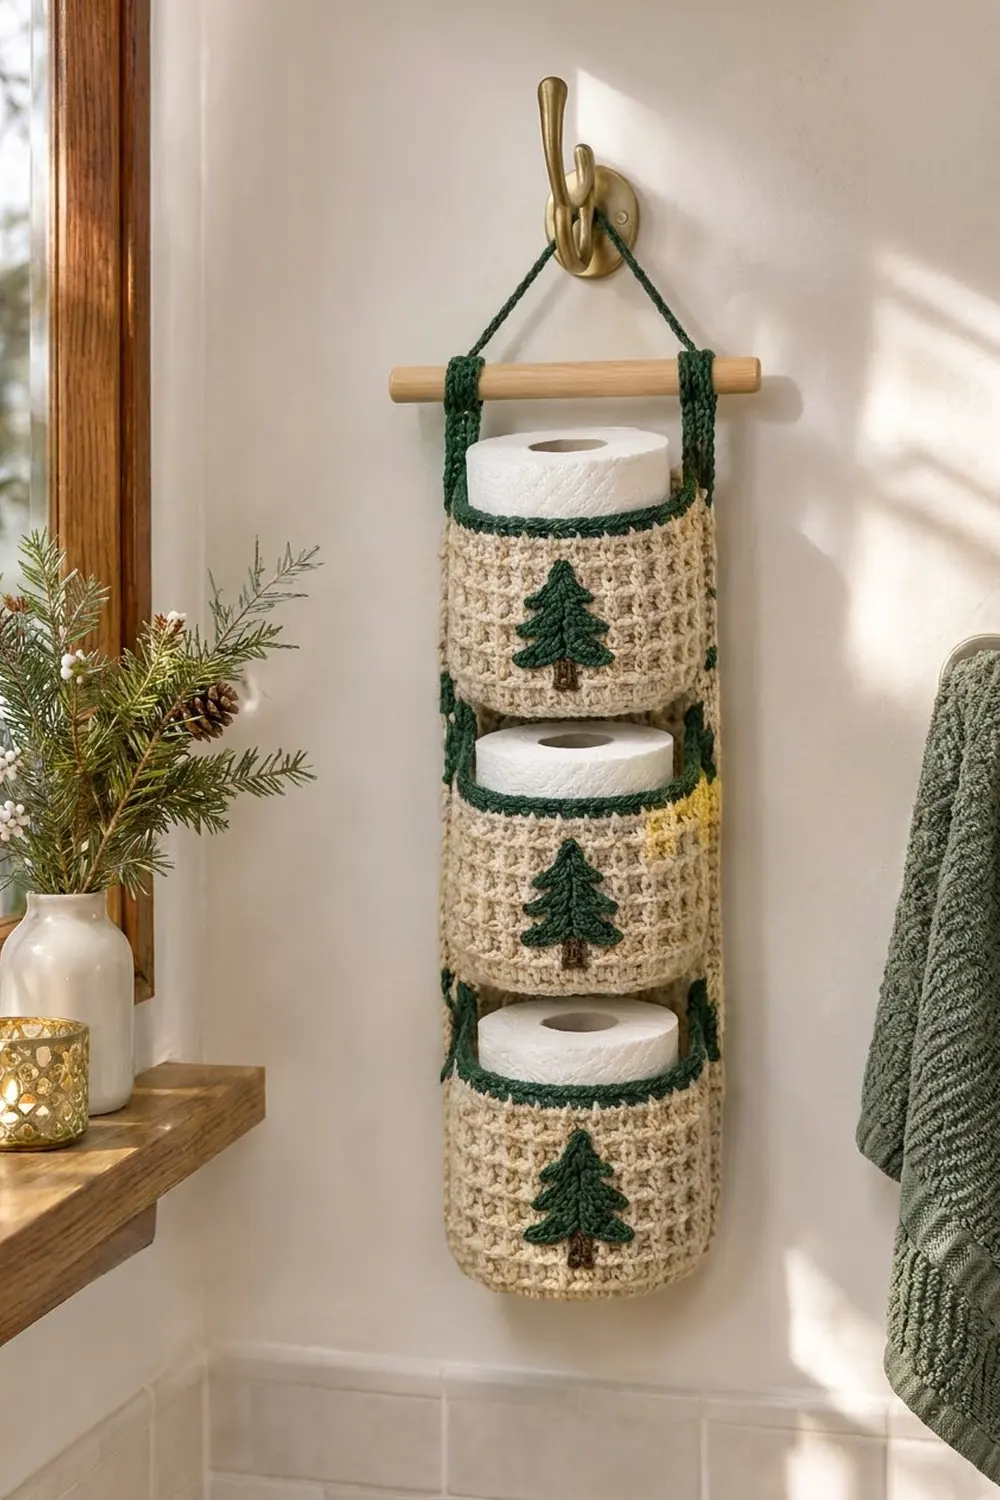
This hanging toilet paper holder gives a bathroom a cozy cabin feel. It has a cream waffle-stitch back panel, three deep pockets that each hold one standard roll, and a small forest-green spruce tree on the front of every pocket.
The palette is simple. Cream or oatmeal is the main color. Forest green is used for the rims, edging, tabs, and trees, and a little brown makes the trunks. The waffle stitch gives a sturdy grid texture that keeps its shape when the pockets are full.
The pattern uses US crochet terms. The finished holder measures 6 in (15.2 cm) wide by 23 in (58.4 cm) tall, and each pocket is 4 in (10.2 cm) tall.
You’ll make one flat back panel, three oval-bottomed pockets worked in the round, and three tree appliqués. Then you sew the trees to the pockets and the pockets to the panel. Last, you add a green border, the dowel tabs, and a hanging cord.
Finished Size and Construction
- Finished size: 6 in (15.2 cm) wide x 23 in (58.4 cm) tall, plus tabs and cord
- Skill level: Intermediate
- Terminology: US crochet terms
- Yarn weight: Worsted (#4), cotton or cotton blend
- Hook: 5 mm (H-8)
- Number of pieces: 7 main pieces (1 back panel, 3 pockets, 3 trees), plus 1 cord
- Layout: 3 pockets stacked in one vertical column
- Piece size: panel 5 in x 22 in (12.7 x 55.9 cm); each pocket 5 in (12.7 cm) wide x 4 in (10.2 cm) tall
- Size before border: 5 in x 22 in (12.7 x 55.9 cm)
- Border depth: 0.5 in (1.3 cm) on every side
Materials
Use a smooth worsted cotton or cotton blend. Cotton keeps the waffle texture crisp and holds up well in a humid bathroom. The amounts below assume about 170 m per 100 g.
- Cream (main color): 320 g (544 m)
- Forest green (rims, border, tabs, trees, cord): 80 g (136 m)
- Brown (trunks): 5 g (about 9 m)
These amounts include a margin of about 15 percent.
Tools:
- 5 mm (H-8) crochet hook
- Tapestry needle
- 6 stitch markers
- Wooden dowel, 8 in (20.3 cm) long and 0.75 in (1.9 cm) thick
- Measuring tape, scissors, rust-proof pins
- Spray bottle
Abbreviations (US Terms)
- ch – chain
- sl st – slip stitch
- sc – single crochet
- dc – double crochet
- sc2tog / sc3tog – single crochet 2 / 3 together
- BLO – back loop only
- FPdc – front post double crochet
- BPdc – back post double crochet
- st(s) – stitch(es)
- RS / WS – right side / wrong side
Special stitch – waffle stitch: This is a 3-stitch repeat. The first stitch of each repeat is raised to the front on every row or round, which builds vertical ridges. The other two stitches switch between plain dc and recessed BPdc from one row to the next, which builds horizontal ridges and forms the grid.
Gauge and Checkpoints
- Waffle stitch: 16 sts and 8 rows/rounds = 4 in (10.2 cm)
- Single crochet: 16 sts and 16 rows = 4 in (10.2 cm)
Make one full pocket first and use it as your gauge piece. Check it at these points:
- Base after Round 9: about 5 in x 4.5 in (12.7 x 11.4 cm), lying flat, and about 14.5 in (36.8 cm) around the edge.
- Wall after Round 7: 15 in (38.1 cm) around and 3.5 in (8.9 cm) tall.
- Finished pocket: 4 in (10.2 cm) tall, with the 20-st back section lying flat at 5 in (12.7 cm).
If the pocket is too big, go down 0.5 mm in hook size. If it’s too small, go up 0.5 mm. Get gauge right here, because the panel has to match the pocket’s back section stitch for stitch.
Back Panel
Use cream and work in rows. The turning ch-2 does not count as a stitch.
Ch 22.
Row 1 (RS): Dc in 3rd ch from hook and in each ch across. Turn. (20 dc)
Row 2 (WS): Ch 2, dc in first st, *BPdc around next st, dc in next 2 sts; rep from * 5 more times, dc in last st. Turn. (20 sts: 2 edge dc + 6 repeats of 3)
Row 3 (RS): Ch 2, dc in first st, *FPdc around next BPdc, BPdc around next 2 sts; rep from * 5 more times, dc in last st. Turn. (20 sts)
On the RS, the Row 2 BPdc and the Row 3 FPdc both stand forward to form the vertical ridges. The BPdc pairs in Row 3 sink back to form the horizontal ridges.
Rows 4–44: Repeat Rows 2 and 3, ending with a Row 2. (20 sts in every row)
Fasten off. Checkpoint: 5 in x 22 in (12.7 x 55.9 cm).
Pocket (Make 3)
Oval Base
Use cream and work in joined rounds with the RS facing. The ch-1 does not count as a stitch.
Ch 5.
Round 1: 3 sc in 2nd ch from hook, sc in next 2 ch, 3 sc in last ch. Rotate and work along the other side of the chain: sc in next 2 ch. Join with sl st to first sc. (10 sc: two 3-st ends, two 2-st sides)
Round 2: Ch 1, 2 sc in each of next 3 sts, sc in next 2, 2 sc in each of next 3 sts, sc in next 2. Join. (16 sc)
Round 3: Ch 1, (sc in next st, 2 sc in next st) 3 times, sc in next 2, (sc in next st, 2 sc in next st) 3 times, sc in next 2. Join. (22 sc)
Round 4: Ch 1, (sc in next 2, 2 sc in next) 3 times, sc in next 2, (sc in next 2, 2 sc in next) 3 times, sc in next 2. Join. (28 sc)
Rounds 5–9: Keep going the same way. Each round, add one more plain sc before each increase. Each end gets 3 increases, and the 2-st sides stay plain.
- Round 5: (sc 3, 2 sc in next) 3 times at each end – 34 sc
- Round 6: (sc 4, 2 sc in next) – 40 sc
- Round 7: (sc 5, 2 sc in next) – 46 sc
- Round 8: (sc 6, 2 sc in next) – 52 sc
- Round 9: (sc 7, 2 sc in next) – 58 sc
Checkpoint: 58 sc, about 5 in x 4.5 in (12.7 x 11.4 cm).
Wall
Round 1 (conversion): Ch 2 (does not count). Working in BLO, dc in each st around, with 2 dc in the 15th st and in the 44th st. Join to first dc. (58 sts worked once + 2 extra = 60 dc)
Working in the BLO makes a crisp fold where the wall turns up from the base.
Round 2 (Waffle A): Ch 2, *FPdc around next st, dc in next 2 sts; rep from * 19 more times. Join. (60 sts, 20 repeats)
Round 3 (Waffle B): Ch 2, *FPdc around next FPdc, BPdc around next 2 sts; rep from * 19 more times. Join. (60 sts)
Rounds 4–7: Repeat Rounds 2 and 3 twice more. (60 sts each)
Fasten off cream. Checkpoint: 15 in (38.1 cm) around and 3.5 in (8.9 cm) tall.
Green Rim
Round 8: Join green in any st, ch 1, sc in each st around. Join. (60 sc)
Round 9: Ch 1, sc in each st around. Join. (60 sc)
Round 10: Sl st loosely in each st around. (60 sl st)
The slip stitches make the chain-look top edge. Fasten off. Checkpoint: 4 in (10.2 cm) tall.
Mark the back: The round joins line up next to one of the base’s 2-st straight sides. Place a marker 10 sts to each side of the join. Those 20 sts are the back section, and they’ll lie against the panel so the joins are hidden. The other 40 sts are the front.
Tree Appliqué (Make 3)
Use green and work in rows. The ch-1 does not count as a stitch.
Ch 10.
- Row 1: Sc in 2nd ch from hook and in each ch across. Turn. (9 sc)
- Row 2: Ch 1, sc2tog, sc in next 5, sc2tog. Turn. (7)
- Row 3: Ch 1, sc2tog, sc in next 3, sc2tog. Turn. (5)
- Row 4: Ch 1, 2 sc in first st, sc in next 3, 2 sc in last st. Turn. (7)
- Row 5: Ch 1, sc2tog, sc in next 3, sc2tog. Turn. (5)
- Row 6: Ch 1, sc2tog, sc in next st, sc2tog. Turn. (3)
- Row 7: Ch 1, 2 sc in first st, sc in next st, 2 sc in last st. Turn. (5)
- Row 8: Ch 1, sc2tog, sc in next st, sc2tog. Turn. (3)
- Row 9: Ch 1, sc3tog. (1)
Fasten off. The increases in Rows 4 and 7 make the tree step out, which creates the three tiers.
Trunk: Turn the tree upside down. Join brown in the 4th loop of the foundation chain, ch 1, sc in the same loop and in the next 2 loops. Turn. (3 sc) Ch 1, sc in each st. (3 sc) Fasten off.
Checkpoint: 2.25 in (5.7 cm) wide and 2.75 in (7.0 cm) tall, including the trunk. If you like, backstitch a green center line down the tree.
Attach: Center one tree on each pocket front, with the trunk 0.25 in (0.6 cm) above the BLO fold. Whipstitch it in place with green.
Make All Pieces
- Cream: 1 back panel, 3 pocket bodies (base + wall Rounds 1–7)
- Green: 3 pocket rims, 3 trees, panel border, 2 tabs, 1 cord
- Brown: 3 trunks
Layout (panel rows counted from the bottom):
+----------------------+
|  TAB          TAB    |  dowel
|  free (rows 37-44)   |
| [POCKET 1 rows 29-36]|
|  gap  (rows 23-28)   |
| [POCKET 2 rows 15-22]|
|  gap  (rows  9-14)   |
| [POCKET 3 rows  1-8] |
+----------------------+
Each pocket covers 8 panel rows, or 4 in (10.2 cm). Each gap is 6 rows, or 3 in (7.6 cm), which leaves room to slide a roll in. The top 4 in (10.2 cm) stays free.
Joining
Lay the panel RS up. Sew with cream and a firm whipstitch.
- Base seam: Line up the 20 back-section sts of wall Round 1 with the 20 sts of the panel where that pocket starts:
- bottom pocket: the foundation edge
- middle pocket: the top of Row 14
- top pocket: the top of Row 28
Sew 1 pocket st to 1 panel st, 20 sts in all.
2. Side seams: Sew each edge of the back section up panel stitch column 1 and column 20. Sew through the front of those columns only, so the row-end posts stay free for the border. Each dc wall round matches 1 panel row (7 rounds to 7 rows), and the two green sc rounds together match the 8th row.
3. Rim tack: Tack the back of each green rim to the panel at center back.
Keep the stitches snug but not puckered, and keep the panel flat with no ripples between seams. Checkpoint: the panel still measures 5 in x 22 in (12.7 x 55.9 cm).
Border
Use green with the RS facing. Border gauge: 4 sc per in (2.5 cm) along every edge.
Round 1: Join in the top right corner st, ch 1.
- Top: 3 sc in first st, sc in next 18, 3 sc in last st.
- Long side: 2 sc in each of the 44 row ends. (88 sc)
- Bottom: Working into the foundation loops, 3 sc in first st, sc in next 18, 3 sc in last st.
- Second long side: 2 sc in each of the 44 row ends. (88 sc)
Join. Each short side has 18 sc between corners and each long side has 88, plus 4 corners x 3 sc = 224 sc.
Round 2: Ch 1, sc in each st, working 3 sc in the center st of each corner. Join. Each short side now has 20 sc between corners and each long side has 90, plus 4 corners x 3 sc = 232 sc.
Why the math works: Each dc row is 0.5 in (1.3 cm) tall. Two sc per row end gives exactly 4 sc per in, so 88 sc cover 22 in (55.9 cm). On each short side, the 18 sts plus the 2 corner-center sts cover the panel’s 20 sts, or 5 in (12.7 cm). Each corner center sits on an end stitch of the panel, so no stitch is counted twice. Round 2 adds 2 sts per corner (8 total) so the corners lie flat. Two sc rounds add 0.5 in (1.3 cm) on every side. Bordered size: 6 in x 23 in (15.2 x 58.4 cm).
Dowel tabs (make 2): Join green in the top-left corner-center st, ch 1, sc in the same st and next 3 sts. (4 sc) Work 9 more rows of 4 sc, for 10 rows and 2.5 in (6.4 cm) total. Fasten off, leaving a long tail. Make a matching tab at the top-right corner so it ends at the corner-center st. Fold each tab over the dowel and whipstitch its last row to the back of border Round 1. The dowel is about 2.4 in (6.1 cm) around, so the tab wraps it snugly.
Hanging cord: With green, ch 75. Sl st in the back bump of the 2nd ch from hook and of each ch across. (74 sl st) The cord is about 18 in (45.7 cm) long. Tie each end firmly around the dowel just outside the tabs.
Final Blocking
- Take the dowel out.
- Pin the panel RS up to 6 in x 23 in (15.2 x 58.4 cm).
- Fill each pocket with a roll wrapped in a plastic bag.
- Mist the whole piece until it’s damp, not soaked.
- Straighten the waffle grid and rims with your fingers.
- Let it dry completely, then take out the rolls and put the dowel back.
Final Quality-Control Checklist
- Panel is 6 in x 23 in (15.2 x 58.4 cm) with square corners
- Every pocket wall has 60 sts and is 4 in (10.2 cm) tall
- Round joins are hidden at the center back
- Trees are centered, with trunks 0.25 in (0.6 cm) above the fold
- Gaps between pockets are 3 in (7.6 cm)
- Tabs are secure and the dowel fits snugly
- Cord knots are tight and the holder hangs level
- All ends are woven in through at least 2 in (5.1 cm)
Troubleshooting
- Base ruffles or cups: If it ruffles, go down a hook size. If it cups, go up a hook size.
- Waffle looks flat: Work around the posts, not into the tops of the stitches. Make sure the first st of each repeat is the raised one.
- Panel wider than 5 in (12.7 cm): Your post stitches are loose. Re-swatch with a smaller hook.
- Pocket sags forward: Tack the rim at center back and at both sides.
- Border waves: Work the border with a hook 0.5 mm smaller, keeping the same counts.
- Tree curls: Steam it lightly before you sew it on.
Care
Remove the dowel, then hand wash in cool water with mild soap. Reshape and dry flat.
Final Notes
All the measurements follow from one gauge. At 16 sts = 4 in (10.2 cm), the 20-st panel is 5 in (12.7 cm) wide and matches each pocket’s 20-st back section. Forty-four rows make 22 in (55.9 cm). Each 4 in (10.2 cm) pocket covers 8 rows. The 0.5 in (1.3 cm) border brings the holder to 6 in x 23 in (15.2 x 58.4 cm). If the first pocket meets gauge, the other pieces will fit.
Happy crocheting!