

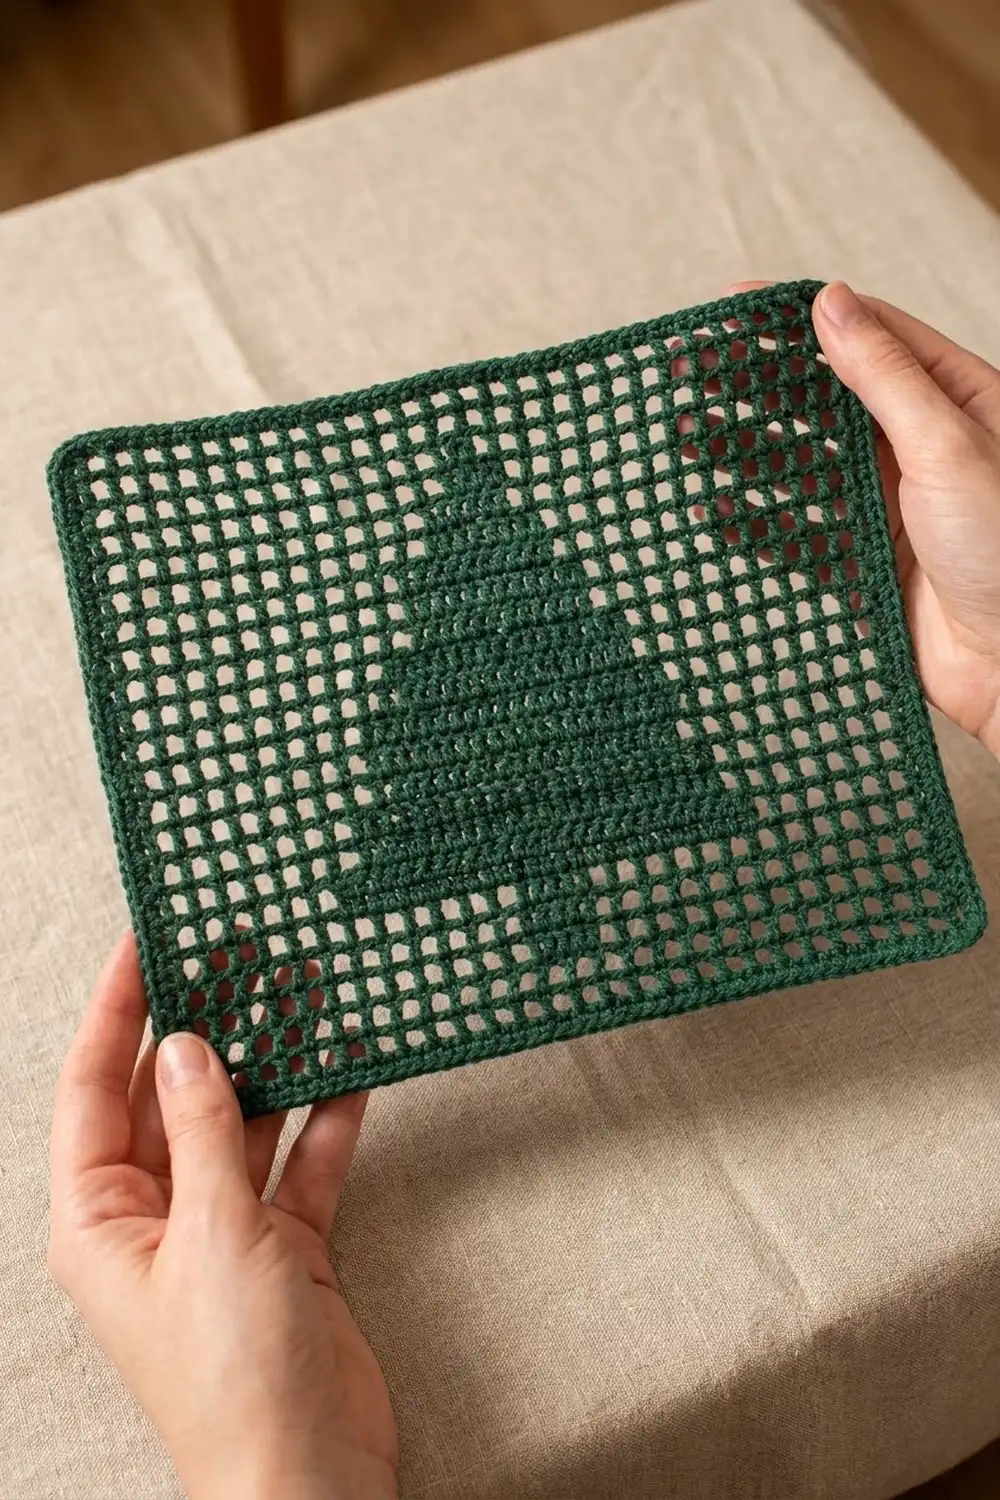
The Evergreen Window panel is a classic filet crochet picture worked in one rich pine green. A grid of small square holes surrounds a solid stepped Christmas tree, so the design reads like a window with a tree inside. It looks great on a table, as a framed ornament, as a mug-rug-sized doily, or pinned to a lampshade.
The style is simple and graphic. There is no color changing and no appliqué. The whole tree comes from filling some mesh squares with double crochet and leaving the others open. One color keeps the look calm and lets the light show through the holes.
This pattern uses US crochet terms. The finished panel measures 10.5 in × 8.1 in (26.7 cm × 20.6 cm) after its single-crochet border and blocking.
For construction, you work a 25-square-wide, 19-row filet mesh rectangle flat in rows from the bottom up, following written square counts for every row. Then you add one round of single crochet border all the way around. That’s it: one piece, one color, no joining.
Finished Size and Construction
- Finished size: 10.5 in × 8.1 in (26.7 cm × 20.6 cm)
- Skill level: Easy / Advanced Beginner
- Terminology: US crochet terms
- Yarn weight: Worsted (#4), cotton or cotton blend
- Hook: 4.0 mm (G-6)
- Number of pieces: 1
- Layout: Single rectangular panel, 25 squares wide × 19 rows tall
- Piece size before border: 10 in × 7.6 in (25.4 cm × 19.3 cm)
- Border depth: 0.25 in (0.6 cm) on every side, one round of sc
- Tree motif size: 13 squares wide × 13 rows tall (trunk included), 5.2 in × 5.2 in (13.2 cm × 13.2 cm)
Materials
Yarn: Choose a smooth, mercerized or matte worsted-weight cotton. Cotton gives crisp square holes and a firm edge, and it blocks flat. Acrylic works too, but the mesh will be softer and the squares a little rounder.
- Pine Green: 45 g, about 77 m (84 yd)
That quantity includes a margin of about 25% over what the panel actually uses, so you have enough for the gauge swatch and a little extra. One standard 50 g ball is plenty.
Tools:
- 4.0 mm (G-6) crochet hook
- Tapestry needle
- Scissors
- Stitch markers (2–3)
- Rust-proof pins and a blocking mat or folded towel
- Spray bottle with clean water
- Ruler or tape measure
Abbreviations (US Terms)
- ch – chain
- sc – single crochet
- dc – double crochet
- sk – skip
- sp – space
- st(s) – stitch(es)
- sl st – slip stitch
- OS – open square
- FS – filled square
Special stitches (filet squares):
- Open square (OS): Ch 1, sk next st (a ch-1 sp or a dc), dc in next dc. Each OS adds 2 sts.
- Filled square (FS): Dc in next st (a ch-1 sp or a dc), dc in next dc. Each FS adds 2 sts.
- Row start (Rows 2–19): Ch 4 (counts as first dc + ch 1), sk first ch-1 sp, dc in next dc. This makes the first OS of the row.
- Row end: Work the last dc of each row into the 3rd ch of the turning ch-4 below.
Every row has 51 sts: 26 “post” dc plus 25 square-fillers, which are either ch-1 or dc. Squares 1 and 25 are open in every row, so the side edges stay neat and identical.
Gauge and Checkpoints
Gauge: 5 squares (11 sts) = 2 in (5.1 cm) wide, and 5 rows = 2 in (5.1 cm) tall, in filet mesh. Each square is 0.4 in × 0.4 in (1.0 cm × 1.0 cm).
Test first: Ch 24 and work Row 1 as written below, but with only 10 squares (21 sts). Work 10 rows of open mesh. The swatch should measure 4 in × 4 in (10.2 cm × 10.2 cm).
- Swatch too big: Go down to a 3.75 mm (F-5) hook.
- Swatch too small: Go up to a 4.5 mm (7) hook.
- Squares taller than wide: Your dc are long. Pull each loop up a little less, or try a hook 0.25 mm smaller.
- Squares wider than tall: Your ch-1 sps are loose. Tighten your chains, but keep the hook size.
Checkpoints on the panel:
- After Row 1: width 10 in (25.4 cm)
- After Row 3: height 1.2 in (3.0 cm)
- After Row 10: height 4 in (10.2 cm)
- After Row 16 (tree tip): height 6.4 in (16.3 cm)
- After Row 19: 10 in × 7.6 in (25.4 cm × 19.3 cm)
Check these lightly, without stretching. Being within 0.25 in (0.6 cm) at each stage is fine.
Panel Pattern
Work flat in rows. Turn at the end of every row. The chart is symmetrical, so right-side and wrong-side rows read the same way.
Foundation: Ch 54.
Row 1: Dc in 6th ch from hook. The 5 skipped ch count as the first dc, the first ch-1 sp, and the turning height. Then [ch 1, sk next ch, dc in next ch] 24 times. Turn.
(25 OS. 51 sts: 26 dc, 25 ch-1 sps.)
Rows 2–3: Row start, then OS 24 times, ending in the 3rd ch of the turning ch. Turn.
(25 OS. 51 sts: 26 dc, 25 ch-1 sps.)
Trunk
Rows 4–5: Row start (1 OS), OS 10 times, FS 3 times, OS 11 times. Turn.
(11 OS, 3 FS, 11 OS. 51 sts: 29 dc, 22 ch-1 sps.)
The 3 filled squares sit exactly over squares 12–14. This makes a trunk 3 squares wide and 2 rows tall, 1.2 in × 0.8 in (3.0 cm × 2.0 cm).
Bottom Tier
Row 6: Row start, OS 5 times, FS 13 times, OS 6 times. Turn.
(6 OS, 13 FS, 6 OS. 51 sts: 39 dc, 12 ch-1 sps.)
This is the widest row of the tree, at 5.2 in (13.2 cm).
Row 7: Row start, OS 6 times, FS 11 times, OS 7 times. Turn.
(7 OS, 11 FS, 7 OS. 51 sts: 37 dc, 14 ch-1 sps.)
Row 8: Row start, OS 7 times, FS 9 times, OS 8 times. Turn.
(8 OS, 9 FS, 8 OS. 51 sts: 35 dc, 16 ch-1 sps.)
Middle Tier
Row 9: Row start, OS 6 times, FS 11 times, OS 7 times. Turn.
(7 OS, 11 FS, 7 OS. 51 sts: 37 dc, 14 ch-1 sps.)
This row steps back out by one square on each side, which creates the tiered “branch” look.
Row 10: Row start, OS 7 times, FS 9 times, OS 8 times. Turn.
(8 OS, 9 FS, 8 OS. 51 sts: 35 dc, 16 ch-1 sps.)
Row 11: Row start, OS 8 times, FS 7 times, OS 9 times. Turn.
(9 OS, 7 FS, 9 OS. 51 sts: 33 dc, 18 ch-1 sps.)
Top Tier
Row 12: Row start, OS 7 times, FS 9 times, OS 8 times. Turn.
(8 OS, 9 FS, 8 OS. 51 sts: 35 dc, 16 ch-1 sps.)
Row 13: Row start, OS 8 times, FS 7 times, OS 9 times. Turn.
(9 OS, 7 FS, 9 OS. 51 sts: 33 dc, 18 ch-1 sps.)
Row 14: Row start, OS 9 times, FS 5 times, OS 10 times. Turn.
(10 OS, 5 FS, 10 OS. 51 sts: 31 dc, 20 ch-1 sps.)
Row 15: Row start, OS 10 times, FS 3 times, OS 11 times. Turn.
(11 OS, 3 FS, 11 OS. 51 sts: 29 dc, 22 ch-1 sps.)
Row 16 (tip): Row start, OS 11 times, FS 1 time, OS 12 times. Turn.
(12 OS, 1 FS, 12 OS. 51 sts: 27 dc, 24 ch-1 sps.)
The single filled square sits over square 13, the center column, directly above the trunk.
Top Margin
Rows 17–19: Row start, OS 24 times. Turn after Rows 17 and 18. Do not fasten off after Row 19.
(25 OS. 51 sts: 26 dc, 25 ch-1 sps.)
Panel check: 25 squares × 0.4 in = 10 in (25.4 cm) wide. 19 rows × 0.4 in = 7.6 in (19.3 cm) tall. There are 3 open rows below the trunk and 3 open rows above the tip, so the tree is centered vertically. There are at least 6 open squares beside the tree’s widest row, so it is centered horizontally.
Border
Border gauge: The border is sc worked at the same density as the mesh: 51 sts over 10 in (25.4 cm), or about 5 sts per inch (2.5 cm). On the sides, 2 sc per row-end equals 5 sc per 1 in (2.5 cm) of height. Because the two ratios match, the edges lie flat without ruffling or cupping.
Corner definition: Each corner is one corner stitch that gets 3 sc. The side counts below are the sc between corner groups and do not include the corner groups.
Round 1: Ch 1, then work 3 sc in the last dc of Row 19 (corner group).
- Side 1 (left edge): Rotate to work down the row ends. Work 2 sc around the post of each row-end dc or turning ch, for all 19 rows. (38 sc.)
- Bottom corner: 3 sc in the first foundation ch, the base of Row 1’s first dc.
- Bottom edge: Sc in each of the next 49 foundation ch. (49 sc.)
- Corner: 3 sc in the last foundation ch.
- Side 2 (right edge): 2 sc around each row-end post for all 19 rows. (38 sc.)
- Top corner: 3 sc in the 3rd ch of Row 19’s turning ch.
- Top edge: Sc in each of the next 49 sts of Row 19, both dc and ch-1 sps. (49 sc.)
- Join with a sl st to the first sc.
Round 1 total: 49 + 49 + 38 + 38 + (4 × 3) = 186 sc.
Why the math works: Each long edge has 51 sts. The 2 end sts become corner stitches, which leaves 49 between them. Each short edge has 19 rows × 2 = 38 sc. Corner groups are counted once, separately, so nothing is counted twice. The border adds 0.25 in (0.6 cm) per side, for a finished size of 10.5 in × 8.1 in (26.7 cm × 20.6 cm).
Fasten off, leaving a 6 in (15.2 cm) tail. Weave in all ends along the solid sc border or inside the filled tree squares, where they won’t show through the holes.
Final Blocking
- Soak the panel in cool water for 10 minutes, then press out the water in a towel. Do not wring it.
- Lay it right side up on a blocking mat.
- Pin the four corners first, to 10.5 in × 8.1 in (26.7 cm × 20.6 cm).
- Pin the middle of each edge, then add pins about every 1 in (2.5 cm) so the edges are straight.
- Gently push the open squares into true squares with your fingertips. Check that the tree trunk lines up with the tip.
- Let it dry completely, about 24 hours.
- For extra crispness, mist it lightly with spray starch before the panel dries.
Final Quality-Control Checklist
- Every row has 51 sts. Count any row that looks off.
- Squares 1 and 25 are open on every row.
- The trunk is 3 squares wide and sits under the center tip.
- The tree’s three tiers step in and out symmetrically on both sides.
- There are 3 open rows above and below the motif.
- The border has 186 sc, with 3 sc in each corner.
- The panel measures 10.5 in × 8.1 in (26.7 cm × 20.6 cm) after blocking.
- No tails are visible through the open mesh.
Troubleshooting
The tree is off-center. You’ve miscounted the open squares before the first FS. Use a marker after the row-start OS and count from there.
The squares lean or slant. You may be working the last dc into the ch-4 space instead of the 3rd ch of the turning chain. Always work that last dc into the turning chain itself.
The filled squares bulge. Your dc in the ch-1 sp is too loose. Work the FS dc into the ch itself, not around it, for a flatter fill.
The border ruffles. You have too many sc on the sides. Check that there are exactly 2 sc per row. If it still ruffles, work 2 sc in every other row-end and 1 sc in the rest.
The border pulls in. Your sc are too tight. Go up 0.5 mm for the border round only.
The panel is too short. Your dc are too short. Lift the yarn-over loop a little higher, or check the rows per inch against your gauge.
Care
Hand-wash in cool water with mild soap, press dry in a towel, and lay flat to dry. Reshape and pin if the squares need tidying.
Final Notes
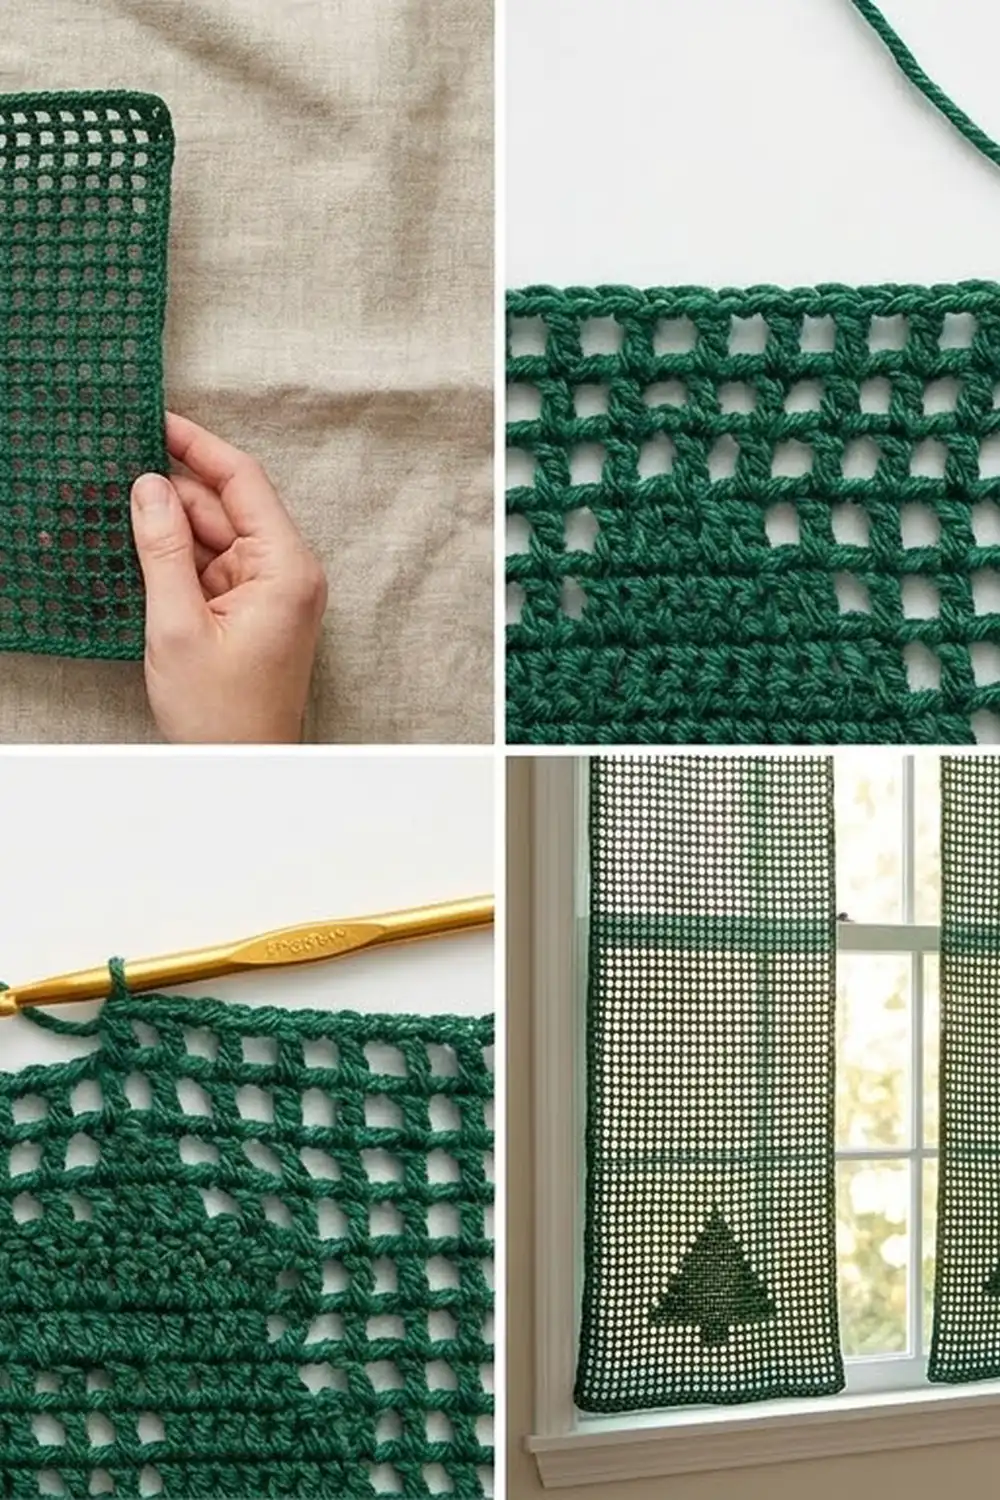
The measurement chain is simple. Each square is 0.4 in (1.0 cm), so 25 squares give 10 in (25.4 cm) of width and 19 rows give 7.6 in (19.3 cm) of height. The sc border adds 0.25 in (0.6 cm) per side, for a finished size of 10.5 in × 8.1 in (26.7 cm × 20.6 cm). Every row holds steady at 51 sts, only the mix of ch-1 sps and dc changes, and the border total is 186 sc. If you match your gauge, every other number follows.
Happy crocheting!