

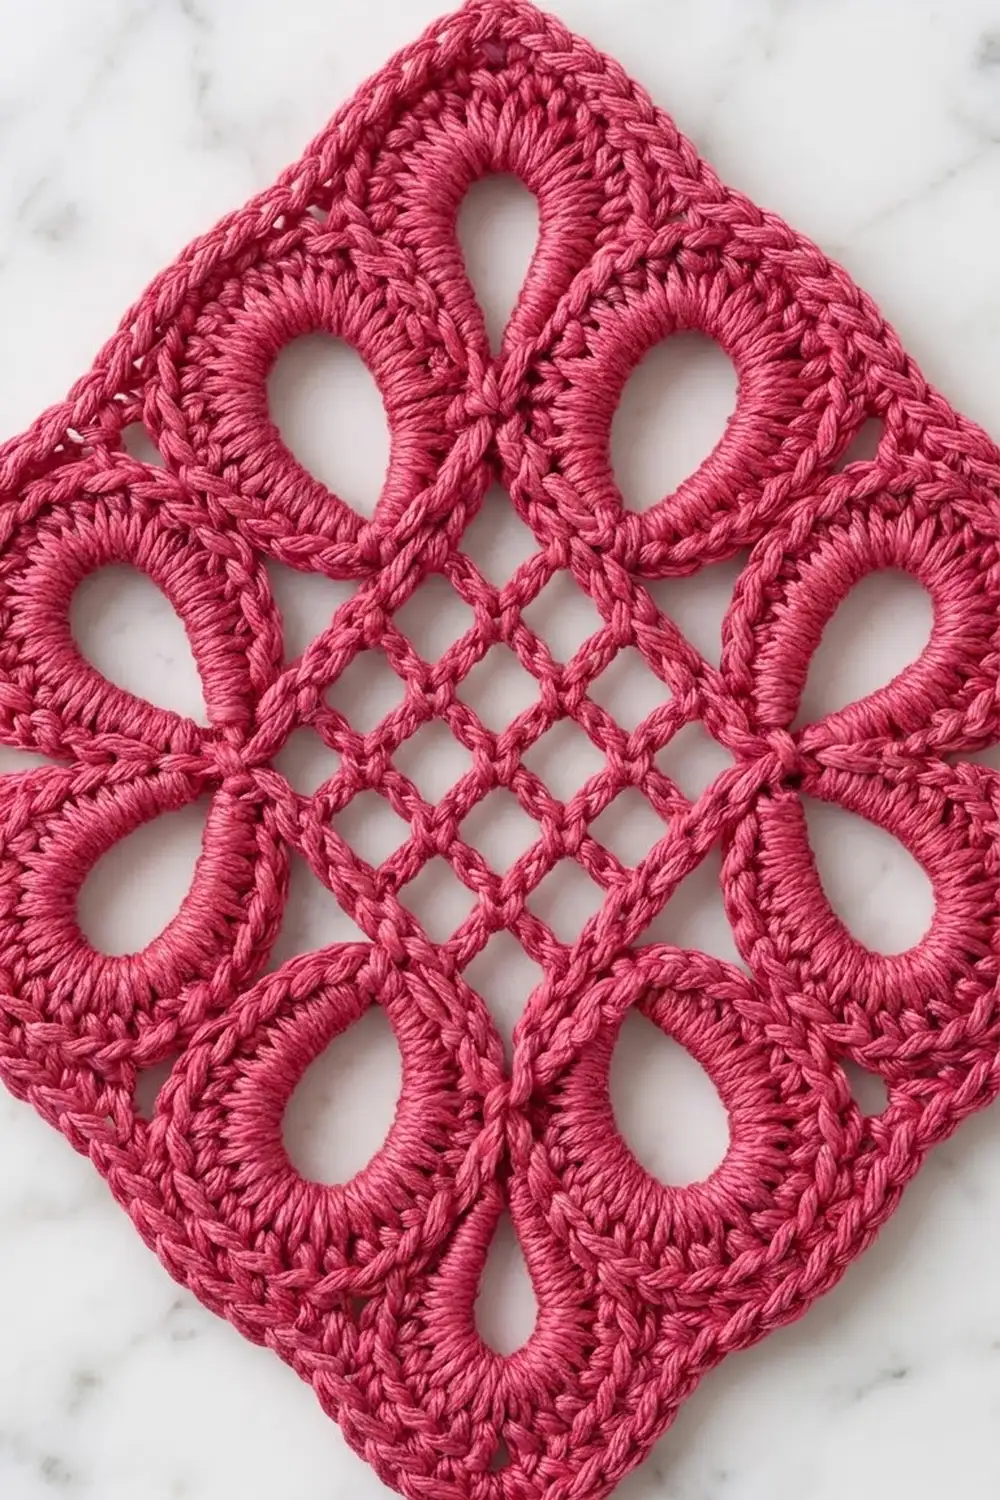
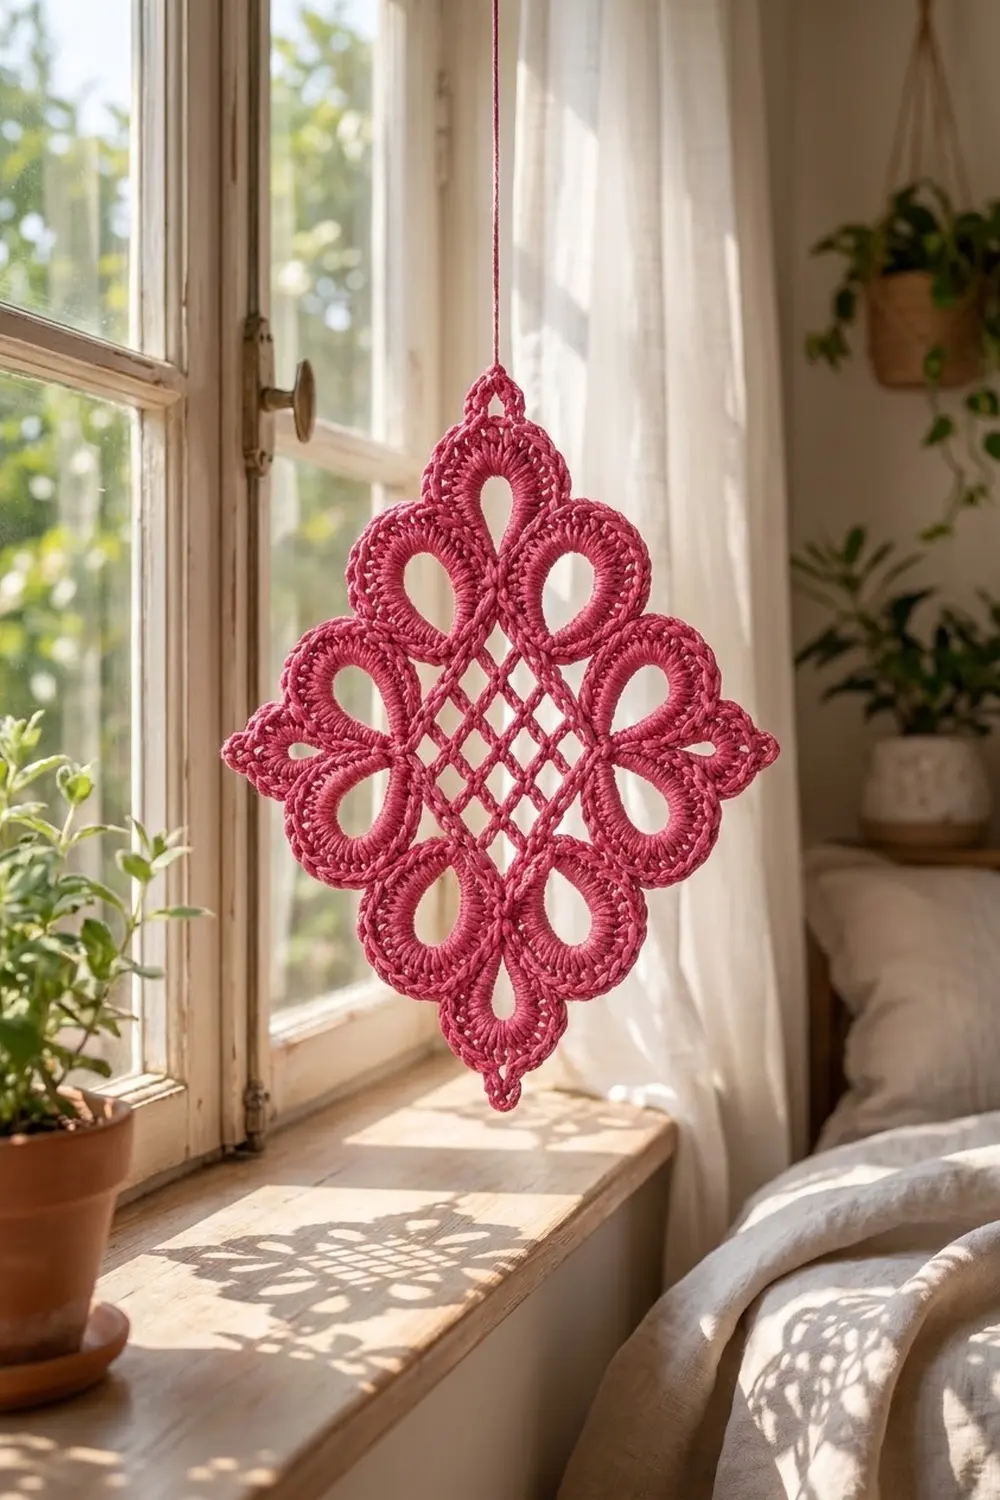
The Rosewater Lattice Diamond is a single lace motif built around an open filet-style grid. Eight large padded rings frame the grid, two on each side, and a small padded teardrop loop sits at each of the four points. Displayed on point, the square reads as a diamond with a soft, scalloped outline.
The motif is worked in one color, a warm raspberry pink, in mercerized cotton thread. The dense single crochet padding gives the rings a rounded, corded look. A reverse single crochet edge adds a firm, rope-like finish. The style sits somewhere between Irish lace and vintage doily work, but every stitch is a basic one.
This pattern uses US crochet terms. The blocked motif measures 5.25 in (13.3 cm) across the flats and about 7.4 in (18.8 cm) point to point.
You work the whole motif in the round, in one piece, with no sewing. In order, you make:
– a 3-round mesh square
– a single crochet frame
– a round of chain rings and corner loops
– a padding round of single crochet
– a reverse single crochet border
Finished Size and Construction
- Finished size: 5.25 in (13.3 cm) across the flats; about 7.4 in (18.8 cm) point to point
- Skill level: Intermediate
- Terminology: US crochet terms
- Yarn weight: Size 3 mercerized cotton crochet thread (light fingering)
- Hook: 2.25 mm (US B-1)
- Number of pieces: 1 single motif
- Layout: One square motif, displayed on point as a diamond
- Piece size: Mesh center is 2.75 in (7.0 cm) per side after Round 3
- Size before border: 5 in (12.7 cm) across the flats; about 7.2 in (18.3 cm) point to point
- Border depth: 1/8 in (0.3 cm) per edge
Materials
Choose a smooth, mercerized cotton thread in size 3. Its sheen and firm twist make the padded rings look crisp and help the grid hold its shape after blocking. Avoid fuzzy or very soft yarns, because they blur the lattice and the rope edge.
- Raspberry pink: 15 g, about 60 m (66 yd)
This amount includes a margin of about 25 percent for the gauge test and the tails. The motif itself uses roughly 11 g.
Tools:
- 2.25 mm (US B-1) crochet hook, plus 2.0 mm and 2.5 mm hooks in case you need to adjust gauge
- Tapestry needle
- Scissors
- Rust-proof pins and a foam blocking mat
- Spray bottle; optional light spray starch
- Ruler or tape measure
Abbreviations (US Terms)
- ch – chain
- sl st – slip stitch
- sc – single crochet
- dc – double crochet
- rev sc – reverse single crochet
- MR – magic ring
- sk – skip
- sp(s) – space(s)
- st(s) – stitch(es)
- rep – repeat
Padded ring: A chain loop anchored at one stitch (ch 14, sl st in the same sc). In a later round you fill it completely with single crochet so that no chain shows.
Reverse single crochet (rev sc): Work from left to right (if you are right-handed). Insert the hook in the next stitch to the right, yarn over, pull up a loop, yarn over, and pull through both loops.
Gauge and Checkpoints
Gauge: 7 sc = 1 in (2.5 cm), worked over a chain space.
Test the motif itself rather than a flat swatch. Work Rounds 1–4 and measure before going on. These four rounds are the base for everything else, so a small error here grows in every later round.
Checkpoints (lightly pressed flat, not yet blocked):
- After Round 1: about 0.75 in (1.9 cm) across
- After Round 3: 2.75 in (7.0 cm) per side
- After Round 4: 3.25 in (8.3 cm) per side
- After Round 6: 5 in (12.7 cm) across the flats; about 7.2 in (18.3 cm) point to point
- After Round 7: 5.25 in (13.3 cm) across the flats; about 7.4 in (18.8 cm) point to point
- Each padded ring: about 1 in (2.5 cm) across, with an opening of about 0.5 in (1.3 cm)
If your Round 4 square is too big (over 3.5 in / 8.9 cm per side), change to a 2.0 mm hook and start again. If it is too small (under 3 in / 7.6 cm per side), change to a 2.5 mm hook. A difference of 1/4 in (0.6 cm) at Round 4 grows to roughly 1/2 in (1.3 cm) across the finished motif, so fix it early.
Motif Pattern
Leave a 6 in (15.2 cm) starting tail.
Lattice Center
Round 1: Make a MR. Ch 5 (counts as dc + ch 2), [dc in ring, ch 2] 7 times, sl st in 3rd ch of beginning ch-5. Pull the ring closed. (8 dc, 8 ch-2 sps)
The 1st, 3rd, 5th and 7th spaces become the corners. The 2nd, 4th, 6th and 8th spaces are side spaces.
Round 2: Sl st in first ch-2 sp (corner). Ch 5 (counts as dc + ch 2), dc in same sp. Ch 2, dc in next dc, ch 2, dc in next ch-2 sp, ch 2, dc in next dc, ch 2. Then [(dc, ch 2, dc) in next corner sp; rep from * to ] 3 times. Sl st in 3rd ch of beginning ch-5. (20 dc: 5 per side, counting each side’s 2 corner dc; 20 ch-2 sps: 4 per side plus 4 corner sps)*
Round 3: Sl st in next ch-2 sp (corner). Ch 5 (counts as dc + ch 2), dc in same sp. [Ch 2, dc in next dc] 5 times, ch 2. Then [(dc, ch 2, dc) in next corner sp; rep from * to ] 3 times. Sl st in 3rd ch of beginning ch-5. (28 dc: 7 per side, counting each side’s 2 corner dc; 28 ch-2 sps: 6 per side plus 4 corner sps)*
Each side grows by 2 dc and 2 spaces per round. The grid should now look like an open lattice of small squares, 2.75 in (7.0 cm) per side.
Frame
Round 4 (conversion round): Sl st in next ch-2 sp (corner). Ch 1, 3 sc in same sp. Sc in next dc, [2 sc in next ch-2 sp, sc in next dc] 6 times, 3 sc in next corner sp. Rep from * to * 3 more times, leaving out the final 3 sc on the last repeat. Sl st in first sc.
Count per side: 7 sc worked 1-per-dc + 12 sc added in the 6 spaces = 19 sc. Each corner has 3 sc. (Total: 4 × 19 + 4 × 3 = 88 sc)
The center sc of each 3-sc group is the corner sc. Between one corner sc and the next there are 21 sc (1 + 19 + 1). Counting both corner sc, each side has 23 sc.
Rings and Corner Loops
Round 5: Sl st in next sc (corner sc). Ch 1, sc in same st, ch 8, sl st in top of sc just made. This makes the first corner loop.
Side: Ch 5, sk 5 sc, sc in next sc. Ch 14, sl st in top of same sc (ring made). Ch 4, sk 4 sc, sc in next sc (side center). Ch 4, sk 4 sc, sc in next sc. Ch 14, sl st in top of same sc (ring made). Ch 5, sk 5 sc.
Corner: Sc in next sc (corner sc), ch 8, sl st in top of same sc.
Work Side, Corner, Side, Corner, Side, Corner, Side. After the last Side, sl st in the first sc instead of making a fourth corner, because you made that corner loop at the start of the round.
Check the math: each side uses 5 + 1 + 4 + 1 + 4 + 1 + 5 = 21 sc, which is exactly the 21 sc between corner sc. (16 anchor sc: 3 per side + 4 corner sc; 8 ch-14 rings; 4 ch-8 corner loops; 16 chain sps, in the order ch-5, ch-4, ch-4, ch-5 on each side)
Let the rings hang outward from the edge. Each ring is anchored to the frame at a single stitch, so it forms a teardrop with the narrow end pointing toward the grid.
Padding
Round 6: Ch 1. 13 sc in next ch-8 corner loop, 6 sc in next ch-5 sp, 22 sc in next ring, 5 sc in next ch-4 sp, 5 sc in next ch-4 sp, 22 sc in next ring, 6 sc in next ch-5 sp. Rep from * to * 3 more times. Sl st in first sc and fasten off. Skip all the anchor sc and work only into the loops and spaces.
Push the stitches together as you go so the chain is completely covered. The rings should look solid and corded. (Per side: 6 + 22 + 5 + 5 + 22 + 6 = 66 sc; per corner: 13 sc. Total: 4 × 66 + 4 × 13 = 316 sc)
The 7th sc of each corner loop is the tip stitch, with 6 sc on either side of it.
Checkpoint: 5 in (12.7 cm) across the flats and about 7.2 in (18.3 cm) point to point. If it helps, pin the motif out roughly to check.
Border
Border gauge: The rev sc edge keeps the same gauge as Round 6, 7 sts = 1 in (2.5 cm) along the edge. It adds 1/8 in (0.3 cm) of depth to each edge.
Round 7 (trim round): With the right side facing, join the thread with a sl st in the tip sc (7th sc) of any corner loop. Ch 1, rev sc in same st, ch 3. Rev sc works toward the right, so you travel around the motif in the opposite direction from Round 6.
Rev sc in each of next 6 sc (rest of corner loop), rev sc in each of next 66 sc (side), rev sc in each of next 6 sc (first half of next corner loop)*, (rev sc, ch 3, rev sc) in next sc (tip). Rep from * 2 more times, then work from * to ** once more. Rev sc in the first tip st (the one that already holds a rev sc), then sl st in first rev sc. Fasten off, leaving an 8 in (20.3 cm) tail.
Count per side: 66 rev sc worked 1-per-stitch + 0 added = 66 rev sc. Count per corner: 13 rev sc worked 1-per-stitch + 1 added = 14 rev sc, plus one ch-3 picot. (Total: 316 + 4 = 320 rev sc; 4 ch-3 picots)
Why the math works: The border adds no stitches along the sides. The rings and padded spaces already lie flat after Round 6, so working 1 stitch into each stitch keeps them flat and only firms the outline. At each tip, the one extra stitch and the picot give the corner room to turn. That keeps the four points sharp without making the sides flare.
Weave in all tails along the back of the padded stitches, not through the open grid, where they would show.
Final Blocking
- Soak the motif in cool water for 10 minutes. Press out the water by rolling it in a towel; do not wring.
- Lay it on the blocking mat on point, with one picot at the top.
- Pin all four picots first. Check that it measures 7.4 in (18.8 cm) point to point both vertically and horizontally.
- Pin the outer edge of each ring so the motif measures 5.25 in (13.3 cm) across the flats on all four sides.
- Shape each ring with a pin or a round dowel about 0.5 in (1.3 cm) across, so all eight openings match.
- Use pins to square up the grid. Each small opening should look like a square sitting on point.
- If you want a crisp, stiff finish, mist the motif lightly with starch.
- Let it dry completely, at least 12 hours, before you remove the pins.
Final Quality-Control Checklist
- The Round 3 grid has 6 open spaces along each side and 4 corner spaces.
- Round 4 has 88 sc, with 19 sc per side between the corner groups.
- Round 5 has 8 rings and 4 corner loops, evenly spaced.
- No chain shows through the padding in Round 6 (316 sc).
- All 8 rings are the same size, about 1 in (2.5 cm) across.
- The border has 320 rev sc and 4 picots, one at each point.
- The motif measures 5.25 in (13.3 cm) across the flats and about 7.4 in (18.8 cm) point to point.
- All tails are woven into solid stitches and trimmed close.
Troubleshooting
The grid puckers in the center. Your ch-2 spaces are too tight. Loosen your chains. If the Round 3 checkpoint is short, you can also work ch 3 instead of ch 2 in Rounds 2–3.
The rings ruffle or twist. Your chains are loose compared to your sc. Work 20 sc into each ring instead of 22 and adjust the totals: 62 sc per side and 300 sc in Round 6, then 304 rev sc in Round 7.
Chain shows between padding stitches. Add 1 or 2 sc per ring, or push the stitches closer together before moving on.
The points look rounded. Make sure each (rev sc, ch 3, rev sc) sits in the 7th sc of its corner loop, and pin the picots firmly while blocking.
The motif curls. Rev sc can tighten the edge. Go up one hook size for Round 7 only.
The sides bow inward. Pin the outer edge of each ring firmly during blocking; the padded ch-4 spaces between the rings will straighten.
Care
Hand wash in cool water with mild soap and dry flat, pinning the points again if needed. Starch again after washing if you want a stiff finish.
Final Notes
Here is the full measurement chain:
– Round 1 is about 0.75 in (1.9 cm) across.
– The lattice reaches 2.75 in (7.0 cm) per side after Round 3.
– The frame reaches 3.25 in (8.3 cm) per side after Round 4.
– The rings and padding bring the motif to 5 in (12.7 cm) across the flats.
– The rev sc border finishes it at 5.25 in (13.3 cm) across the flats, or about 7.4 in (18.8 cm) point to point.
Measure at Round 4, count your stitches at Rounds 4, 6 and 7, and block on point. The result is a crisp raspberry diamond with eight even rings around an open lattice.
Happy crocheting!