

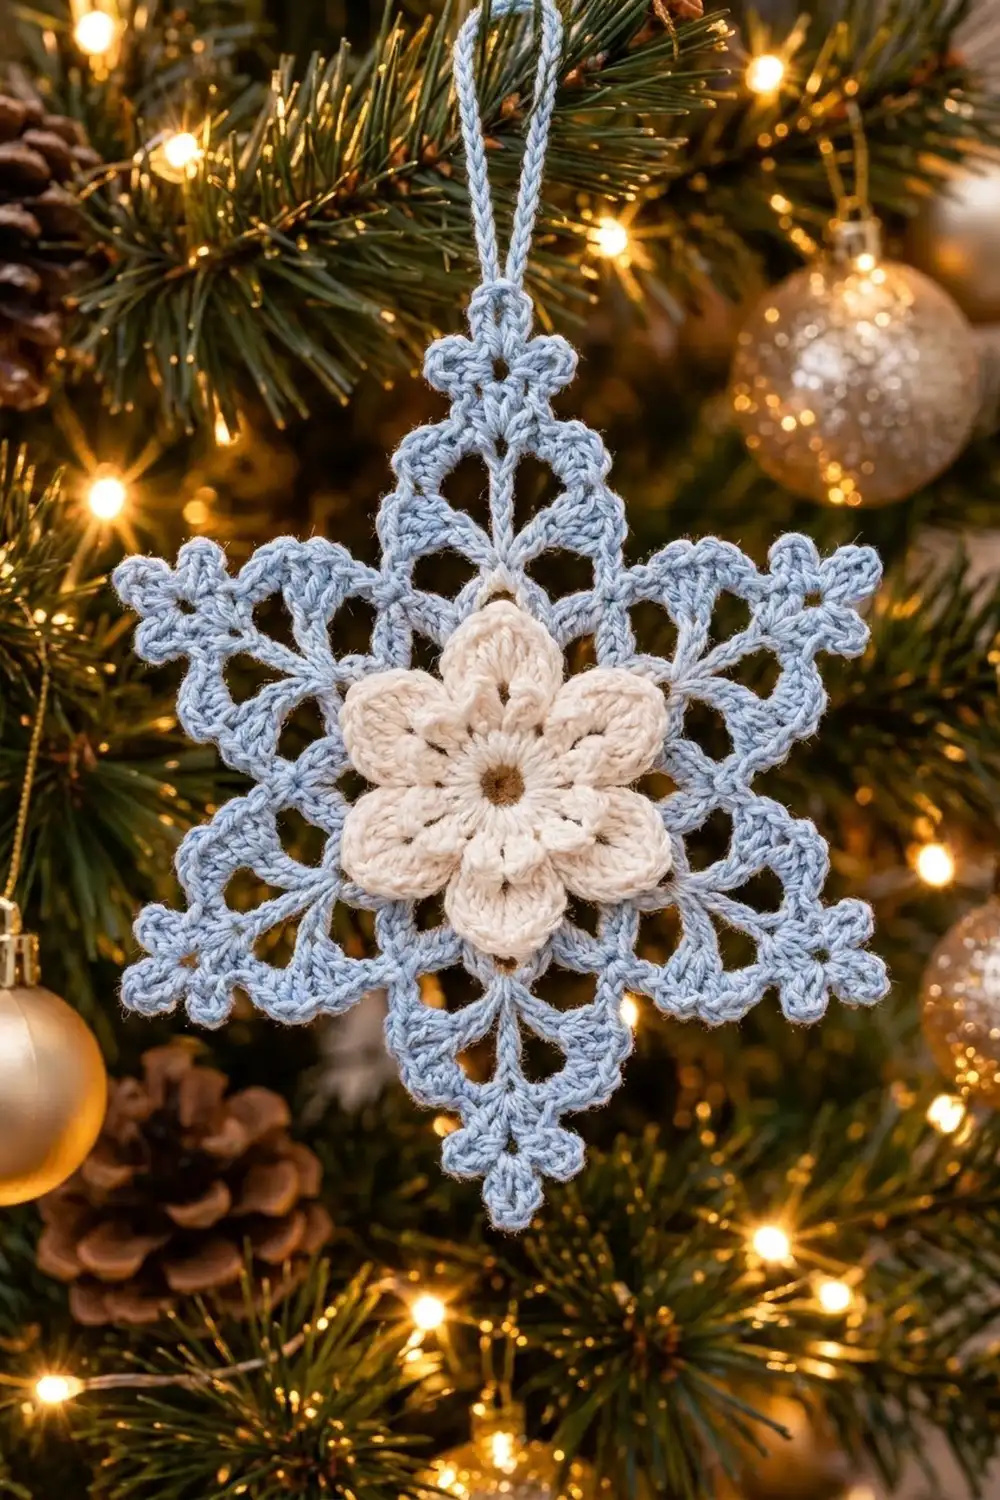
The Frosted Blossom Snowflake is a lacy six-pointed ornament with a soft flower at its heart. Light powder-blue thread makes an airy star frame. A two-layer cream blossom sits in the center, and a tiny tan-brown center finishes it off.
It has a classic, cozy holiday look. The picot edging and trefoil tips give it a delicate, frosty feel, and the puffy cream petals add some depth. It looks lovely on a tree, as a gift topper, or hanging in a window.
This pattern uses US crochet terms. The finished ornament measures 4.5 in (11.4 cm) from point to point and about 4 in (10.2 cm) from flat edge to flat edge.
You make the whole thing as one piece, working outward from the center. Rounds 1–5 make the cream two-layer flower. Rounds 6–9 build the blue lace frame, and Round 10 is the picot-and-trefoil edge. A chain hanging loop is added last.
Finished Size and Construction
- Finished size: 4.5 in (11.4 cm) point to point; 4 in (10.2 cm) flat edge to flat edge
- Skill level: Intermediate
- Terminology: US crochet terms
- Yarn weight: Size 3 mercerized cotton crochet thread
- Hook: 2.25 mm (US B-1)
- Number of pieces: 1
- Layout: One single motif, worked in the round
- Flower size (after Rnd 5): 1.75 in (4.4 cm) across
- Size before edging (after Rnd 9): 3.25 in (8.3 cm) point to point
- Edging depth (Rnd 10): about 0.6 in (1.6 cm) at each point
- Hanging loop: about 2 in (5.1 cm) tall
Materials
Use a smooth, mercerized cotton thread in size 3. It shows stitch definition well, holds the picots crisply, and takes stiffener without going fuzzy. A slightly heavier size 3 thread or a fine fingering-weight cotton also works, but the ornament will come out a little larger.
Yarn:
– Light blue (powder blue): 8 g, about 22 m
– Cream: 5 g, about 14 m
– Light brown: 1 g, about 3 m (for the center knot)
These quantities include a safety margin of roughly 30%, so you have room for a test swatch and longer weaving tails.
Tools:
– 2.25 mm (US B-1) crochet hook
– Fine tapestry needle
– Small sharp scissors
– Rustproof pins and a foam blocking board
– Fabric stiffener or a starch solution (optional)
– Ruler or tape measure
Abbreviations (US Terms)
- ch – chain
- sl st – slip stitch
- sc – single crochet
- hdc – half double crochet
- dc – double crochet
- tr – treble crochet
- sp(s) – space(s)
- sk – skip
- st(s) – stitch(es)
- BPsc – back post single crochet: insert the hook from back to front to back around the post of the stitch, and complete a sc
- rep – repeat
Special stitches:
- Picot: ch 3, sl st in 3rd ch from hook.
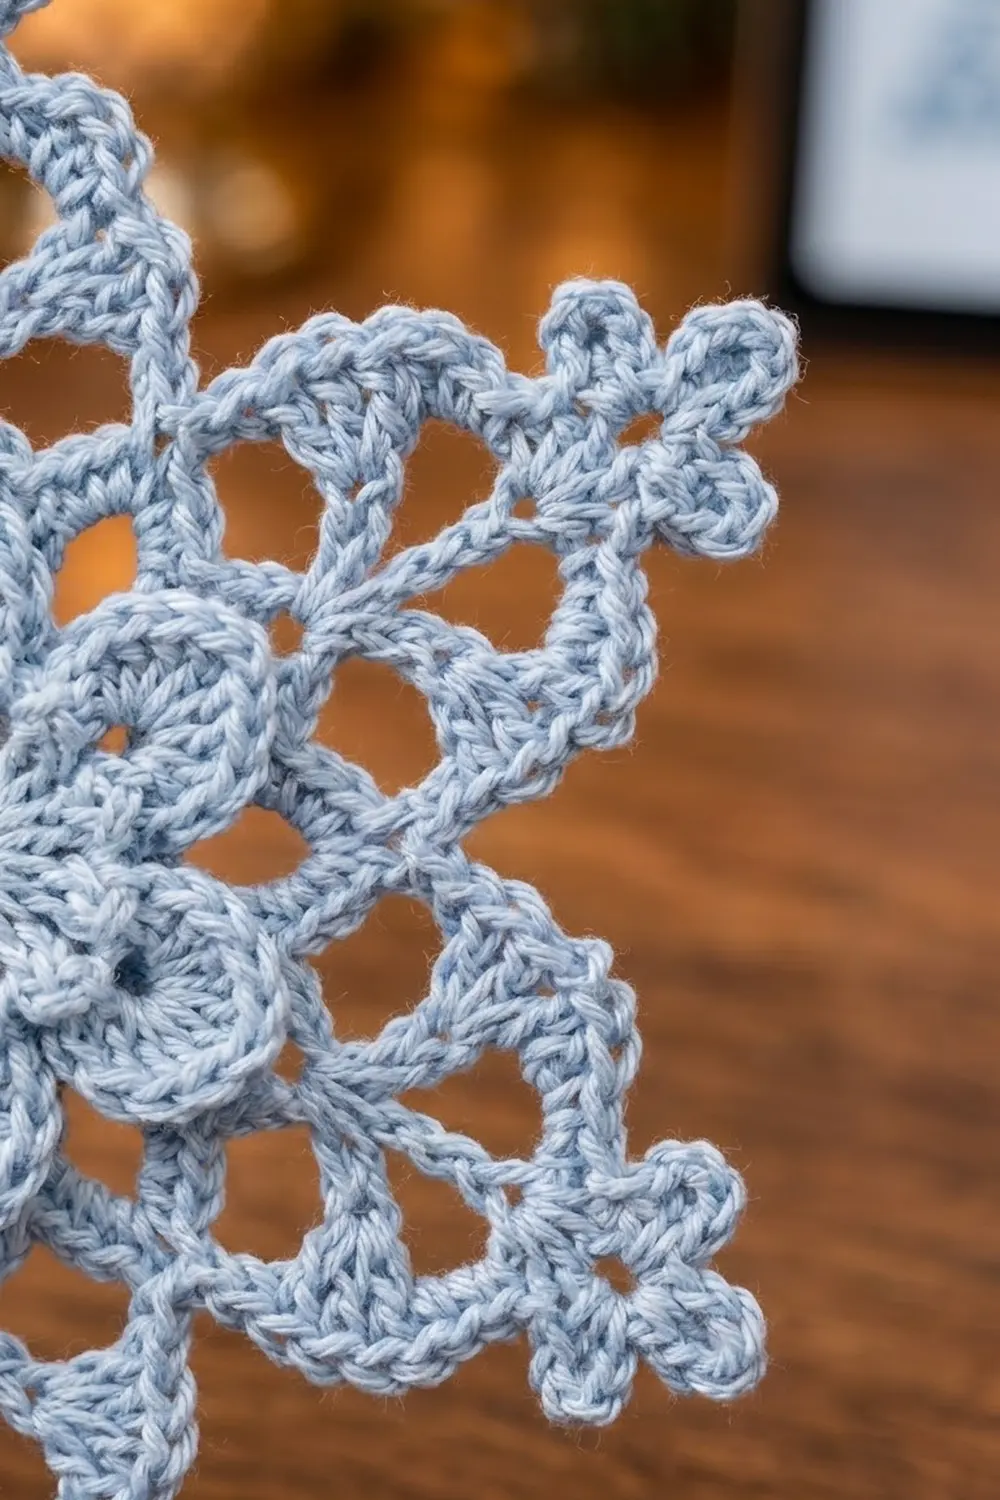
- Trefoil spike: ch 9, sl st in 4th ch from hook (first ring made), [ch 4, sl st in the same ch] twice (three rings now sit at one base point), then sl st in each of the remaining 5 ch back down to the base. This gives a 5-ch stem topped with three small loops.
Gauge and Checkpoints
Gauge is not critical for an ornament, but it controls the final size, so make the cream flower first and measure it before you go on.
Checkpoints (blocked lightly and measured flat):
- After Rnd 1: 0.5 in (1.3 cm) across
- After Rnd 3 (inner petals): 1.25 in (3.2 cm) across
- After Rnd 5 (outer petals): 1.75 in (4.4 cm) across
- After Rnd 7 (solid blue ring): 2.4 in (6.1 cm) across
- After Rnd 8: 2.75 in (7.0 cm) across
- After Rnd 9: 3.25 in (8.3 cm) point to point
- After Rnd 10: 4.5 in (11.4 cm) point to point
If your flower is larger than 1.75 in (4.4 cm): go down to a 2.0 mm hook, or tighten your chains.
If it is smaller: go up to a 2.5 mm hook.
A difference of about 0.1 in (0.3 cm) at the flower stage grows to roughly 0.25 in (0.6 cm) at the finished points.
Pattern
Cream Flower
Rnd 1: With cream, make a magic ring. Ch 1, work 12 sc into the ring. Pull the ring snug, but leave a tiny center hole for the brown knot. Join with sl st to first sc. (12 sc)
Rnd 2: Ch 1, sc in the same st, ch 3, sk next st, sc in next st, ch 3, sk next st; rep from * 4 more times. Join with sl st to first sc. (6 sc, 6 ch-3 sps)
Rnd 3 (inner petals): Sl st into first ch-3 sp. In the ch-3 sp work (sc, hdc, 3 dc, hdc, sc); rep from * in each ch-3 sp around. Join with sl st to first sc. (6 petals of 7 sts each = 42 sts)
These six small petals are the top layer of the flower.
Rnd 4 (back loops): Fold the Rnd 3 petals toward you so you are working behind them. Ch 1, BPsc around the first Rnd 2 sc, ch 5, BPsc around the next Rnd 2 sc, ch 5; rep from * 4 more times. Join with sl st to first BPsc. (6 BPsc, 6 ch-5 sps)
The ch-5 loops sit behind the inner petals, so the second layer of petals is offset beneath them.
Rnd 5 (outer petals): Sl st into first ch-5 sp. In the ch-5 sp work (sc, hdc, 2 dc, 3 tr, 2 dc, hdc, sc); rep from * in each ch-5 sp around. Join with sl st to first sc. (6 petals of 11 sts each = 66 sts)
The center tr of each petal (the 6th of its 11 stitches) is that petal’s tip. Fasten off cream and weave in the tails.
Checkpoint: the flower should measure 1.75 in (4.4 cm) across, with the larger petals peeking out between and behind the small inner ones.
Blue Frame
Rnd 6: With the right side facing, join blue with a sc in the center tr of any outer petal. Ch 7, sc in the center tr of next petal, ch 7; rep from * 4 more times. Join with sl st to first sc. (6 sc, 6 ch-7 sps)
Rnd 7 (solid ring, conversion round): Ch 1, sc in the same st, 7 sc in next ch-7 sp, sc in next sc, 7 sc in next ch-7 sp; rep from * 4 more times. Join with sl st to first sc. (6 sc worked 1-per-existing-sc + 42 sc worked into the spaces = 48 sc)
Each sc worked into a Rnd 6 sc sits directly above a petal tip. These are the “point stitches” (A). The 4th sc of each 7-sc group is the “side stitch” (B).
Rnd 8: Ch 1, sc in the first st (an A stitch), ch 5, sk 3 sts, sc in next st (B), ch 5, sk 3 sts, sc in next st (A), ch 5, sk 3 sts, sc in next st (B), ch 5, sk 3 sts; rep from * 4 more times. Join with sl st to first sc. (12 sc, 12 ch-5 sps)
Check: 12 sc + (12 × 3 skipped) = 48 stitches, which matches Rnd 7.
Rnd 9: Sl st in each of the next 3 ch so you are in the middle of the first ch-5 sp. Ch 1, sc in the same sp. Ch 5, sc in next B sc, ch 5, sc in next ch-5 sp, ch 7, sc in next ch-5 sp; rep from * 5 more times. On the last repeat, skip the final sc and join with sl st to the first sc instead. (18 sc, 12 ch-5 sps, 6 ch-7 sps)
Each ch-7 arch jumps over one A stitch and becomes the base of a snowflake point. Checkpoint: 3.25 in (8.3 cm) point to point.
Border (Round 10: Picot and Trefoil Edge)
Border gauge: in this round, 4 sc plus a picot worked into one ch-5 space should lie flat, about 0.4 in (1.0 cm) along the edge. If the space cups or ruffles, check your chain length in Rnd 9 before you continue.
Rnd 10: Ch 1. Sc in next sc, (2 sc, picot, 2 sc) in next ch-5 sp, sc in next B sc, picot, (2 sc, picot, 2 sc) in next ch-5 sp, sc in next sc, (3 sc, trefoil spike, 3 sc) in next ch-7 sp; rep from * 5 more times. Join with sl st to first sc.
Per section (one side, point to point): 1 + 4 + 1 + 4 + 1 + 6 = 17 sc, plus 3 picots and 1 trefoil spike.
Round total: 6 sections × 17 sc = 102 sc, 18 picots, 6 trefoil spikes.
Why the math works: each of the six sections uses exactly the Rnd 9 stitches between two points, which are 3 sc, 2 ch-5 sps and 1 ch-7 sp. The spike is worked inside the ch-7 space, not on top of a stitch, so there are no separate corner stitches to count twice. The 3 sc on each side of the spike pad the ch-7 arch evenly, so the point stays straight and centered over its petal.
Do not fasten off yet; go on to the hanging loop.
Hanging loop: Sl st along the stitches to the next trefoil spike: up its stem and into the middle ring. Ch 40, then sl st into the same middle ring. Fasten off, leaving a 6 in (15.2 cm) tail, and weave it securely down the stem.
Center knot: Thread an 8 in (20.3 cm) length of light brown onto the tapestry needle. Work two or three French knots stacked in the center hole of the flower, and secure the ends on the back.
Final Blocking
- Weave in all remaining tails along the back of the blue stitches, not through the cream petals.
- Dip the ornament in fabric stiffener or starch solution, then gently squeeze out the extra. Do not wring it.
- Lay it face up on the blocking board.
- Pin the six trefoil tips first, spaced evenly around a 4.5 in (11.4 cm) circle.
- Pin each B picot outward so the flat edges measure 4 in (10.2 cm) across.
- Open the three trefoil rings at each tip with a pin.
- Shape the cream petals with your fingertips so they dome up slightly. Do not pin the petals.
- Let it dry completely, usually 12–24 hours, before unpinning.
Final Quality-Control Checklist
- Exactly 6 inner petals and 6 outer petals, with the outer petals offset behind the inner ones
- Each blue point sits directly above an outer petal tip
- 102 sc, 18 picots and 6 trefoil spikes in Round 10
- Each trefoil has three clearly open rings
- Point-to-point size is 4.5 in (11.4 cm), give or take 0.2 in (0.5 cm)
- The hanging loop is secure and about 2 in (5.1 cm) tall
- The brown center knot is tight and centered
- No tails show on the front
Troubleshooting
The flower cups or curls: the Rnd 4 ch-5 loops are too short or too tight. Loosen your chains or use ch 6.
Outer petals don’t show between the inner ones: make sure you worked the Rnd 4 BPsc around the Rnd 2 sc, not into the Rnd 3 petals.
The blue ring ripples: you may have more than 7 sc in a space in Rnd 7. Count back to 48.
Points lean sideways: the 3 sc on each side of the spike are uneven. Rework that ch-7 space.
Trefoil rings collapse: pin them open while the stiffener dries, or use 5 ch per ring instead of 4.
The ornament is too floppy: block again with a stronger stiffener mix.
Care
Store flat or hanging, away from humidity. To clean, gently hand wash in cool water, then re-block and re-stiffen.
Final Notes
The measurement chain is simple. The flower is 1.75 in (4.4 cm), the solid blue ring is 2.4 in (6.1 cm), Round 9 is 3.25 in (8.3 cm) point to point, and the finished ornament is 4.5 in (11.4 cm) point to point. If each checkpoint matches, the next one will too. Make one, measure as you go, and you’ll soon have a flurry of these for your tree.
Happy crocheting!