

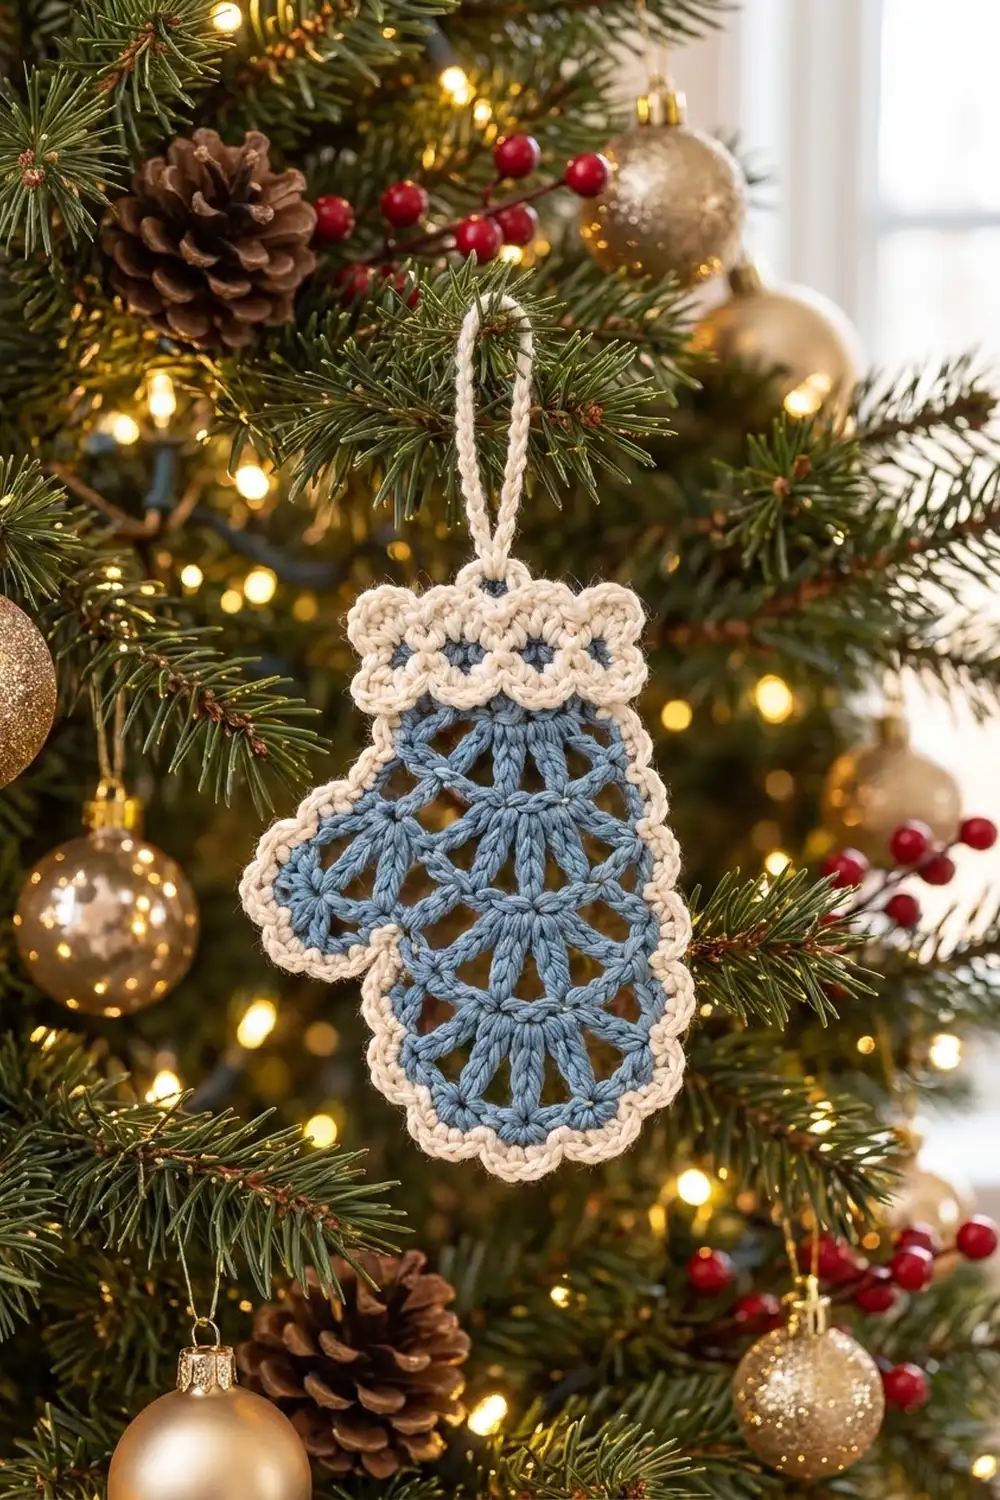
This little mitten ornament looks like frost on a window. Columns of dusty blue fans make a light, lacy body. A soft cream border traces every curve, and a scalloped cream cuff and a simple chain loop at the top finish the winter look.
The design uses only two colors, denim blue and cream. That keeps it calm and cozy, and it looks good on a real tree, a garland of greenery or a gift tag. Make one in each hand direction and they read as a pair.
This pattern uses US crochet terms. The finished ornament measures 4¼ in (10.8 cm) wide including the thumb and 5⅛ in (13.0 cm) tall, not counting the hanging loop.
Construction is simple and all in one piece. You work the blue body flat in rows from the cuff down to the fingertips. Then you add a single fan for the thumb on one side. Next you work the cream cuff into the foundation chain. Two rows of cream single crochet frame the body, and a chain loop finishes the top.
Finished Size and Construction
- Finished size: 4¼ in (10.8 cm) wide × 5⅛ in (13.0 cm) tall, plus a 2 in (5.1 cm) hanging loop
- Skill level: Easy-intermediate
- Terminology: US crochet terms
- Yarn weight: DK / light worsted (3)
- Hook: 3.5 mm (E-4)
- Number of pieces: 1, worked in one piece
- Layout: a single mitten with the cuff at the top and the thumb on one side
- Body size (blue, without the thumb): 3 in (7.6 cm) wide × 4 in (10.2 cm) long
- Size before border: 3½ in (8.9 cm) wide × 4¾ in (12.1 cm) tall, including the thumb and cuff
- Border depth: ⅜ in (1.0 cm), 2 rows of single crochet
Materials
Yarn: Use a smooth cotton or cotton blend in DK / light worsted weight. Cotton shows off the fan texture and blocks crisply. Fuzzy yarns hide the openwork, so avoid them.
- Color A, dusty denim blue: 8 g, about 22 m (24 yd)
- Color B, cream: 6 g, about 16 m (17 yd)
These quantities include a margin of about 20% for swatching and weaving in ends.
Tools:
- 3.5 mm (E-4) crochet hook
- Tapestry needle
- Scissors
- Stitch markers (2)
- Blocking mat and rustproof pins
- Spray bottle with water
- Ruler or tape measure
Abbreviations (US Terms)
- ch – chain
- sl st – slip stitch
- sc – single crochet
- dc – double crochet
- sp – space
- st(s) – stitch(es)
- RS / WS – right side / wrong side
Special stitches:
- Fan: work (dc, ch 1) 4 times, then 1 more dc, all in the same stitch. That makes 5 dc and 4 ch-1 sps.
- Large fan: work (dc, ch 1) 6 times, then 1 more dc, all in the same stitch. That makes 7 dc and 6 ch-1 sps.
- Shell: 3 dc in the same space.
Gauge and Checkpoints
Test first. Before you make the full mitten, work Rows 1–2 as a swatch and measure it.
- Gauge: 19 sc = 3 in (7.6 cm), so Row 1 should measure 3 in (7.6 cm) wide.
- Checkpoint 1: After Row 2, the piece is ¾ in (1.9 cm) tall.
- Checkpoint 2: After Row 4, it is 1¾ in (4.4 cm) tall.
- Checkpoint 3: After Row 6, it is 2¾ in (7.0 cm) tall.
- Checkpoint 4: After Row 8, the body is 4 in (10.2 cm) long.
- Checkpoint 5: With the cuff and thumb added, the piece is 3½ in (8.9 cm) × 4¾ in (12.1 cm).
- Checkpoint 6: After the border, it is 4¼ in (10.8 cm) × 5⅛ in (13.0 cm).
If your piece is too big, go down to a 3.25 mm hook. If it is too small, go up to a 3.75 mm hook. Width matters more than height, because every later count builds on the 19 stitches of Row 1. If the width matches but the fans look short, try lifting your dc loops slightly taller instead of changing hooks.
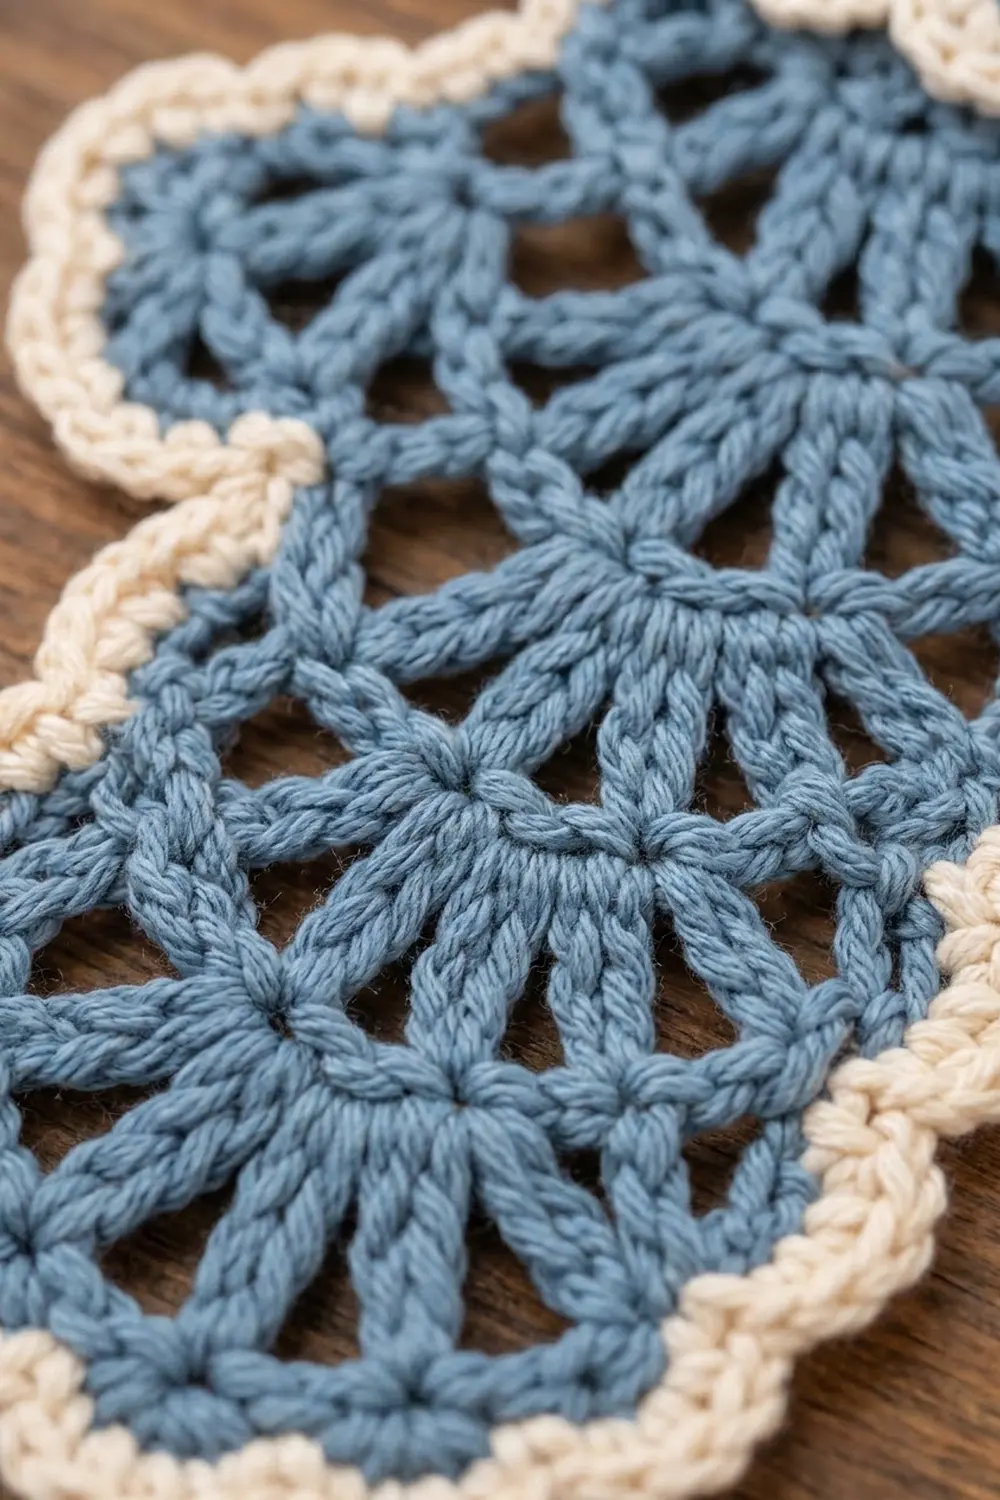
Mitten Body (Color A, Blue)
The body is worked flat in rows from the top (the wrist) down. The fans open downward, toward the fingertips. Turn at the end of every row.
Foundation: With Color A, ch 20.
Row 1 (RS): Sc in the 2nd ch from hook and in each ch across. Turn. (19 sc)
Measure now: 3 in (7.6 cm).
Row 2 (WS): Ch 1, sc in the first sc. Then work this repeat 3 times: skip 2 sc, fan in the next sc, skip 2 sc, sc in the next sc. Turn. (3 fans, 4 sc)
Check: each repeat uses 6 sts. One starting sc plus 3 × 6 = 19. ✓
Row 3 (connector): Ch 3 (counts as dc). Then work this repeat 3 times: ch 2, sc in the center (3rd) dc of the next fan, ch 2, dc in the next sc. Turn. (4 dc including the turning ch, 3 sc, 6 ch-2 sps)
Row 4: Ch 1, sc in the first dc. Then work this repeat 3 times: fan in the next sc, sc in the next dc. Work the last sc in the top of the turning ch. Turn. (3 fans, 4 sc)
The fans now sit directly below the Row 2 fans, which starts the vertical columns.
Row 5: Repeat Row 3. (4 dc, 3 sc, 6 ch-2 sps)
Row 6: Repeat Row 4. (3 fans, 4 sc)
Row 7: Repeat Row 3. (4 dc, 3 sc, 6 ch-2 sps)
Row 8 (fingertips): Ch 1, sc in the first dc. Then work this repeat 3 times: large fan in the next sc, sc in the next dc. Work the last sc in the top of the turning ch. (3 large fans: 21 dc and 18 ch-1 sps, plus 4 sc)
Fasten off. The larger fans spread out and give the rounded, scalloped fingertip edge.
Measure now: about 4 in (10.2 cm) from the foundation to the tips of the fans.
Thumb (Color A)
Pick either side edge for the thumb. One side gives a left mitten and the other gives a right mitten.
On the side you chose, place markers in the end sc of Row 4 and the end sc of Row 6. Row 5’s end stitch lies between them. It is either a dc or the turning ch, depending on the side.
Thumb row: With RS facing, join Color A with a sl st in the side of the marked Row 6 sc. Work a large fan around the post of the Row 5 end stitch, meaning (dc, ch 1) 6 times, then 1 dc. Sl st in the side of the marked Row 4 sc. Fasten off. (1 large fan: 7 dc, 6 ch-1 sps)
The thumb sticks out ½ in (1.3 cm) from the side.
Cuff (Color B, Cream)
Hold the piece so the foundation chain is at the top, and work the cuff into the free loops of that chain.
Cuff Row 1: With RS facing, join Color B in the first free loop of the foundation ch. Ch 1, then sc in the same loop and in each free loop across. Turn. (19 sc)
Cuff Row 2 (windows): Ch 1, sc in the first sc. Then work this repeat 6 times: ch 2, skip 2 sc, sc in the next sc. Turn. (7 sc, 6 ch-2 sps)
Check: 1 + (6 × 3) = 19. ✓
Cuff Row 3 (scallops): Ch 1, sc in the first sc. Then work this repeat 6 times: shell in the next ch-2 sp, sc in the next sc. (6 shells: 18 dc, plus 7 sc)
Fasten off. The cuff is ¾ in (1.9 cm) tall. Body plus cuff is now 4¾ in (12.1 cm), and the width across the thumb is 3½ in (8.9 cm).
Border (Color B, Cream)
The border is worked in rows down one side, across the fingertips and up the thumb side. It ends at Body Row 1 on each side. The cuff edges stay unbordered.
Border gauge: 2 rows of sc = ⅜ in (1.0 cm) deep. Work about 6 sc per inch (2.5 cm) along straight row edges.
Border Row 1 (RS): With RS facing, join Color B in the side of Body Row 1 on the side without the thumb. Ch 1.
- Side without the thumb (Rows 1–8): Work 1 sc in the end of Row 1. Then work 2 sc in the end of each of Rows 2–8. (1 + 7 × 2 = 15 sc)
- Fingertip edge (Row 8): Work 2 sc in the first sc. For each large fan, work 1 sc in every dc and every ch-1 sp (13 sc per fan). Work 1 sc in each sc between fans (2 sc). Work 2 sc in the last sc. (2 + 13 + 1 + 13 + 1 + 13 + 2 = 45 sc)
- Thumb side, going up: 2 sc in the end of Row 8 and 2 sc in the end of Row 7. Then 1 sc in the end of Row 6 at the base of the thumb. Next, 13 sc around the thumb fan, 1 in each dc and each ch-1 sp. Then 1 sc in the end of Row 4, 2 sc in the end of Row 3, 2 sc in the end of Row 2 and 1 sc in the end of Row 1. (2 + 2 + 1 + 13 + 1 + 2 + 2 + 1 = 24 sc)
Total: 15 + 45 + 24 = 84 sc. Turn.
Border Row 2 (WS): Ch 1. Work 1 sc in each sc, with one change: work 2 sc in the center (7th) sc of each 13-sc fan section. There are 3 of these on the fingertips and 1 on the thumb. (84 + 4 = 88 sc)
- Per side: 25 on the thumb side, 48 on the fingertip edge and 15 on the side without the thumb. 25 + 48 + 15 = 88. ✓
Fasten off.
Why the math works: A dc-height row edge needs about 2 sc to lie flat, and a sc row edge needs 1. Each fan gets 1 sc per dc and per ch-1 sp, so the border follows its curve exactly. The 2-sc corners at the fingertips round the bottom corners. The 4 increases in Row 2 sit at the tips of the fans, where the outer edge is longest, so the scallops stay flat instead of cupping. Two rows add ⅜ in (1.0 cm) on each side and at the bottom. That takes the piece from 3½ in (8.9 cm) to 4¼ in (10.8 cm) wide and from 4¾ in (12.1 cm) to 5⅛ in (13.0 cm) tall.
Hanging Loop
Join Color B in the center (4th) sc of Cuff Row 3. Ch 30, then sl st in the same sc. Fasten off. The loop hangs about 2 in (5.1 cm) above the cuff.
Final Blocking
- Weave in all ends along the blue fan stitches or inside the cream border, where they won’t show through the windows.
- Pin the mitten flat, RS up, to 4¼ in (10.8 cm) × 5⅛ in (13.0 cm).
- Pin the 3 fingertip fans and the thumb fan so each one spreads into an even half-circle.
- Open each cuff window gently with a pin tip.
- Mist the piece well with water. For cotton, you can steam lightly instead, holding the iron above the piece.
- Leave it pinned until completely dry, usually 6–8 hours.
- If you want a stiffer ornament, brush on diluted fabric stiffener before it dries and re-pin.
Final Quality-Control Checklist
- Row 1 has 19 sc and measures 3 in (7.6 cm).
- All 3 fan columns line up vertically from Row 2 to Row 8.
- Each fan has 5 dc, and each large fan has 7 dc.
- The thumb fan sits between Rows 4 and 6 and sticks out ½ in (1.3 cm).
- The cuff has 6 windows and 6 shells.
- Border Row 1 has 84 sc and Border Row 2 has 88 sc.
- The mitten lies flat with no cupping or ruffling.
- The finished size is 4¼ in (10.8 cm) × 5⅛ in (13.0 cm).
- The loop is centered over the cuff.
Troubleshooting
Fans lean to one side: You may have missed the center dc in a connector row. Count to the 3rd dc of each 5-dc fan every time.
Body narrows toward the fingertips: Your connector rows are too tight. Chain loosely, or chain 3 instead of 2 in the connector rows (the stitch counts stay the same).
Border ruffles: Your sc are too loose, or you added extra sc on the row edges. Go back to exactly 2 sc per dc row end.
Border cups or pulls in: You skipped the Row 2 increases, or your tension is tight. Check that you have 88 sc.
Thumb flops forward: Work the thumb fan around the post, not into the top of the stitch, and pin it flat during blocking.
Cuff wider than body: Use a hook 0.25 mm smaller for the cuff only.
Care
Hand wash in cool water with mild soap, then reshape and dry flat. Store the ornament flat or hanging, away from crushing.
Final Notes
Each measurement builds on the one before. The 19-sc Row 1 sets a 3 in (7.6 cm) body width. Four fan tiers give a 4 in (10.2 cm) body. The thumb adds ½ in (1.3 cm) and the cuff adds ¾ in (1.9 cm), for 3½ in × 4¾ in (8.9 × 12.1 cm) before the border. The ⅜ in (1.0 cm) border brings it to 4¼ in × 5⅛ in (10.8 × 13.0 cm). If Row 1 is right, the rest falls into place. Make a few in mirrored pairs and hang them together on the tree.
Happy crocheting!