

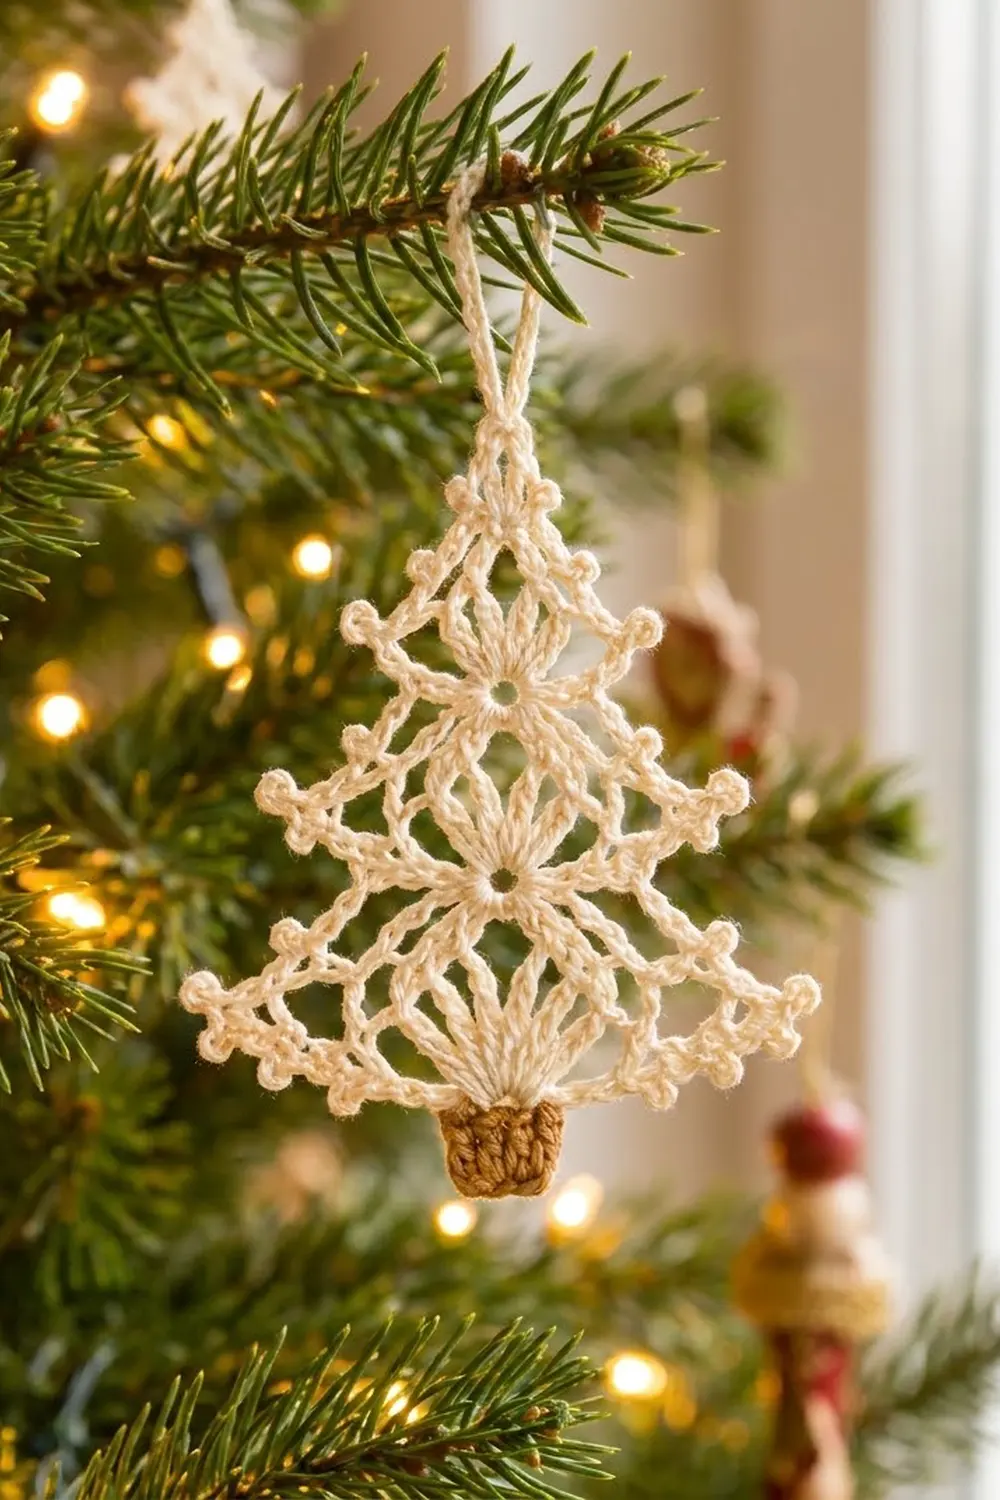
This little lace tree is light, airy and quick to make. Three tiers of open fans and picot arches stack into a classic Christmas tree outline, and a tiny caramel trunk anchors the bottom. It looks lovely on a real tree, tied onto a gift, or hung in a window.
The palette is simple: cream cotton thread for the tree and warm tan for the trunk. The style is vintage and delicate, but the tree holds its shape well once you block it with a little starch.
This pattern uses US crochet terms. The finished ornament measures about 4 in (10.2 cm) wide at the bottom branch tips and 4.25 in (10.8 cm) tall from the trunk to the top point. With the hanging loop, it’s about 5.5 in (14.0 cm) tall.
The ornament is one piece. You work the lace body flat in rows from the bottom edge up to the point. Then one edging round adds the picot arches, the six branch tips and the hanging loop. Last, you work the trunk in tan directly into the bottom edge.
Finished Size and Construction
- Finished size: 4 in (10.2 cm) wide × 4.25 in (10.8 cm) tall; 5.5 in (14.0 cm) with the loop
- Skill level: Intermediate
- Terminology: US crochet terms
- Yarn weight: Size 3 cotton crochet thread
- Hook: 2.75 mm (US C/2)
- Number of pieces: 1 (single ornament)
- Layout: One tree with three stacked tiers; trunk worked onto the bottom edge
- Size before edging: 3.5 in (8.9 cm) wide × 3.25 in (8.3 cm) tall
- Edging depth: Branch tips stand about 0.25 in (0.6 cm) out from the body
- Trunk: 0.7 in (1.8 cm) wide × 0.5 in (1.3 cm) tall
Materials
Yarn: Use a mercerized cotton crochet thread in size 3. It gives crisp stitch definition, takes starch well and doesn’t fuzz. Avoid acrylic, because it won’t hold the points after blocking.
- Cream (tree): 8 g, about 22 m (24 yd)
- Caramel tan (trunk): 1 g, about 3 m (3.3 yd)
These amounts include a margin for a gauge test and weaving in ends.
Tools:
- 2.75 mm (US C/2) crochet hook
- Tapestry needle
- Scissors
- Blocking board or foam mat
- Rustproof pins
- Fabric stiffener or spray starch (recommended)
Abbreviations (US Terms)
- ch – chain
- sl st – slip stitch
- sc – single crochet
- dc – double crochet
- sk – skip
- sp – space
- st(s) – stitch(es)
- RS – right side
Special stitches:
- Picot: Ch 3, sl st in 3rd ch from hook.
- Tip (triple picot): Ch 3, sl st in 3rd ch from hook; [ch 3, sl st in same ch] 2 times. This makes three picots clustered at one point.
- Arch: Ch 3, picot, ch 3.
Gauge and Checkpoints
Gauge: 7 sc and 8 sc rows = 1 in (2.5 cm) with size 3 thread and a 2.75 mm hook.
Make one test piece first. Work Rows 1–5 (Tier 1) and measure before you go on. Lace is forgiving, but the edging only lies flat if the body is the right size.
Checkpoints:
- After Row 1: The 25 sc measure 3.5 in (8.9 cm) across.
- After Row 3: The 9-dc fan stands about 0.3 in (0.8 cm) tall.
- After Row 5: The body is 1.25 in (3.2 cm) tall, and Row 5 is about 2.75 in (7.0 cm) wide.
- After Row 9: The body is 2.25 in (5.7 cm) tall, and Row 9 is about 2 in (5.1 cm) wide.
- After Row 14: The body is 3.25 in (8.3 cm) tall.
- After the edging: The bottom tips are 4 in (10.2 cm) apart.
If your piece is too big, switch to a 2.5 mm hook. If it’s too small, switch to a 3.0 mm hook. Check Row 1 again before you continue. Keep the arch chains slightly loose, because tight chains pull the sides inward.
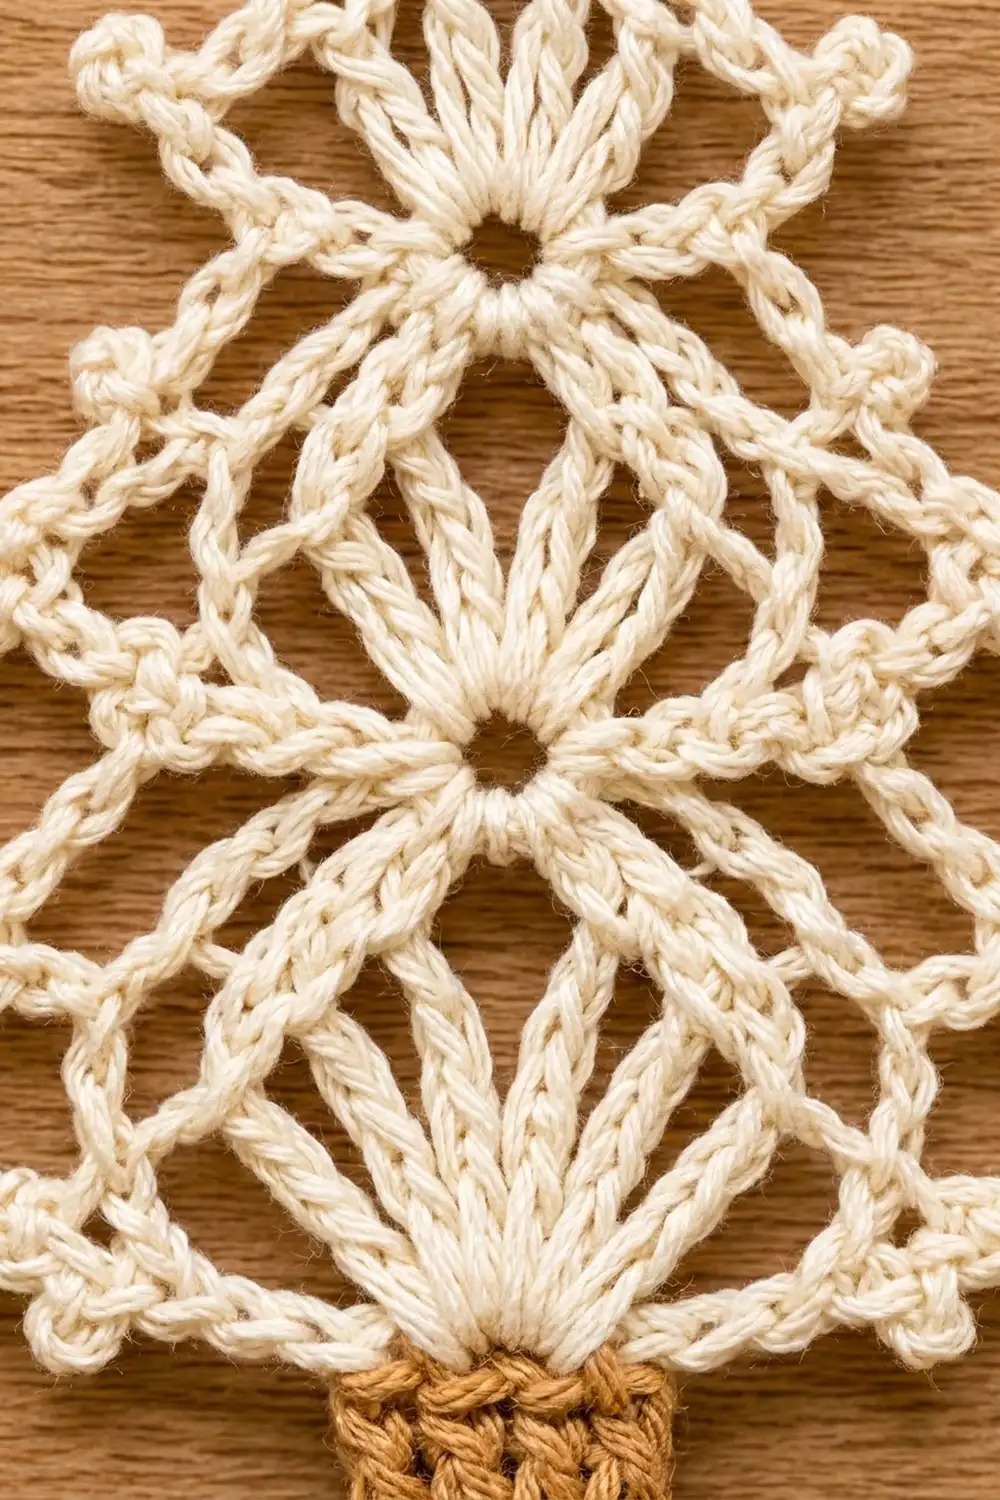
Pattern: Tree Body
Use cream. Work the body flat in rows from the bottom up. The rows get narrower toward the point.
Tier 1 (Bottom)
Row 1 (RS): Ch 26. Sc in 2nd ch from hook and in each ch across. Turn. (25 sc)
Leave the free loops on the underside of the foundation chain unworked. You’ll use them in the edging.
Row 2: Ch 1, sc in first sc, [ch 5, sk 2 sc, sc in next sc] 8 times. Turn. (9 sc, 8 ch-5 arches)
The 5th sc of this row sits over the center stitch of Row 1. This is the center sc.
Row 3: Sl st in each of first 3 ch of first arch, ch 1, sc in same arch, [ch 5, sc in next arch] 2 times, ch 2, sk next arch, 9 dc in center sc, ch 2, sk next arch, sc in next arch, [ch 5, sc in next arch] 2 times. Turn. (6 sc, 4 ch-5 arches, 9 dc, 2 ch-2 sps)
Row 4: Sl st in each of first 3 ch of first arch, ch 1, sc in same arch, ch 5, sc in next arch, ch 3, sk ch-2 sp, [dc in next dc, ch 1] 8 times, dc in last dc, ch 3, sk ch-2 sp, sc in next arch, ch 5, sc in last arch. Turn. (4 sc, 2 ch-5 arches, 9 dc, 8 ch-1 sps, 2 ch-3 sps)
The fan now opens into spokes.
Row 5: Sl st in each of first 3 ch of first arch, ch 1, sc in same arch, ch 3, sc in first ch-1 sp, [ch 3, sc in next ch-1 sp] 7 times, ch 3, sc in last arch. Turn. (10 sc, 9 ch-3 loops)
Number the Row 5 loops 1 to 9. Loop 5 is the center loop.
Tier 2 (Middle)
Row 6: Sl st in each of 3 ch of loop 1 and in next sc, ch 1, sc in loop 2, ch 7, sc in loop 5, ch 7, sc in loop 8. Turn. (3 sc, 2 ch-7 arches)
Leave loops 1 and 9 unworked. They hold the Tier 2 branch tips in the edging. The sc in loop 5 is the new center sc.
Row 7: Sl st in each of first 4 ch of first arch, ch 1, sc in same arch, ch 2, 7 dc in center sc, ch 2, sc in last arch. Turn. (2 sc, 7 dc, 2 ch-2 sps)
Row 8: Ch 1, sc in first sc, ch 3, sk ch-2 sp, [dc in next dc, ch 1] 6 times, dc in last dc, ch 3, sk ch-2 sp, sc in last sc. Turn. (2 sc, 7 dc, 6 ch-1 sps, 2 ch-3 sps)
Row 9: Ch 1, sc in first sc, ch 3, sc in first ch-1 sp, [ch 3, sc in next ch-1 sp] 5 times, ch 3, sc in last sc. Turn. (8 sc, 7 ch-3 loops)
Number the Row 9 loops 1 to 7. Loop 4 is the center loop.
Tier 3 (Top)
Row 10: Sl st in each of 3 ch of loop 1 and in next sc, ch 1, sc in loop 2, ch 5, sc in loop 4, ch 5, sc in loop 6. Turn. (3 sc, 2 ch-5 arches)
Leave loops 1 and 7 unworked for the Tier 3 tips. The middle sc is the center sc.
Row 11: Sl st in each of first 3 ch of first arch, ch 1, sc in same arch, ch 2, 5 dc in center sc, ch 2, sc in last arch. Turn. (2 sc, 5 dc, 2 ch-2 sps)
Row 12: Ch 1, sc in first sc, ch 2, sk ch-2 sp, [dc in next dc, ch 1] 4 times, dc in last dc, ch 2, sk ch-2 sp, sc in last sc. Turn. (2 sc, 5 dc, 4 ch-1 sps, 2 ch-2 sps)
Row 13: Sl st in first ch-2 sp, ch 1, sc in same sp, ch 3, sk first ch-1 sp, sc in 2nd ch-1 sp, ch 3, sc in 3rd ch-1 sp, ch 3, sk last ch-1 sp, sc in last ch-2 sp. Turn. (4 sc, 3 ch-3 loops)
Row 14: Sl st in first loop, ch 1, sc in same loop, ch 3, sk center loop, sc in last loop. (2 sc, 1 ch-3 top loop)
Fasten off and weave in the end. The body should measure 3.5 in (8.9 cm) wide at Row 1 and 3.25 in (8.3 cm) tall.
Edging (Border)
Edging gauge: Each arch covers about 0.5 in (1.3 cm) of the side edge. Each tip stands about 0.25 in (0.6 cm) out from the body.
The edging is one round in cream, worked with the RS facing. Hold the body upside down so the free loops of the foundation chain are on top. Number them 1 to 25, starting at the corner where you join.
Corner 1: Join cream in loop 1, ch 1, (sc, ch 2, tip, ch 2, sc) in loop 1.
Bottom edge: Sc in each of loops 2 to 24. Work a picot right after the sc in loops 3, 5, 7, 9, 17, 19, 21 and 23. (23 sc, 8 picots)
Corner 2: (Sc, ch 2, tip, ch 2, sc) in loop 25.
Side going up:
- Arch, sc in the end sc of Row 3.
- Arch, (sc, ch 2, tip, ch 2, sc) in the free outer loop of Row 5.
- Arch, sc in the side of the end sc of Row 8.
- Arch, (sc, ch 2, tip, ch 2, sc) in the free outer loop of Row 9.
- Arch, sc in the side of the end sc of Row 12.
- Arch, sc in the end sc of Row 13, ch 2.
Per side: 6 arches, 2 tips, 8 sc.
Top and hanging loop: Work 2 sc in the Row 14 top loop. Ch 25, then sl st in the last sc made to close a ring. Work 32 sc into the ring and sl st in the same sc. Work 2 more sc in the top loop. (4 sc in the top loop, plus 32 sc covering the hanging loop)
Side going down:
- Ch 2, sc in the end sc of Row 13.
- Arch, sc in the side of the end sc of Row 12.
- Arch, (sc, ch 2, tip, ch 2, sc) in the free outer loop of Row 9.
- Arch, sc in the side of the end sc of Row 8.
- Arch, (sc, ch 2, tip, ch 2, sc) in the free outer loop of Row 5.
- Arch, sc in the end sc of Row 3, arch.
Sl st in the first sc of Corner 1 and fasten off.
Edging totals: 79 sc (4 at corners, 23 along the bottom, 8 per side × 2, 4 at the top, 32 on the loop), 6 tips, 12 arches and 8 bottom picots.
Why the math works: Row 1 has 25 sc, so the foundation has exactly 25 free loops. The two corners use loops 1 and 25, and the bottom edge uses loops 2 to 24 one-to-one, for 23 sc. Every loop is used once, so the bottom neither ruffles nor pulls in.
The picots are spaced symmetrically: loop 3 mirrors 23, 5 mirrors 21, 7 mirrors 19 and 9 mirrors 17. That leaves loops 10 to 16 picot-free around loop 13, the center under all three fans. On each side, the tips sit in the outer loops that Rows 6 and 10 skipped, so the outline steps out at each tier. The arches between the tips pull it back in, which creates the tiered silhouette.
Trunk
Use tan. With the bottom edge facing up and the RS facing you, find the 5 picot-free sc worked into loops 11 to 15.
Row 1: Join tan in the sc worked into loop 11, ch 1, sc in the same st and in each of the next 4 sc. Turn. (5 sc)
Rows 2–4: Ch 1, sc in each sc across. Turn. (5 sc)
Fasten off. The trunk measures 0.7 in (1.8 cm) wide × 0.5 in (1.3 cm) tall. Weave the ends into the trunk stitches so they don’t show through the lace.
Final Blocking
- Soak the ornament in cool water for a few minutes, then roll it in a towel to press out the water. Don’t wring it.
- If you’re using stiffener, dip the ornament and squeeze out the excess.
- Lay it RS up on the blocking board.
- Pin the two bottom tips 4 in (10.2 cm) apart.
- Pin the Tier 2 and Tier 3 tips at matching distances from the center line.
- Pin the top point so the height from trunk to top is 4.25 in (10.8 cm).
- Put a pin in each ch-1 space of the fans so the spokes spread evenly.
- Pin out each picot and arch along the sides.
- Shape the hanging loop into a teardrop about 1.25 in (3.2 cm) tall.
- Let the ornament dry completely, for at least 12 hours, before you unpin it.
Final Quality-Control Checklist
- The bottom tips are 4 in (10.2 cm) apart.
- The tree is 4.25 in (10.8 cm) tall, or 5.5 in (14.0 cm) with the loop.
- All three fans line up on the center line above the trunk.
- The fans have 9, 7 and 5 dc, from the bottom up.
- There are 6 tips, and each pair is level.
- There are 8 bottom picots and none above the trunk.
- The trunk is 5 sc wide and centered.
- All ends are woven in.
- The ornament lies flat.
Troubleshooting
Fans cup forward: The chains around the fan are too tight. Loosen the ch-2 and ch-3 spaces beside each fan, or block more firmly.
Sides pull inward: The arches are too tight. Chain more loosely, or add 1 ch on each side of every arch picot.
Bottom edge ruffles: Some foundation loops probably have more than one sc. Count again: there should be 23 sc between the corners.
Tips are uneven: Check that Rows 6 and 10 skipped the outer loop at both ends.
Trunk is off-center: Count the bottom picots. There should be 4 on each side of the trunk.
Ornament is limp: Use a stronger stiffener mix, or spray it with starch again.
Care
Hand wash in cool water and dry flat, pinning the tips if needed. Stiffen again after washing, and store the ornament flat.
Final Notes
Here’s the measurement chain. Row 1 sets the width at 25 sc, or 3.5 in (8.9 cm). Tiers 1 and 2 finish at 1.25 in (3.2 cm) and 2.25 in (5.7 cm) tall, and the body ends at 3.25 in (8.3 cm). The edging uses all 25 foundation loops and adds 0.25 in (0.6 cm) tips, bringing the width to 4 in (10.2 cm). The trunk adds 0.5 in (1.3 cm), for a 4.25 in (10.8 cm) tree and a 5.5 in (14.0 cm) ornament with its loop. If every checkpoint matches, your finished tree will too.
Happy crocheting!