

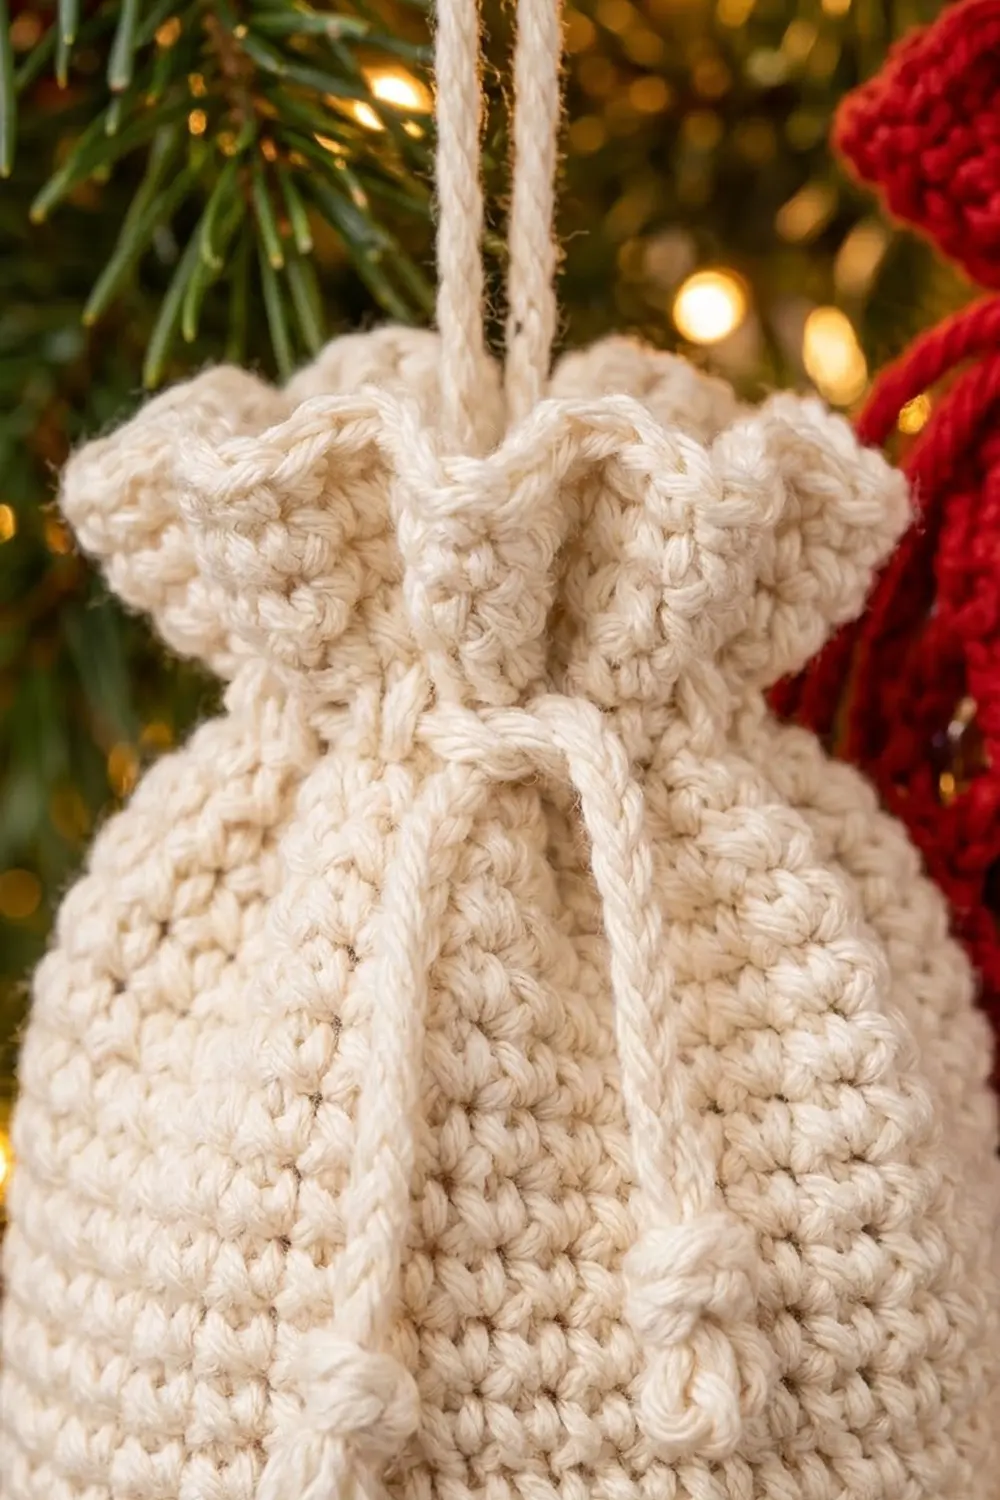
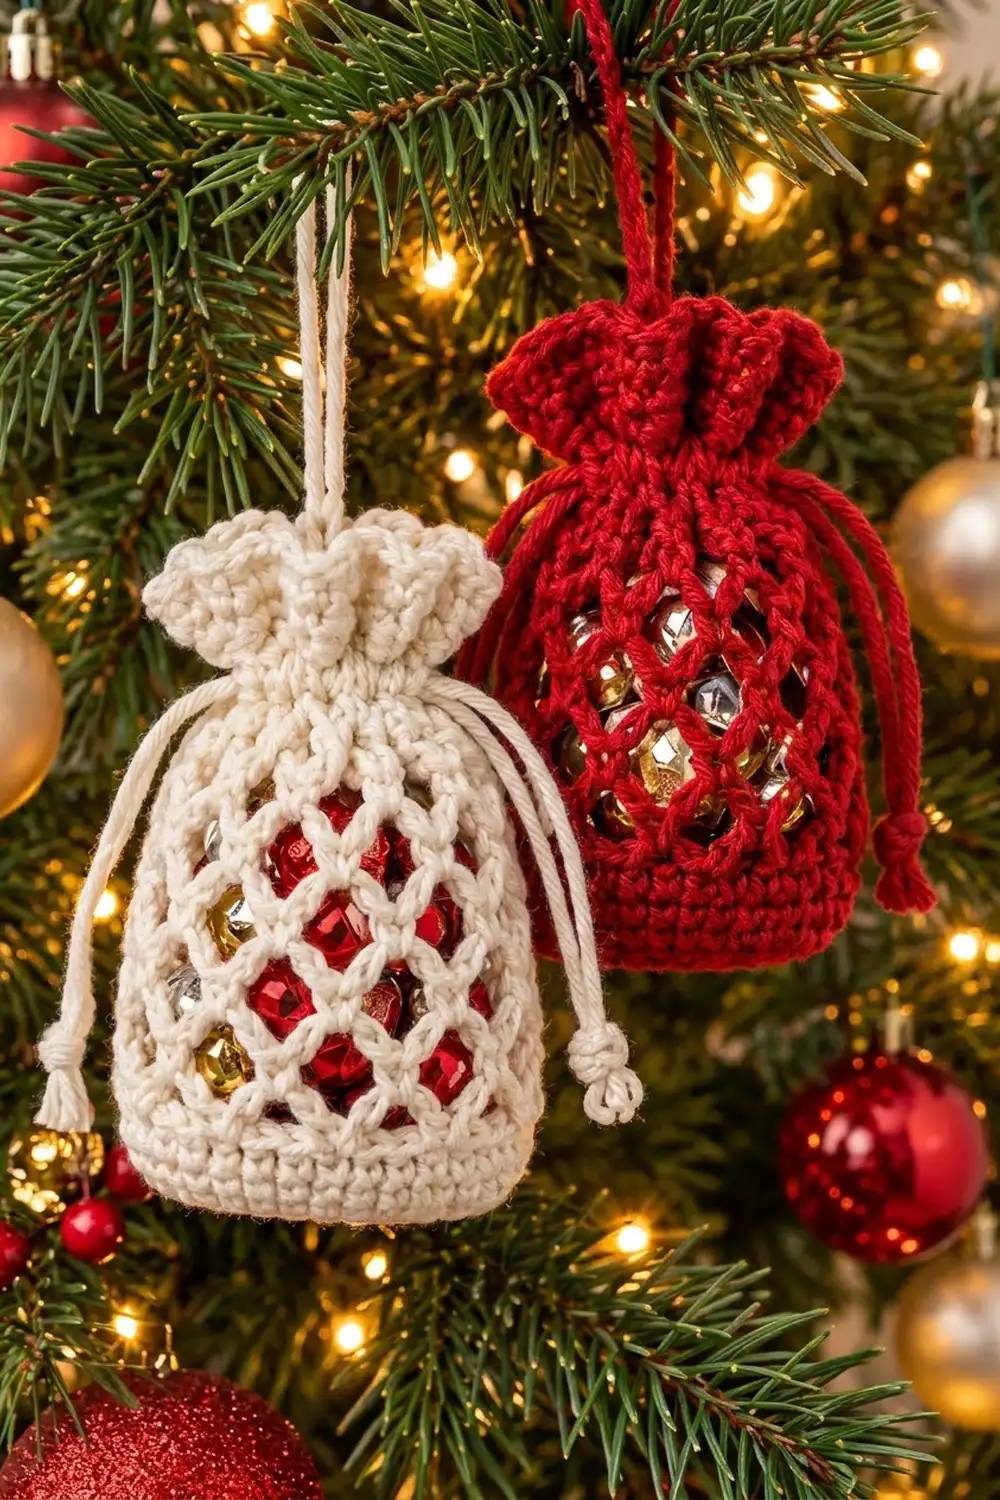
The Frosted Lattice Drawstring Pouch is a small gift bag that doubles as a Christmas tree ornament. It has a solid oval base, a short band of single crochet, an open diamond mesh body, a row of eyelets for a drawstring, and a ruffled cuff. When you pull the cord closed, the cuff gathers into a soft frill.
The sample uses creamy off-white cotton, and the same pattern looks just as good in a deep holiday red. You can see through the mesh, so mini red, gold and silver baubles, wrapped candies or a small gift card all look festive inside the lattice.
This pattern uses US crochet terms. The finished pouch is about 3 in (7.6 cm) wide when laid flat and 4.4 in (11.2 cm) tall from the base to the top of the ruffle, not counting the hanging loop.
The construction is simple. You crochet an oval base, turn the wall upward with a back-loop round, work a solid single crochet band, and then switch to a chain-loop mesh. A conversion round brings the count back to solid stitches. Then you work an eyelet round and finish with a ruffle cuff that triples the stitch count. Last, you add a chain drawstring with knotted ends and a separate hanging loop. The body is one piece worked in joined rounds, so there are no seams to sew.
Finished Size and Construction
- Finished size: 3 in (7.6 cm) wide flat x 4.4 in (11.2 cm) tall
- Skill level: Easy / advanced beginner
- Terminology: US crochet terms
- Yarn weight: DK / light worsted (#3), cotton or cotton blend
- Hook: 3.5 mm (E-4)
- Number of pieces: 1 body piece, plus 1 drawstring cord and 1 hanging loop
- Layout: Single pouch worked bottom-up in joined rounds
- Base size: 2.4 in x 1.1 in (6.1 cm x 2.8 cm) oval
- Size before border (through Rnd 18): 3 in (7.6 cm) wide flat x 3.8 in (9.7 cm) tall
- Border (ruffle cuff) depth: 0.6 in (1.5 cm)
Materials
Choose a smooth cotton in DK weight, either mercerized or matte. Cotton holds the mesh shape well, shows clear stitches, and does not stretch out when the pouch is filled. Avoid fuzzy or very soft acrylics, which blur the diamond lattice.
Yarn (one pouch):
- Main color – Cream / off-white: 15 g, about 38 m (42 yd)
Optional alternate colorway:
- Red: 15 g, about 38 m (42 yd), used in place of cream for a second pouch
Quantities include a margin of about 30 percent for your gauge test, the drawstring, the hanging loop, and weaving in ends.
Tools:
- 3.5 mm (E-4) crochet hook
- Locking stitch marker
- Tapestry needle
- Scissors
- Measuring tape or ruler
- Optional: mini ornaments, beads, or wrapped candies for filling
Abbreviations (US Terms)
- ch – chain
- sl st – slip stitch
- sc – single crochet
- dc – double crochet
- BLO – back loop only
- st(s) – stitch(es)
- sp(s) – space(s)
- sk – skip
- inc – 2 sc in the same stitch
- beg – beginning
- rep – repeat
Special stitch – joining dc: At the end of each mesh round, work “ch 2, dc” instead of a full ch-5 loop. Together, the ch 2 and the dc are as long as one ch-5 loop. The dc also leaves your hook in the middle of that loop, ready to start the next round. Treat this ch-2-plus-dc as a normal ch-5 space in the next round.
Gauge and Checkpoints
Gauge: 20 sc x 22 rounds = 4 in (10.2 cm) square. That is 5 sc and 5.5 rounds per 1 in (2.5 cm).
Gauge matters here because the mesh, eyelets and ruffle all depend on the 30-stitch round. Make the base and solid band first and use them as your test piece.
Checkpoints:
- After Rnd 3 (base): the oval measures 2.4 in x 1.1 in (6.1 cm x 2.8 cm).
- After Rnd 8 (solid band): the pouch is 3 in (7.6 cm) wide when pressed flat, and the band is 0.9 in (2.3 cm) tall above the base edge.
- After Rnd 15 (mesh): the wall is about 3 in (7.6 cm) tall above the base edge.
- After Rnd 18 (eyelet section): the wall is 3.8 in (9.7 cm) tall.
- After Rnd 20 (ruffle): the total height is 4.4 in (11.2 cm).
If your piece is too big: go down to a 3.25 mm (D-3) hook. If it is too small or stiff: go up to a 3.75 mm (F-5) hook. Do not change the stitch counts, because the mesh and ruffle math depends on a 30-stitch round.
Pattern
Work in joined rounds with the right side facing you at all times. The beginning ch 1 does not count as a stitch. Place a marker in the first stitch of each round.
Oval Base
Foundation: Ch 9.
Rnd 1: Sc in 2nd ch from hook, sc in next 6 ch, 3 sc in last ch. Turn the chain and work along the other side: sc in next 6 ch, 2 sc in the same ch as the first sc. Sl st to first sc. (18 sts)
Rnd 2: Ch 1, inc in first st, sc in next 6 sts, inc in each of next 3 sts, sc in next 6 sts, inc in each of last 2 sts. Sl st to first sc. (24 sts)
Rnd 3: Ch 1, (sc in next st, inc) once, sc in next 6 sts, (sc in next st, inc) 3 times, sc in next 6 sts, (sc in next st, inc) 2 times. Sl st to first sc. (30 sts)
Check: the oval should lie flat and measure 2.4 in x 1.1 in (6.1 cm x 2.8 cm). If it cups, your tension is too tight. If it ripples, it is too loose.
Solid Band
Rnd 4: Ch 1, sc in BLO of each st around. Sl st to first sc. (30 sts)
The unworked front loops form a crisp ridge, and the wall now turns upward.
Rnds 5–8: Ch 1, sc in each st around. Sl st to first sc. (30 sts each round)
You now have a solid band of 5 rounds, 0.9 in (2.3 cm) tall. Flatten the pouch so the ends of the base sit at the left and right folds. You should see 15 sts on the front, 15 sts on the back, and a width of 3 in (7.6 cm).
Diamond Mesh Body
Rnd 9 (set-up mesh): Ch 1, sc in first st, ch 5, sk next 2 sts, sc in next st; rep from * 8 more times, ch 2, sk last 2 sts, dc in first sc. (10 loops, counting the final ch-2-plus-dc as 1 loop)*
Check: 10 sc anchors x 3 sts each (1 sc + 2 skipped) = 30 sts used, so the loops are evenly spaced.
Rnds 10–15: Ch 5, sc in next ch-5 sp; rep from * 8 more times, ch 2, dc in top of joining dc from previous round. (10 loops each round)*
Each sc lands in the center of a loop below, so the loops shift by half a loop each round and form the diamond lattice. The sc become the small knots where the lattice lines cross.
After Rnd 15 you have 7 mesh rounds, about 2.1 in (5.3 cm) tall, and the wall is about 3 in (7.6 cm) tall above the base edge. If you plan to fill the pouch with something round, test it now. The mesh should hold mini baubles about 0.6 in (1.5 cm) across without letting them slip through.
Closing the Mesh
Rnd 16 (conversion round): Ch 1, 2 sc around the post of the joining dc, 3 sc in next ch-5 sp; rep from * 8 more times, 1 sc around the post of the same joining dc. Sl st to first sc. (10 loops x 3 sc = 30 sts)*
The last loop gets 2 sc at the start of the round and 1 sc at the end, so it also holds 3 sc. Check that each flat side has 15 sts again.
Eyelet Round
Rnd 17: Ch 5 (counts as dc + ch 2), sk next 2 sts, dc in next st, ch 2, sk next 2 sts; rep from * 8 more times. Sl st to 3rd ch of beg ch-5. (10 dc + 10 ch-2 sps = 30 sts; 10 eyelets)*
Rnd 18 (trim round): Ch 1, sc in next dc, 2 sc in next ch-2 sp; rep from * around. Sl st to first sc. (10 sc in dc + 20 sc in sps = 30 sts)*
Check: the pouch is now 3.8 in (9.7 cm) tall and still 3 in (7.6 cm) wide flat, with 5 eyelets on each side.
Border: Ruffle Cuff
On this single-piece pouch, the ruffle is the border. Work it directly into Rnd 18.
Border gauge: 3 dc into each sc of Rnd 18. With the pouch flat, each side starts with 15 sts.
Rnd 19: Ch 3 (counts as dc), 2 dc in same st, 3 dc in each st around. Sl st to top of beg ch-3. (30 sts worked + 60 sts added = 90 dc; 45 per side)
Rnd 20: Ch 1, sc in each dc around. Sl st to first sc. Fasten off and weave in ends. (90 sc; 45 per side)
Why the math works: Each side starts with 15 sts. Tripling gives 15 x 3 = 45 sts per side and 45 x 2 = 90 sts around. Rnd 20 keeps the same 90 sts, so the edge stops growing and gets a firm finish. The top edge has three times as many stitches as the 3 in (7.6 cm) side below it. That extra length can’t lie flat, so it folds into soft waves. When you pull the drawstring, the waves bunch into the full frill seen on the finished pouch. The ruffle adds 0.6 in (1.5 cm), for a total height of 4.4 in (11.2 cm).
Drawstring
Ch 80, about 16 in (40.6 cm). Fasten off, leaving 1 in (2.5 cm) tails. Tie an overhand knot 0.5 in (1.3 cm) from each end and trim the tails close to the knots.
Start on the outside of the pouch, at the eyelet nearest one side fold. Weave the cord in through eyelet 1, out through eyelet 2, and keep alternating around until the cord comes out through eyelet 10. Both knotted ends now hang outside the pouch from neighboring eyelets.
Hanging Loop
Ch 35, about 7 in (17.8 cm), leaving 4 in (10.2 cm) tails at each end. Sew one end to the inside of Rnd 18 at the left side fold and the other end at the right side fold, so the loop arches over the ruffle. Weave in the ends securely.
Final Blocking
- Lightly spray the pouch with water, or hold an iron 1 in (2.5 cm) above it and steam it. Do not press the iron onto the stitches.
- Stuff the pouch firmly with plastic wrap or a small rolled towel so the body is 3 in (7.6 cm) wide flat.
- Gently tug each mesh diamond into an even shape and line up the lattice knots in straight diagonals.
- Shape the base into a neat oval and push the back-loop ridge outward.
- Fluff the ruffle with your fingers so the waves are evenly spaced, about 4 to 5 waves per side.
- Let the pouch dry completely, for at least 4 hours, before removing the stuffing.
- Add the drawstring after blocking so the cord does not dry kinked.
Final Quality-Control Checklist
- The base oval is flat and measures 2.4 in x 1.1 in (6.1 cm x 2.8 cm).
- The back-loop ridge makes a clean line all the way around the base.
- The solid band has 5 rounds of 30 sts each.
- The mesh has 7 rounds of 10 loops each, with no twisted or doubled loops.
- Rnd 16 and Rnd 18 each have 30 sts.
- There are exactly 10 eyelets, 5 per flat side.
- The ruffle has 90 sts, 45 per side.
- The pouch measures 3 in (7.6 cm) wide and 4.4 in (11.2 cm) tall.
- The drawstring ends come out of neighboring eyelets on the outside.
- The hanging loop is secure on both sides and centered over the ruffle.
- All ends are woven in and can’t be seen from the outside.
Troubleshooting
The base curls up like a bowl. Your increases are too tight. Go up 0.25 mm in hook size for Rnds 1–3 only.
The wall flares out instead of rising straight. Make sure Rnd 4 is worked in back loops only and that every round after it has exactly 30 sts.
The mesh is lopsided or spirals. You probably skipped the joining dc as a space. In each mesh round, the final “ch 2, dc” counts as the 10th loop.
Mini ornaments fall through the mesh. Use larger fillers, or work the mesh with ch-4 loops and end each round with “ch 1, dc” instead of “ch 2, dc.” The loop counts stay the same.
The ruffle is flat instead of wavy. Check that Rnd 19 has 3 dc in every st, for 90 total. With fewer stitches, the edge won’t ruffle.
The drawstring won’t pull closed. The eyelets may be too tight for the cord. Make a thinner cord by chaining with a 3 mm hook, or use a length of plain yarn twisted into a cord.
The pouch is too tall. Work 6 mesh rounds instead of 7. Each mesh round you leave out takes away about 0.3 in (0.8 cm).
Care
Hand wash in cool water with mild soap, roll the pouch in a towel to remove moisture, and dry it flat or stuffed so it keeps its shape. Take out any fillers and metal ornament hooks before washing.
Final Notes
The whole pouch is built on one number: 30 stitches. The oval base grows from 18 to 24 to 30 sts. That 30-st round carries through the solid band, divides evenly into 10 mesh loops, goes back to 30 sts, makes 10 eyelets, and triples into a 90-st ruffle.
Keep the measurement chain in mind as you work. The base is 2.4 in x 1.1 in (6.1 cm x 2.8 cm), the solid band is 0.9 in (2.3 cm), the mesh is about 2.1 in (5.3 cm), and the body is 3.8 in (9.7 cm) tall before the ruffle. Add the 0.6 in (1.5 cm) ruffle for a finished pouch of 3 in x 4.4 in (7.6 cm x 11.2 cm).
Make one in cream and one in red, then fill them with tiny treasures for the tree or a gift exchange.
Happy crocheting!