

The Frosted Lattice Tree is a flat, airy ornament made from classic filet mesh. Rows of open square holes step inward in neat tiers, and the outline looks like a stylized evergreen. Light from your tree shows through the holes.
The samples are in two soft colors: a light dusty blue and a warm cream. Each ornament uses only one color. The style is calm and Scandinavian, so these trees suit a pale, frosty theme and are easy to make in multiples.
This pattern uses US crochet terms. The finished ornament measures 4.0 in (10.2 cm) wide and 5.4 in (13.7 cm) tall including the trunk. The hanging loop adds about 1.2 in (3.0 cm) more.
Construction is simple. You start with a row of single crochet and then work filet mesh rows, decreasing one square at each side every two rows. One round of single crochet goes around the whole stepped outline. Then you work a short trunk off the bottom edge and finish with a covered hanging loop at the tip.
Finished Size and Construction
- Finished size: 4.0 in (10.2 cm) wide × 5.4 in (13.7 cm) tall, trunk included
- Hanging loop: about 1.2 in (3.0 cm) above the tip
- Skill level: Easy / advanced beginner
- Terminology: US crochet terms
- Yarn weight: DK (light worsted, #3), cotton recommended
- Hook: 3.5 mm (E-4)
- Number of pieces: 1. No joining is needed.
- Layout: Single stepped triangle with 11 rows: 1 sc row plus 10 mesh rows
- Size before border: 3.6 in (9.1 cm) wide × 4.2 in (10.7 cm) tall
- Border depth: 0.2 in (0.5 cm) on every edge
- Trunk: 1.4 in (3.6 cm) wide × 0.8 in (2.0 cm) tall
Materials
Yarn: Use a smooth DK cotton or cotton blend. Cotton gives the crisp, open holes and clean steps you see in the samples. Soft acrylic works too, but the mesh will look rounder and will need firmer blocking. Choose a yarn with good stitch definition and avoid fuzzy or brushed yarns.
Yarn quantities (per ornament):
– Light Blue: 10 g, about 23 m (25 yd) for one blue tree
– Cream: 10 g, about 23 m (25 yd) for one cream tree
Each ornament uses only one color. To match the photos, make one tree in each color. These amounts include a margin of about 30% for your gauge swatch, the tails and any ripping back.
Tools:
– 3.5 mm (E-4) crochet hook
– Tapestry needle
– Scissors
– Stitch marker (1)
– Blocking mat and rust-proof pins
– Spray bottle with water
– Optional: fabric stiffener or a light starch spray
– Ruler or tape measure
Abbreviations (US Terms)
- ch – chain
- sl st – slip stitch
- sc – single crochet
- dc – double crochet
- sk – skip
- sp – space
- st(s) – stitch(es)
- rep – repeat
- * * – repeat the instructions between the asterisks as directed
Special stitch: Mesh square. A mesh square is one open box made from 2 posts with a ch-1 space between them. Neighboring squares share their posts. A row of n squares therefore has n + 1 posts and n ch-1 spaces, for a total of 2n + 1 stitches.
Turning chain: At the start of each mesh row, ch 4 counts as 1 dc plus 1 ch-1 space. That gives you the first post and the first space of the row.
Gauge and Checkpoints
Mesh gauge: 5 squares × 5 rows = 2.0 in (5.1 cm) square, so each square is 0.4 in (1.0 cm) wide and tall.
Single crochet gauge: 20 sc × 20 rows = 4.0 in (10.2 cm) square, or 5 sc per 1.0 in (2.5 cm).
Since this is a small item, the ornament can serve as your swatch. Work through Row 3, measure, and only then continue. If the numbers are off, rip back now rather than after the border.
Checkpoints:
– After Row 3: 3.6 in (9.1 cm) wide × 1.0 in (2.5 cm) tall
– After Row 7: 2.6 in (6.6 cm) tall. Rows 6–7 are 2.0 in (5.1 cm) wide.
– After Row 11: 4.2 in (10.7 cm) tall
– After the border: 4.0 in (10.2 cm) wide × 4.6 in (11.7 cm) tall
– After the trunk: 5.4 in (13.7 cm) tall
If your piece is too big: Use a hook 0.5 mm smaller, such as 3.0 mm. Also make sure your ch-1 spaces are not loose, because loose chains stretch the squares.
If your piece is too small: Use a hook 0.5 mm larger, such as 4.0 mm (G-6). Pull each dc up to its full height before you finish it.
If your squares are wider than they are tall (or the reverse): Change only how you work the dc. Taller dc make the rows taller, and tighter ch-1s make the squares narrower. Square holes make the steps look sharp.
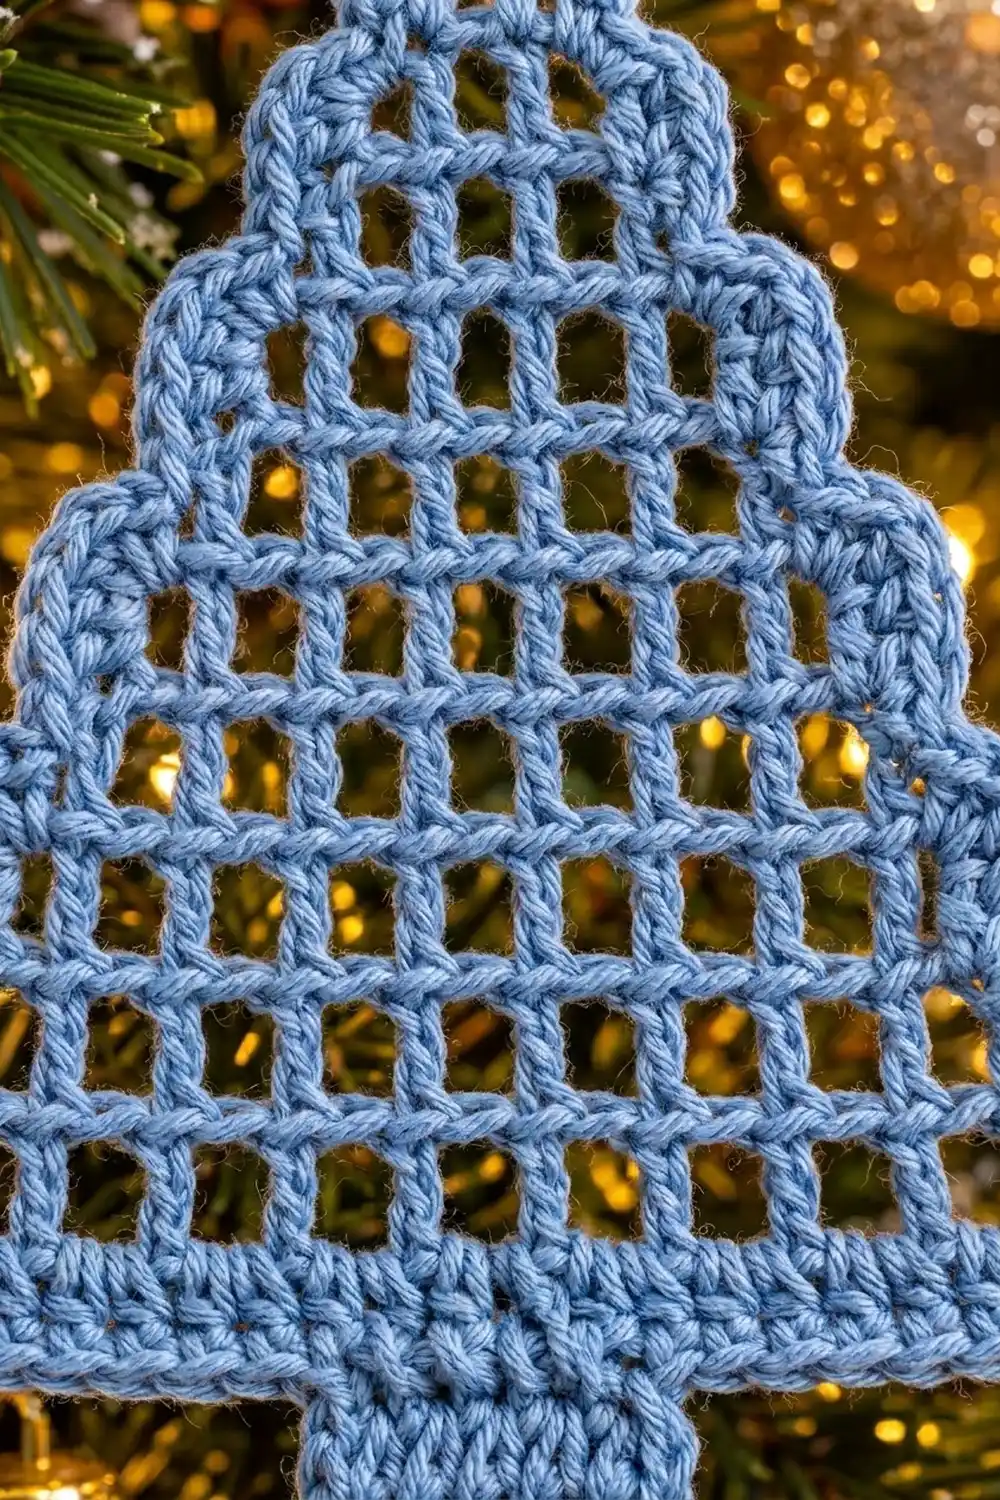
Tree Body
Work flat in rows. Turn at the end of every row. Filet mesh looks the same on both sides, so either side can be the front.
Foundation: Ch 20.
Row 1: Sc in 2nd ch from hook and in each ch across. Turn. (19 sc)
This solid row forms the base of the tree and anchors the first mesh row.
Row 2 (first mesh row): Ch 4 (counts as dc + ch-1), sk next sc, dc in next sc. *Ch 1, sk next sc, dc in next sc.* Rep from * to * 7 more times. Turn. (9 squares; 10 posts + 9 ch-1 sps = 19 sts)
Row 3: Ch 4 (counts as dc + ch-1), dc in next dc. *Ch 1, dc in next dc.* Rep from * to * 7 more times, working the last dc in the 3rd ch of the turning ch-4. Turn. (9 squares, 19 sts)
Checkpoint: 3.6 in (9.1 cm) wide, 1.0 in (2.5 cm) tall.
Row 4 (decrease row): Do not chain. Sl st in first dc, sl st in next ch-1 sp, sl st in next dc. This moves you in by 1 square. Ch 4 (counts as dc + ch-1), dc in next dc. *Ch 1, dc in next dc.* Rep from * to * 5 more times. Leave the last square of Row 3 unworked. Turn. (7 squares, 15 sts)
The row is now 1 square shorter at each end. This creates the first step on both sides.
Row 5: Ch 4, dc in next dc. *Ch 1, dc in next dc.* Rep from * to * 5 more times, working the last dc in the 3rd ch of the turning ch-4. Turn. (7 squares, 15 sts)
Rows 4–5 measure 2.8 in (7.1 cm) wide.
Row 6 (decrease row): Sl st in first dc, ch-1 sp and next dc. Ch 4, dc in next dc. *Ch 1, dc in next dc.* Rep from * to * 3 more times. Leave the last square unworked. Turn. (5 squares, 11 sts)
Row 7: Ch 4, dc in next dc. *Ch 1, dc in next dc.* Rep from * to * 3 more times, working the last dc in the 3rd ch of the turning ch-4. Turn. (5 squares, 11 sts)
Checkpoint: 2.6 in (6.6 cm) tall. Rows 6–7 are 2.0 in (5.1 cm) wide.
Row 8 (decrease row): Sl st in first dc, ch-1 sp and next dc. Ch 4, dc in next dc. *Ch 1, dc in next dc.* Rep from * to * once more. Leave the last square unworked. Turn. (3 squares, 7 sts)
Row 9: Ch 4, dc in next dc, ch 1, dc in 3rd ch of the turning ch-4. Turn. (3 squares, 7 sts)
Rows 8–9 measure 1.2 in (3.0 cm) wide.
Row 10 (decrease row): Sl st in first dc, ch-1 sp and next dc. Ch 4, dc in next dc. Leave the last square unworked. Turn. (1 square, 3 sts)
Row 11: Ch 4 (counts as dc + ch-1), dc in 3rd ch of the turning ch-4. (1 square, 3 sts) Do not fasten off.
Checkpoint: 4.2 in (10.7 cm) tall. The tip is 0.4 in (1.0 cm) wide.
Counting check: Every row of n squares has 2n + 1 stitches. The square counts run 9, 9, 7, 7, 5, 5, 3, 3, 1, 1, and each decrease row removes 2 squares (4 stitches). Since all decreases are worked the same way, the tree stays centered.
Note on the stepped edges: The decrease rows (4, 6, 8 and 10) all start from the same side. On that side, each ledge is covered by the 3 slip stitches. On the other side, the ledge is an unworked square. The border treats both sides the same way.
Border
Border gauge: 5 sc per 1.0 in (2.5 cm), which matches the single crochet gauge. Each mesh square is 0.4 in (1.0 cm), so the border uses:
– 2 sc per dc row-end (0.4 in / 1.0 cm of edge)
– 1 sc per sc row-end (0.2 in / 0.5 cm)
– 1 sc in each ch-1 space along the horizontal edges
– 3 sc at every outer corner, so the corner turns without pulling
– No extra stitch at the inner corners where a ledge meets the row above. Skipping it keeps each inner corner sharp instead of puffy.
Border Round: Continue from the end of Row 11 without turning. Ch 1.
Tip (7 sc):
– 3 sc in the top of the dc just made (tip corner)
– 1 sc in the ch-1 sp of Row 11. Place a marker in this sc, the 4th of the round, for the hanging loop.
– 3 sc in the 3rd ch of the turning ch-4 (tip corner)
First side, working down (37 sc):
– 2 sc in each row-end of Rows 11 and 10 (4 sc)
– Ledge on top of Row 9: 1 sc in the ch-1 sp (or the sl st sitting on it), 3 sc in the outer corner dc (4 sc)
– 2 sc in each row-end of Rows 9 and 8 (4 sc)
– Ledge on top of Row 7: 1 sc in the ch-1 sp, 3 sc in the corner dc (4 sc)
– 2 sc in each row-end of Rows 7 and 6 (4 sc)
– Ledge on top of Row 5: 1 sc in the ch-1 sp, 3 sc in the corner dc (4 sc)
– 2 sc in each row-end of Rows 5 and 4 (4 sc)
– Ledge on top of Row 3: 1 sc in the ch-1 sp, 3 sc in the corner dc (4 sc)
– 2 sc in each row-end of Rows 3 and 2 (4 sc)
– 1 sc in the row-end of Row 1 (1 sc)
That makes 5 row-end pairs × 4 sc = 20, plus 4 ledges × 4 sc = 16, plus 1 = 37 sc.
Bottom edge (23 sc): Work into the free loops of the foundation chain:
– 3 sc in the first free loop (corner)
– 1 sc in each of the next 17 free loops
– 3 sc in the last free loop (corner)
That makes 3 + 17 + 3 = 23 sc. There are 19 free loops, the same as Row 1.
Second side, working up (37 sc): Mirror the first side:
– 1 sc in the Row 1 row-end
– 4 sc along Rows 2–3
– Ledge: 3 sc in the corner dc, 1 sc in the ch-1 sp or sl st
– Repeat the pattern of 4 row-end sc and one ledge of 4 sc until 4 sc remain along Rows 10–11
Sl st in the first sc of the round to join. (104 sc: 7 + 37 + 23 + 37)
Fasten off and weave in the ends.
Why the math works: Each side is 10 dc rows plus 1 sc row, or 4.2 in (10.7 cm) of vertical edge. At 2 sc per dc row and 1 sc for the sc row, that is 21 sc, or exactly 5 sc per inch. The ledges and corners add the remaining 16 sc. Each ledge uses 4 sc over 0.4 in (1.0 cm), and the 2 extra stitches turn the outer corner. The bottom edge matches Row 1 stitch for stitch, plus 2 extra at each corner. Since the stitch count matches the edge length, the border lies flat without ruffling or cupping.
Checkpoint: 4.0 in (10.2 cm) wide × 4.6 in (11.7 cm) tall.
Trunk
The trunk is worked in rows directly off the bottom edge of the border, centered on it.
Lay the tree tip-down with the bottom edge facing up. The bottom edge has 23 sc, and the 12th sc is the center. Skip the first 8 sc (counting from the corner stitches inward) and join the yarn in the 9th sc.
Row 1: Ch 1, sc in the same st and in each of the next 6 sc. Turn. (7 sc)
You have now used sc 9–15 of the bottom edge, which leaves 8 sc free on each side, so the trunk is centered.
Rows 2–4: Ch 1, sc in each sc across. Turn. (7 sc)
At the end of Row 4, do not turn. Fasten off and weave in the ends, hiding them in the trunk’s stitches.
Checkpoint: the trunk is 1.4 in (3.6 cm) wide × 0.8 in (2.0 cm) tall. The ornament is now 5.4 in (13.7 cm) tall.
Hanging Loop
Join the yarn in the marked center sc at the tip, which is the 4th sc of the border round.
Loop: Ch 15, sl st in the same marked sc to form a loop.
Covering: Work 20 sc into the ch-15 loop and pack them evenly. Sl st in the marked sc again. Fasten off and weave the end down into the border.
The covered loop stands about 1.2 in (3.0 cm) above the tip and stays firm and upright, as in the photos. With the loop, the ornament is 6.6 in (16.8 cm) tall.
Final Blocking
Blocking squares the holes and sharpens the steps, so don’t skip it.
- Dampen: Mist the ornament with water until it is evenly damp but not dripping. For cotton, you can also dip it in water and squeeze it gently in a towel.
- Pin the outline: Pin the two bottom corners 4.0 in (10.2 cm) apart. Pin the tip center so the bordered tree is 4.6 in (11.7 cm) tall.
- Pin each step: Place a pin at every outer ledge corner on both sides. Line up the steps so the two sides mirror each other.
- Open the mesh: Pull each square gently into a true square, 0.4 in (1.0 cm) on each side. A blunt tapestry needle helps nudge the posts straight.
- Shape the trunk and loop: Pin the trunk square to the center of the bottom. Stand the loop upright, or pin it flat in a teardrop shape.
- Optional stiffening: For a crisp, card-like ornament, brush on diluted fabric stiffener or spray starch at this stage.
- Dry completely: Leave it pinned until fully dry, usually 6–12 hours.
Final Quality-Control Checklist
- [ ] The tree is 4.0 in (10.2 cm) wide and 4.6 in (11.7 cm) tall before the trunk.
- [ ] The total height with the trunk is 5.4 in (13.7 cm).
- [ ] The square counts from the bottom are 9, 9, 7, 7, 5, 5, 3, 3, 1, 1.
- [ ] Both sides have 4 matching steps.
- [ ] The border round totals 104 sc, with 3 sc at every outer corner.
- [ ] The trunk is 7 sc wide and centered, with 8 border sc free on each side.
- [ ] The hanging loop starts from the exact center of the tip.
- [ ] All ends are woven into solid stitches, not across the open mesh.
- [ ] The ornament lies flat with no cupping or ruffling.
Troubleshooting
The tree is leaning or off-center. One decrease row was probably worked differently from the others. Check that every decrease row has 3 sl sts at the start and leaves exactly 1 square unworked at the end.
The squares look like rectangles. Your dc are too short or your ch-1s are too long. Adjust how you work the dc rather than changing the stitch counts, then block firmly.
The border ruffles. You probably have extra stitches on the sides. Use exactly 2 sc per dc row-end. Also check that you didn’t add a stitch at the inner corners.
The border pulls in or cups. Your stitches are too tight, or you skipped the 3-sc outer corners. Go up 0.5 mm in hook size for the border only.
The steps look rounded. Pin each outer corner when blocking. Starch keeps the corners sharp.
The loop flops over. Pack all 20 sc tightly into the loop. A little stiffener on the loop also helps.
The turning chains look loose. Try ch 3 instead of ch 4 if your chains run large. The stitch counts stay the same.
Care
Hand wash in cool water with mild soap, press out the water in a towel, and reshape and dry flat. If you used stiffener, re-stiffen after washing and store the ornament flat between tissue paper.
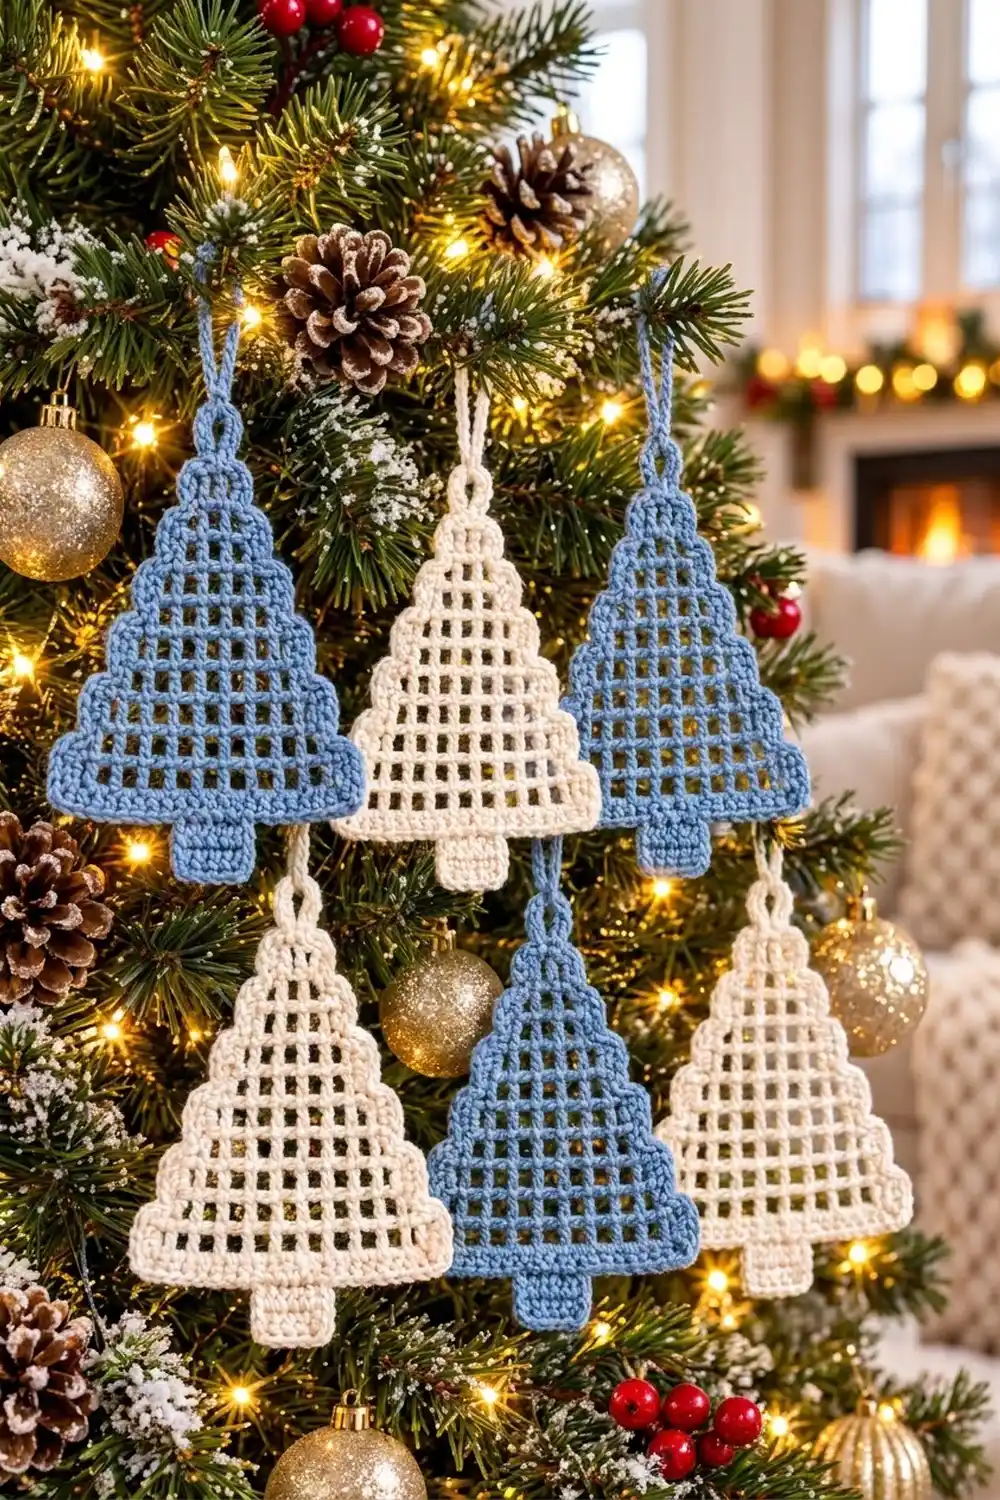
Final Notes
Each stage of the ornament builds on the one before:
– Gauge: each mesh square is 0.4 in (1.0 cm).
– Base: 9 squares make the 3.6 in (9.1 cm) base.
– Body: 10 mesh rows plus the sc base row make the 4.2 in (10.7 cm) height.
– Border: a 0.2 in (0.5 cm) border brings the tree to 4.0 × 4.6 in (10.2 × 11.7 cm).
– Trunk: a 0.8 in (2.0 cm) trunk brings the total height to 5.4 in (13.7 cm).
– Loop: a 1.2 in (3.0 cm) loop on top completes the ornament.
Check each checkpoint as you go and the final ornament will measure correctly. One tree uses about 10 g of yarn, so you can make a whole set in blue and cream from very little yarn.
Happy crocheting!