

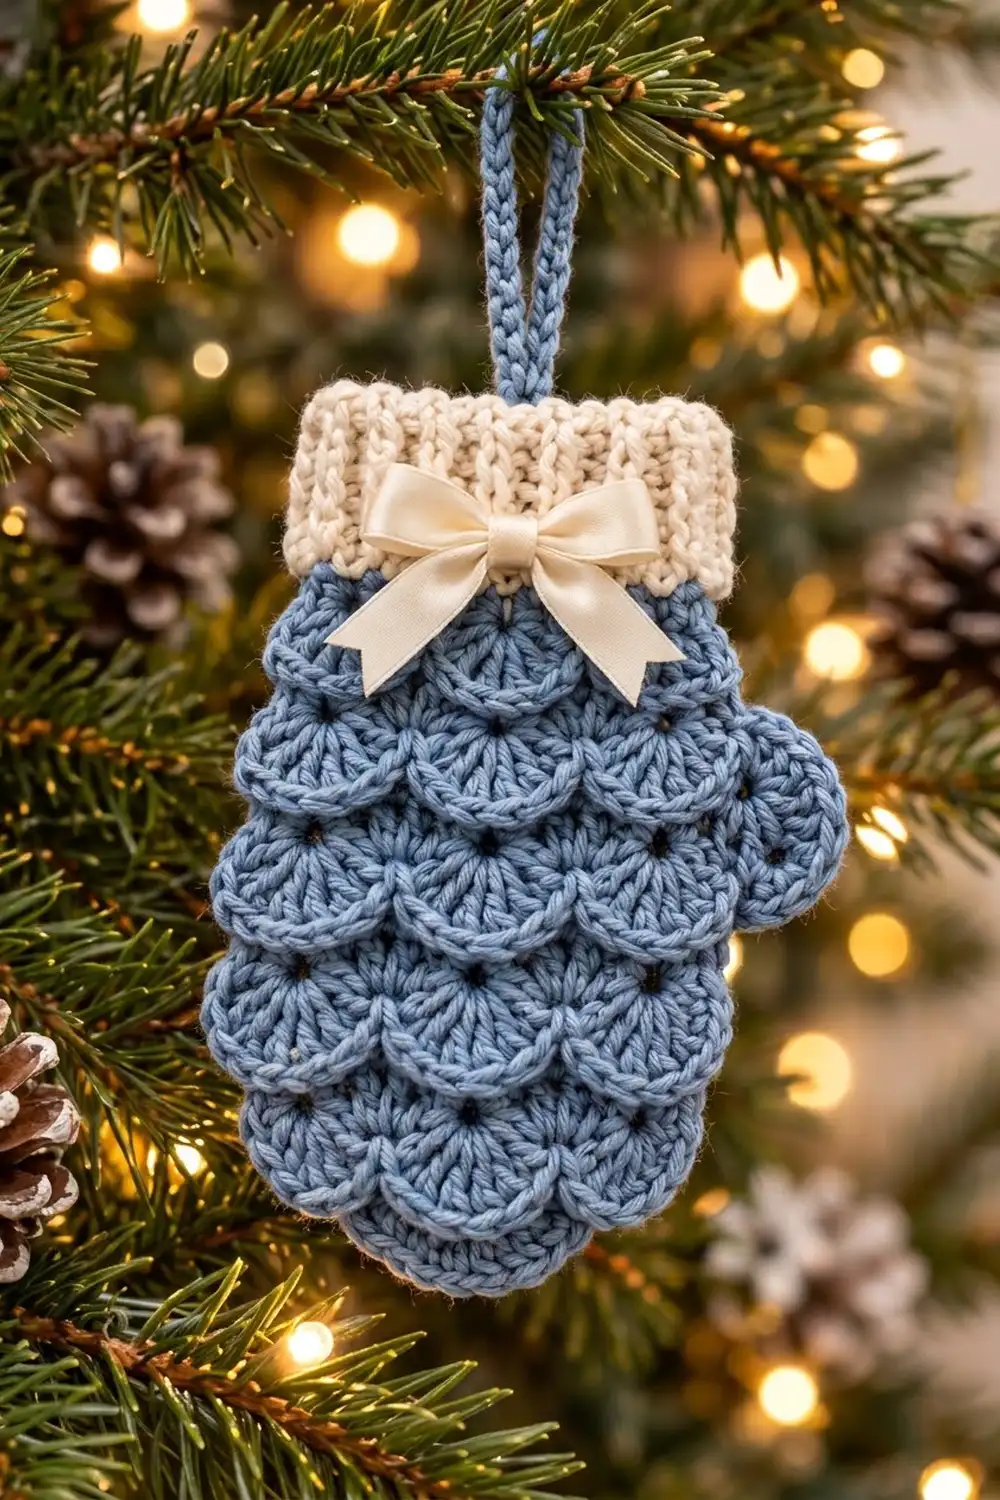
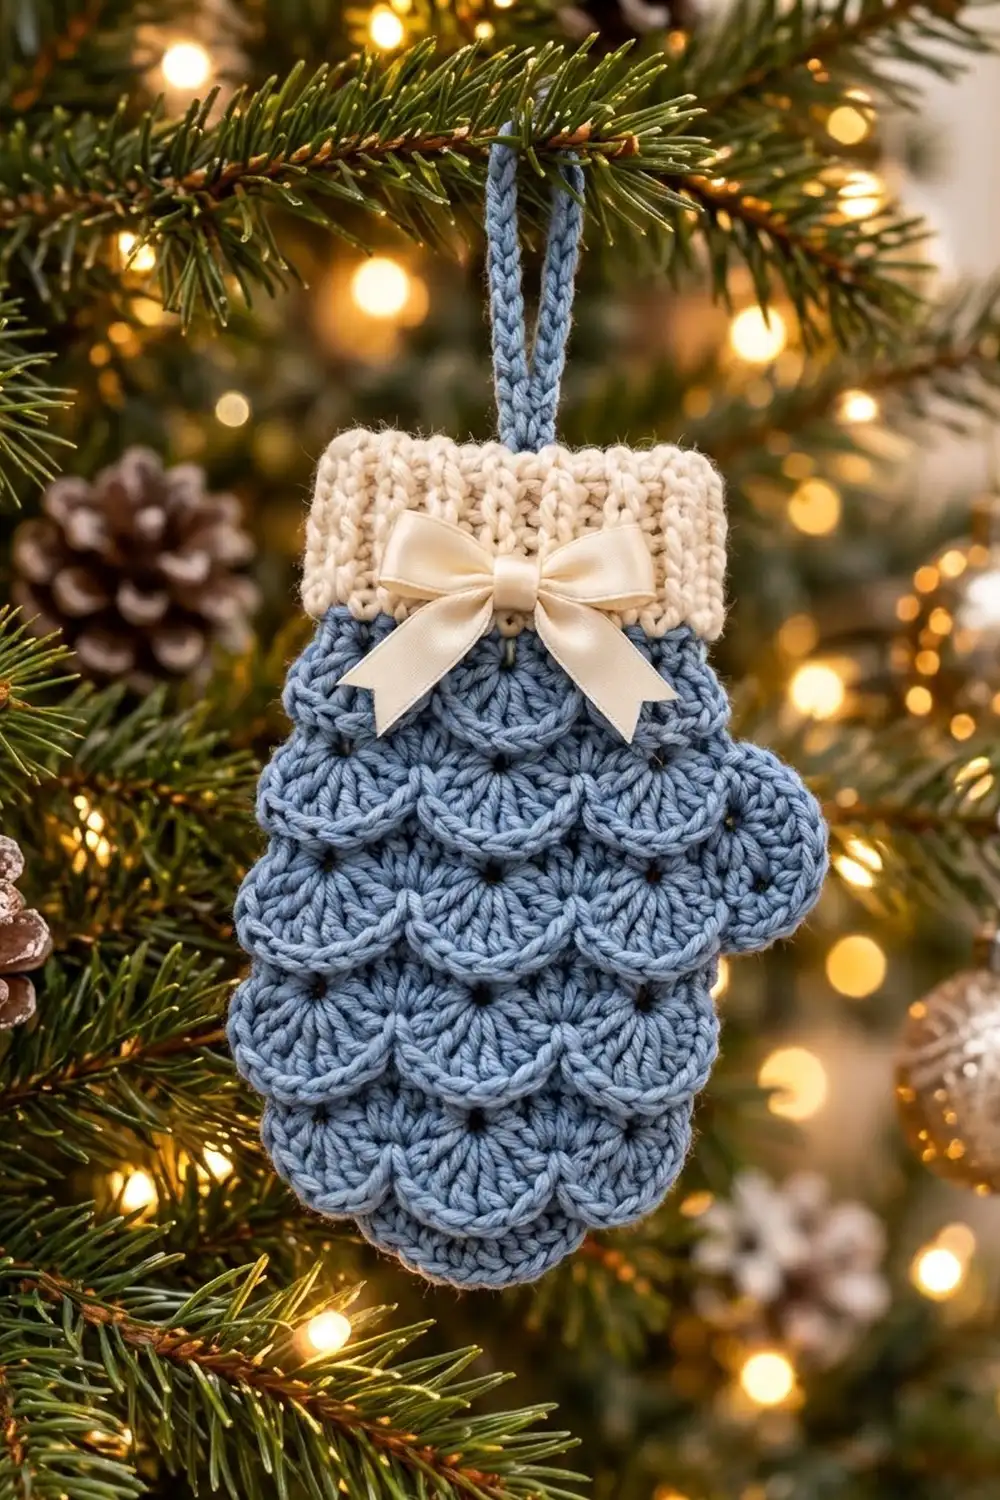
This little mitten ornament has denim-blue scallops that overlap like frosty roof tiles. A soft cream ribbed cuff, a satin bow, and a sturdy blue loop finish it off so it’s ready for the tree.
The colors are calm and wintry: one dusty blue for the body and one cream for the cuff, plus a cream ribbon. It’s a cozy Nordic-cottage look that suits a natural, white-and-gold, or blue-themed tree.
The finished ornament measures 4 in (10.2 cm) wide across the hand, 4.5 in (11.4 cm) wide including the thumb, and 5.25 in (13.3 cm) tall from the top of the cuff to the fingertip. The hanging loop adds another 1.5 in (3.8 cm). The pattern uses US crochet terms throughout.
You start at the wrist and work the body top-down in rows of 7-dc shells, so every scallop arc hangs downward. A short final row rounds the fingertip. You then add the thumb into the side edge, work the ribbed cuff into the foundation chain, and finish with the loop and bow.
Finished Size and Construction
- Finished size: 4 in (10.2 cm) wide body; 4.5 in (11.4 cm) with thumb; 5.25 in (13.3 cm) tall without loop
- Skill level: Easy-intermediate
- Terminology: US
- Yarn weight: Fingering (#1 Super Fine)
- Hook: 2.5 mm (US B/1 or C/2, depending on brand)
- Number of pieces: 1 (single flat piece)
- Layout: One mitten, worked top-down, single layer
- Piece size before cuff: 4 in (10.2 cm) wide × 4 in (10.2 cm) tall
- Cuff depth: 1.25 in (3.2 cm)
Materials
Choose a smooth, plied fingering-weight yarn in cotton, a cotton blend, or soft acrylic. A plied yarn gives crisp, well-defined fans. Avoid fuzzy yarns, because they blur the eyelets.
- Dusty blue (Color A): 8 g / 32 m, for the body, thumb, and hanging loop
- Cream (Color B): 4 g / 16 m, for the cuff
- Cream satin ribbon: 3/8 in (1.0 cm) wide, 10 in (25.4 cm) long
- 2.5 mm crochet hook
- Tapestry needle
- Sewing needle and cream thread
- Scissors
- Rustproof pins and a foam blocking mat
- Spray bottle with water
- Optional: fray stopper for the ribbon ends
The quantities above include a margin of about 25% for your gauge check and weaving in ends.
Abbreviations (US Terms)
- ch – chain
- sl st – slip stitch
- sc – single crochet
- hdc – half double crochet
- dc – double crochet
- fpdc – front post double crochet
- bpdc – back post double crochet
- sk – skip
- st(s) – stitch(es)
- RS / WS – right side / wrong side
Special stitches
- Shell: 7 dc in the same stitch. The 4th dc is the center dc. When you crowd 7 dc into one sc, the base opens into a small eyelet at the top of each fan.
- Half shell: 4 dc in the same stitch. At the start of a row, ch 3 counts as the first dc, so you only work 3 more dc.
Gauge and Checkpoints
Gauge in shell pattern: one shell repeat (8 sts) = 1 in (2.5 cm), and 5 rows = 2 in (5.1 cm).
The mitten itself is your gauge test. Work Rows 1–5, then lay the piece flat and measure it before you go on.
Checkpoints:
- After Row 1: foundation edge 4 in (10.2 cm) wide
- After Row 5: 4 in (10.2 cm) wide × 2 in (5.1 cm) tall
- After Row 9: 4 in (10.2 cm) wide × 3.6 in (9.1 cm) tall
- After Row 10: body 4 in (10.2 cm) tall
- After the thumb: total width 4.5 in (11.4 cm)
- After the cuff: total height 5.25 in (13.3 cm)
If your piece is too big, go down to a 2.25 mm hook. If it’s too small, go up to a 2.75 mm hook. A difference of 0.25 in (0.6 cm) across Row 5 is fine for an ornament. More than that will make the cuff and body sizes drift apart.
Body Pattern
The body is worked in rows. Row 1 is the RS, so all odd rows are RS rows.
Foundation: With Color A, ch 34.
Row 1 (RS): Sc in 2nd ch from hook, sk 3 ch, shell in next ch, sk 3 ch, sc in next ch 4 times. Turn.
(33 sts: 4 shells + 5 sc)
The chain math: the first sc uses 1 ch, and each repeat uses 8 ch. That’s 1 + (4 × 8) = 33 chains worked, with the 34th chain acting as the turning chain.
Row 2 (WS): Ch 3 (counts as dc), 3 dc in first sc (half shell made), sk 3 dc, sc in next dc (center dc), sk 3 dc, shell in next sc 3 times, sk 3 dc, sc in center dc of last shell, sk 3 dc, 4 dc in last sc (half shell made). Turn.
(33 sts: 2 half shells of 4 dc + 3 shells + 4 sc = 8 + 21 + 4)
Row 3 (RS): Ch 1, sc in first dc, sk 3 dc, shell in next sc, sk 3 dc, sc in next dc 4 times, working the final sc in the top of the turning ch-3. Turn.
(33 sts: 4 shells + 5 sc)
Each new shell sits in the sc between two shells of the row before. That staggers the fans so each arc overlaps the joint below it, which creates the scale-like layering.
Rows 4–9: Repeat Rows 2–3 three more times. Rows 4, 6, and 8 match Row 2 (33 sts). Rows 5, 7, and 9 match Row 3 (33 sts). Do not fasten off.
Check your measurements now: 4 in (10.2 cm) wide × 3.6 in (9.1 cm) tall.
Row 10 (WS, fingertip): Do not ch. Sl st in first sc and in next 3 dc (4 sl sts). Ch 1, sc in next dc (center dc of first shell), sk 3 dc, shell in next sc, sk 3 dc, sc in next dc 3 times. The final sc lands in the center dc of the last shell. Leave the remaining 3 dc and the edge sc unworked. Fasten off.
(25 sts, not counting sl sts: 3 shells + 4 sc = 21 + 4)
Leaving the outer half of each edge shell unworked lets the sides curve inward. The three-fan tip measures 3 in (7.6 cm) across and gives the mitten its rounded fingertip.
Thumb
The thumb is a small two-row fan worked straight into the right-hand side edge. Hold the piece with the RS facing and the foundation chain at the top. The thumb covers Rows 3–5, a stretch of about 1.2 in (3.0 cm) along the edge.
Along this right edge, the odd rows begin with a sc and the even rows end with a full-height dc. The dc at the end of Row 4 is the pivot post.
Thumb Row 1 (RS): Join Color A with sl st in the first sc of Row 5. Ch 3 (counts as dc), then work 8 dc around the post of the last dc of Row 4. Sl st in the first sc of Row 3. Turn.
(9 dc, including the ch-3)
Thumb Row 2 (WS): Ch 1, 2 sc in first dc, sc in next dc, 2 sc in next dc 4 times, working the last 2 sc in the top of the ch-3. Sl st into the edge of Row 5 next to the starting join. Fasten off.
(14 sc: 9 sts worked once + 5 increases)
The thumb sticks out 0.5 in (1.3 cm) from the side, which brings the total width to 4.5 in (11.4 cm). An increase ratio of about 1.5:1 suits a half circle that grows by one sc height, so the thumb stays flat instead of ruffling.
Border: Ribbed Cuff
The cuff is the ornament’s only border. It’s worked along one side, the top edge, into the free loops on the opposite side of the foundation chain.
Border gauge: 33 sts across = 4 in (10.2 cm), and 4 cuff rows = 1.25 in (3.2 cm).
Cuff Row 1 (WS): With the WS facing, join Color B with sl st in the first free loop of the foundation chain. Ch 1, then hdc in the same loop and in each free loop across. Turn.
(33 hdc)
Cuff Row 2 (RS): Ch 2 (does not count as a st), dc in first st, fpdc around next st, bpdc around next st 15 times, fpdc around next st, dc in last st. Turn.
(33 sts: 2 edge dc + 16 fpdc + 15 bpdc)
Cuff Row 3 (WS): Ch 2 (does not count), dc in first st, bpdc around next st, fpdc around next st 15 times, bpdc around next st, dc in last st. Turn.
(33 sts: 2 edge dc + 16 bpdc + 15 fpdc)
Cuff Row 4 (RS): Repeat Cuff Row 2. Fasten off.
(33 sts)
Why the math works: Body Row 1 used 33 chains, so the foundation has exactly 33 free loops. The cuff takes 1 hdc per loop with nothing added, so it matches the body width of 4 in (10.2 cm). Inside the 2 edge dc, the odd count of 31 means the ribs start and end with a raised fpdc on the RS. That centers the ribbing, and stitch 17, the 8th raised rib, marks the exact middle for the loop and bow. On WS rows, working bpdc around the raised stitches keeps them raised on the RS.
Hanging loop: With the RS facing, join Color A with sl st in the center st (17th st) of Cuff Row 4. Ch 26, then sl st in the back bump of the 2nd ch from the hook and in each ch across (25 sl sts). Sl st in the same cuff st to close the loop. Fasten off and weave the ends into the cuff.
This gives you a firm cord about 3 in (7.6 cm) long. Folded in half, it rises 1.5 in (3.8 cm) above the cuff.
Bow: Tie the ribbon into a small bow about 1.5 in (3.8 cm) wide. Trim the tails into V-cuts and seal them with fray stopper. With cream thread, stitch the bow knot to the lower center of the cuff, directly below the loop. Let the tails fall onto the first tier of scallops.
Final Blocking
- Weave in all yarn ends along edges of the same color.
- Pin the mitten RS up on the blocking mat.
- Pin the top of the cuff straight, at 4 in (10.2 cm) wide.
- Pin the sides so the body stays 4 in (10.2 cm) wide from Row 1 to Row 9.
- Pin the lowest point of each of the 3 tip fans so the total height is 5.25 in (13.3 cm).
- Pin the thumb into a smooth half circle that sticks out 0.5 in (1.3 cm).
- Mist the piece until it’s damp, then pat the scallop arcs flat with your fingers.
- Let it dry completely, at least 4 hours, before unpinning.
- Attach the bow after blocking so the ribbon stays crisp.
Final Quality-Control Checklist
- Rows 1–9 each have 33 sts, and Row 10 has 25 sts.
- Each tier’s fans sit centered over the sc between the fans below.
- An eyelet shows clearly at the top of every shell.
- The thumb has 14 sc and lies flat.
- The cuff has 33 sts, with raised ribs at both ends and in the center.
- The body is 4 in (10.2 cm) wide, or 4.5 in (11.4 cm) with the thumb.
- The total height is 5.25 in (13.3 cm), and the loop adds 1.5 in (3.8 cm).
- The loop and bow are centered on stitch 17.
- All ends are woven in securely, with no tails showing on the RS.
Troubleshooting
The fans cup or ruffle. Your shells are too loose compared with your sc. Tighten your dc tension or go down a hook size.
The edges slant inward. You’ve probably missed the turning ch-3 at the end of a Row 3-type row. Count to 33 at the end of every row.
The eyelets don’t show. Work the sc that each shell sits on a little looser, so the 7 dc can spread its base open.
The cuff flares wider than the body. Your post stitches are loose. Redo the cuff with a 2.25 mm hook.
The cuff pulls in. Work Cuff Row 1 loosely, or use a 2.75 mm hook for the cuff only.
The thumb ruffles. Check that you have 14 sc. Extra increases make it wavy.
The thumb is too small. Make sure all 8 dc go around the full post of the Row 4 edge dc, not just through its top loops.
Care
Spot clean with cool water and mild soap, then lay flat to dry. Store the ornament flat in tissue so the scallops and bow keep their shape.
Final Notes
The whole ornament comes down to one simple measurement chain. Thirty-four foundation chains give 33 stitches, which make 4 shell repeats at 1 in (2.5 cm) each, for a 4 in (10.2 cm) wide body. Nine straight rows at 0.4 in (1.0 cm) each give 3.6 in (9.1 cm), and the three-fan tip row brings the body to 4 in (10.2 cm). The 33-stitch ribbed cuff adds 1.25 in (3.2 cm), for 5.25 in (13.3 cm) in total, and the thumb brings the width to 4.5 in (11.4 cm).
If your gauge is right at Row 5, everything after that falls into place. Make one for every branch, or tie one onto a gift.
Happy crocheting!