

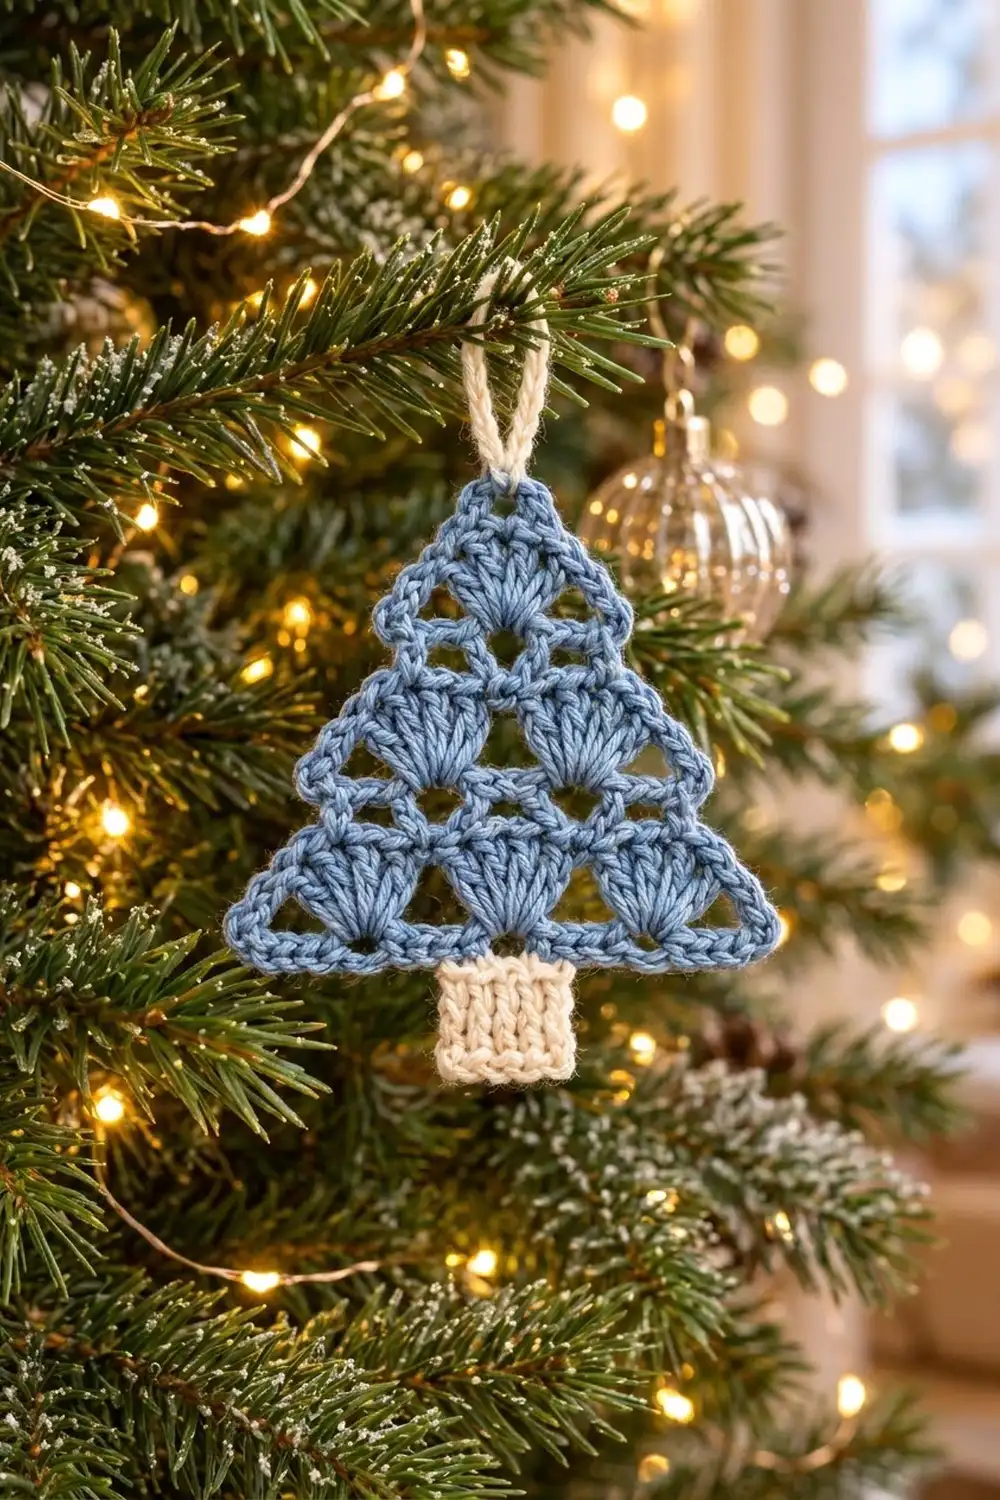
This little tree ornament is made from three tiers of fan shells stacked into a triangle: three shells at the bottom, two in the middle and one at the top. Chain bars between the fans leave small triangular windows, so the tree looks lacy and light against the branches. A neat single-crochet border frames the shape, a cream ribbed trunk anchors the base, and a matching cream loop makes it ready to hang.
The colors are soft and wintry: a dusty powder blue for the tree, and a warm cream for the trunk and loop. It looks a little Scandinavian and works well on a real tree, as a gift-wrap topper or as a garland charm.
This pattern uses US crochet terms. The finished ornament is about 4.25 in (10.8 cm) wide and 3.5 in (8.9 cm) tall for the tree. With the trunk it is 4.5 in (11.4 cm) tall, and with the loop it is 5.5 in (14.0 cm).
You work the tree flat in rows from the bottom edge up, adding one shell tier at a time. Next comes a two-round border. After that, the trunk is worked sideways straight onto the base, and the loop is added at the top point. There is no sewing apart from weaving in ends.
Finished Size and Construction
- Finished size: tree 4.25 in (10.8 cm) wide x 3.5 in (8.9 cm) tall; 4.5 in (11.4 cm) tall with trunk; 5.5 in (14.0 cm) tall with loop
- Skill level: Easy
- Terminology: US
- Yarn weight: DK (light worsted, #3)
- Hook: 4.0 mm (G-6)
- Number of pieces: 1 (trunk and loop are worked on)
- Layout: single standalone ornament
- Piece size before border: 3.8 in (9.7 cm) wide x 3 in (7.6 cm) tall
- Border depth: about 0.25 in (0.6 cm), 2 rounds
Materials
Yarn: A smooth DK cotton or cotton blend gives the clearest shell definition and the crispest point. Soft acrylic also works, but it may need firmer blocking.
- Color A, powder blue: 8 g, about 18 m
- Color B, cream: 3 g, about 7 m
These quantities include a small safety margin. One ornament uses roughly 5 g of blue and 2 g of cream, so a 50 g ball of blue will make several trees.
Tools:
– 4.0 mm (G-6) crochet hook
– Tapestry needle
– Scissors
– 2 locking stitch markers
– Ruler or tape measure
– Blocking mat and rustproof pins
– Spray bottle with water
Abbreviations (US Terms)
- ch – chain
- sl st – slip stitch
- sc – single crochet
- dc – double crochet
- tr – treble crochet
- BLO – back loop only
- sk – skip
- sp(s) – space(s)
- st(s) – stitch(es)
- RS – right side
Special stitch:
– Shell: 7 dc worked into the same stitch. The 4th dc is the center dc of the shell.
Gauge and Checkpoints
Gauge: 20 sc = 4 in (10.2 cm) with a 4.0 mm hook. Exact row gauge is not critical, but the checkpoints below matter.
For an ornament, the tree itself is your gauge swatch. Make one tree through the end of the border before cutting a second color, then compare it to these checkpoints:
- After Row 1: 19 sc measure 3.8 in (9.7 cm).
- After Row 2: each shell repeat measures about 1.2 in (3.0 cm), and the piece is about 0.75 in (1.9 cm) tall.
- After Row 4: about 1.75 in (4.4 cm) tall.
- After Row 6: about 2.75 in (7.0 cm) tall.
- After Row 7: about 3 in (7.6 cm) tall.
- After the border: 4.25 in (10.8 cm) wide x 3.5 in (8.9 cm) tall.
If your piece is too big, go down to a 3.5 mm hook. If it’s too small, go up to a 4.5 mm hook. A difference of 0.25 in (0.6 cm) or less is normal and blocking will fix it. The stitch counts stay the same whichever hook you use.
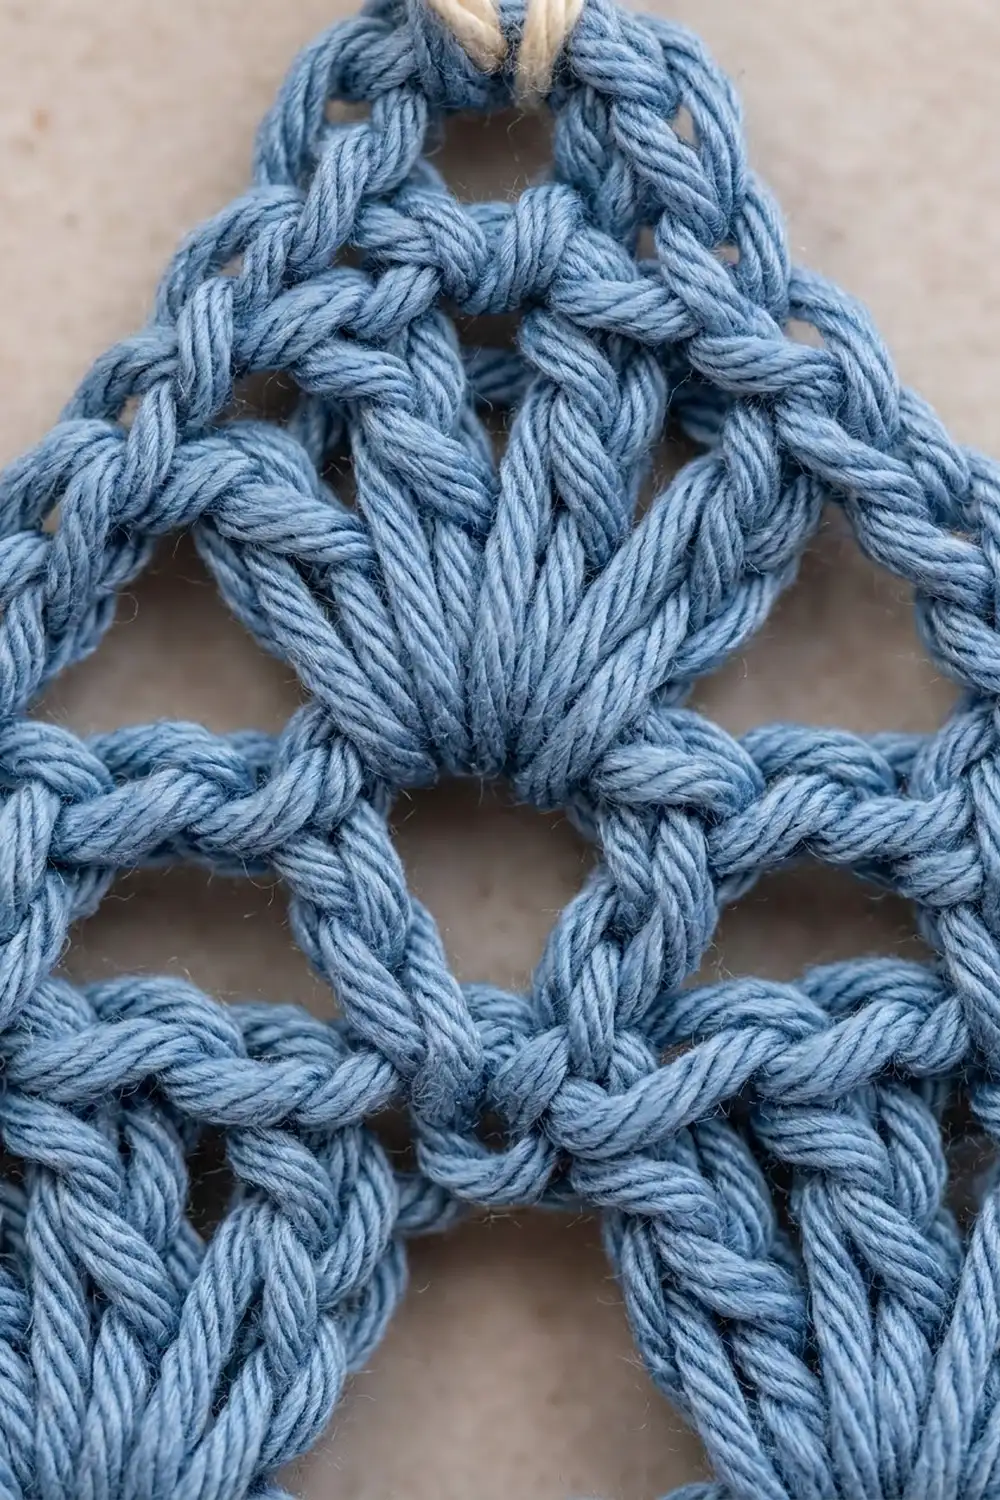
Tree Body
Work with Color A. Turn at the end of every row. Leave a 6 in (15.2 cm) starting tail.
Row 1: Ch 20, sc in 2nd ch from hook and in each ch across. Turn. (19 sc)
Row 2 (bottom shell tier): Ch 1, sc in first sc, [sk 2 sc, shell in next sc, sk 2 sc, sc in next sc] 3 times. Turn. (3 shells, 4 sc = 25 sts)
Check: each repeat uses 6 base stitches. 1 + (3 x 6) = 19, so the last sc lands in the final stitch of Row 1. Because each shell grows from a single sc, its base comes to a point.
Row 3 (bridge row): Sl st in first sc and in next 4 dc, so you finish in the center dc of the first shell. Ch 1, sc in the same center dc. [Ch 2, tr in next sc (the valley between shells), ch 2, sc in center dc of next shell] 2 times. Turn. (3 sc, 2 tr, 4 ch-2 sps = 13 sts)
The outer 3 dc and the end sc of each outer shell stay unworked. This step-in is what makes the slanted sides. Each tr reaches down into a valley, and the ch-2 bars on either side of it outline the open triangular windows.
Row 4 (middle shell tier): Ch 1, sc in first sc, [sk ch-2 sp, shell in next tr, sk ch-2 sp, sc in next sc] 2 times. Turn. (2 shells, 3 sc = 17 sts)
Each new shell grows from a tr. That centers it above a valley of the lower tier, and its base comes to a point.
Row 5: Sl st in first sc and in next 4 dc (center dc of the first shell). Ch 1, sc in same dc, ch 2, tr in next sc, ch 2, sc in center dc of next shell. Turn. (2 sc, 1 tr, 2 ch-2 sps = 7 sts)
Row 6 (top shell tier): Ch 1, sc in first sc, sk ch-2 sp, shell in tr, sk ch-2 sp, sc in last sc. Turn. (1 shell, 2 sc = 9 sts)
Row 7 (point): Sl st in first sc and in next 4 dc (center dc). Ch 1, sc in same dc. (1 sc) Do not fasten off.
Place a marker in this top sc. Measure: the piece should be 3.8 in (9.7 cm) wide at Row 1 and about 3 in (7.6 cm) tall.
Choose the side with the cleaner shells as the RS. Turn if needed so the RS faces you for the border.
Border
Border gauge: each ch-5 sp plus its anchor sc should lie flat at about 1.2 in (3.0 cm), the same as one shell repeat. Work the border with Color A, continuing from Row 7.
Side anchors: On each slanted side there are two end stitches you will work into. The upper one is the end sc of Row 6, which sits on top of the outer middle-tier shell. The lower one is the end sc of Row 4, which sits on top of the outer bottom-tier shell. Mark them before you start if that helps.
Round 1: Ch 1, (sc, ch 2, sc) in the top sc.
- First side: ch 5, sc in end sc of Row 6, ch 5, sc in end sc of Row 4, ch 5, sc in the free loop of the foundation ch at the corner.
- Base: sc in each of the next 17 free loops of the foundation ch, sc in the last free loop (corner).
- Second side: ch 5, sc in end sc of Row 4, ch 5, sc in end sc of Row 6, ch 5. Sl st to the first sc.
Round 1 counts:
– Top: 2 sc + 1 ch-2 sp
– Each side: 3 ch-5 sps + 2 anchor sc
– Base: 19 sc, including both corner sc
– Total: 25 sc, 6 ch-5 sps and 1 ch-2 sp (57 sts including chains)
The ch-5 bars run across the outer halves of the shells and make the smooth chain outline along each slant.
Round 2: Ch 1, sc in same sc, 3 sc in ch-2 sp, sc in next sc. [5 sc in ch-5 sp, sc in next sc] 2 times, 5 sc in next ch-5 sp. 3 sc in corner sc, sc in each of next 17 sc, 3 sc in corner sc. [5 sc in ch-5 sp, sc in next sc] 2 times, 5 sc in last ch-5 sp. Sl st to first sc. Fasten off. (62 sc)
Count by section:
– Top: 1 + 3 + 1 = 5 sc. The middle sc of the 3 is the top corner stitch.
– Each side: (3 x 5) + 2 = 17 sc between the corner groups.
– Base corners: 3 + 3 = 6 sc. The middle sc of each group is the corner stitch.
– Base: 17 sc between the corner groups.
– Total: 5 + 17 + 6 + 17 + 17 = 62 sc.
Measured between corner stitches, the base edge is 1 + 17 + 1 = 19 sts, which matches Row 1. Each slanted side is 1 + 17 + 1 + 1 = 20 sts between corners.
Why the math works: The base gets exactly one sc per foundation stitch, so it can’t flare or pull in. On the sides, each 1.2 in (3.0 cm) segment gets 5 sc in its chain space plus 1 anchor sc. That is 6 sts at 5 sc per inch, so 6 ÷ 5 = 1.2 in (3.0 cm) and the slant lies flat. Three segments add up to 3.6 in (9.1 cm) per side before the border thickness. The 3-sc groups give each corner a sharp point without curling.
Hanging Loop
With Color B, join with a sl st in the top corner sc of Round 2 (the middle sc of the top 3-sc group). Ch 14, sl st in the same top sc to form a ring. Work 18 sc into the ch-14 loop, then sl st in the top sc again. Fasten off, leaving an 8 in (20.3 cm) tail.
The loop is packed with 18 sc over 14 ch, which makes it a firm, round, rope-like loop about 1 in (2.5 cm) tall that won’t twist flat.
Trunk
With RS facing, find the 17 base sc between the corner groups and count to the center 5 (stitches 7–11). That leaves 6 sc on each side, so the trunk is centered. Mark st 7 and st 11.
You work the trunk sideways in short rows. Each row runs from the base down and back, so the BLO ridges form vertical ribs.
Row 1: With Color B, join with a sl st in base st 7. Ch 6, sc in 2nd ch from hook and in next 4 ch, sl st in next base sc (st 8). Turn. (5 sc)
Row 2: Sk the sl st, sc BLO in each of the 5 sc. Ch 1, turn. (5 sc)
Row 3: Sc BLO in each of the 5 sc, sl st in next base sc (st 9). Turn. (5 sc)
Rows 4–7: Repeat Rows 2–3 twice. The sl sts at the ends of Rows 5 and 7 go into base sts 10 and 11. (5 sc per row)
Fasten off. The trunk is 7 rows wide and 5 sc long, about 1 in x 1 in (2.5 cm x 2.5 cm). It is attached across 5 base sts.
Final Blocking
- Weave in all ends inside the border or trunk stitches. Hide blue ends in blue and cream ends in cream.
- Lightly mist the ornament until it is damp, not soaked.
- Pin the three corners to form a triangle 4.25 in (10.8 cm) wide and 3.5 in (8.9 cm) tall.
- Pin each slanted side straight between its corner pins, adding a pin at each anchor point.
- Pin each shell so its fan opens fully upward. Ease the open windows into clean triangles with a pin tip.
- Square the trunk to 1 in (2.5 cm) and pin the loop into an upright oval.
- Let it dry completely, usually 4–6 hours. For acrylic, hold a steam iron above the piece without touching it, then let it cool before unpinning.
- For extra stiffness, brush on a diluted fabric stiffener before drying.
Final Quality-Control Checklist
- Row 1 has 19 sc, and Row 2 has 3 shells of 7 dc each.
- Every upper shell sits centered over a valley, with its base coming to a point.
- Round 2 counts 62 sc, with 17 sc on each slanted side between corner groups.
- The base edge is straight and measures 4.25 in (10.8 cm).
- The trunk is centered over base sts 7–11 and has vertical ribs.
- The loop rises from the exact top corner and stands upright.
- No ends show on the RS.
Troubleshooting
Shells look crowded or cupped. Your dc are tight. Go up a hook size, or relax your tension on the shells only.
Windows are not open. Make sure you used tr, not dc, in Rows 3 and 5. A shorter stitch closes the windows.
Sides bow outward. Your chains are loose. Make the ch-5 sps a little tighter, or work 4 sc into each instead of 5 and block firmly.
Sides pull inward. Your chains are tight. Loosen the ch-5 sps, and don’t skip any anchor sc.
Trunk is off-center. Recount the 17 base sc between the corner groups. The trunk must start in st 7.
Loop flops sideways. Pack the full 18 sc into the loop and stiffen it lightly.
Care
Hand wash in cool water with mild soap, press out the water in a towel and dry flat. Reshape the point and pin it again if needed. Store flat between tissue paper.
Final Notes
The measurement chain is short. 19 sc make a 3.8 in (9.7 cm) base. Three shell tiers bring the piece to 3 in (7.6 cm) tall. The 62-st border finishes the tree at 4.25 in x 3.5 in (10.8 cm x 8.9 cm). A 1 in (2.5 cm) trunk and loop bring the total to 5.5 in (14.0 cm). If your Row 1 and border checkpoints match, the rest will fall into place.
Happy crocheting!